Auto Mate 3203A Owner's manual
- Category
- Remote starters
- Type
- Owner's manual
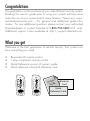
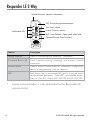
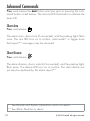
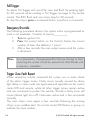
Auto Mate 3203A is an advanced vehicle security and car stereo system, recipient of nearly 100 patents and Innovations Awards in the field of advanced electronic technology. Auto Mate 3203A is designed to deliver world-class quality products and services that excite and delight customers. It comes with a range of features such as:
- Arm/Disarm: Arm and disarm your vehicle with a simple press of a button.
- AUX/Trunk: Open your trunk or activate other auxiliary features with the dedicated button.
- Remote Start/AUX1/AUX4: Remotely start your vehicle or control other auxiliary functions with the designated buttons.


-
 1
1
-
 2
2
-
 3
3
-
 4
4
-
 5
5
-
 6
6
-
 7
7
-
 8
8
-
 9
9
-
 10
10
-
 11
11
-
 12
12
-
 13
13
-
 14
14
-
 15
15
-
 16
16
-
 17
17
-
 18
18
-
 19
19
-
 20
20
-
 21
21
-
 22
22
-
 23
23
-
 24
24
-
 25
25
-
 26
26
-
 27
27
-
 28
28
-
 29
29
-
 30
30
-
 31
31


Auto Mate 3203A Owner's manual
- Category
- Remote starters
- Type
- Owner's manual
Auto Mate 3203A is an advanced vehicle security and car stereo system, recipient of nearly 100 patents and Innovations Awards in the field of advanced electronic technology. Auto Mate 3203A is designed to deliver world-class quality products and services that excite and delight customers. It comes with a range of features such as:
- Arm/Disarm: Arm and disarm your vehicle with a simple press of a button.
- AUX/Trunk: Open your trunk or activate other auxiliary features with the dedicated button.
- Remote Start/AUX1/AUX4: Remotely start your vehicle or control other auxiliary functions with the designated buttons.
Ask a question and I''ll find the answer in the document
Finding information in a document is now easier with AI
Related papers

Other documents
-
Viper 3606V Owner's manual
-
-
-
Viper Matrix 5806X Owner's manual
-
-
Directed Electronics VIPER 3203 User manual
-
Clifford CLIFFORD 320.3X User manual
-
Automate 3303A Owner's manual
-
-