Dahua DH-IPC-HDBW1431EP-0360B is an HD IR Vandal Proof Network Dome Camera. It features a 1/2.8" 4MP progressive CMOS sensor, 3.6mm fixed lens, up to 30m IR range, IP67 weatherproof rating, and IK10 vandal-proof rating. This camera is ideal for indoor and outdoor surveillance applications, such as retail stores, offices, warehouses, and schools. With its high-resolution sensor and powerful IR capabilities, the DH-IPC-HDBW1431EP-0360B can capture clear images and videos even in low-light conditions.
Dahua DH-IPC-HDBW1431EP-0360B is an HD IR Vandal Proof Network Dome Camera. It features a 1/2.8" 4MP progressive CMOS sensor, 3.6mm fixed lens, up to 30m IR range, IP67 weatherproof rating, and IK10 vandal-proof rating. This camera is ideal for indoor and outdoor surveillance applications, such as retail stores, offices, warehouses, and schools. With its high-resolution sensor and powerful IR capabilities, the DH-IPC-HDBW1431EP-0360B can capture clear images and videos even in low-light conditions.


-
 1
1
-
 2
2
-
 3
3
-
 4
4
-
 5
5
-
 6
6
-
 7
7
-
 8
8
-
 9
9
-
 10
10
-
 11
11
-
 12
12
-
 13
13
-
 14
14
-
 15
15
-
 16
16
-
 17
17


Dahua DH-IPC-HDBW1431EP-0360B User manual
- Type
- User manual
- This manual is also suitable for
Dahua DH-IPC-HDBW1431EP-0360B is an HD IR Vandal Proof Network Dome Camera. It features a 1/2.8" 4MP progressive CMOS sensor, 3.6mm fixed lens, up to 30m IR range, IP67 weatherproof rating, and IK10 vandal-proof rating. This camera is ideal for indoor and outdoor surveillance applications, such as retail stores, offices, warehouses, and schools. With its high-resolution sensor and powerful IR capabilities, the DH-IPC-HDBW1431EP-0360B can capture clear images and videos even in low-light conditions.
Ask a question and I''ll find the answer in the document
Finding information in a document is now easier with AI
Related papers
-
Dahua DH-IPC-HDBW4831EP-ASE-0280B Quick start guide
-
-
-
-
-
-
-
-
-
Other documents
-
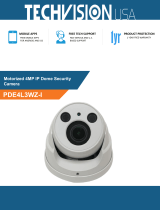 TechVision PDE4L3WZ-I Quick start guide
-
 Zhejiang Dahua Vision Technology Co., LTD DH-IPC-HF8242F-FD Quick start guide
-
Security Camera King IPVD-ELS5IR28A-AI-EP User manual
-
Costar CDI2D28IW Quick start guide
-
-
Costar CDI2110VIRFH Quick start guide
-
Costar CDI2510IFW Quick start guide
-
Dante DNA1355V Operating instructions
-
-
Costar CDI2110RF Quick start guide

