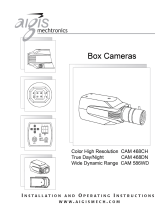
Revo REVDN700-2 User manual

Category
Security cameras
Type
User manual

Revo REVDN700-2 is a vandal-proof dome camera that delivers high-quality images with its 1/3" Super-HAD CCD and digital signal processing LSIs. It boasts a super high-resolution of 700TVL and wide dynamic range for capturing clear images in challenging lighting conditions. With its impressive low-light performance of 0.1Lux (Color) and 0.01 Lux (B/W) at F1.2 50IRE, you can expect excellent image quality even in dimly lit environments.

Revo REVDN700-2 is a vandal-proof dome camera that delivers high-quality images with its 1/3" Super-HAD CCD and digital signal processing LSIs. It boasts a super high-resolution of 700TVL and wide dynamic range for capturing clear images in challenging lighting conditions. With its impressive low-light performance of 0.1Lux (Color) and 0.01 Lux (B/W) at F1.2 50IRE, you can expect excellent image quality even in dimly lit environments.

INSTRUCTION MANUAL
WDR Super High Resolution
Day & Night Color Camera
Model No: REVDN700-2
Vandal Proof dome Camera
LIMITATION OF LIABILITY
THE INFORMATION IN THIS PUBLICATION IS BELIEVED TO BE ACCURATE IN ALL
RESPECTS, HOWEVER, WE CANNOT ASSUME RESPONSIBILITY FOR ANY
CONSEQUENCES RESULTING FROM THE USE THEREOF. THE INFORMATION
CONTAINED HEREIN IS SUBJECT TO CHANGE WITHOUT NOTICE. REVISIONS
OR NEW EDITIONS TO THIS PUBLICATION MAY BE ISSUED TO INCORPORATE
SUCH CHANGES
WARNING
This is a Class A product. In a domestic environment this product may cause
radio interference in which case the user may be required to take adequate
measures.
CE COMPLIANCE STATEMEN
T
PRECAUTIONS
Before installation, carefully read the manual to ensure correct operation and setup,
heeding all warnings and instructions.
Do not block any ventilation openings. Install in accordance with the manufacturer's
instructions.
Ensure manual is kept in good condition for future use.
Do not install the device near any heat sources such as radiators, heat registers, stoves,
or other equipment (including amplifiers) that produce heat.
Only use attachments/accessories specified by the manufacturer.
Should any liquid get into the housing, immediately disconnect the device from the
power supply and have it checked by authorized personnel before reusing.
Do not install the device in a place of high humidity or where exposed to gas or oil.
Installation and servicing by authorized personnel only, adhering to local safety
regulations.
Unless you are an authorized technician, never try to dismantle the device. To avoid
electric shock, never remove the screws or covers.
If a camera, do not expose the device to radioactivity. It will cause serious damage to
the CCD.
Use Certified/Listed Class 2 power source only.
Cleaning
Clean the device with a slightly damp soft cloth. Use a mild household detergent. Never
use strong solvents such as thinner or benzene as they might damage the finish of the
unit.
3
TABLE OF CONTENTS
CONTENTS OF PACKAGE ------------------------------------------------------------------------- 4
INTRODUCTION --------------------------------------------------------------------------------------- 5
CAMERA CONNECTIONS -------------------------------------------------------------------------- 6
INSTALLATION ----------------------------------------------------------------------------------------- 7
LENS ADJUSTMENT --------------------------------------------------------------------------------- 9
CAMERA OVERVIEW -------------------------------------------------------------------------------- 10
CAMERA ADJUSTMENT ---------------------------------------------------------------------------- 11
EXTERNAL DIMENSION ---------------------------------------------------------------------------- 20
SPECIFICATIONS ------------------------------------------------------------------------------------- 22
CONTENTS OF PACKAGE
Installation of the camera must be performed by qualified service personnel in
accordance with all local and national electrical and mechanical codes.
Carefully remove the colour camera and its accessories from the carton and verify that
they were not damaged in shipment.
The content of the package includes:
1. Camera in Housing
2. This Manual
3. Accessory Kit for Installing
4. Drilling guide label
4
INTRODUCTION
The camera provided high-quality image using SONY 1/3” CCD and digital signal
processing LSIs.
Features:
z 1/3" Super-HAD CCD
z Super high-resolution (700TVL)
z Wide Dynamic Range
z Day & Night(Auto, Manual, External, Filter delay, Change level adjust)
z 0.1Lux(Color), 0.01 Lux(BW) @ F1.2 50IRE
z Auto Electronic Shutter [1/50(60) ~ 1/100,000] and manual electronic shutter
modes [1/50(60) ~ 1/10,000]
z Sens-Up (~x256)
z 2D-NR
z UDF Function(Ultra Deep Field)
z Multi Camera Configuration Set (4-Sets/Night Profile, Ext DN Profile)
z PVA/PVA+ (Personal Video Analytics)
Very High Configurable.
Various Detection Methods(Motion, Loitering Object, Abandon, Scene
Change, Unfocus, Windy Area)
Various Zone Event Detection Methods, and Event Area Combinations.
8 Objects Trace, 4 Objects Display
Concurrent Processing with All Detections, and All Objects.
Two Counting Block.
Event String Sending (Editable String)
Digital Tracking(Using D-PTZ)
Various Detection Area(MAX. 10 area, Line, Rectangle, 4-Point polygonal)
z Back Light Compensation (EHLC, Auto, Spot)
z i-Freeze Function(Reduce recording space)
z Privacy Mask or Mosaic(MAX. 10 area/4-point polygonal/transparency)
z Digital Image Stabilization.
z Digital PTZ
z Digital Effect (H/V reverse, 180 degree rotate, inverse, freeze)
z White Pixel Removal.
z Focus Aid Function.
z Color Rolling Suppression.
z System Lock (4-character password)
z Auto and Manual white balance modes
z Support Line-Lock external synchronization
z RS-485 Remote camera control
z Multi-Language
z User Certified / Listed Class 2 power source only
z Operates in 12VDC or 24VAC
z IP66
5
CAMERA CONNECTIONS
Connection Cable Description
COLOR Description
RED AC24V/DC12V
WHITE AC24V/DC12V
BLUE RS485(-)
GREEN RS485(+)
YELLOW ALARM OUT
GRAY DN EXT-IN
BLACK&WHITE DN EXT-OUT
BLACK GND
SKY BLUE UTP+(Option)
PINK UTP- (Option)
1) External Day/Night Control
Select Day/Night mode using external equipment, by connecting control lines to the
appropriate terminals.
z DAY&NIGHT EXTERNAL INPUT
Switches the cameras D/N mode to either Day or Night based on the input
status. Refer to the diagram below. The cameras D/N mode must be set to
EXT for this to function.
z DAY&NIGHT OUTPUT
The camera turns on an external IR LED Lamp by detecting the sensitivity on the AGC
level when the D&N mode is set "AUTO" on the OSD menu of the camera.
DA
B
DAY&NIGHT INPUT Gray
GND
Black
Open contact: DAY
Close contact: NIGHT
GNDBlack
Y&NIGHT OUTPUT
lack&White
0V : IR LED OFF (DAY)
5V/10mA : IR LED ON (NIGHT)
2) Alarm Out
- TTL level
z Motion detection signals are output through this port. (YELLOW AND GND)
z Active state is configurable.
3) Power Input Terminal
z RED & WHITE : These terminals accept 24VAC or 12 VDC. When using 12VDC
it is recommended to use a DC power supply that can support an inrush current
of 0.55A
4) Camera Control
z GREEN : RS 485+
z BLUE : RS 485-
5) UTP (Option)
z Video signal through out the UTP Cable (SKY BLUE(+) & PINK(-))
6
INSTALLATION
1. Loosen the four torx screws located midway up the front of the housing leaving the
screws intact in the front portion. (Fig. 1)
2. Drill the mounting location, using the Drilling guide. (Fig. 3)
3. Attach the housing to the ceiling using suitable fasteners, M6x35 tapping screws are
supplied. Only use if they are suitable. (Fig. 3)
4. Close the housing using the loosen torx screws. (Fig. 2)
*Label is attached at the bottom.
Torx screws
M5x10 (4x)
Torx screws
M5x10
(
4x
)
Seal around
the housing
base tightly
using
Figure 1
Figure 2
7
LENS ADJUSTMENT
Focus: Adjust lens focus from
near (N) to infinity.
Field of view: Adjust setting
from Telephoto (T) to wide (W)
field of View.
DC AUTO IRIS LENS
2.6-6mm 4-9mm 2.8~12mm 6-50mm
Image Size
1/3” CCD 1/3" CCD 1/3" CCD 1/3" CCD
Focal Length
2.6-6.0mm 5% 4.0-9.0mm 5% 2.8-12mm 5% 6.0-50mm 5%
Ape. Ratio
1 : 1.6 5% 1 : 1.6 5% 1 : 1.4 5% 1 : 1.6 6.9%
Angular
Field of View
(Degree)
DIAGONAL
2.6mm : 134.6
6mm : 59.2
DIAGONAL
4mm : 92.4
9mm : 39.2
DIAGONAL
2.8mm : 119.9
12mm : 28.8
DIAGONAL
6mm : 58.6
50mm : 7.1
8
CAMERA OVERVIEW
A. Up
B. Right
C. Down
D. Left
E. Enter
External AD Key Control (optional)
<Remarks>
1) Menu: Represent present menu subject on top of screen.
In case of used Multi-Camset, Represent CAM ID and “camset” name included.
Common Headers:
: Currently active menu item is displayed. Move by Up/Down keys.
: There is sub-menu. Press Enter key going to sub-menu.
: Indicates the selected menu item.
Item: Displays the current control item you are adjusting.
Item: Disabled menu item or can’t adjust.
2) Bottom Line Control Bar.
Exit: Exit menu mode. Pop-up menu rise when configuration changed.
- Overwrite: Save the changed data to save area.
- Restore: Cancel the changes. Read from save area.
- Cancel: Return to menu.
Load: Load saved data
- Default: Load default configuration from default area.
- Backup: Load saved configuration from backup area.
- Cancel: Return to menu.
Save: Save current configuration.
- Save: Save current configuration to save area.
- Backup: Copy configurations to backup area.
- Cancel: Return to menu.
Back : Return to previous menu.
NOTE:
G
F
H
F. Test Video Output
G. External AD Key Input
H. BNC/UTP Switch
White
/
AD out
p
ut
Black
/
GND
GND Terminal / Brown
D Key Terminal / Orange
A
9
* There are 4 types of configuration area.
Editing Area(No Save), Default(Read Only). Save Area(Use on Start), Backup
* Don’t Power off while doing Save, Load, Backup, Overwrite
CAMERA ADJUSTMENT
<White Balance>
1) ATW/Wide Mode: No limits in the range of color temperature.
2) ATW/Indoor Mode: Suitable for low color temperature.
- CRS(Color Rolling Suppression) Mode supported.
NOTE:
* When you select the CRS will be processed in the following order:
Checking Condition: Checking current environment within the range.
Checking Variation: Measure color rolling range during 30 seconds.
User can stop this action.
No Need CRS: Variation is low. No need to use CRS function.
Force CRS: Even if color variation is low, use CRS function.
- ATW Range: Adjust AWB Range.
- Convergence Shift: Adjust AWB target.
R Variation: Represent blue variation.
B Variation: Represent red variation.
3) ATW/Outdoor Mode: Suitable for high color temperature. (Natural Light)
4) Fix/Indoor Mode: Fixed color temperature (3200 ºK) mode, for indoor environment.
- R: Adjust red color.
- B: Adjust blue color.
- Push/Set: Tracking WB of current screen, and represent R, B value.
- Default: Restore R, B default value.
5) Fix/FL Mode: Fixed color temperature mode, for fluorescent lamp environment.
6) Fix/Outdoor Mode: Fixed color temperature (6300 ºK)mode, for outdoor environment.
<Auto Exposure>
NOTE:
* MIN_SHT (Minimum shutter speed) : NTSC:1/60se/ PAL:1/50sec
* MAX_SHT (Maximum shutter speed) : 1/100000sec
* FLC_SHT (Flickerless shutter speed) : NTSC:1/100sec PAL:1/120sec
1) AE Mode
- Full Auto: DC Lens or Video Lens – Fix shutter speed to MIN_SHT.
Manual Lens - Operating as shutter mode.
- Fast SHT (Fast shutter mode): Adjust range - 1/250~1/10000
- SHT Fix (Shutter Fix Mode): shutter speed is fixed at a given value.
NOTE:
* If lighting is not enough, noise may be increase.
* If lighting is enough using AGC maximum, automatically decrease shutter speed.
2) UDF (Ultra Deep Field)
Depending on lighting conditions and Motion state, automatically adjust AE and DNR.
Normally in low light environment, Sens-up feature may be missing the movement of
objects and High AGC value makes increase the noise. UDF function effectively to
10
improve this phenomenon.
NOTE:
* Motion is none : Noise removal mode.
* Motion is occured: Fast screen update mode.
3) Low Light: If using UDF function, this function being disabled.
- AGC: Boost the signal and adjusting the brightness. (Off/Low/Mid/High)
- Sens-Up: By summing multiple fields, adjusting the proper brightness in low light
conditions (2X~ 256X)
- Apert : In low light conditions, reduce noise by lowing the sharpness value.
- Color: In low light conditions, reduce noise by lowing the color value.
4) WDR (Wide Dynamic Range) / WDR-Lite
WDR function can not be used with the BLC and is recommended Full Auto Modes.
- Visibility: Increases sharpness of the high brightness region.
- Comb Bal (Combination Balance) :Adjust the balance of High&low luminance area.
- Brightness: Adjust brightness level of WDR.
5) BLC: Back Light Compensation / BLC function can not be used with WDR function.
- EHLC (Excessive High Light Compensation) : Fill to high brightness area
with gray color. Clipping of the area is more bright area than the threshold value.
Clip Th (Clipping Threshold) : Adjust clipping level.
Clip Mask (Clip Mask Brightness) : Selecting gray color of clipping area.
- Auto: Weighting on the dark area of AE among the splitting 9 area.
- Spot: Weighting on the specified area of AE.
6) Brightness: Adjust AE reference level.
<Mask>
Privacy Zone can be configured with up to 10. Because they share area ID with
PVA Zone, It can not be used same ID.
1) Zone: Select mask number.
NOTE:
*If you see "PVA" in the “Func” menu PVA Function is currently being used in the area.
2) Func: Select mask on/off.
3) Color: Select mask color (15 colors available).
4) Transparency: Change the mask transparency.
5) Mosaic: Making mosaic current area.
6) Frame: Border display current area.
7) Shape: Select the shape of mask (4-point polygon or rectangle)
- Rect (Rectangle)
Adjust rectangle with 4-arrow keys. Press [ENTER] key is to finish edit area.
- Poly (4-Point Polygon/Each point can move)
It you select one of “a,b,c,d”, the active point is displayed. Move the point with 4-
arrow keys. Press [ENTER] key is to finish edit area.
NOTE:
* For more than 180 of interior angle is not permitted.
- Posi: Adjust area position with 4-arrow keys.
<PVA/PVA+ (Personal Video Analytics>
PVA is our unique name of our video analytics.
11
If you exit menu, doing Initialize started while 4~5 seconds the background.
During initialization the background, it is good to be none of moving objects.
When Day / Night mode is changed or Cam Set is changed, the background of the re-
initialization performed.
Global Functions: This functions being performed in the entire area.
- Output Select: It must be specify the outputs, each function will be enabled.
Press [Enter Key], to select output of each detection zone.
Alarm: Trigger alarm to output port.
Communication: Event string sends on RS-485
Screen: Display on screen.
Back: return to previous menu.
- Detections
Motion: General motion detection
Loitering: Within a set period of time, detect loitering objects of entire screen.
NOTE:
* Please don’t use as a signal for video recording start.
* The result of loitering detection can be inaccuracy.
Abandon/Absent: Detect the difference to stored background.
NOTE:
* Please don’t use as a signal for video recording start.
* The result of abandon/absent detection can be inaccuracy.
Scene Change: Detect a change in the screen.
NOTE:
* It is good for detecting scene change, including vertical lines or high contrast objects of the
background.
* Please don’t use as a signal for video recording start.
* The result of scene change detection can be inaccuracy.
Windy Area Detection: Detect continuous movement caused by wind or etc.
If same movement occurs in same area, alarm is ignored in this area.
If no motion is detected for a period of time, windy area turns off.
NOTE:
* Please don’t use as a signal for video recording start.
* In Simple mode is not supported.
* The result of windy area detection can be inaccuracy.
1) Zone Base Functions
Max 10 Zone can be configured.
NOTE:
* Because they share area ID with Privacy mask, it can not be used same ID.
- Zone: Select zone ID.
- Func(Function) : Zone Function On/Off (Blinking enabled area).
- Shape: Select area shape.
Color: Select area’s frame color.
Rect(Rectangle) : Adjust rectangle with 4-arrow keys.
Press [ENTER] key is to finish edit area.
12
Poly (Polygon)
It you select one of “a,b,c,d”, the active point is displayed.
Move the point with 4-arrow keys. Press [ENTER] key is to finish edit point.
NOTE:
* For more than 180 of interior angle is not permitted.
Line: Select Start/End Point. It you select one of start/end,
the active point is displayed. Move the point with 4-arrow keys.
Press [ENTER] key is to finish edit point.
Posi: Adjust area position with 4-arrow keys.
- MD Event
NOTE:
* The result of MD event detection can be inaccuracy.
Zone: Configurations for various zone events.
Following area, possible events are different.
Output Select: Press [Enter] key on icon to watching event, popup box appear.
Alarm: Trigger alarm to output port.
Communication: Event string sends on RS-485
Screen: Display on screen.
Back: return to previous menu.
, : Send event to counting machine. (OFF : No Effect /
INC : Increment counting value. / DEC : Decrement counting value)
NOTE:
* The result of counting value can be inaccuracy.
Screen: Printed event at bottom side by side scrolling.
Icon Subject Range
Motion
Rect,Poly,Line
Motion occurred.
Motion Inside
Rect, Poly
Motion occurred in the area.
Move Into
Rect, Poly
Object on outside moves into the area.
Appear Inside
Rect, Poly
Object which appeared inside.
*
)
In Simple mode is not supported.
Move Out
Rect, Poly
Object moves out.
*) Please don’t use as a signal for video
recordin
g
start.
Appeared &
Move Out
Rect, Poly
Object which appeared inside, and moves out
*) Please don’t use as a signal for video
recording start.
*
)
In Simple mode is not supported.
Disappear
Inside
Rect, Poly
Object disappea
ed inside.
*) Please don’t use as a signal for video
recording start.
*
)
In Simple mode is not supported.
Moved In &
Disappear
Rect, Poly
Objects from outside, move into inside, and
disappears inside.
*) Please don’t use as a signal for video
recording start.
*
)
In Simple mode is not supported.
Loitering
Rect, Poly
Detect moving object within the zone during a
time.
13
*) Please don
t use as a signal for video
recording start.
*
)
In Simple mode is not supported.
Abandon/Abs
ent
Rect, Poly
Detect different region to stored background.
*) Please don’t use as a signal for video
recording start.
*
)
In Simple mode is not supported.
In & Out
Direction
Rect
Detect object moving. From top to enter of
area, detecting direction of moving out.
*) Please don’t use as a signal for video
recording start.
*) In Simple mode is not supported.
In & Out
Direction
Rect
Detect object moving. From right to enter of
area, detecting direction of moving out.
*) Please don’t use as a signal for video
recording start.
*) In Simple mode is not supported.
In & Out
Direction
Rect
Detect object moving. From left to enter of
area, detecting direction of moving out.
*) Please don’t use as a signal for video
recording start.
*) In Simple mode is not supported.
In & Out
Direction
Rect
Detect object moving. From bottom to enter of
area, detecting direction of moving out.
*) Please don’t use as a signal for video
recording start.
*) In Simple mode is not supported.
Move
Clockwise
Line
Event will occu
r
the object moves in a
clockwise direction that start around.
*) Please don’t use as a signal for video
recordin
g
start.
Move Conte
r
-
Clockwise
Line
Event will occu
r
the object moves in a counte
r
-
clockwise direction that start around.
*) Please don’t use as a signal for video
recordin
g
start.
Path Event: Detect route between two zones. (Max.10 path detection is possible).
NOTE:
* Disabled zone can not be configured.
* In Simple mode is not supported.
* The result of path event detection can be inaccuracy.
Output Direction Setup: same as zone output configuration.
Clear All: All path combinations clear.
2) Env.Setup(Environment setup) : Configurations for each PVA functions.
- Md Sens(MD Sensitivity) : Adjust motion sensitivity.(HW sensitivity)
- Loiter Time (min): Time for judge to loitering object.
- Abandon/Absent Setup
Sens(Sensitivity) : Adjust sensitivity of abandon/absent detection.
Det Time (min): Time for judge to absent/abandon area.
Rst Time (sed): Time for maintain event. After this, background will be update.
- Scn Chg Setup (Scene Change Setup)
Sens(Sensitivity) : Adjust sensitivity of scene change detection.
Chg Ratio: Adjust judgment ratio that changed from the stored background.
Det Time (sec): Time for judge scene changing.
14
Rst Time (sec): Time for maintain event. After this, background will be update.
Unfocus : Detection on/off of unfocused state/defocused state.
- Windy Setup (Windy Area Detection Setup) : Not applied in Simple PVA mode
Sens(Sensitivity) : Adjust sensitivity of windy object detection.
Det Time (sec): Time for judge to windy object.
Rst Time (sec): Time for release to windy object that staying with no motion
3) Display Setup: Configuration for information on screen.
NOTE:
* Priority: Abandon/Absent > Loiter > Moving Object > Windy
* Same priority: large object size order
Alarm: Represent alarm icon on right-up side by of screen.
Counter: Represent counting on left-bottom. (Det Only: When an event occurs)
Zone Area: Represent active zone.
Moving Object: Represent moving object with white rectangle.
Loitering: Represent loitering object with green rectangle.
Abandon/Absent: Represent abandon/absent area with wine colored rectangle.
Windy Area: Represent moving object with violet rectangle.
4) dTracking Setup : Configurations for digital Pan/Tilt/Zoom.
NOTE:
* Prority : Tracking priority : Zone > Loitering > Abandon/Absent > Obj.
* Maximum 4 objects can be represented.
* Same priority: Continuing detect. And Obj. > Size
- All Object: Tracking all detected object.
- Loitering: Tracking detected loitering object.
- Abandon/Absent: Tracking detected absent/abandon area.
- Zone: When zone event rising, tracking the area.
<Picture/DNR (Picture/Digital Noise Reduction)>
Menu for adjustment of video quality and DNR.
1) 2D-NR: Adjust 2D-NR strength.
2) 3D-NR: Adjust 3D-NR strength. Remove noise by summing several frames.
3) DNR Demo: Represent DNR effect. Left side is none DNR screen,
Right side is DNR screen.
4) Color Enh(Color Enhance) : Adjust of color strength.
<Effect>
1) Freeze: When [ENTER] key pressed, still image will be output on the screen.
2) d-Effect: Off/Rotation/Mirror/V Flip
3) Nega (Negative Picture) : Inverse color effect.
4) DIS (Digital Image Stabilization) : Compensation to image vibration.
Because of this function used d-ptz, screen magnification will be changed.
5) dPTZ Preset : Configuration for dPTZ preset. It will be applied when menu exit.
- Zoom: Adjust magnification.
- Pan&Tilt: Adjust Pen/Tilt position.
- Up/Down: Adjust tilt position.
- Left/Right: Adjust pan position.
6) i-Freeze: Select term of refresh rate for output video. This function is useful to reduce
the recording data storage. When motion is detected while i-Freeze, image is refresh to
15
live mode. So not only reducing the recording data but also not to miss object
movement.
- No Motion(s): Adjust Interval while no motion.
- Motion (0.1s): Adjust Interval while motion exists.
<System Setup>
1) General
- Cam Info: Display camera basic information.
NOTE:
* Cam ID/Baud rate/Protocol/Lens Type/CCD Type/Video System/Firmware Version
- System Lock: System locking by 4-characters PID (Lock/Unlock)
- Change PID: Change PID used in the system lock.
NOTE:
* Enter PID: Input previous password. Default PID is “0000”.
* Enter New PID: Input new password.
* Retype New PID: Confirm of new password.
- Title: Change camera title. Max. 8-characters.
- Display: Configurations for display camera ID&title.
Cam ID: Select camera ID display on/off.
Title: Select title display on/off.
Display Pos: Change position the string location.
- Language: Change menu&OSD language.
2) Setup Tools
- System Config
Multi-Camset: Select On (User can use 4 configuration sets)/off
Video Analytics: Select PVA mode. (Simple PVA/ PVA+)
Communication: Configuration for RS-485.
Cam ID: Select the camera ID (001 - 255).
Baud Rate: Select serial communication speed (2400/4800/9600/19200).
Protocol : RS-485 protocol. (Auto, FASTRAX/PELCO-D/PELCO-P)
Event Out: Off, Text-Out, FxLink
Event Strings: Select&edit sending strings for PVA/PVA+ Events.
NOTE:
* Text Out: Send event string through RS-485 line.
This function can work with IDIS DVR’s Text-in feature.
* FxLink: Send event to PC application.
- WPC (White Pixel Compensation) : Compensation for defected pixel on CCD.
NOTE:
* While operating on WPC, Iris will be closed automatically if you using DC/IRIS Lens.
For manual lens, you have to block the lens hole.
Static/Auto: Automatic detecting for defected pixel & compensation.
Proceeding: Doing detection for white pixel.
NOTE:
* If brightness is too high, stop the process and print message “Bright Too High”.
* This function can compensate max. 63 points.
* If detected points are more than 63 points, repeats this detection by changes conditions.
* If more than 63 point while changing conditions, stop the process, and print “Too Many WH
Pixels”
16
* User can stop the proceeding while on operating.
Done: Complete white pixel detection.
View Detected WP: Print detected pixel on screen.
Retry: Restart WPC process.
Accept: Store WPC result, and return to precious menu.
Dynamic
Automated white pixel compensation for not compensated pixel by static method,
No limits of compensation pixel number.
Select level (Low/Mid/High). Higher value setting is compensating more pixels.
NOTE:
* If the scene contains high frequency components can cause a loss.
Static/Manual: Manual white pixel compensation by appointment method.
Move Finder window using 4-arrow keys.
Marker: Expand finder window using digital zoom.
Move compensation pixel using 4-arrow keys.
Register: Adding compensation pixel.
NOTE:
* Registered points are more than 63 points, print “Memory Full” and stops action.
Marker: Use this if user sees other points.
Finder: Use this when you need to move finder screen.
UnDo: Cancel the registered point.
Done: Return to previous menu.
Unregist: Deleting registered pixel.
NOTE:
* No more exist register pixel, Print “Memory empty” and stops action.
Marker: Select for if you continue unregister action.
UnDo: Cancel the unregistered point.
Done: Return to previous menu.
Default: Recover to factory adjustment state.
- Focus Aid
For prevent the spread of light, AE mode changed to Shutter Fix Mode.
Min SHT (sec): Adjust minimum shutter speed.
Zoom: Zoom to focus window.
Adj: Adjust.
Start: Start measurement of maximum focus value.
Stop: Stop the measurement. And initialize maximum focus value.
NOTE:
* FAD Max: Hold maximum focus value.
* FAD Val: Print present focus value.
* Usage:
Step1: Point target to focus window.
Good target: higher contrast, more complex patterns.
Step2: Minimize the spread of light with adjust shutter speed.
Step3 : Turn the lens focus ring to end, start “Adj”
Step4: Turn the lens focus ring slow by opposite side, record max focus value.
Step5: If current fad value is lower than Max fad value, stop turning focus ring.
Step6: Adjust focus ring to be closer to the max fad value.
17
3) Lens : Select lens (DC lens/Video lens/Manual Lens)
- Iris Speed: Only for DC/Video Lens, Adjust Iris speed.
NOTE:
* If iris speed is too high, it can occur AE hunting.
* If iris speed is too low, IRIS adjusting operate too slowly.
4) LLC (Line Lock Control)
Active only used AC Power. - Int(Internal)/Ext(External)
If mode is set to Ext, Sync Phase can be adjusted.
5) Day/Night
- Detection: Configuration D/N change method. (Internal/Fix-Day/Fix-Night/EXT-IN)
Internal: Operating DN changing with internal detection algorithm.
Fix-Day: Day mode fixed.
Fix-Night: Night mode fixed.
External: Work with EXT-IN mode. If port input voltage is high,
DN mode is Night. And If port w voltage is low, DN mode is Day.
- Burst: Select burst signal on/off at night mode.
- Delay (sec): Select Delay time in D/N mode changing.
- D/N Threshold: Configuration for threshold level in D/N mode changing.
(Low/Mid/High/User)
NOTE:
* User Mode : Difference of D>N Level and N>D Level must be more than 2,
and D>N must be less than N>D.
D>N: Adjust level that changing point of Day -> Night.
N>D: Adjust level that changing point of Night -> Day.
- OPD: Optical detector value. Represent present physical brightness.
- Use Alt Camset(N), Alt Camset:
Select camera configuration set to apply in night mode.
NOTE:
* Not support in single camset mode.
6) EXT-I/O
- D/N OUT (Day&Night Output) : Select output method, No Func/D/N Out/AUX0
AUX0: User Defined output 0.
Set AUX0: Output voltage through to D/N OUT port (On:5V/Off:0V)
- ALARM OUT: Select output method, No Func/Alarm Out/AUX1
AUX1: User Defined output 1.
Set AUX1: Output voltage through to D/N OUT port (On:5V/Off:0V)
- D/N IN: Select input method. No Func/Alt Camset.
Alt. Camset: When inputted signal, change camera configuration.
Select camset number
7) Counter: Configurations for output of counting machine.
- , : Represent counting value / adjust offset value.
- Alarm On Zero: When counter value reached zero, will be alarmed.
Preset Cnt1, Cnt2: When counter reached zero, counter value will be reset this
value.
Reset: Initialize counter. (Default Zero, or Alarm on zero enabled: Offset Value)
TextOut to Comm: Event string sends through RS-485 lines.
NOTE:
* Event Out must be activated.
18
EXTERNAL DIMENSION
Window Size
0.1 in. (2.5mm thick),
impact-resistant P.C (LEXAN)
3.93 in. (10cm) diameter
Cable Entry One 1" (25mm) opening holes
Weight – Unit:
Shipping:
1.66 lb. (760 g)
2.11 lb. (960 g)
19
SPECIFICATIONS
ITEM NTSC PAL
ELECTRICAL
Input Voltage DUAL(DC12V, AC24V) ±10%
Power Consumption 3.5 Watts (300mA)
Power Connector 2-Pin Terminal Block
VIDEO
Image Device 1/3" Sony EXview 960H CCD II
Total Pixels 1020(H) x 508(V) 1020(H) x 596(V)
Effective Pixels 976(H) x 494(V) 976(H) x 582(V)
Scanning System 2:1 Interlace
Sync. System Internal / Line Lock (Phase Control)
Scanning Freq. 15.734KHz(H), 59.95Hz(V) 15.625KHz(H), 50Hz(V)
Horizontal Resolution 700TVL
Min. illumination
0.1 Lux(Color), 0.01 Lux(BW), 0.0001 Lux(Sens-Up B/W) @ F1.2 50IRE
S/N (Y signal) More than 50dB
Video Output CVBS 1.0Vp-p, 75 , UTP(Option)
OPERATIONAL
Image Enhancement WDR-Lite
White Balance
ATW/Wide, ATW/Indoor, ATW/Outdoor, Fix/Indoor, Fix/Outdoor,
Fix/FL, CRS, ATW Range Adjust
Exposure
Full Auto , Manual Shutter , Flickerless, Low Light(AGC, Sens-Up),
UDF(Ultra Deep Field)
Electronic Shutter
Speed
1/60 ~ 1/10,000
Auto : ~ 100,000
1/50 ~ 1/10,000
Auto : ~ 100,000
Dynamic Noise
Reduction
2D + 3D : Gain Adjust, DNR Demo
Day & Night Auto , Day , Night , Ext
Sens-up x256
Backlight Compensation EHLC , AUTO , SPOT
Motion Detection&
Video Analytics
PVA(Motion, Loitering, Abandon, Scene Change, Unfocus, Windy
Area)/ Simple(Motion, Loitering, Abandon, Scene Change)
Digital Image Stabilizer OFF / ON
Privacy Masking Max 10 ( 4-point polygonal, Color, Transparancy, Mosaic )
Digital Zoom x4 / D-PTZ Support
Digital Image Effect
V-FLIP, MIRROR , ROTATION , NEGA&POSI , FREEZE ,
SHARPNESS, STILL SHOT
Display
Camera Name : ON / OFF/Adjustable Location
Camera ID : ON / OFF/Adjustable Location
Language English,German(TBD),French(TBD),Portuguese(TBD),Spanish(TBD)
Camera ID 001~ 255
Camera Control Tact Switch , RS485
Protocol Auto, FASTRAX , PELCO-D, PELCO-P
Connector & etc
Power input Terminal block
Video output BNC, UTP (Option)
Lens mount Fixed Mount
Lens 2.8mm~11.0mm/F1.2 D&N DC IRIS Vari-Focal Lens
Operating Temp. -10ºC to +50ºC
Operating humidity Less than 90%
External dimension VP: 146.3(W) x 113.7(H) / INDOOR: 145.6(W) x 113(H)
Weight VP: 760g
20
  • Page 1 1
  • Page 2 2
  • Page 3 3
  • Page 4 4
  • Page 5 5
  • Page 6 6
  • Page 7 7
  • Page 8 8
  • Page 9 9
  • Page 10 10
  • Page 11 11
  • Page 12 12
  • Page 13 13
  • Page 14 14
  • Page 15 15
  • Page 16 16
  • Page 17 17
  • Page 18 18
  • Page 19 19
  • Page 20 20
  • Page 21 21

Revo REVDN700-2 User manual

Category
Security cameras
Type
User manual

Revo REVDN700-2 is a vandal-proof dome camera that delivers high-quality images with its 1/3" Super-HAD CCD and digital signal processing LSIs. It boasts a super high-resolution of 700TVL and wide dynamic range for capturing clear images in challenging lighting conditions. With its impressive low-light performance of 0.1Lux (Color) and 0.01 Lux (B/W) at F1.2 50IRE, you can expect excellent image quality even in dimly lit environments.

Ask a question and I''ll find the answer in the document

Finding information in a document is now easier with AI