Page is loading ...

INSTRUCTIONS FOR
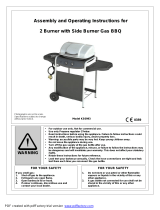
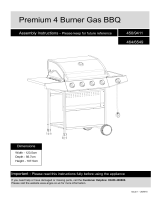
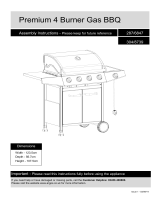
GAS BBQ 4 BURNER
MODEL NO: BBQ10
Thank you for purchasing a Sealey product. Manufactured to a high standard, this product will, if used according to these instructions,
and properly maintained, give you years of trouble free performance.
IMPORTANT: PLEASE READ THESE INSTRUCTIONS CAREFULLY. NOTE THE SAFE OPERATIONAL REQUIREMENTS, WARNINGS & CAUTIONS. USE
THE PRODUCT CORRECTLY AND WITH CARE FOR THE PURPOSE FOR WHICH IT IS INTENDED. FAILURE TO DO SO MAY CAUSE DAMAGE AND/OR
PERSONAL INJURY AND WILL INVALIDATE THE WARRANTY. KEEP THESE INSTRUCTIONS SAFE FOR FUTURE USE.
1. SAFETY
1.1. GENERAL SAFETY
WARNING! The warnings, cautions and instructions in this manual cannot cover all possible conditions and situations that
may occur. It must be understood by the operator that common sense and caution are factors which cannot be built into
this product, but must be applied by the operator.
WARNING! Hazardous fire or explosion may result if instructions are ignored.
WARNING! Never use a flame to do the leak test and ensure no naked flames are nearby when doing the leakage test.
WARNING! Accessible parts may be very hot. Keep young children and pets away.
WARNING! If you smell gas: turn off the gas supply at the cylinder, extinguish all naked flames, DO NOT operate any electrical
appliances, check for leaks as detailed in this manual. If odour persists, contact your Sealey dealer.
WARNING! Any modification to this appliance may be dangerous and is absolutely not permitted.
WARNING! The hood must always be open when lighting the burner.
9 Read the instructions carefully before assembly and retain this manual for future reference.
9 Use outdoors only, stand on a level surface, remember hot fat may drip out of the drip tray.
9 Handle the hot barbecue with the help of oven gloves.
9 The barbecue should be cleaned on a regular basis. Take care not to enlarge burner ports of orifice openings when cleaning the
burner or valves.
9 Connect the regulator and hose onto the gas cylinder, close all the valves by turning the control knobs to the “OFF” (fully clockwise)
position.
9 Always do the gas leak check before you use the barbecue and after a cylinder change. Test the leakage on all the connections where
gas passes by.
9 GAS LEAK CHECK Put soapy water on all the connections where the gas reaches. Open the gas cylinder valve and regulator. If bubbles
are seen, tighten the connection. If bubbles are still seen, close all valves, turn off the regulator and contact your Sealey dealer for help.
Never use the barbecue with a leak.
9 The gas cylinder can only be changed by a competent person.
9 Use oven gloves and sturdy long handled barbecue tools when cooking on the grill.
9 Be prepared if an accident or fire should occur. Know where your first aid kit and fire extinguishers are and how to use them correctly.
Keep the gas supply hose away from any heated surfaces.
9 Ensure the appliance has completely cooled before storing.
9 Cylinders must be stored outdoors, upright and out of reach of children. Protect cylinder from high temperatures and replace the
plastic port cap.
9 This gas barbecue is designed for outside use only.
8 DO NOT use in high winds.
8 DO NOT move the barbecue whilst it is in operation.
8 DO NOT operate if there is a gas leak.
8 DO NOT attempt to disconnect any gas fitting if your barbecue is being used, including the gas hose and regulator.
8 DO NOT leave unattended, from being lit to fully cooled.
8 DO NOT use this barbecue in a garage or any enclosed area. Keep the surrounding area clear, at least 1.0m from any combustable
materials and 0.5m from a brick wall.
8 DO NOT attempt any unauthorised interference of the main controls on this barbecue, i.e. gas taps, injectors, valve etc.
8 DO NOT attempt to use charcoal in this barbecue.
8 DO NOT position on a surface that may be damaged by hot fat or heat.
8 DO NOT store petrol or other flammable vapours or liquids in the vicinity of this barbecue.
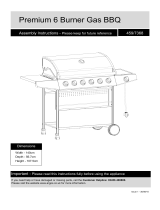
2. INTRODUCTION
Gas barbecue with 4 stainless steel burners and piezoelectric igniter. Features cast iron enamel cooking grill, built in temperature
gauge,warmingrackandundergrillstoragecabinet.Fittedwithtwoxedwheelsandtwocastors.
BBQ10 | Issue 2(L) 25/09/17
Original Language Version
© Jack Sealey Limited
Refer to
instruction
manual
Wear
Gloves
Warning:
Hot
Surface

3. SPECIFICATION
Model no: .................................................................. BBQ10
Cooking area: ....................................................700 x 420mm
Gas category: ..................................................I3+ 28-37mbar
Heat output: ...............................................................14.5kW
Overall size (W x D x H): ..................... 1330 x 590 x 1120mm
4. ASSEMBLY
WARNING! Although we take every effort to ensure that the assembly process is as easy as possible, it is inherent with fabricated steel
parts that corners and edges can cause cuts if improperly handled during assembly procedures. Be careful while handling any parts
during assembly. It is strongly recommended that you protect hands with a pair of work gloves.
BBQ10 | Issue 2(L) 25/09/17
Original Language Version
© Jack Sealey Limited

5. PARTS LIST
BBQ10 | Issue 2(L) 25/09/17
Original Language Version
© Jack Sealey Limited

BBQ10 | Issue 2(L) 25/09/17
Original Language Version
© Jack Sealey Limited

BBQ10 | Issue 2(L) 25/09/17
Original Language Version
© Jack Sealey Limited

BBQ10 | Issue 2(L) 25/09/17
Original Language Version
© Jack Sealey Limited

BBQ10 | Issue 2(L) 25/09/17
Original Language Version
© Jack Sealey Limited

BBQ10 | Issue 2(L) 25/09/17
Original Language Version
© Jack Sealey Limited

6. PREPARATION
6.1. ATTACH THE GAS CYLINDER Refer to fig.1.
6.1.1. Position your gas cylinder at the side of your barbecue, not underneath, remember the cylinder must be kept away from heat, and be in
a safe position.
6.1.2. Attach the regulator to the gas cylinder.
6.1.3. Perform the Gas Leak Test as described in Safety Precautions Section 1.
6.1.4. Check that all areas under the front panel are free from any obstructions (insects etc.). This area must be kept clean as this may affect
the flow of combustion or of ventilation air.
6.1.5. Check the hose before each and every use, looking for cracks, cuts or any abrasions.
6.1.6. If the hose is found to be faulty in any way, DO NOT attempt to use your barbecue, replace the hose with one from your Sealey dealer.
6.1.7. Ensure the hose is free from any kinks or bends which will affect the gas flow, when using your barbecue. Also the hose must not have
undue tension and must not touch any part of the barbecue which may be hot. The hose must not be longer than 1.5 metres.
6.1.8. When changing your gas cylinder ensure there are no sources of ignition nearby and make sure the barbecue is switched off.
6.1.9. The barbecue must be kept away from flammable materials.
6.1.10. DO NOT move the barbecue whilst in use.
7. LIGHTING INSTRUCTIONS
WARNING! The lid must be open when lighting the barbecue.
WARNING! DO NOT stand with your face directly over the barbecue when lighting it.
7.1. PILOTGASCONTROLIGNITIONRefertogs.2,3and4.
7.2. Make sure all gas controls on the barbecue are in the OFF position.
7.2.1. Turn the gas cylinder valve to the ON position at the regulator.
7.2.2. TocreatethesparkpresscontrolknobAandholditinfor3-5secondstoallowgastoowTHENturnANTICLOCKWISEtoHI(HIGH)
seeg.2B.ItwillthensendasparktothelightingtubeC.A“snap”willbeheardfromtheigniterandanorangeamewillbeseen
coming from the burner lighting tube at the left side of the burner D.
7.2.3. Continue to hold the burner control knob in for two seconds after the “snap”, this will allow
gastoowcompletelydowntheburnertubeEandensureignition.
7.2.4. When the burner is alight, adjacent burners will cross light when their controls are turned
to “HI” (HIGH).
7.2.5. AttheHI(HIGH)settingtheburnerameshouldbeapproximately12to20mmlongwith
aminimumoforangeame.
7.2.6. Turn the gas control fully ANTICLOCKWISE for the MINIMUM setting.
WARNING! If the burner does not light, turn the burner control knob to OFF and wait
5 minutes to let the gas clear before lighting again.
Fig.1
Fig.4
Fig.2
Fig.3
BBQ10 | Issue 2(L) 25/09/17
Original Language Version
© Jack Sealey Limited

8. OPERATION
8.1. Food can be barbecued with the lid open or closed. When the lid is closed for 5 minutes, the lid must be opened for 1 minute to
release heat.
WARNING!Theblackareaofthehandles(refertog.5)willbecomehotwhenthebarbecueisinuse.DO NOT touch the black area.
TO RELEASE HEAT.
8.1.1.
8.1.2.
8.1.3.
8.1.4.
8.1.5.
9. MAINTENANCE
9.1. CLEANING
9.1.1. To clean the barbecue, turn the burner on for 5 to 10 minutes. Grease will be burned off from the grill as well as the Flame Tamer
Plate.
9.1.2. Ensure the barbecue is cold before continuing. The grill should be cleaned periodically by soaking and washing in soapy water. Use a
wire brush, steel wool or a scouring pad to remove stubborn spots. Always rinse thoroughly with clean water.
9.1.3. The interior surfaces of the grill housing cover should be washed with hot soapy water.
9.1.4. Regularly clean the drip tray reservoir with hot soapy water. It is sited beneath the barbecue at the back and will be hot whilst the
barbecue is in use, see assembly picture 15, part number 18.
9.1.5. Periodically check the burner to see that it is free from insects and spiders which may block the gas system.
9.1.6. Clean the venturi tube on the burner very carefully, checking to see that it is free of obstructions. We recommend the use of a pipe
cleaner to clean the venturi tube area.
9.1.7. Anymodicationsofthisappliancemaybedangerousandisnotpermitted.DO NOT alter parts sealed by the manufacturer.
9.2. STORAGE
9.2.1. The gas bottle must be stored outdoors in a well ventilated area and must be disconnected from your barbecue when not being used.
9.2.2. Ensure that you are outside and well away from any sources of ignition before disconnecting your bottle.
9.2.3. When using your barbecue after a period of storage, check for gas leaks and for any obstructions in the burner before using. Also
followthecleaninginstructionstoensurethebarbecueissafe.Checkthatareasunderthelidandametamerarefreefromany
obstruction,(insect,ingressetc.).Thisareamustbekeptclean,asitmayaffecttheowofcombustionorair.
9.2.4. We recommend you use a barbecue cover to protect this item when not in use. Ensure it is cool before the cover is used. Covers must
be removed periodically to minimise moisture build up.
10. TROUBLESHOOTING
Fig.5
NOTE: It is our policy to continually improve products and as such we reserve the right to alter data, specications and component parts without prior notice.
IMPORTANT: No liability is accepted for incorrect use of this product.
WARRANTY: Guarantee is 12 months from purchase date, proof of which will be required for any claim.
Sole UK Distributor, Sealey Group.
Kempson Way, Suffolk Business Park,
Bury St. Edmunds, Suffolk.
IP32 7AR
www.sealey.co.uk
sales@sealey.co.uk
01284 757500
01284 703534
Web
Environmental Protection
Recycle unwanted materials instead of disposing of them as waste. All tools, accessories and packaging should be sorted,
taken to a recycling centre and disposed of in a manner which is compatible with the environment.
When the product becomes completely unserviceable and requires disposal, drain off any fluids (if applicable)
into approved containers and dispose of the product and the fluids according to local regulations.
BBQ10 | Issue 2(L) 25/09/17
Original Language Version
© Jack Sealey Limited
Problem Possible cause Solution
Burners will not light using the ignition
system.
Gas cylinder empty.
Faulty regulator.
Obstructions in burner.
Obstructions in gas jet or gas hose.
Wire is loose or disconnected on electrode
or ignition unit.
Electrode or wire is damaged or faulty push
button igniter.
The distance between the burner and the
electrode pin is too large or too small
Replace with full cylinder.
Have regulator checked or replace.
Cleans jets and gas hose.
Reconnect wire.
Change electrode wire or change igniter.
Check and ensure the distance between the
burner and the electrode pin is 3-5mm.
Lowameorashback(ameinburner
tube, a hissing or roaring noise may be
heard).
Gas cylinder is too small.
Obstructions in burner.
Obstructions in gas jets or gas hose.
Windy conditions.
Use larger cylinder.
Clean burner.
Clean jets and gas hose.
Use barbecue in a more sheltered position.
/