Dual XML8110 Owner's manual
- Category
- Car media receivers
- Type
- Owner's manual
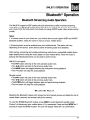
Dual XML8110: Conquer the road with a symphony of sound! This in-dash AM/FM/Bluetooth® Ready Docking Station is your key to a transformative audio experience. Immerse yourself in crystal-clear radio reception, connect your iPod® for a personalized music library, and relish the convenience of hands-free calling with Bluetooth® connectivity. Get ready to elevate your journeys with Dual XML8110, the ultimate fusion of technology and entertainment.
Dual XML8110: Conquer the road with a symphony of sound! This in-dash AM/FM/Bluetooth® Ready Docking Station is your key to a transformative audio experience. Immerse yourself in crystal-clear radio reception, connect your iPod® for a personalized music library, and relish the convenience of hands-free calling with Bluetooth® connectivity. Get ready to elevate your journeys with Dual XML8110, the ultimate fusion of technology and entertainment.


-
 1
1
-
 2
2
-
 3
3
-
 4
4
-
 5
5
-
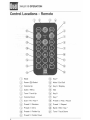 6
6
-
 7
7
-
 8
8
-
 9
9
-
 10
10
-
 11
11
-
 12
12
-
 13
13
-
 14
14
-
 15
15
-
 16
16
-
 17
17
-
 18
18
-
 19
19
-
 20
20
-
 21
21
-
 22
22
-
 23
23


Dual XML8110 Owner's manual
- Category
- Car media receivers
- Type
- Owner's manual
Dual XML8110: Conquer the road with a symphony of sound! This in-dash AM/FM/Bluetooth® Ready Docking Station is your key to a transformative audio experience. Immerse yourself in crystal-clear radio reception, connect your iPod® for a personalized music library, and relish the convenience of hands-free calling with Bluetooth® connectivity. Get ready to elevate your journeys with Dual XML8110, the ultimate fusion of technology and entertainment.
Ask a question and I''ll find the answer in the document
Finding information in a document is now easier with AI
Related papers
Other documents
-
LoopTone DS-R08 User manual
-
West Marine WM4000 Owner's manual
-
Bluedio US User manual
-
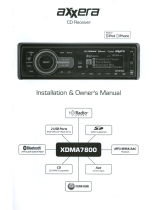 Axxera XDMA7800 Installation & Owner's Manual
-
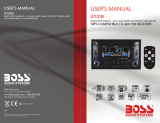 Boss Audio Systems 870DBI Owner's manual
-
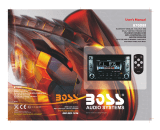 Boss Audio Systems 870DB User manual
-
 Boss Audio Systems 758DBI User manual
-
Alpine CDE-HD138BT User manual
-
Alpine CDE-W233R User manual
-
Alpine CDE-131R Owner's manual


