Page is loading ...
Page is loading ...
Page is loading ...

Attention !
Il est indispensable que vous lisiez les instructions contenues dans ce manuel avant
le montage et la mise en service de l’appareil.
Important!
It is essential that you read the instructions in this manual before mounting and operating
this machine.
Achtung!
Bitte lesen Sie unbedingt vor Montage und Inbetriebnahme die Hinweise dieser Bedienungsanleitung.
¡Atención!
Es imprescindible que lea las instrucciones de este manual antes del montaje y de la
puesta en servicio.
Attenzione!
Prima di procedere al montaggio e alla messa in funzione, è indispensabile leggere
attentamente le istruzioni del presente manuale.
Atenção!
É indispensável ler as instruções deste manual antes de montar e pôr em serviço.
Let op !
Het is absoluut noodzakelijk vóór montage en inbedrijfstelling de aanwijzingen in deze
handleiding te lezen.
Observera!
Det är nödvändigt att läsa instruktionerna i denna bruksanvisning före montering och
driftsättning.
OBS!
Denne brugsanvisning skal læses igennem inden montering og ibrugtagning.
Advarsel!
Vennligst les instruksjonene i denne bruksanvisningen før du monterer og tar i bruk
maskinen.
Huomio!
On ehdottoman välttämätöntä lukea tässä käyttöohjeessa annetut ohjeet ennen
asennusta ja käyttöönottoa.
Προσοχή!
Είναι απαραίτητο να διαβάσετε τις συστάσεις των οδηγιών αυτών πριν τη
συναρμολόγηση και τη θέση σε λειτουργία.
Figyelem! Feltétlenül fontos, hogy a jelen használati útmutatóban foglalt előírásokat az
összeszerelés és az üzembe helyezés ellőt elolvassa!
Důležité upozornění! Před montáží nářadí a uvedením do provozu je nutné si přečíst následující pokyny.
ÇÌËχÌËe! èee‰ Ò·ÓÍÓÈ Ë Á‡ÔÛÒÍÓÏ ËÌÒÚÛÏeÌÚ‡ ÌeÓ·ıÓ‰ËÏÓ ÔÓ˜eÒÚ¸ ËÌÒÚÛ͈ËË ËÁ ̇ÒÚÓfl˘e„Ó
ÛÍÓ‚Ó‰ÒÚ‚‡.
Atenţie! Este indispensabil sã citiţi instrucţiunile conţinute în acest mod de utilizare înainte de montaj
şi de punerea în funcţiune.
Uwaga! Przed montowaniem i uruchomieniem, koniecznie musicie się Państwo zapoznać
z zaleceniami zawartymi w niniejszym sposobie użycia.
Pomembno! Zelo pomembno je, da pred namestitvijo in prvo uporabo te naprave preberete
navodila v tem priročniku.
Upozorenje!
Vaæno je da upute u ovom KorisniËkom priruËniku proËitate prije postavljanja i uporabe ovog alata.
Dikkat! Montajdan ve aletin kullanımına başlamadan bu kılavuzda bulunan talimatları
okumanız gerekmektedir.
Sous réserve de modifications techniques / Subject to technical modifications / Technische Änderungen vorbehalten /
Bajo reserva de modificaciones técnicas / Con riserva di eventuali modifiche tecniche / Com reserva de modificações técnicas /
Technische wijzigingen voorbehouden / Med förbehåll för tekniska ändringar / Med forbehold for tekniske ændringer /
Med forbehold om tekniske endringer / Tekniset muutokset varataan / Υπό την επιφύλαξη τεχνικών τροποποιήσεων /
A műszaki módosítás jogát fenntartjuk / Změny technických údajů vyhrazeny /
åÓ„ÛÚ ·˚Ú¸ ‚ÌeÒeÌ˚ ÚeıÌ˘eÒÍËe ËÁÏeÌeÌËfl /
Sub rezerva modificaţiilor tehnice / Z zastrzeżeniem modyfikacji technicznych / Tehnične spremembe dopuščene
Podloæno tehniËkim promjenama / Teknik düzeltmeler hakkı saklıdır
960931224-01B.indd A4960931224-01B.indd A4 7/20/07 11:16:35 AM7/20/07 11:16:35 AM
Page is loading ...
Page is loading ...
Page is loading ...
Page is loading ...
Page is loading ...
Page is loading ...
Page is loading ...

GENERAL SAFETY RULES
WARNING
Read all instructions. Failure to follow all
instructions listed below may result in electric
shock, fire and/or serious injury. The term "power
tool'' in all of the warnings listed below refers
to your mains operated( corded) power tool or
battery operated( cordless) power tool.
SAVE THESE INSTRUCTIONS.
WORK AREA
■ Keep work area clean and well lit. Cluttered and
dark areas invite accidents.
■ Do not operate power tools in explosive
atmospheres, such as in the presence of
flammable liquids, gases, or dust. Power tools
create sparks which may ignite the dust or fumes.
■ Keep children and bystanders away while
operating a power tool. Distractions can cause you
to lose control.
ELECTRICAL SAFETY
■ Power tool plugs must match the outlet. Never
modify the plug in any way. Do not use any
adapter plugs with earthed(grounded) power
tools. Unmodified plugs and matching outlets will
reduce risk of electric shock.
■ Avoid body contact with earthed or grounded
surfaces such as pipes, radiators, ranges and
refrigerators. There is an increased risk of electric
shock if your body is earthed or grounded.
■ Do not expose power tools to rain or wet
conditions. Water entering a power tool will
increase the risk of electric shock.
■ Do not abuse the cord. Never use the cord for
carrying, pulling or unplugging the power tool.
Keep cord away from heat, oil, sharp edges or
moving parts. Damaged or entangled cords increase
the risk of electric shock.
■ When operating a power tool outdoors, use an
extension cord suitable for outdoor use. Use of
a cord suitable for outdoor use reduces the risk of
electric shock.
PERSONAL SAFETY
■ Stay alert, watch what you are doing and use
common sense when operating a power tool. Do
not use a power tool while you are tired or under
the influence of drugs, alcohol or medication. A
moment of inattention while operating power tools
may result in serious personal injury.
■ Use safety equipment. Always wear eye
protection. Safety equipment such as dust mask,
non-skid safety shoes, hard hat, or hearing protection
used for appropriate conditions will reduce personal
injuries.
■ Avoid accidental starting. Ensure the switch is in
the off position before plugging in. Carrying power
tools with your finger on the switch or plugging in
power tools that have the switch on invites accidents.
■ Remove any adjusting key or wrench before
turning the power tool on. A wrench or a key left
attached to a rotating part of the power tool may
result in personal injury.
■ Do not overreach. Keep proper footing and
balance at all times. This enables better control of
the power tool in unexpected situations.
■ Dress properly. Do not wear loose clothing or
jewellery. Keep your hair, clothing and gloves
away from moving parts. Loose clothes, jewellery or
long hair can be caught in moving parts.
■ If devices are provided for the connection of dust
extraction and collection facilities, ensure these
are connected and properly used. Use of these
devices can reduce dust related hazards.
POWER TOOL USE AND CARE
■ Do not force the power tool. Use the correct
power tool for your application. The correct power
tool will do the job better and safer at the rate for
which it was designed.
■ Do not use the power tool if the switch does not turn
it on and off. Any power tool that can not be controlled
with the switch is dangerous and must be repaired.
■ Disconnect the plug from the power source before
making any adjustments, changing accessories,
or storing power tools. Such preventive safety
measures reduce the risk of starting the power tool
accidentally.
■ Store idle power tools out of the reach of children
and do not allow persons unfamiliar with the
power tool or these instructions to operate the
power tool. Power tools are dangerous in the hands
of untrained users.
■ Maintain power tools. Check for misalignment or
bindling of moving parts, breakage of parts and
any other condition that may affect the power
tools operation. If damaged, have the power tool
repaired before use. Many accidents are caused by
poorly maintained power tools.
8
GB
English
F
D
E I
P NL
S DK N FIN GR
H CZ RUS PL
RO
SLO TR
HR
960931224-01B.indd 8960931224-01B.indd 8 7/20/07 11:16:38 AM7/20/07 11:16:38 AM

GENERAL SAFETY RULES
■ Keep cutting tools sharp and clean. Properly
maintained cutting tools with sharp cutting edges are
less likely to bind and are easier to control.
■ Use the power tool, accessories and tool bits etc.,
in accordance with these instructions and in the
manner intended for the particular type of power
tool, taking into account the working conditions
and the work to be performed. Use of the power
tool for operations different from intended could result
in a hazardous situation.
BATTERY TOOL USE AND CARE
■ Ensure the switch is in the off position before
inserting battery pack. Inserting the battery pack
into power tools that have the switch on invites
accidents.
■ Recharge only with the charger specified by the
manufacturer. A charger that is suitable for one type
of battery pack may create a risk of fire when used
with another battery pack.
■ Use power tools only with specifically designated
battery packs. Use of any other battery packs may
create a risk of injury and fire.
■ When battery pack is not in use, keep it away
from other metal objects like paper clips, coins,
keys, nails, screws, or other small metal objects
that can make a connection from one terminal to
another. Shorting the battery terminals together may
cause burns or a fire.
■ Under abusive conditions, liquid may be ejected
from the battery; avoid contact. If contact
accidentally occurs, flush with water. If liquid
contacts eyes, additionally seek medical help.
Liquid ejected from the battery may cause irritation or
burns.
SERVICE
■ Have your power tool serviced by a qualified repair
person using only identical replacement parts.
This will ensure that the safety of the power tool
is maintained.
SPECIAL RULES
■ Wear ear protectors with impact drills. Exposure
to noise can cause hearing loss.
■ Use auxiliary handles supplied with the tool (for
CHI-1442/CHI-1802 only). Loss of control can cause
personal injury.
CHARGER SAFETY
■ To reduce risk of injury, charge only nickel-cadmium
type rechargeable batteries. Other types of batteries
may burst, causing personal injury and damage.
■ Do not expose charger to wet or damp conditions.
■ Use of an attachment not recommended or sold by
the battery charger manufacturer may result in a risk
of fire, electric shock, or injuries to person.
■ To reduce risk of damage to charger body and
cord, pull by charger plug rather than cord when
disconnecting charger.
■ Make sure cord is located so that it will not be stepped
on, tripped over, or otherwise subjected to damage
and stress.
■ An extension cord should not be used unless
absolutely necessary. Use of improper extension
cord could result in a risk of fire and electric shock.
If extension cord must be used, make sure:
a. That pins on plug of extension cord are the same
number, size and shape as those of plug on charger.
b. That extension cord is properly wired and in good
electrical condition.
■ Do not operate charger with a damaged cord or
plug. If damaged, have it replaced immediately by a
qualified serviceman.
■ Do not operate charger if it has received a sharp
blow, been dropped, or otherwise damaged in any
way; take it to a qualified serviceman.
■ Do not disassemble charger; take it to a qualified
serviceman when service or repair is required.
Incorrect reassembly may result in a risk of electric
shock or fire.
■ To reduce risk of electric shock, unplug the charger
from outlet before attempting any maintenance or
cleaning. Turning off controls will not reduce this risk.
■ Disconnect charger from power supply when not in use.
■ Risk of electric shock. Do not touch uninsulated portion
of output connector or uninsulated battery terminal.
■ Save these instructions. Refer to them frequently and
use them to instruct others who may use this unit.
If you loan someone this unit, loan them these
instructions also.
9
GB
English
F
D
E I
P NL
S DK N FIN GR
H CZ RUS PL
RO
SLO TR
HR
960931224-01B.indd 9960931224-01B.indd 9 7/20/07 11:16:38 AM7/20/07 11:16:38 AM

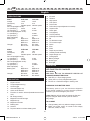
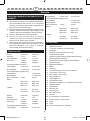
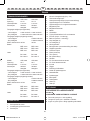
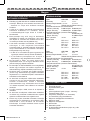
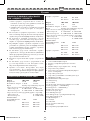
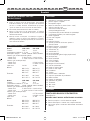
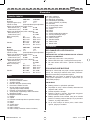
SPECIFICATIONS
Model CHD-1442 CHI-1442
Voltage 14.4V 14.4V
Chuck(mm) 2-13 2-13
Switch Variable speed Variable speed
No load speed(drill mode):
-Lo speed(min
-1
) 0-400 0-400
-Hi speed(min
-1
) 0-1400 0-1400
No load speed(impact mode):
-Lo speed(min
-1
) 0-5200
-Hi speed(min
-1
) 0-18200
Max Torque(Nm) 34 34
Battery pack BPP-1413/ BPP-1413/
BPP-1415/ BPP-1415/
BPP-1417 BPP-1417
Charger BC-1440/ BC-1440/
BC-1415-S BC-1415-S
Model CHP-1802 CHI-1802
Voltage 18V 18V
Chuck(mm) 2-13 2-13
Switch Variable speed Variable speed
No load speed(drill mode):
-Lo speed(min
-1
) 0-440 0-440
-Hi speed(min
-1
) 0-1600 0-1600
No load speed(impact mode):
-Lo speed(min
-1
) 0-5720
-Hi speed(min
-1
) 0-20800
Max Torque(Nm) 37 37
Battery pack BPP-1813/ BPP-1813/
BPP-1815/ BPP-1815/
BPP-1817 BPP-1817
Charger BC-1800/ BC-1800/
BC-1815-S BC-1815-S
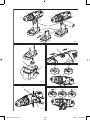
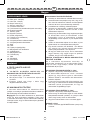
DESCRIPTION
1. Keyless chuck
2. Torque adjustment ring
3. Switch trigger
4. Gear train(High-Low)
5 . Quick mode selector
6. Direction of rotation selector(forward/reverse/center
lock)
7. Bit storage area(s)
8. Magnetic bit holder storage
9. Magnetic tray
10. Magnetic bit holder
11. Battery pack
12. Latches
13. Depress latches to release battery pack
14. Forward
15. Reverse
16. High speed
17. Low speed
18. Drive mode
19. Drill mode (torque adjustment not active)
20. Impact mode
21. Chuck jaws
22. Lock(tighten)
23. Unlock (release)
24. Drill bit(not included)
25. Bit
26. To decrease torque
27. To increase torque
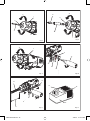
28. Notch
29. Ears
30. Plate
31. Depth stoprod clamp
32. Auxiliary handle assembly
33. Depth Gauge rod
34. Drilling depth
35. Battery Charger
36. Green Light
37. Red Light
OPERATION
LED FUNCTION OF CHARGER
LED WILL BE ON TO INDICATE STATUS OF
CHARGER AND BATTERY PACK
■ Red LED on = Fast charging mode.
■ Green LED on = Fully charged battery pack.
■ No LED on = Defective charge or battery pack.
CHARGING YOUR BATTERY PACK
The battery pack for your tool has been shipped in
a low charge condition to prevent possible problems.
Therefore, you should charge it prior to use.
Note: Batteries will not reach full charge the first time
they are charged. Allow several cycles for them to
fully charge.
TO CHARGE
■ Charge battery pack only with the charger provided.
■ Make sure power supply is normal house voltage,
230 volts, 50 Hz, AC only.
10
GB
English
F
D
E I
P NL
S DK N FIN GR
H CZ RUS PL
RO
SLO TR
HR
960931224-01B.indd 10960931224-01B.indd 10 7/20/07 11:16:39 AM7/20/07 11:16:39 AM

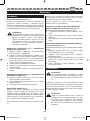
OPERATION
■ Connect charger to power supply.
■ Place battery pack in charger. Align raised rib on
battery pack with groove in charger.
■ Press down on battery pack to be sure contacts on
battery pack engage properly with contacts in charger.
When properly connected, red light will turn on.
■ When your battery pack becomes fully charged, the
red light will turn off and the green light will turn on.
■ After normal usage, 1 hour of charge time is required
to be fully charged. A minimum charge time of 1 to
1-1/2 hours is required to recharge a completely
discharged tool.
■ DO NOT place charger in an area of extreme heat
or cold. It will work best at temperatures above 10°C
and below 38°C
IMPORTANT INFORMATION FOR RECHARGING HOT
BATTERIES
When using your tool continuously, the batteries in your
battery pack will become hot. You should let a hot battery
pack cool down for approximately 30 minutes before
attempting to recharge.
TO INSTALL BATTERY PACK (Fig.2)
■ Place the direction of rotation selector in center
position.
■ Place the battery pack in the tool. Align raised rib on
battery pack with groove in the tool’s battery port.
■ Make sure the latches on each side of the battery
pack snap in place and that battery pack is secured in
the tool before beginning operation.
TO REMOVE BATTERY PACK (Fig.2)
■ Place the direction of rotation selector in center
position.
■ Locate latches on side of battery pack and depress
both sides to release battery pack.
■ Remove battery pack from the tool.
SWITCH TRIGGER (Fig.3)
■ To turn the drill ON, depress the switch trigger.
■ To turn it OFF, release the switch trigger.
VARIABLE SPEED
The variable speed switch trigger delivers higher speed
and torque with increased trigger pressure and lower
speed with decreased trigger pressure.
SWITCH LOCK (Fig. 3)
The switch trigger can be locked in the OFF position.
This feature can be used to prevent the possibility of
accidental starting when not in use. To lock switch trigger,
place the direction of rotation selector (Forward/Reverse
Selector) in center position.
Note: When selector is in center position, switch trigger
is locked.
REVERSIBLE (Fig. 3)
The direction of bit rotation is reversible and is controlled
by a selector located above the switch trigger. With the
drill held in normal operating position, the direction of
rotation selector should be positioned to the left of the
switch trigger for drilling. The drilling direction is reversed
when the selector is to the right of the switch trigger. To
stop the drill, release the switch trigger and allow the
chuck to come to a complete stop.
ADJUSTING THE SPEED (Fig. 4)
Follow these steps to adjust the speed.
■ For high speed: Slide the two-speed gear train switch
to “2”.
■ For low speed: Slide the two-speed gear train switch
to “1”.
Note: If you have difficulty changing from one gear
range to the other, turn the chuck by hand until the gears
engage.
CAUTION
To prevent gear damage, always allow chuck to
come to a complete stop before changing the
speed or the direction of rotation.
QUICK MODE SELECTOR (CHD-1442/CHP-
1802 Fig.5 / CHI-1442/CHI-1802 Fig.6)
The Quick Mode Selector allows you to quickly switch
from drill mode to drive mode.
In general, drill mode should be used for drilling and
other heavy duty applications. Drive mode should be
used for driving screws. Impact mode should be used for
impact drilling.
11
GB
English
F
D
E I
P NL
S DK N FIN GR
H CZ RUS PL
RO
SLO TR
HR
960931224-01B.indd 11960931224-01B.indd 11 7/20/07 11:16:39 AM7/20/07 11:16:39 AM

OPERATION
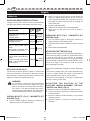
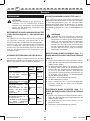
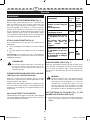
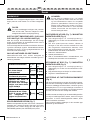
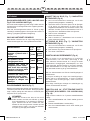
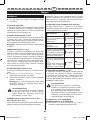
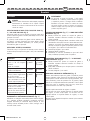
SELECTING DRIVE OR DRILL SETTING
Using the chart below, choose correct speed and mode
the type of bit, fastener, and material you will be using.
APPLICATION
CHD-1442/
CHP-1802
Fig.5
CHI-1442/
CHI-1802
Fig.6
Lag screws up to 9.5 mm dia.
by 38mm long
Concr
ete screws
1/LOW
1/LOW
2/HIGH
Drill bits up to 6.35 mm
Self tapping scews
2/HIGH 1/L
OW
Deck or wood screws up to
50
mm
Small
screws or delicate work
that
requires more control
1/L
OW 2/HIGH
Deck or wood screws #8 up to
25
mm
Scre
ws for rough work where
spee
dismoreimportantthan
prec
ise control
2/HIGH
1/LOW
2/HIGH
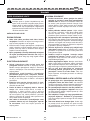
KEYLESS CHUCK (Fig.7)
The drill has a keyless chuck to tighten or release drill
bits in the chuck jaws. The arrows on the chuck indicate
which direction to rotate the chuck body in order to LOCK
(tighten) or UNLOCK (release) the drill bit.
WARNING
Do not hold the chuck body with one hand and
use the power of the drill to tighten the chuck
jaws on the drill bit. The chuck body could slip in
your hand, or your hand could slip and come in
contact with the rotating drill bit. This could cause
an accident resulting in serious personal injury.
INSTALLING BITS (Fig.7) / MAGNETIC BIT
HOLDER (Fig.8)
■ Lock the switch trigger by placing the direction of
rotation selector in the center position.
■ Open or close the chuck jaws to a point where the
opening is slightly larger than the bit size or the end
of the magnetic bit holder. Also, raise the front of the
drill slightly to keep the bit /bit holder from falling out
of the chuck jaws.
■ Insert the drill bit/bit holder.
■ Tighten the chuck jaws on the drill bit/bit holder
■ Insert a bit into the open end of the bit holder if
applicable.
REMOVING BITS (Fig.7) / MAGNETIC BIT
HOLDER (Fig.8)
■ Lock the switch trigger by placing the direction of
rotation selector in the center position.
■ Rotate the chuck sleeve clockwise to open the chuck
jaws.
■ Remove the drill bit/bit holder.
ADJUSTING THE TORQUE (Fig.9)
When using the drill-driver for various driving applications,
it becomes necessary to increase or decrease the torque
in order to help prevent the possibility of damaging
screw heads, threads, workpiece, etc. In general, torque
intensity should correspond to the screw diameter. If the
torque is too high or the screws too small, the screws
may be damaged or broken.
The torque is adjusted by rotating the torque adjustment
ring.
The torque is greater when the torque adjustment ring
is set on a higher setting. The torque is less when the
torque adjustment ring is set on a lower setting.
The proper setting depends on the type of material and
the size of screw you are using.
ADJUSTING THE POSITION OF THE
AUXILIARY HANDLE ASSEMBLY (FOR CHI-
1442/CHI-1802 ONLY) (Fig.10)
To adjust the position of the auxiliary handle assembly.
■ Loosen the handle assembly by turning the handle
counterclockwise.
■ Insert the auxiliary handle assembly in the desired
operating position.
■ Securely tighten by turning the auxiliary handle
clockwise.
12
GB
English
F
D
E I
P NL
S DK N FIN GR
H CZ RUS PL
RO
SLO TR
HR
960931224-01B.indd 12960931224-01B.indd 12 7/20/07 11:16:39 AM7/20/07 11:16:39 AM

13
GB
English
F
D
E I
P NL
S DK N FIN GR
H CZ RUS PL
RO
SLO TR
HR
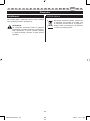
OPERATION
ADJUSTING THE DEPTH STOP ROD (FOR CHI-
1442/CHI-1802M ONLY) (Fig.11)
The depth stop rod helps control the depth of drilled
holes.
■ Lock the switch trigger by placing the direction of
rotation selector in the center position.
■ Loosen the auxiliary handle assembly by turning the
knob counterclockwise.
■ Adjust the depth stop rod so that the drill bit extends
beyond the end of the rod to the required drilling
depth.
■ Tighten the auxiliary handle assembly by turning the
knob clockwise.
MAINTENANCE
WARNING
When servicing, use only identical Ryobi
replacement parts. Use of any other parts may
create a hazard or cause product damage.
Avoid using solvents when cleaning plastic parts. Most
plastics are susceptible to damage from various types of
commercial solvents and may be damaged by their use.
Use clean cloths to remove dirt, dust, oil, grease, etc.
WARNING
Do not at any time let brake fluids, gasoline,
petroleumbased products, penetrating oils, etc.,
come in contact with plastic parts. Chemicals can
damage, weaken or destroy plastic which may
result in serious personal injury.
Do not abuse power tools. Abusive practices can damage
tool as well as workpiece.
WARNING
Do not attempt to modify this tool or create
accessories not recommended for use with this
tool. Any such alteration or modification is misuse
and could result in a hazardous condition leading
to possible serious personal injury.
ENVIRONMENTAL PROTECTION
Recycle raw materials instead of disposing as
waste.
The machine, accessories and packaging
should be sorted for environmental-friendly
recycling.
960931224-01B.indd 13960931224-01B.indd 13 7/20/07 11:16:39 AM7/20/07 11:16:39 AM
Page is loading ...
Page is loading ...
Page is loading ...
Page is loading ...
Page is loading ...
Page is loading ...
Page is loading ...
Page is loading ...
Page is loading ...
Page is loading ...
Page is loading ...
Page is loading ...
Page is loading ...
Page is loading ...
Page is loading ...
Page is loading ...
Page is loading ...
Page is loading ...
Page is loading ...
Page is loading ...
Page is loading ...
Page is loading ...
Page is loading ...
Page is loading ...
Page is loading ...
Page is loading ...
Page is loading ...
Page is loading ...
Page is loading ...
Page is loading ...
Page is loading ...
Page is loading ...
Page is loading ...
Page is loading ...
Page is loading ...
Page is loading ...
Page is loading ...
Page is loading ...
Page is loading ...
Page is loading ...
Page is loading ...
Page is loading ...
Page is loading ...
Page is loading ...
Page is loading ...
Page is loading ...
Page is loading ...
Page is loading ...
Page is loading ...
Page is loading ...
Page is loading ...
Page is loading ...
Page is loading ...
Page is loading ...
Page is loading ...
Page is loading ...
Page is loading ...
Page is loading ...
Page is loading ...
Page is loading ...
Page is loading ...
Page is loading ...
Page is loading ...
Page is loading ...
Page is loading ...
Page is loading ...
Page is loading ...
Page is loading ...
Page is loading ...
Page is loading ...
Page is loading ...
Page is loading ...
Page is loading ...
Page is loading ...
Page is loading ...
Page is loading ...
Page is loading ...
Page is loading ...
Page is loading ...
Page is loading ...
Page is loading ...
Page is loading ...
Page is loading ...
Page is loading ...
Page is loading ...
Page is loading ...
Page is loading ...
Page is loading ...
Page is loading ...
Page is loading ...
Page is loading ...
Page is loading ...
Page is loading ...
Page is loading ...
Page is loading ...
Page is loading ...
Page is loading ...
Page is loading ...
Page is loading ...
Page is loading ...
Page is loading ...
Page is loading ...
Page is loading ...
Page is loading ...
Page is loading ...
Page is loading ...
Page is loading ...
Page is loading ...
Page is loading ...
Page is loading ...
Page is loading ...
Page is loading ...
Page is loading ...
Page is loading ...
Page is loading ...
Page is loading ...
Page is loading ...

GARANTIE - CONDITIONS
Ce produit Ryobi est garanti contre les vices de fabrication et les pièces
défectueuses pour une durée de vingt-quatre (24) mois, à compter de
la date faisant foi sur l'original de la facture établie par le revendeur à
l'utilisateur final.
Les détériorations provoquées par l'usure normale, par une utilisation ou
un entretien anormal ou non autorisé, ou par une surcharge sont exclues
de la présente garantie de même que les accessoires tels que batteries,
ampoules, lames, embouts, sacs, etc.
En cas de mauvais fonctionnement au cours de la période de garantie,
veuillez envoyer le produit NON DÉMONTÉ avec la preuve d'achat à votre
fournisseur ou au Centre Service Agréé Ryobi le plus proche de chez
vous.
Vos droits légaux se rapportant aux produits défectueux ne sont pas remis
en cause par la présente garantie.
WARRANTY - STATEMENT
All Ryobi products are guaranteed against manufacturing defects and
defective parts for a period of twenty four (24) months from the date
stated on the original invoice drawn up by the retailer and given to the
end user.
Deterioration caused by normal wear and tear, unauthorised or improper
use or maintenance, or overload are excluded from this guarantee as are
accessories such as battery packs, light bulbs, blades, fittings, bags, etc.
In the event of malfunction during the warranty period, please take the
NON-DISMANTLED product, along with the proof of purchase, to your
retailer or nearest Authorised Ryobi Service Centre.
This warranty in no way affects your legal rights concerning defective
products.
GARANTIE - BEDINGUNGEN
Für alle Ryobi-Produkte gilt eine Garantie gegen Material- und
Verarbeitungsfehler für einen Zeitraum von vierundzwanzig (24)
Monaten ab dem Datum der vom Wiederverkäufer für den Endbenutzer
ausgestellten Originalrechnung.
Fehler, die auf Grund einer normalen Abnutzung, einer unberechtigten oder
falschen Wartung oder Handhabung oder durch eine Überbelastung auftreten,
sind von der Garantie ausgeschlossen. Dies gilt auch für Zubehörteile wie
Batterien, Glühbirnen, Sägeblätter, Ansatzstücke, Beutel usw.
Senden Sie das Produkt im Fall eines Defekts innerhalb des
Garantiezeitraumes in NICHT ZERLEGTEM Zustand zusammen
mit dem Kaufnachweis an Ihren Händler oder Ihr nächstes Ryobi-
Kundendienstzentrum zurück.
Diese Garantie hat keine Auswirkungen auf Ihre gesetzlichen Rechte in
Bezug auf fehlerhafte Produkte.
GARANTÍA - CONDICIONES
Este producto Ryobi está garantizado contra los defectos de fabricación
y las piezas defectuosas por un período de veinticuatro (24) meses, a
partir de la fecha que figura en el original de la factura establecida por el
distribuidor al usuario final.
Se excluyen de la presente garantía los deterioros provocados por
un desgaste normal, una utilización o mantenimiento incorrecto o no
autorizado, y una sobrecarga, así como los diversos accesorios: baterías,
bombillas, hojas, puntas, bolsas, etc.
En caso de funcionamiento incorrecto durante el período de la garantía, envíe
el producto SIN DESMONTAR con la prueba de compra a su proveedor o al
Centro de Servicio Acreditado Ryobi más cercano a su domicilio.
Los derechos legales relacionados con los productos defectuosos no son
cuestionados por la presente garantía.
GARANZIA - CONDIZIONI
Questo prodotto Ryobi è garantito contro tutti i difetti di fabbricazione e
pezzi difettosi per una durata di ventiquattro (24) mesi, a partire dalla data
indicata sull’originale della fattura compilata dal rivenditore e consegnata
all’utente finale.
Il deterioramento provocato dall’usura normale, da un utilizzo o una
manutenzione non conformi o non autorizzati, o da un sovraccarico,
è escluso dalla presente garanzia. La garanzia è esclusa anche per gli
accessori come batterie, lampadine, lame, punte, borse, ecc.
In caso di malfunzionamento nel corso del periodo di garanzia, riportare
il prodotto NON SMONTATO corredato della prova d’acquisto al fornitore
o al più vicino Centro di Assistenza Autorizzato Ryobi.
I diritti legali relativi ai prodotti difettosi non sono rimessi in causa dalla
presente garanzia.
GARANTIA - CONDIÇÕES
Este produto Ryobi está garantido contra os vícios de fabrico e as peças
defeituosas por um prazo de vinte e quatro (24) meses, a contar da
data que faz fé no original da factura emitida pelo vendedor ao utilizador
final.
As deteriorações provocadas pelo desgaste normal, por uma utilização
ou uma manutenção anormal ou não autorizada, ou por uma sobrecarga
ficam excluídas da presente garantia assim como os acessórios tais como
baterias, lâmpadas, lâminas, ponteiras, sacos, etc.
No caso de mau funcionamento durante o período de garantia, queira
enviar o produto NÃO DESMONTADO com a prova de compra ao seu
fornecedor ou ao Centro de Serviço Autorizado Ryobi mais próximo.
Os seus direitos legais relativos aos produtos defeituosos não são
prejudicados pela presente garantia.
GARANTIEVOORWAARDEN
Dit Ryobi product is gewaarborgd tegen fabricagefouten en defecte
onderdelen gedurende een periode van vierentwintig (24) maanden,
te rekenen vanaf de officiële datum op het origineel van de door de
wederverkoper aan de eindgebruiker uitgeschreven rekening.
Beschadigingen veroorzaakt door normale slijtage, door abnormaal of
ongeoorloofd gebruik of onderhoud, of door overbelasting vallen niet
onder deze garantie, evenmin als accu's, lampen, bits, snijbladen,
zakken enz.
In geval van slechte werking tijdens de garantieperiode, wordt u verzocht
het NIET GEDEMONTEERDE product samen met de koopbon aan uw
leverancier of aan het dichtstbijzijnde Ryobi servicecentrum te sturen.
Deze garantie doet niet af aan uw wettelijke rechten met betrekking tot
defecte producten.
GARANTI - VILLKOR
Ryobi garanterar denna produkt mot fabrikationsfel och defekta delar
under tjugofyra (24) månader, räknat från det datum som anges
på originalfakturan fastställd av återförsäljaren och överlämnad till
slutanvändaren.
Denna garanti täcker inte skador som förorsakas av normalt slitage,
av onormal eller otillåten användning eller skötsel, eller av överbelastning.
Den täcker inte heller tillbehör som batterier, glödlampor, blad, ändstycken,
påsar, osv.
I händelse av felaktig funktion medan garantin är i kraft skall produkten
sändas UTAN ATT DEMONTERAS tillsammans med inköpsbeviset
till leverantören eller till närmaste servicecenter som auktoriserats av
Ryobi.
De rättigheter som lagen ger i förhållande till defekta produkter ifrågasätts
inte av denna garanti.
I tilfælde af driftsfejl i garantiperioden skal produktet afleveres IKKE
DEMONTERET med købebevis til forhandleren eller nærmeste autoriserede
Ryobi serviceværksted.
De lovbestemte rettigheder i forbindelse med defekte produkter forringes
ikke af denne reklamationsret.
F
GB
D
E
I
P
NL
S
960931224-01B.indd 131960931224-01B.indd 131 7/20/07 11:17:14 AM7/20/07 11:17:14 AM
Page is loading ...
Page is loading ...

S
DK
N
FIN
F
GB
D
E
I
P
NL
CHD-1442/CHP-1802 CHI-1442/CHI-1802
Niveau de pression acoustique (71+3) dB(A) (89+3) dB(A)
Niveau de puissance acoustique (82+3) dB(A) (100+3) dB(A)
Niveau de vibrations
1.56 m/s
2
16.17 m/s
2
Sound pressure level (71+3) dB(A) (89+3) dB(A)
Sound power level (82+3) dB(A) (100+3) dB(A)
Vibration level 1.56 m/s
2
16.17 m/s
2
Schalldruckpegel (71+3) dB(A) (89+3) dB(A)
Schallleistungspegel (82+3) dB(A) (100+3) dB(A)
Vibrationspegel 1.56 m/s
2
16.17 m/s
2
Nivel de presión acústica (71+3) dB(A) (89+3) dB(A)
Nivel de potencia acústica (82+3) dB(A) (100+3) dB(A)
Nivel de vibraciones 1.56 m/s
2
16.17 m/s
2
Livello di pressione acustica (71+3) dB(A) (89+3) dB(A)
Livello di potenza acustica (82+3) dB(A) (100+3) dB(A)
Livello di vibrazioni 1.56 m/s
2
16.17 m/s
2
Nível de pressão acústica (71+3) dB(A) (89+3) dB(A)
Nível de potência acústica (82+3) dB(A) (100+3) dB(A)
Nível de vibrações 1.56 m/s
2
16.17 m/s
2
Geluidsdrukniveau (71+3) dB(A) (89+3) dB(A)
Geluidsvermogensniveau (82+3) dB(A) (100+3) dB(A)
Trillingenniveau 1.56 m/s
2
16.17 m/s
2
Ljudtrycksnivå (71+3) dB(A) (89+3) dB(A)
Ljudeffektnivå (82+3) dB(A) (100+3) dB(A)
Vibrationsnivå 1.56 m/s
2
16.17 m/s
2
Lydtryksniveau (71+3) dB(A) (89+3) dB(A)
Lydstyrkeniveau (82+3) dB(A) (100+3) dB(A)
Vibrationsniveau 1.56 m/s
2
16.17 m/s
2
Lydtryrkknivå (71+3) dB(A) (89+3) dB(A)
Lydstyrkenivå (82+3) dB(A) (100+3) dB(A)
Vibrasjonsnivå 1.56 m/s
2
16.17 m/s
2
Äänenpainetaso (71+3) dB(A) (89+3) dB(A)
Äänen tehotaso (82+3) dB(A) (100+3) dB(A)
Värähtelytaso 1.56 m/s
2
16.17 m/s
2
960931224-01B.indd 134960931224-01B.indd 134 7/20/07 11:17:15 AM7/20/07 11:17:15 AM
Page is loading ...

F
GB
D
E
P
NL
S
DK
N
FIN
GR
DÉCLARATION DE CONFORMITÉ
Nous déclarons sous notre propre responsabilité que ce produit
est en conformité avec les normes ou documents normalisés
suivants:
98/37/EC, 89/336/EEC; EN60745, EN61000, EN55014
DECLARATION OF CONFORMITY
We declare under our sole responsibility that this product is
in conformity with the following standards or standardized
documents.
98/37/EC, 89/336/EEC; EN60745, EN61000, EN55014
KONFORMITÄTSERKLÄRUNG
Wir erklären in alleiniger Verantwortung, dass dieses Produkt
mit den folgenden Normen oder normativen Dokumenten
übereinstimmt:
98/37/EC, 89/336/EEC; EN60745, EN61000, EN55014
DECLARACIÓN DE CONFORMIDAD
Declaramos bajo nuestra exclusiva responsabilidad que este
producto es conforme a las siguientes normas o documentos
normalizados:
98/37/EC, 89/336/EEC; EN60745, EN61000, EN55014
DICHIARAZIONE DI CONFORMITÀ
Dichiariamo, assumendo la piena responsabilità di tale
dichiarazione, che il prodotto è conforme alle seguenti normative
e ai relativi documenti.
98/37/EC, 89/336/EEC; EN60745, EN61000, EN55014
DECLARAÇÃO DE CONFORMIDADE
Declaramos, sob nossa exclusiva responsabilidade, que este
produto cumpre as seguintes normas ou documentos normativos.
98/37/EC, 89/336/EEC; EN60745, EN61000, EN55014
CONFORMITEITSVERKLARING
Wij verklaren op onze eigen verantwoordelijkheid dat dit product
voldoet aan de volgende normen of normatieve documenten.
98/37/EC, 89/336/EEC; EN60745, EN61000, EN55014
FÖRSÄKRAN
Vi intygar och ansvarar för, att denna produkt överensstämmer
med följande normer och dokument.
98/37/EC, 89/336/EEC; EN60745, EN61000, EN55014
KONFORMITETSERKLÆRING
Vi erklærer på eget ansvar, at dette produkt er i overensstemmelse
med følgende standarder eller standardiseringsdokumenter:
98/37/EC, 89/336/EEC; EN60745, EN61000, EN55014
SAMSVARSERKLÆRING
Vi erklærer på eget ansvar at dette produktet er i samsvar med
følgende standarder og normative dokumenter:
98/37/EC, 89/336/EEC; EN60745, EN61000, EN55014
TODISTUS STANDARDIN-MUKAISUUDESTA
Todistamme täten ja vastaamme yksin siitä, että tämä tuote on alla
lueteltujen standardien ja standardoimis-asiakirjojen vaatimusten
mukainen.
98/37/EC, 89/336/EEC; EN60745, EN61000, EN55014
ΔHΛΩΣH ΣΥMMΟΡΦΩΣΗΣ
Δηλώνουμε υπευθύνως ότι το προϊόν αυτό συμμορφούται
προς τα ακόλουθα πρότυπα ή τυποποιημένα έγγραφα:
98/37/EC, 89/336/EEC; EN60745, EN61000, EN55014
MEGFELELŐSÉGI NYILATKOZAT
Felelősségünk teljes tudatában kijelentjük, hogy a jelen termék
megfelel a következő szabványoknak és előírásoknak:
98/37/EC, 89/336/EEC; EN60745, EN61000, EN55014
PROHLÁŠENÍ O SHODĚ
Prohlašujeme na svou zodpovědnost, že tento výrobek splňuje
požadavky níže uvedených norem a závazných předpisů:
98/37/EC, 89/336/EEC; EN60745, EN61000, EN55014
áÄüÇãÖçàÖ é ëééíÇÖíëíÇàà ëíÄçÑÄêíÄå
å˚ ÒÓ ‚ÒÂÈ ÓÚ‚ÂÚÒÚ‚ÂÌÌÓÒÚ¸˛ Á‡fl‚ÎflÂÏ, ˜ÚÓ Ì‡ÒÚÓfl˘‡fl ÔÓ‰Û͈Ëfl
ÒÓÓÚ‚ÂÚÒÚ‚ÛÂÚ ÌËÊ ÒÎÂ‰Û˛˘ËÏ ÌÓÏ‡Ï Ë ‰ÓÍÛÏÂÌÚ‡Ï:
98/37/EC, 89/336/EEC; EN60745, EN61000, EN55014
DECLARAŢIE DE CONFORMITATE
Declarãm, cu toatã responsabilitatea cã acest produs este conform
cu normele sau documentele urmãtoare:
98/37/EC, 89/336/EEC; EN60745, EN61000, EN55014
DEKLARACJA ZGODNOŚCI
Z całą odpowiedzialnością oświadczamy, że niniejszy produkt
jest zgodny z normami czy też znormalizowanymi dokumentami
wymienionymi poniżej:
98/37/EC, 89/336/EEC; EN60745, EN61000, EN55014
IZJAVA O SKLADNOSTI
Z lastno odgovornostjo izjavljamo, da je ta izdelek skladen z
zahtevami sledečih standardov ali standariziranih dokumentov:
98/37/EC, 89/336/EEC; EN60745, EN61000, EN55014
DEKLARACIJA O USKLA–ENOSTI
Odgovorno izjavljujemo da je ovaj proizvod u skladu sa sljedeÊim
normama ili normiranim dokumentima:
98/37/EC, 89/336/EEC; EN60745, EN61000, EN55014
UYGUNLUK BELGESİ
Sorumluluğumuz altında beyan ederizki bu ürün aşağıdaki normlar
yada norm belgeleri ile uyumludur :
98/37/EC, 89/336/EEC; EN60745, EN61000, EN55014
I
HU
CZ
RU
RO
PL
SLO
HR
TR
960931224-01B.indd 136960931224-01B.indd 136 7/20/07 11:17:15 AM7/20/07 11:17:15 AM

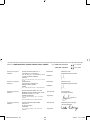
Machine: CORDLESS DRILL DRIVER / IMPACT DRILL DRIVER Type: CHD-1442 / CHI-1442 14.12.2006
CHP-1802 / CHI-1802 25.10.2006
Name of company:
Address:
Name/Title: Mark Pearson
Managing Director
Signature:
Name/Title: Walter Martin Eichinger
General Manager
Signature:
RYOBI TECHNOLOGIES S.A.S.
Immeuble Le Grand Roissy
Z.A. du Gué, 35, rue de Guivry, B.P.5
77990 LE MESNIL AMELOT
FRANCE
Tel: +33-1-60 94 69 70 Fax: +33-1-60 94
69 79
RYOBI Ibérica
Avenidad de la Industria 52
28820 Coslada - Madrid
SPAIN
Tel : + 34 91 627 93 26 Fax : + 34 91 627 93 29
RYOBI TECHNOLOGIES (UK) LTD.
MEDINA HOUSE, FIELD HOUSE LANE
MARLOW, BUCKS, SL7 1TB
UNITED KINGDOM
Tel: +44-1628-894400 Fax: +44-1628-
894401
Technical hotline: (0)+44 800 389 0305
RYOBI TECHNOLOGIES GMBH
Itterpark 4
D-40724 Hilden
GERMANY
Tel: +49-2103-29580 Fax: +49-2103-
2958544
Name of company:
Address:
Name of company:
Address:
Name of company:
Address:
Name/Title: Alexandre Thorn
Président/Directeur Général
Signature:
Name/Title: Alexandre Thorn
Président/Directeur Général
Signature:
960931224-01B.indd 137960931224-01B.indd 137 7/20/07 11:17:16 AM7/20/07 11:17:16 AM
Page is loading ...
-
 1
1
-
 2
2
-
 3
3
-
 4
4
-
 5
5
-
 6
6
-
 7
7
-
 8
8
-
 9
9
-
 10
10
-
 11
11
-
 12
12
-
 13
13
-
 14
14
-
 15
15
-
 16
16
-
 17
17
-
 18
18
-
 19
19
-
 20
20
-
 21
21
-
 22
22
-
 23
23
-
 24
24
-
 25
25
-
 26
26
-
 27
27
-
 28
28
-
 29
29
-
 30
30
-
 31
31
-
 32
32
-
 33
33
-
 34
34
-
 35
35
-
 36
36
-
 37
37
-
 38
38
-
 39
39
-
 40
40
-
 41
41
-
 42
42
-
 43
43
-
 44
44
-
 45
45
-
 46
46
-
 47
47
-
 48
48
-
 49
49
-
 50
50
-
 51
51
-
 52
52
-
 53
53
-
 54
54
-
 55
55
-
 56
56
-
 57
57
-
 58
58
-
 59
59
-
 60
60
-
 61
61
-
 62
62
-
 63
63
-
 64
64
-
 65
65
-
 66
66
-
 67
67
-
 68
68
-
 69
69
-
 70
70
-
 71
71
-
 72
72
-
 73
73
-
 74
74
-
 75
75
-
 76
76
-
 77
77
-
 78
78
-
 79
79
-
 80
80
-
 81
81
-
 82
82
-
 83
83
-
 84
84
-
 85
85
-
 86
86
-
 87
87
-
 88
88
-
 89
89
-
 90
90
-
 91
91
-
 92
92
-
 93
93
-
 94
94
-
 95
95
-
 96
96
-
 97
97
-
 98
98
-
 99
99
-
 100
100
-
 101
101
-
 102
102
-
 103
103
-
 104
104
-
 105
105
-
 106
106
-
 107
107
-
 108
108
-
 109
109
-
 110
110
-
 111
111
-
 112
112
-
 113
113
-
 114
114
-
 115
115
-
 116
116
-
 117
117
-
 118
118
-
 119
119
-
 120
120
-
 121
121
-
 122
122
-
 123
123
-
 124
124
-
 125
125
-
 126
126
-
 127
127
-
 128
128
-
 129
129
-
 130
130
-
 131
131
-
 132
132
-
 133
133
-
 134
134
-
 135
135
-
 136
136
-
 137
137
-
 138
138
-
 139
139
-
 140
140
-
 141
141
-
 142
142


Ask a question and I''ll find the answer in the document
Finding information in a document is now easier with AI
in other languages
- italiano: Ryobi CHD-1442 Manuale utente
- français: Ryobi CHD-1442 Manuel utilisateur
- español: Ryobi CHD-1442 Manual de usuario
- Deutsch: Ryobi CHD-1442 Benutzerhandbuch
- Nederlands: Ryobi CHD-1442 Handleiding
- português: Ryobi CHD-1442 Manual do usuário
- dansk: Ryobi CHD-1442 Brugermanual
- polski: Ryobi CHD-1442 Instrukcja obsługi
- čeština: Ryobi CHD-1442 Uživatelský manuál
- Türkçe: Ryobi CHD-1442 Kullanım kılavuzu
- svenska: Ryobi CHD-1442 Användarmanual
- suomi: Ryobi CHD-1442 Ohjekirja
- română: Ryobi CHD-1442 Manual de utilizare