Pittsburgh 62831 Owner's manual

Type
Owner's manual

This manual is also suitable for

Visit our website at: http://www.harborfreight.com
Email our technical support at: [email protected]
Owners Manual & Safety Instructions
Save This Manual Keep this manual for the safety warnings and precautions, assembly,
operating, inspection, maintenance and cleaning procedures. Write the product’s serial number in the back
of the manual near the assembly diagram (or month and year of purchase if product has no number). Keep
this manual and the receipt in a safe and dry place for future reference. 19j
When unpacking, make sure that the product is intact
and undamaged. If any parts are missing or broken,
please call 1-888-866-5797 as soon as possible.
Copyright
©
2015 by Harbor Freight Tools
®
. All rights reserved.
No portion of this manual or any artwork contained herein may be reproduced in
any shape or form without the express written consent of Harbor Freight Tools.
Diagrams within this manual may not be drawn proportionally. Due to continuing
improvements, actual product may differ slightly from the product described herein.
To ols required for assembly and se rv ic e m ay n ot b e i nc lu de d .
Read this material before using this product.
Failure to do so can result in serious injury.
SAVE THIS MANUAL.
Page 2 For technical questions, please call 1-888-866-5797. Item 62831
Specifications
Tap & Die Scale SAE
Material Carbon Steel
Tap & Die Sizes
4-36
6-32
8-32
10-24
10-32
12-24
1/4"-20
1/4"-28
5/16"-18
5/16"-24
3/8"-16
3/8"-24
7/16"-14
7/16"-20
1/2"-13
1/2"-20
1/8" NPT pipe tap
IMPORTANT SAFETY INFORMATION
Use Precautions
1. Wear ANSI-approved safety goggles and
heavy-duty work gloves during use.
2. Keep work area clean and well lit.
3. Keep bystanders out of the area during use.
4. Do not use when tired or when under the
influence of alcohol, drugs or medication.
5. This product is not a toy. Do not allow
children to play with or near this item.
6. Use as intended only.
7. Inspect before every use; do not use if
parts are loose or damaged. Do not use
cracked or chipped tap/die.
8. Keep the handles clean, dry, and free
from oil and grease at all times.
9. The flutes on these tools are sharp and
can cut you. Handle with care.
10. Do not use any high-speed means, such as a
lathe or drill press, to cut threads with these
Taps and Dies. High-speed use will void the
warranty and may overheat the tool, causing
loss of heat-treatment and premature failure.
11. Taps and Dies are heat-treated,
and not designed to be sharpened. After
considerable use and with corrosion buildup
these tools may lose their cutting edge.
12. Use clamps (sold separately) or other practical ways
to secure and support the workpiece to a stable
platform. Holding the work by hand or against your
body is unstable and may lead to loss of control.
13. Do not apply excessive force on the cutters.
Allow the tool to do the work. Use cutting oil
when tapping or threading hard materials.
14. Maintain product labels and nameplates.
These carry important safety information.
If unreadable or missing, contact
Harbor Freight Tools for a replacement.
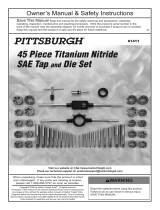
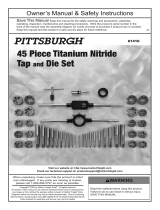
Page 3For technical questions, please call 1-888-866-5797.Item 62831
Operation Instructions
Read the ENTIRE IMPORTANT SAFETY INFORMATION section at the beginning of this document
including all text under subheadings therein before set up or use of this product.
Before using either taps or dies, test the material to determine that it
is not hardened by attempting to mark it with a file.
If the material marks with a file, material should be cuttable.
If the material will not mark with a file,
do not cut threads to avoid tool damage.
Tap Instructions
TAPS are used to cut (tapping) or clean (chase) internal threads into
a pre-drilled hole, such as in a nut or component part.
1. To cut an internal thread, first select
the tap of the desired size and have
lubricating or cutting oil ready for use.
2. The proper hole size is very important to
successfully cut good threads. An oversized
hole will result in shallow threads, and poor
holding power. An undersized hole may cause
the tap to wear prematurely or break. The correct
hole size is marked on the shank of each tap.
3. Insert the square end of the Tap into the
Tap Wrench, turn the threaded side of the
Tap Wrench to secure the Tap firmly.
4. Precisely align the tap with the direction of the
hole. THIS IS ESSENTIAL. The first cut will help
determine the accuracy of the entire finished thread.
5. Start turning the Tap clockwise, keeping the
Tap aligned with the hole. As the Tap turns, it
will bite into the metal and create threads.
6. After every 1/4 to 1/2 turn of progress, depending on
material hardness, rotate the Tap counterclockwise
an equal amount to prevent chips from building
up in the hole and breaking the tap.
7. Lubricate amply with cutting oil while tapping.
Proper lubrication will result in smoother threads,
and increased tool life. Continue tapping
until the Tap passes through the workpiece,
or the desired thread depth is reached.
8. Carefully thread the tap out backwards
and clean out any chips from the hole.
Die Instructions
DIES are used to cut (threading) or clean (chase) external threads, such as on a screw or threaded rod.
NOTE: It will be easier to start the Die correctly if
the end of the work material is slightly chamfered
with a grinder or file (not included).
1. Select the proper Die size for the rod to be
threaded. The Die can be no larger than the
rod stock, and should be .005″ to .010″ smaller.
Oversized rod stock may damage the die, and
will make turning it difficult. Slightly undersized
rod stock makes turning the die easier, and will
result in good threads for most applications.
2. Secure the workpiece in a vise or other fixture
(not included). Ensure that the workpiece will not
move or turn while it is being threaded. Note that
the workpiece may be damaged by the vise
during the threading process. When possible,
thread the workpiece before cutting it to the
final length to eliminate the damaged area.
3. Insert the Die into the Die Wrench.
Align the groove on the side of the Die with
the Screw on the Die Holder. Tighten the
screw using the included Screwdriver. Use
the Screw on side of the Die Wrench to secure
the Die firmly in place. See Figure A.
Screw
Die
Figure A
4. Place the chamfered side of the Die onto
the workpiece, being careful to precisely
align the Die perpendicular to the rod.
5. Begin turning the Die clockwise. The cutting
edges will begin to bite into the material, and
the Die will begin to thread itself onto the rod.
6. As you progress, apply lubrication, using a high-
quality cutting oil. As with the Tap, reverse
the Die to clear the shavings after every 1/4
to 1/2 turn of progress, depending on material
hardness. Continue this forward and back
process, using proper lubrication, until you
have cut the desired length of threads.
7. Then turn the Die counterclockwise
completely off the rod.
26541 Agoura Road • Calabasas, CA 91302 • 1-888-866-5797
Maintenance and Servicing
1. Clean immediately after use and apply a light
layer of oil or grease to prevent corrosion.
Note: The carbon steel parts of this
set are susceptible to corrosion.
Even light corrosion may reduce effectiveness.
2. Store tools in the provided case in a secure
location, out of the reach of children,
to protect them from moisture.
Record Serial Number Here:
Note: If product has no serial number, record month and year of purchase instead.
UPC 193175336989
Limited 90 Day Warranty
Harbor Freight Tools Co. makes every effort to assure that its products meet high quality and durability
standards, and warrants to the original purchaser that this product is free from defects in materials
and workmanship for the period of 90 days from the date of purchase. This warranty does not apply to
damage due directly or indirectly, to misuse, abuse, negligence or accidents, repairs or alterations outside
our facilities, criminal activity, improper installation, normal wear and tear, or to lack of maintenance.
We shall in no event be liable for death, injuries to persons or property, or for incidental, contingent,
special or consequential damages arising from the use of our product. Some states do not allow the
exclusion or limitation of incidental or consequential damages, so the above limitation of exclusion
may not apply to you. THIS WARRANTY IS EXPRESSLY IN LIEU OF ALL OTHER WARRANTIES,
EXPRESS OR IMPLIED, INCLUDING THE WARRANTIES OF MERCHANTABILITY AND FITNESS.
To take advantage of this warranty, the product or part must be returned to us with transportation charges
prepaid. Proof of purchase date and an explanation of the complaint must accompany the merchandise.
If our inspection verifies the defect, we will either repair or replace the product at our election or we may
elect to refund the purchase price if we cannot readily and quickly provide you with a replacement. We will
return repaired products at our expense, but if we determine there is no defect, or that the defect resulted
from causes not within the scope of our warranty, then you must bear the cost of returning the product.
This warranty gives you specific legal rights and you may also have other rights which vary from state to state.
  • Page 1 1
  • Page 2 2
  • Page 3 3
  • Page 4 4

Pittsburgh 62831 Owner's manual

Type
Owner's manual
This manual is also suitable for

Ask a question and I''ll find the answer in the document

Finding information in a document is now easier with AI