Page is loading ...

USER’S MANUAL
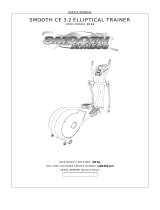
SMOOTH CE-3.0 ELLIPTICAL TRAINER
USER WEIGHT LIMITATION: 350lbs(160kgs).
SERIAL NUMBER (found on frame):
REV 12/27/11

2 SMOOTH CE3.0 ELLIPTICAL TRAINER
PREASSEMBLY
For future service or related questions:
Please staple your receipt and/or write in the name and phone number of the retail store where you purchased your Smooth
Fitness Elliptical Trainer.
Name: ______________________________ Phone Number: ___________________ Receipt: ______________________
Open the boxes:
You are now ready to open
the boxes of your new equipment. Make sure to inventory all of the parts that are included in the boxes.
Check the Parts List for a full count of the number of parts included for this product to be assembled properly. If you are missing
any parts or have any assembly questions call your local dealer or contact us directly at 888-800-1167.
Gather your tools:
Before starting the assembly of your unit, make sure that you have gathered all the necessary tools you may require to assemble
the unit properly. Having all of the necessary equipment at hand will save time and make the assembly quick and hassle-free.
Clear your work area:
Make sure that you have cleared away a large enough space to properly assemble the unit. Make sure the space is free from
anything that may cause injury during assembly. After the unit is fully assembled, make sure there is a comfortable amount of free
area around the unit for unobstructed operation.
Invite a friend:
Some of the assembly steps may require heavy lifting. It is recommended that you obtain the assistance of another person when
assembling this product.
User Weight Limitation:
Please note that there is a weight limitation for this product. If you weigh more than 350lbs. it is not recommended that you use this
product. Serious injury may occur if the user’s weight exceeds the limit shown here. This product is not intended to support users
whose weight exceeds this limit.
PACKAGING
Environmentally friendly, recyclable materials:
— Outer packaging of the cardboard
— Form parts of foamed, CPC-free polystyrene(PS)
— Foils and bag of polyethylene (PE)
— Tension bands of polypropylene (PP)
DISPOSAL Please undertake environmentally friendly disposal.

www.smoothfitness.com
3
COMPLETE PARTS LIST
Part Number
Name&specification
Qty
CE-30i-1
computer
1
CE-30i-2
computer screw
4
CE-30i-3
handlebar end cap
2
CE-30i-4
handlebar tube
1
CE-30i-5
Fixed handlebar foam
2
CE-30i-6
handle pulse
2
CE-30i-7
handle pulse line
2
CE-30i-8
curved washer OD20*ID8.5*1.5T
2
CE-30i-9
Inner hexagon M8*20 Screw
30
CE-30i-10
console support tube
1
CE-30i-11
fixed handlebar cover-R
1
CE-30i-12
fixed handlebar cover-L
1
CE-30i-13
screw M4*20
17
CE-30i-14
Flat washer OD20*ID8.5*1.5T
22
CE-30i-15
Spring washer M8*2.0T
28
CE-30i-16
computer wire upper section
1
CE-30i-17
computer wire lower section
1
CE-30i-18
action handlebar cover –rear
2
CE-30i-19
R12 bearing
12
CE-30i-20
action handlebar tube-L
1
CE-30i-21
screw M5*16
34
CE-30i-22
front stabilizer cover
2
CE-30i-23
Flat head M6*16 screw
10
CE-30i-24
Spring washer M6*1.5T
10
CE-30i-25
Flat washer OD16*ID6.5*1.5T
10
CE-30i-26
transport wheel axle
1
CE-30i-27
Transport wheel
1
CE-30i-28
action handlebar tube –R
1
CE-30i-29
action handlebar end cap
2
CE-30i-30
action handlebar foam
2
CE-30i-31
action handlebar cover –front
2
CE-30i-32
Flat washer OD22*ID8.5*2.0T
2
CE-30i-33
computer post cover end hook
1
CE-30i-34
computer post cover
1
CE-30i-35
water bottle holder
1

4 SMOOTH CE3.0 ELLIPTICAL TRAINER
COMPLETE PARTS LIST
Part Number
Name&specification
Qty
CE-30i-36
main frame cover fixing plate
10
CE-30i-37
screw M4*20
3
CE-30i-38
cover –Right
1
CE-30i-39
main frame cover front cover
1
CE-30i-40
motor
1
CE-30i-41
motor cable
1
CE-30i-42
M10*1.5*10T nut
13
CE-30i-43
C style button (∮12)
2
CE-30i-44
Flat washer OD20*ID10.5*2.0T
14
CE-30i-45
flywheel axes
1
CE-30i-46
6001 bearing
2
CE-30i-47
flywheel
1
CE-30i-48
Magnetic assembly
1
CE-30i-49
screw M5*30
1
CE-30i-50
M5 nut
2
CE-30i-51
magnet spring
1
CE-30i-52
connecting bar axle
2
CE-30i-53
C style button (∮17)
4
CE-30i-54
M10 (Subtense 17) nut
2
CE-30i-55
2203-R5ZZbearing
2
CE-30i-56
connecting bar tube
1
CE-30i-57
connecting bar cover-R
2
CE-30i-58
connecting bar cover -L
2
CE-30i-59
Right and left rear stabilizer end cap
6
CE-30i-60
main frame
1
CE-30i-61
M6*1.0*6T nut
8
CE-30i-62
Crank Pulley
1
CE-30i-63
powder bushing
1
CE-30i-64
C style button (∮19)
2
CE-30i-65
crank axle set
1
CE-30i-66
screw M6*18
4
CE-30i-67
belt
1
CE-30i-68
crank arm -left
1
CE-30i-69
pedal axes gap bushing
2
CE-30i-70
screw 5/16-18*25
2

www.smoothfitness.com
5
COMPLETE PARTS LIST
Part Number
Name&specification
Qty
CE-30i-71
pedal axle sleeve
2
CE-30i-72
power cable
1
CE-30i-73
sensor wire
1
CE-30i-74
roller track support cover –middle
1
CE-30i-75
aluminum roller track
2
CE-30i-76
roller track cover –rear
1
CE-30i-77
roller track support tube
1
CE-30i-78
screw M10*68
2
CE-30i-79
Spring washer M10*2.0T
2
CE-30i-80
Arc washer OD20*ID10.5*2.0T
2
CE-30i-81
crank arm -right
1
CE-30i-82
screw M10*25
8
CE-30i-83
pedal –right
1
CE-30i-84
Transport handle foam
1
CE-30i-85
Transport handle
1
CE-30i-86
M8*1.25*8T nut
1
CE-30i-87
J screw
1
CE-30i-88
pedal arm tube –right
1
CE-30i-89
M10*1.5*6.35T
(
subtense 17
)
nut
2
CE-30i-90
pedal fixing plate
2
CE-30i-91
pedal axle bushing
2
CE-30i-92
main frame cover –left
1
CE-30i-93
tension wheel bushing
1
CE-30i-94
tension wheel gap bushing
1
CE-30i-95
Flat washer OD25*ID19.5*1.5T
1
CE-30i-96
tension wheel bracket
1
CE-30i-97
washer flat
1
CE-30i-99
pedal arm tube-L
1
CE-30i-100
pedal –L
1
CE-30i-101
Round head M5*10 screw
10
CE-30i-102
roller cover
2
CE-30i-103
roller
2
CE-30i-105
roller shaft bushing
2
CE-30i-106
connecting bar –L
1
CE-30i-107
protect line
2
CE-30i-108
adaptor
1

6 SMOOTH CE3.0 ELLIPTICAL TRAINER
PARTS DIAGRAM
MOST OF THE PARTS SHOWN HERE HAVE BEEN PRE-ASSEMBLED.
1
2
7
107
4
16
34
33
11
13
22
21
21
22
13
18
28
13 31
58
13
57
9
1514
13
57
58
13
18
13
31
32
9
15
101
102
102
101
9
15
14
21
74
9 15
8
2176
21
85
77
78
82
100
44
42
20
10
8
9
15
12
89
44
82
44
42
83
89
44
9
15
14
42
79
80
88
99
17
105
105
54
54

www.smoothfitness.com
7
PARTS DIAGRAM
A MAJORITY OF THE PARTS SHOWN HERE HAVE BEEN PREASSEMBLED AT THE FACTORY.

8 SMOOTH CE3.0 ELLIPTICAL TRAINER
ASSEMBLY
STEP 1: Attach the Rear Roller Track Support Tube Cover and Transport Handle
(A) Attach the rear stabilizer cover to the roller track support tube (77) and secure with 4x M5*16(21) screws.
(B) Insert the transport handle through the top of rear stabilizer cover, then secure it with 2x M8*20(9) screws, 2
x M8*2.0T(15) spring washers and 2 x OD20*ID8.5*1.5T (8) curved washers.
(C) Tighten all bolts and screws now.

www.smoothfitness.com
9
ASSEMBLY
STEP 1: Attach the Roller Track Support Tube to the Main Frame
(A) Attach the roller track support tube (77) to the main frame (60) and secure with 2 x M10*68(78) bolts, insert
the bolts through the frame then attach 2x OD20*ID10.5*2.0T curved washers (80), 2 x M10*2.0T spring
washers (79), and 2 x M10*1.5*10T nut (42). Tighten the bolts now.
(B) Place the middle roller track support tube cover –middle (74) over the roller track support tube (77) and
secure it with 2 x M5*16(21) screws.
(C) Place the left front stabilizer bar cover (21) over the front stabilizer and secure it with 2 x M5*16(21) screws.
(D) Repeat the above process for the right front stabilizer bar cover(22)
(E) Tighten all bolts and screws now
21
74
22
21
21
22
60
42
79
80
78
77

10 SMOOTH CE3.0 ELLIPTICAL TRAINER
ASSEMBLY
STEP 2: Attach the Action Handlebars and Covers
(A) Slide the right handlebar on to the action handlebar axle. Secure the action handlebar to the axle with 1 x
M8*2.0T bolt (9), 1 x M8*2.0T spring washer (15) and 1 x OD22*ID8.5*2.0T flat washer (32). Tighten all bolts
now
(B)
Place the front and rear action handle bar covers around the pivot joint and secure with 1 x M8*20(13) screw
(C) Repeat the above process for the left side
13
18
13
31
13
18
28
13
31
32
9
15
20
Action Handlebar axle

www.smoothfitness.com
11
ASSEMBLY
STEP 3: Attach the Left and Right Pedal Arms, Connecting Tubes and Covers
(A) Rotate the crank arm of the elliptical so the pedal arm (88) can be attached to the crank arm. (see diagram 4a
and 4b)
(B) Secure the right pedal arm to the crank arm with 1 x OD20*ID10.5*2.0T flat washer (44) and M10*1.5*6.35T
Nut (89) Tighten all bolts now.
(C) Attach the connecting tube (56) to the right action handlebar (28) (see diagram 4c).Secure the arm with 2 x
M8*20 bolt (9), 2 x M8*2.0T spring washer (15) and 2 x OD20*ID8.5*1.5T flat washer (14) (see diagram 4c)
(D) Put the left and right connecting tube covers (58 & 57) over the connecting tube / action handlebar joint ( see
diagram 4d) Secure the covers together with 5 x M4*20 screws (13)
(E) Position the pedal arm roller on to the aluminum roller track (see diagram 4e). remove the M8*20 bolt (9),
OD20*ID8.5*1.5T flat washer (14) and M5*10 screw (101), Install the retaining loop from under the roller track
support tube (77) and line line up the holes on the retaining loop and the roller bolt holes (previously removed).
Then reinsert the M8*20 bolt (9), OD20*ID8.5*1.5T flat washer (14) and M5*10 screw (101), to secure both the
retaining loop and the roller. Fully tighten all bolts now.
(F) Repeat the above processes for the left side.
4a
4e
4b
4a
4d
4c
101
102
89
44
9
15
14
88
9
15
14
102
102
89
44
99
56
106
60
28
77
58
13
57
13
57
58
105
105
54
54
Crank arm
bracket
89
44
88
9
15
14
103
77
101
105
9
14
13
57
58

12 SMOOTH CE3.0 ELLIPTICAL TRAINER
ASSEMBLY
STEP 4: Attach the Left and Right Pedals
(A)
Place the right pedal on the pedal plate (located on the pedal arm). Insert the 4 x M10*25(82) bolts trough the
pre drilled holes in the pedal and the pedal plate. Then secure the bolts with 4 x OD20*ID10.5*2.0T Flat washers
(44) and 4 x M10*1.5*10T Nuts (42)
(B) Tighten all nuts and bolts now
(C) Repeat the above processes for the left side
82
100
44
42
82
83
99

www.smoothfitness.com
13
ASSEMBLY
STEP 5: Attach the Console Support Tube
Caution: Pinch point. Do not pinch the wires between the frame.
(A) Connect the Computer Wire – Upper (16) to the Computer Wire –
Lower (17) (be certain that the connectors are properly connected)
(B)
Push the extra computer wire in to the console support tube. Line up the 4 bolt holes on the console post
with the 4 bolt holes on the main frame. (be certain the console support is facing the correct direction.)
(C) Secure the console support tube to the main frame with 4x M8*20 (9), M8*2.0T spring washers (15) and
OD20*ID8.5*1.5T flat washers (14)
(D) tighten all bolts now
16
9
15
14
17
10

14 SMOOTH CE3.0 ELLIPTICAL TRAINER
ASSEMBLY
STEP 6: Attach the tube Cover
(A) Separate the split end of the post cover (34) and put the cover around the console support tube
(B) Slide the cover down to the main cover.
(C) Push the split ends together and insert the retaining clip (33) into the slots on the tube cover.
34
33

www.smoothfitness.com
15
ASSEMBLY
STEP 7: Assemble Console Back Cover
Caution: Do not Pinch the wires between the frame
(A) Feed the Hand pulse wires (7) through the hole in the computer post (10) until they extend through the top of the
computer post. Do not pull on the wire as they may disconnect from the hand pulse sensors.
(B) Line up the bolt holes on the handle bars (7) with the holes on the computer post (10)
(C) Secure the handle bar to the computer post with 4 x M8*20 bolts (9), 4 x M8*2.0T spring washers (15) and 4 x
OD20*ID8.5*1.5T curved washers (8)
(D) Tighten all bolts now
7
4
8
9
15
10

16 SMOOTH CE3.0 ELLIPTICAL TRAINER
ASSEMBLY
STEP 9: Attach the Computer Monitor
(A) Connect the Computer wire Upper (16) to the computer monitor wire (A). Be certain the wires are facing the proper
direction and that the connectors lock in place.
(B) Connect the two heart rate wires (7) with the two heart rate wire (B). Be certain the wires are facing the proper
direction and that the connectors lock in place.
(C) Line up the four screw holes on the computer monitor(1) with the four holes on the computer post (10)
(D) Secure the computer monitor (1) to the computer post (10) with 4 x Computer screws (2)
(E) Tighten all bolts now
1
2
16
7
A
B

www.smoothfitness.com
17
ASSEMBLY
STEP 7: ATTACH THE COMPUTER POST COVERS
(A) Place the left (12) and right (11) covers around the computer post (see picture below for proper direction)
(B) Secure the two covers together with 3 x M4*20 screws (13).
ASSEMBLY IS NOW COMPLETE. DOUB:E CHECK THAT ALL BOLTS AND FASTENERS HAVE BEEN
PROPERLY TIGHTENED.
11
13
12
10

18 SMOOTH CE3.0 ELLIPTICAL TRAINER
LEVEL ADJUSTMENT
LEVEL ADJUSTMENT:
To adjust the levelers follow these instructions: There are 6 levelers (3 on each side)
You will need someone to help you with this procedure, as you will need to tip elliptical trainer while adjusting the
levelers
Tilt the elliptical trainer to the left/right. You will then see the LEVEL ADJUSTERS. These will need to be screwed
either in or out to level the elliptical trainer. Repeat for the other side. It may help to use a bubble level when adjusting
the level on your elliptical trainer.
Leveler location
Leveler location

www.smoothfitness.com
19
TRANSPORT INSTRUCTION
TRANSPORT INSTRUCTIONS:
To transport your elliptical trainer simply lift the back end and roll it away to the desired location.
Wheel
location
Transport
handle

20 SMOOTH CE3.0 ELLIPTICAL TRAINER
COMPUTER OPERATION
/