Page is loading ...

Instruction
Manual
Manuel d’instructions
Manual de instrucciones
IMPORTANT:
Retain for future reference, read carefully.
IMPORTANT :
À conserver pour référence ultérieure – lire attentivement.
IMPORTANTE:
Guarde estas instrucciones para referencia futura, lea
detenidamente.
Model Number / Numéro de modèle / Número de modelo: AAD-773
FN 20021541-F AA
EN FRANÇAIS AU VERSO
ENGLISH
WELCOME TO THE WATERPIK
®
DUALSPRAY+
™
SHOWER EXPERIENCE
Thank you for purchasing this Waterpik
®
shower head. This booklet
gives you the proper information to make installation easy and quick.
You are minutes away from enjoying your 2-in-1 DualSpray+
™
showering experience.
COMPONENTS
FRANÇAIS
BIENVENUE! ENTREZ DANS LE MONDE DE LA
DOUCHE DUALSPRAY+
MC
WATERPIK
®
Nous vous remercions pour l’achat de cette douchette Waterpik
®
.
Ce manuel vous fournit les informations nécessaires pour une
installation facile et rapide. Dans quelques minutes seulement, vous
pourrez profiter d'une douche 2 en 1 DualSpray+
MC
.
COMPOSANTS
TROUBLESHOOTING GUIDE
Problem Solution
No water flow from
installed shower head
a Confirm previous shower washer is not in
the j-pipe.
b Confirm there is only one washer in the
pivot ball.
Low water pressure or
missing spray patterns
a Clean shower head in vinegar/water
solution. (See care & cleaning section).
b Clean filter screen.
Leaking at pipe pivot ball
connection
a Confirm only one washer is seated on top
of the screen.
b Grate bar of soap across the j-pipe threads
to act as a sealant.
Shower head too stiff to
change angle
a Install shower head to provide additional
leverage to change angle of spray (contact
Water Pik for further instructions).
Loose Shower Head a Check inside the large nut for a large
plastic ring. Note: the ring is tapered.
Make sure the ring is installed correctly.
The smooth surfaced side of the ring
should face towards the pipe inside the
large nut and will snap into place when
properly installed.
DualSpray+
™
is a trademark of Water Pik, Inc.
PowerSpray
™
is a trademark of Water Pik, Inc.
© 2016 Water Pik, Inc.
Designed in U.S.A.
Printed in China Made in China.
Water Pik, Inc.
1730 East Prospect Road
Fort Collins, CO 80553-0001 U.S.A.
www.waterpik.com
OTHER HELPFUL ITEMS
AUTRES ARTICLES UTILES
INSTALLATION
INSTALLATION
OPERATION
To change the spray setting on the fixed
mount simply turn the dial on the head
using the lever. (8).
To use the overhead rainfall, turn the
knob on the side in either direction. (9)
To combine any spray on the fixed mount,
with the overhead rainfall, turn the knob
on the side again.
WARNING:
1 To avoid hot water dangers and conserve even more energy, make
sure your water heater is set at 120°F (48.9°C) or below.
2 Test the tub/shower water with your hand before bathing.
FONCTIONNEMENT
Pour modifier le réglage du jet sur la
douchette fixe, il suffit de tourner le
cadran sur la tête au moyen du levier. (8).
Pour une pluie battante en hauteur,
tourner le bouton situé sur le côté dans
n'importe quel sens. (9) Pour combiner
n'importe quel jet de la douchette fixe
avec la pluie battante en hauteur, tourner
de nouveau le bouton situé sur le côté.
LIMITED LIFETIME WARRANTY
Save your receipt as proof of purchase is required for
warranty action. Water Pik, Inc. warrants to the original
purchaser of this product that it is free from defects in material and
workmanship for as long as the original purchaser owns this product.
Water Pik, Inc. will replace any part of the product which in our
opinion is defective, provided that the product has not been abused,
misused, altered or damaged after purchase.(This includes, but is
not limited to, damage due to use of tools or harsh chemicals, from
operation outside of normal pressure ranges, and any use in non-
domestic applications). In the event an item has been discontinued
we will replace with what we deem to be the closest product. Water
Pik, Inc. is not responsible for labor charges, installation, or other
consequential cost. The responsibility of Water Pik, Inc. shall not
exceed the original purchase price of the product. This warranty
gives you specific legal rights. You may also have other rights that
vary where you reside.
Have any questions or need assistance?
For quickest service have your model number and receipt ready prior
to calling.
In the U.S., call our toll-free
Customer Assistance Line
1-800-525-2774.
In Canada, call our toll-free
Customer Assistance Line
1-888-226-3042.
www.waterpik.com
Outside the U.S., write us at
Water Pik, Inc.
1730 East Prospect Road
Fort Collins, CO 80553-0001
U.S.A
If product malfunctions or becomes damaged, stop use and contact
Water Pik, Inc. for replacement.
Waterpik
®
is a trademark of Water Pik, Inc. registered in Argentina, Australia,
Austria, Benelux, Canada, Chile, China, Czech Republic, EU, Finland, France,
Germany, Hong Kong, Hungary, India, Israel, Italy, Japan, Korea, Mexico, Norway,
Poland, Russian Federation, South Africa, Spain, Sweden, Switzerland, Turkey,
Ukraine, and the United States.
Waterpik
®
(stylized) is a trademark of Water Pik, Inc. registered in Australia,
Canada, China, EU, Hong Kong, India, Israel, Japan, Korea, Mexico, Russian
Federation, Switzerland, Taiwan and the United States.
EcoFlow
®
is a trademark of Water Pik, Inc. registered in Australia, Canada, China,
EU, Hong Kong, Mexico, and the United States.
A Powerful and Invigorating Experience
®
is a trademark of Water Pik, Inc. registered
in Canada, Mexico and the United States.
Filter
Screen
Pivot Ball
Large Nut
Seal
(inside nut)
Soft Cloth
(not included)
Adjustable Wrench
or Pliers
(not included)
Note: We recommend avoiding
the use of pipe thread compound
(pipe dope) or pipe tape.
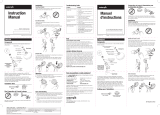
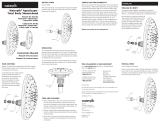
1. Remove old shower head. Clean
threads of shower pipe thoroughly
with a cloth rag and/or brush.
1. Retirer l'ancienne douchette.
Nettoyer soigneusement le filetage
du tuyau de douche avec un chiffon
et/ou une brosse.
2. Place large nut over shower pipe
(flat side toward wall).
2. Placer le gros écrou sur le tuyau
de douche (extrémité plate vers
le mur).
4. With an adjustable wrench
or pliers, tighten pivot ball an
additional ¼ to ½ turn. Wrap
pivot ball with a cloth if you are
using pliers.
4. Serrer la boule d’articulation
d’un quart à un demi-tour
supplémentaire à l’aide
d’une clé à molette ou d’une
pince. Envelopper la boule
d'articulation dans un chiffon
si l’on utilise une pince.
5. Hold threaded collar of shower
head up to pivot ball (5A), adjust
shower head to desired position
and tighten nut in clockwise
direction until secure. (5B)
5. Placer le collier fileté de la
douchette contre la boule
d’articulation (5A), régler
la douchette à la position
souhaitée, puis serrer l'écrou
dans le sens horaire jusqu'à
ce qu'il ne tourne plus
librement. (5B)
6. To adjust the angle of the
drencher, simply pull the head
up or down to desired position.
The head will click into place.
6. Pour régler l'angle de la
douchette de type rideau d’eau,
il suffit d'appuyer sur la tête
vers le haut ou vers le bas à
la position souhaitée. La tête
s'emboîte.
7. To adjust the fixed mount spray
direction, hold fixed mount with
both hands and rotate fixed
mount up or down on pivot ball.
7. Pour régler la direction du jet
de la douchette à montage fixe,
tenir la douchette fixe à deux
mains, puis la faire pivoter vers
le haut ou vers le bas sur la
boule d'articulation.
3. Thread pivot ball onto shower pipe
and hand-tighten to a snug fit.
3. Enfiler la boule d’articulation
sur le tuyau de douche et serrer
fermement à la main pour bien
l’ajuster.
2
2
1
1
3
3
4
4
5B
5B
5A
5A
6
6
7
7
8
8
9
9
3 For additional safety for Ecoflow
®
or high efficiency shower heads,
it is recommended that all homes have installed a pressure
balance tub and shower valve with the rotational limit stops
properly set by a plumber.
4 For external use only. The potentially deadly amoeba, Naegleria
fowleri, may be present in some tap water or unchlorinated well
water.
CARE AND CLEANING
• To maintain proper working conditions cleaning is required when
mineral deposits appear on the spray orifices. To clean mineral
deposits, gently rub the rubber nozzles on the face of the shower
head to dislodge.
• To clean heavier deposits, remove shower head and soak face
down in 1-2 cups of white vinegar (use white vinegar only) for
about 2-3 hours. Replace shower head and run in each mode to
flush out vinegar.
• Do not clean or rinse any part with harsh chemicals, heavy duty
cleaners, or abrasives; this may damage parts or finish and will
void warranty.
• Clean filter screen by unscrewing from the pivot ball and rinse
by back flushing to remove particles. Follow steps 2-5 under
installation to reinstall shower head.
Tamis de
filtration
Boule
d’articulation
Gros écrou
Joint (à l'intérieur
de l'écrou)
Chiffon doux
(non compris)
Clé à molette ou pince
(non fournie)
Remarque: Nous recommandons
d’éviter d’utiliser du composé pour
filetage (pâte lubrifiante) ou du
ruban pour tuyau.
/


