Page is loading ...

FOR USE ONLY WITH STōK
QUATTRO LP GAS GRILLS
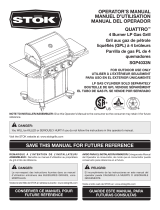
Quattro Grill
Model / Modèle / Modelo : SGP4033N
Input Rating / Taux d’Entrée / Índice de Entrada : 48,000 BTU/Hr
Equipped for use with Liquid
Propane Gas only.
Read Instructions
Before Lighting:
1. Open Lid during lighting.
2. Pushin and turn the control
knob to the ON position for
the burner you wish to light.
3. Press and hold ignitor until
the burner lights. When the
burner is lit, turn the control
knob to the desired setting.
4. To light ot her burners, repeat
steps 2 and 3. To light an adjacent
burner, simply push in and turn
adjacent cont rol knob to ON
once the prior burner is lit.
5. If ignition does not occur in 5
seconds, turn the burner
control(s)
nutes,
and repeat the lighting
procedure.
1. Ouvrez le couvercle avant
d’allume r l’appareil.
2. Enfoncer et tourner le bouton
de commande à la position
« ON » pour le brûleu r à
allumer.
3. Appuyer sur l’allumeur et
le maintenir enfoncé jusqu’à
ce que le brûleur s’allume.
Quand le b rûleur est allumé,
tourner le bou ton de commande
au réglage désiré.
4. Pour allumer les autres brûle urs,
répéter les étapes 2 et 3. Pour
allumer un brûleur adjacent,
simplement appuyer sur les
bout ons de commande et les
tourner à la position « ON »
quand le brûleur précédent est
allumé.
5. Si l’appareil ne s’allume pas en
5 secondes, fermez le robinet
du brûler, attendez 5 minutes,
et procédez de nouveau à
l’allumage.
Lisez les instructions avant
d’allumer l’appareil:
1. Abra la tapa durante el encendido.
2. Presione y gire la perilla de
control a la posición “ON”
del quema dor que desea
encender.
3. Oprima y no suelte el botón de
encendido hasta que el
quemador se encienda. Cuan do
se encienda el quemador, gire
la perilla de control a la posición
deseada.
4. Para encender otros quemado res,
repita los pasos 2 y 3. Para
encender un quemador adyacente,
simplemente presione y gire la
perilla de control adyacente a la
posición “ON” cuando ya se
haya encendido el quemador
anterior.
5. Si no se enciende en 5 segundos,
gire los controles del quemador
a la posición de apagado ,
espere 5 minutos y repita el
procedimiento de encendido.
Lea las instrucciones antes
del encendido:
?
1-800-847-5993
www.stokgrills.com
ANSZ21.58a-2008, CSA 1.6a-2008. Aparatos
a gas para cocinar al aire libre. Para utilizar al
aire libre solamente. Si guarda el aparato en un
espacio cerrado, retire el cilindrio de gas y
déjelo en el exterior. Apague el suministro de
gas propano líquido en el cilindro cuando el
aparato no esté en uso.
ANSZ21.58a-2008, CSA 1.6a-2008. Appareils
pour la Cuisson à l’Exterieur Seulement. Si
l’appareil est gardé à l’interieur, détachez et
laissez le cylindre à gaz à l’extérieur.
Fermez l’alimentation de gaz au niveau du
cylindre quand l’appereil n’est pas utilisé .
ANSZ21.58a-2008, CSA 1.6a-2008.
Outdoor Cooking Gas Appliances. For Outdoor
Use Only. If stored indoors, detach and leave
at cylinder when appliance is not in use.
Turn controls and gas or tank OFF when not in
use.
Do not store a spare LP-gas cylinder under or
near this appliance.
WARNING
AVERTISSEMENT
ADVERTENCIA
Flammable gas under pressure.
if ignited.
Contact LP-gas supplier for repairs or disposal
of cylinder or unused LP-gas.
Do not store cylinder in a building, garage
or enclosed area.
Failure to follow these instructions could result
Do not u se this app liance under overhead
combustible surf aces.
DANGER
DANGER
PELIGRO
Equipado para ser usado con
Gas Propano Líquido solamente.
Equipé pur utilisation avec du
Gaz Propane Liquide seulement.
Le gaz propane s’échappant d’une fuite peut
provoquer un incendie ou une explosion s’il
est allumé.
Communique r avec le fourni sseur de gaz
propane à propos des réparations ou de
l’élimination de cette bouteille ou du gaz
propane non utilisé.
Ne pas entreposer cette bouteille dans un
Le non-respect de ces instructions pourrait
entraîner des BLESSURES GRAVES ou la
MORT.
Ne pas utiliser cet appareil sous une surface
combustible.
La pérdida del gas LP puede ocasionar un
incendio o una explosión si se enciende.
Comuníquese con el proveedor de gas LP para
reparar o eliminar este cilindro o gas LP sin
usar.
o espacios cerrados.
La inobservancia de estas instrucciones puede
provocar un incendio que resulte en la
MUERTE o en LESIONES GRAVES.
N
combustibles.
Éteindre les commandes et legaz ou le réservoir
lorsque l’appareil est inutilisé.
Ne pas entreposer de bouteille de propane
liquide de rechange à proximité de l’appareil
ou en-dessous d e celui-ci.
Gire los controles para apagar el gas o el
tanque cuando no estén en uso.
No almacene un cilindro de gas LP de repuesto
debajo o cerca de este aparato.
Nunca llene el cilindro más allá del 80 por
D
E
S
I
G
N
C
E
R
T
I
F
I
E
D
D
E
S
I
G
N
C
E
R
T
I
F
I
E
D
CONSERVER CE MANUEL POUR
FUTURE RÉFÉRENCE
GUARDE ESTE MANUAL PARA
FUTURAS CONSULTAS
SAVE THIS MANUAL FOR FUTURE REFERENCE
NOTE TO INSTALLER/ASSEMBLER: Give this Operator’s Manual to the consumer so the consumer may retain it for future
reference.
DANGER:
You WILL be KILLED or SERIOUSLY HURT if you do not follow the instructions in this operator’s manual.
Visit the STOK website at: www.stokgrills.com
REMARQUE À L’INTENTION DE L’INSTALLATEUR/
ASSEMBLEUR : Remettre ce manuel d’utilisation au propriétaire
du gril à titre de référence.
DANGER :
Le non-respect des instructions fournies dans ce manuel
d’utilisation entraînera des BLESSURES GRAVES, voire
MORTELLES.
Visitez le site Web de STOK à l’adresse suivante : www.stokgrills.com
AVISO PARA EL INSTALADOR/ARMADOR: Entregue este Manual
del Operador al consumidor, de modo que el consumidor pueda
conservarlo para referencia en el futuro.
PELIGRO:
El incumplimiento de las instrucciones en este manual del
operador puede CAUSARLE LA MUERTE O LESIONARLE
GRAVEMENTE.
Visite el sitio web de STOK en: www.stokgrills.com
UTILISER SEULEMENT AVEC
LE GRIL DE STōK
DE 4 QUEMADORES
PARA USAR CON PARRILLA
STōK À 4 BRÛLEURS
OPERATOR’S MANUAL
MANUEL D’UTILISATION
MANUAL DEL OPERADOR
Natural Gas Conversion Kit
Trousse de conversion au gaz naturel
Kit de conversión a gas natural
SGA7040

2 - English
Introduction ......................................................................................................................................................................2
General Safety Rules ........................................................................................................................................................3
Specific Safety Rules ........................................................................................................................................................3
Symbols ............................................................................................................................................................................ 4
Features ............................................................................................................................................................................5
Tools Needed ...................................................................................................................................................................5
Assembly .................................................................................................................................................................... 6-12
Operation .................................................................................................................................................................. 13-14
Maintenance ............................................................................................................................................................. 15-16
Troubleshooting ..............................................................................................................................................................17
Parts Ordering/Service ..................................................................................................................................... Back Page
This product has many features for making its use more pleasant and enjoyable. Safety, performance, and dependability
have been given top priority in the design of this product making it easy to maintain and operate.
TABLE OF CONTENTS
INTRODUCTION
DANGER:
If you smell gas:
1. Shut off gas to the appliance.
2. Extinguish any open flame.
3. Open lid.
4. If odor continues, keep away from the appliance
and immediately call your gas supplier or your fire
department.
DANGER:
Improper assembly, adjustment, alteration, service, or
maintenance can cause property damage, injury, or
death. Read the Assembly, Operation, and Maintenance
instructions thoroughly before use, assembly, or servicing
of this product.
WARNING:
1. Do not store or use gasoline or other flammable liquids
or vapors in the vicinity of this or any other appliance.
2. A gas cylinder not connected for use shall not be
stored in the vicinity of this or any other appliance.
To register your ST
ō
K
™
product, please
visit: http://register.stokgrills.com

3 - English
GENERAL SAFETY RULES
WARNING:
Read and understand all instructions. Failure to follow
all instructions listed below, may result in electric shock,
fire and/or serious personal injury.
READ ALL INSTRUCTIONS
For use only with SGP4033N and SGP4333SB STOK
Quattro LP gas grills.
Read these instructions and the instructions for your grill
thoroughly before using the accessory.
Know the accessory. Read and understand the operator’s
manual and observe the warnings and instruction labels
affixed to the grill and the accessory.
This appliance must be installed in accordance with the
latest local codes. In the absence of local codes, use the:
•
United States:
- National Fuel Gas Code, ANSI Z223.1/NFPA 54
- LP gas Code, NFPA 58
• Canada:
- Natural Gas and Propane Installation Code, CSA
B149.1
- Propane Storage and Handling Code, CSA B149.2.
Do not alter the grill accessory in any manner.
When in use, keep children and pets away at all times.
Do not leave the grill unattended.
Keep any electrical cord and fuel supply hose away from
any heated surfaces.
Do not store a gas cylinder under or near the grill. If not
followed exactly, a fire causing death or serious injury
may occur.
If a leak is detected at any time, get away from the gas
supply line and call the fire department.
Do not use the grill until leak-tested.
Gas cylinders must be stored outdoors out of reach of
children and must not be stored in a building, garage, or
any other closed in area.
Inspect the hose for damage before each use. If it is
evident there is excessive abrasion or wear, or the hose
is cut, it must be replaced prior to using the grill. The
replacement hose assembly shall be that specified by
the manufacturer.
If a leak is detected at any time, get away from the supply
line and call the fire department.
Do not use a grill until it is leak-tested.
Stay alert and exercise control. Watch what you are doing
and use common sense. Do not operate a grill when you
are tired.
SPECIFIC SAFETY RULES
Check for leaks prior to grilling operations. Do this even
if this grill accessory was assembled at the store.
Do not operate the grill if there is a gas leak present.
Never use a flame to check for gas leaks.
Apartment Dwellers: Check with management to learn
requirements and fire codes of using a gas grill in your
apartment complex.
Do not smoke when connecting or disconnecting the
natural gas hose to the supply line.
Save these instructions. Refer to them frequently and use
them to instruct others who may use this grill. If you loan
someone this grill, loan them these instructions also.
NOTE: SEE YOUR GRILL OPERATOR’S MANUAL FOR
ADDITIONAL SPECIFIC SAFETY RULES.

4 - English
SYMBOLS
Some of the following symbols may be used on this product. Please study them and learn their meaning. Proper
interpretation of these symbols will allow you to operate the product better and safer.
SYMBOL NAME DESIGNATION/EXPLANATION
Safety Alert Indicates a potential personal injury hazard.
Read Operator’s
Manual
To reduce the risk of injury, user must read and understand opera-
tor’s manual before using this product.
Hot Surface
To reduce the risk of injury or damage, avoid contact with any hot
surface.
CALIFORNIA PROPOSITION 65
WARNING:
Combustion by-products produced when using this product may contain chemicals known to the State of California to
cause cancer, birth defects, or other reproductive harm. To reduce the risk of exposure to these substances, always use
the grill in a well-ventilated area. This product contains chemicals, including lead and lead compounds, known to the
State of California to cause cancer, birth defects, or other reproductive harm. Wash hands after handling.
To minimize exposure to these substances, always operate this unit according to the use and care manual, ensuring
you provide adequate ventilation when cooking with gas. In Massachusetts: All gas products must be installed using a
Massachusetts-licensed plumber or gasfitter. A “T” handle type manual gas valve must be installed in the gas supply
line to this appliance. This applies to permanently installed natural gas and propane installations. This does not apply to
propane portable installations using a 20-lb tank.
The following signal words and meanings are intended to explain the levels of risk associated with this product.
SYMBOL SIGNAL MEANING
DANGER:
Indicates a hazardous situation, which, if not avoided, will result in death or
serious injury.
WARNING:
Indicates a hazardous situation, which, if not avoided, could result in death or
serious injury.
CAUTION:
Indicates a hazardous situation, that, if not avoided, may result in minor or
moderate injury.
NOTICE:
(Without Safety Alert Symbol) Indicates information considered important, but
not related to a potential injury (e.g. messages relating to property damage).

5 - English
Quattro Grill
Model / Modèle / Modelo : SGP4033N
Input Rating / Taux d’Entrée / Índice de Entrada : 48,000 BTU/Hr
Equipped for use with Liquid
Propane Gas only.
Read Instructions
Before Lighting:
1. Open Lid during lighting.
2. Push inand turn the control
knob to the ON position for
the burner you wish to light.
3. Press and hold ignitor until
the burner lights. When the
burner is lit, turn the control
knob to the desired setting.
4. To light ot her burners, re peat
steps 2 and 3. To light an adjacent
burner, simply push in and turn
adjacent cont rol knob to ON
once the prior burner is lit.
5. If ignition does not occur in 5
seconds, turn the burner
control(s)
nutes,
and repeat the lighting
procedure.
1. Ouvrez le couvercle avant
d’allume r l’appareil.
2. Enfoncer et tourner le bouton
de commande à la position
« ON » pour le brûleu r à
allumer.
3. Appuyer sur l’allumeur et
le maintenir enfoncé jusqu’à
ce que le brûleur s’allume.
Quand le b rûleur est allumé,
tourner le bou ton de commande
au réglage désiré.
4. Pour allumer les autres brûle urs,
répéter les étapes 2 et 3. Pour
allumer un brûleur adjacent,
simplement appuyer sur les
bout ons de commande et les
tourner à la position « ON »
quand le brûleur précédent est
allumé.
5. Si l’appareil ne s’allume pas en
5 secondes, fermez le robinet
du brûler, attendez 5 minutes,
et procédez de nouveau à
l’allumage.
Lisez les instructions avant
d’allumer l’appareil:
1. Abra la tapa durante el encendido.
2. Presione y gire la perilla de
control a l a posición “ON”
del quema dor que desea
encender.
3. Oprima y no suelte el botón de
encendido hasta que el
quemador se encienda. Cuan do
se encienda el quemador, gire
la perilla de control a la posición
deseada.
4. Para encender otros quemado res,
repita los pasos 2 y 3. Para
encender un quemador adyacente,
simplemente presione y gire la
perilla de control adyacente a la
posición “ON” cuando ya se
haya encendido el quemador
anterior.
5. Si no se enciende en 5 segundos,
gire los controles del quemador
a la posición de apagado ,
espere 5 minutos y repita el
procedimiento de encendido.
Lea las instrucciones antes
del encendido:
?
1-800-847-5993
www.stokgrills.com
ANSZ21.58a-2008, CSA 1.6a-2008. Aparatos
a gas para cocinar al aire libre. Para utilizar al
aire libre solamente. Si guarda el aparato en un
espacio cerrado, retire el cilindrio de gas y
déjelo en el exterior. Apague el suministro de
gas propano líquido en el cilindro cuando el
aparato no esté en uso.
ANSZ21.58a-2008, CSA 1.6a-2008. Appareils
pour la Cuisson à l’Exterieur Seulement. Si
l’appareil est gardé à l’interieur, détachez et
laissez le cylindre à gaz à l’extérieur.
Fermez l’alimentation de gaz au niveau du
cylindre quand l’appereil n’est pas utilisé .
ANSZ21.58a-2008, CSA 1.6a-2008.
Outdoor Cooking Gas Appliances. For Outdoor
Use Only. If stored indoors, detach and leave
at cylinder when appliance is not in use.
Turn controls and gas or tank OFF when not in
use.
Do not store a spare LP-gas cylinder under or
near this appliance.
WARNING
AVERTISSEMENT
ADVERTENCIA
Flammable gas under pressure.
if ignited.
Contact LP-gas supplier for repairs or disposal
of cylinder or unused LP-gas.
Do not store cylinder in a building, garage
or enclosed area.
Failure to follow these instructions could result
Do not u se this app liance under overhead
combustible surf a ces.
DANGER
DANGER
PELIGRO
Equipado para ser usado con
Gas Propano Líquido solamente.
Equipé pur utilisation avec du
Gaz Propane Liquide seulement.
Le gaz propane s’échappant d’une fuite peut
provoquer un incendie ou une explosion s’il
est allumé.
Communiq uer avec le four nisseur de gaz
propane à propos des réparations ou de
l’élimination de cette bouteille ou du gaz
propane non utilisé.
Ne pas entreposer cette bouteille dans un
Le non-respect de ces instructions pourrait
entraîner des BLESSURES GRAVES ou la
MORT.
Ne pas utiliser cet appareil sous une surface
combustible.
La pérdida del gas LP puede ocasionar un
incendio o una explosión si se enciende.
Comuníquese con el proveedor de gas LP para
reparar o eliminar este cilindro o gas LP sin
usar.
o espacios cerrados.
La inobservancia de estas instrucciones puede
provocar un incendio que resulte en la
MUERTE o en LESIONES GRAVES.
N
combustibles.
Éteindre les commandes et le gaz ou le réservoir
lorsque l’appareil est inutilisé.
Ne pas entreposer de bouteille de propane
liquide de rechange à proximité de l’appareil
ou en-dessous d e celui-ci.
Gire los controles para apagar el gas o el
tanque cuando no estén en uso.
No almacene un cilindro de gas LP de repuesto
debajo o cerca de este aparato.
Nunca llene el cilindro más allá del 80 por
PRODUCT SPECIFICATIONS
Fuel Source ................................Natural Gas (not included)
Natural Gas Hose Length ............................................ 10 ft.
FEATURES
Fig. 1
Natural Gas Coupler .......................................... 3/8 in. NPT
Maximum pressure ................................. 7 in. water column
NATURAL GAS
BURNERS
COTTER PINS
SCREWS
NATURAL GAS
MANIFOLD AND VALVE
ASSEMBLY
NATURAL GAS HOSE
NATURAL GAS
DATA LABEL
QUICK-CONNECT
COUPLER
KNOW YOUR ACCESSORY
See Figure 1.
The safe use of this accessory requires an understanding
of the information on the grill, the accessory, and in this
operator’s manual. Before use of this accessory, familiarize
yourself with all operating features and safety rules.
NATURAL GAS CONVERSION - Converting a Quattro LP
gas grill from propane to natural gas is simple and can be
done using a Phillips screw driver and adjustable wrench.
The following tools (not included or drawn to scale) are needed for assembly and making adjustments:
PHILLIPS
SCREWDRIVER
TOOLS NEEDED
Fig. 2
ADJUSTABLE WRENCH

6 - English
ASSEMBLY
UNPACKING
This product requires assembly.
Carefully remove the product from the box. Make sure
that all items listed in the packing list are included.
WARNING:
Do not use this product if any parts on the Packing List
are already assembled to your product when you unpack
it. Parts on this list are not assembled to the product by
the manufacturer and require customer installation. Use
of a product that may have been improperly assembled
could result in serious personal injury.
Inspect the product carefully to make sure no breakage
or damage occurred during shipping.
Do not discard the packing material until you have
carefully inspected and satisfactorily operated the
product.
If any parts are damaged or missing, please call
1-800-847-5993 for assistance.
PACKING LIST
Cotter Pins (4)
Natural Gas Burners (4)
Natural Gas Data Label
Natural Gas Manifold and Valve Assembly
Screws (4)
10 ft. Natural Gas Hose w/quick-connect coupler
WARNING:
If any parts are damaged or missing, do not operate this
product until the parts are replaced. Use of this product
with damaged or missing parts could result in serious
personal injury.
CAUTION:
Some parts may contain sharp edges that may cause
personal injury. Wear protective gloves if necessary.
STEP 1: TURN OFF THE GRILL
See Figure 3.
Open the hood.
Turn all control knobs on the control panel OFF ( O ).
Fig. 3
0
0
CONTROL
KNOBS
STEP 2: DISCONNECT PROPANE GAS
CYLINDER
See Figure 4.
Open cabinet doors.
Make sure handwheel on the propane gas cylinder is in
its full off position.
Holding coupling nut and regulator as shown, turn coupling
nut counter-clockwise and disconnect by hand. Do not
use tools.
WARNING:
To avoid serious personal injury, always check for gas
leaks any time a gas cylinder is disconnected and then
reconnected.
Fig. 4
COUPLING NUT
REGULATOR

7 - English
ASSEMBLY
Fig. 6
STEP 3: REMOVE THE PROPANE GAS
CYLINDER
See Figure 5.
Turn the cylinder retention bolt counter-clockwise until
the cylinder is loose.
With knees bent and in proper lifting position, carefully
lift the propane gas cylinder up and away from the grill.
NOTE: Do not store gas cylinders not connected for use
in the vicinity of the grill or any other appliance.
REGULATOR
HOSE
Fig. 5
STEP 4: DISCONNECT THE REGULATOR HOSE
See Figure 6.
Using a wrench (not provided), unscrew the collar of
the regulator hose from the propane manifold and valve
assembly located behind the control panel.
STEP 5: REMOVE THE CONTROL KNOBS
See Figure 7.
Grasp a control knob and pull firmly to remove.
Remove remaining control knobs.
Fig. 7
Fig. 8
0
0
STEP 6: REMOVE THE CONTROL KNOB BEZEL
See Figure 8.
Loosen the two black screws securing the control knob
bezel.
Remove the control knob bezel.
Repeat steps to remove remaining control knob bezels.
0
0
0
0
0
0
CONTROL
KNOB
CONTROL
KNOB BEZEL
PHILLIPS
SCREW
DRIVER
BLACK
SCREW

8 - English
ASSEMBLY
Fig. 11
STEP 8: REMOVE THE CONTROL PANEL
See Figures 11 and 12.
Loosen and remove the six screws securing the control
panel.
Carefully remove the control panel from the grill.
STEP 9: DISCONNECT THE ELECTRODE WIRES
FROM THE IGNITOR
See Figure 12.
Locate the wires going from the ignitor to the electrodes
inside the firebox.
Carefully disconnect the wires from the ignitor. Keep
ignitor for reassembly.
STEP 7: REMOVE IGNITOR CAP AND NUT
See Figures 9 and 10.
Turn the ignitor cap counterclockwise and lift cap from
the control panel.
Remove AA battery (if installed).
Turn nut counterclockwise and remove.
Push ignitor through the control panel and allow it to hang.
CONTROL
PANEL
SCREWS
Fig. 10
Fig. 9
IGNITOR
IGNITOR CAP
NUT
Fig. 12
IGNITOR
ELECTRODE
WIRE

9 - English
ASSEMBLY
0
0
0
0
STEP 10: REMOVE GRATES AND HEAT TENTS
See Figure 13.
Remove the grates, grate inserts, and warming rack. Refer
to the grill operator’s manual.
Lift the heat tents out of the grill to reveal the burners
below.
Fig. 14
STEP 11: REMOVE THE PROPANE MANIFOLD
AND VALVE ASSEMBLY
See Figure 14.
Remove propane manifold and valve assembly from the
burners.
Pull the propane manifold and valve assembly up and
away from the grill.
PROPANE MANIFOLD
AND VALVE ASSEMBLY
Fig. 13
GRATE
INSERTS
HEAT TENTS
BURNERS
GRATES
WARMING
RACK
Fig. 15
STEP 12: DISCONNECT THE PROPANE
BURNERS
See Figures 15 and 16.
Remove the cotter pins securing the propane burners
and carryover tubes in place.
Disconnect the propane burners by lifting them up and
toward the back of the firebox.
Remove the carryover tubes and keep for reassembly.
Unscrew and remove the electrode assemblies from the
propane burners.
COTTER
PINS
BURNERS
Fig. 16
ELECTRODE
ASSEMBLY
CARRYOVER
TUBE
CARRYOVER
TUBE
BURNER
SCREW

10 - English
ASSEMBLY
STEP 13: INSTALL THE NATURAL GAS
BURNERS
See Figure 17.
Place the carryover tubes onto the tabs inside the firebox,
so the tabs go through the slots in the tubes.
Attach electrode assemblies to the natural gas burners
using provided screws.
Orient the natural gas burners, which are marked with
“NG”, so that the burners with the shortest electrode wires
are on the left and the burners with the longest electrode
wires are on the right.
Slide burner inlets and electrodes through their respective
holes in the firebox, and then, slide the burners and
electrode wires through the holes in the grill frame.
NOTE: The burners and electrode wires should go through
the same hole in the grill frame.
Lower the back ends of the burners down over the
carryover tubes and onto the tabs inside the firebox, so
the tabs go through the slots in the burners.
Install new cotter pins to secure the burners in place.
STEP 14: INSTALL THE NATURAL GAS
MANIFOLD AND VALVE ASSEMBLY
See Figure 18.
Insert the tips of the manifold valves into the burners.
NOTE: The natural gas manifold and valve assembly
should be oriented as shown.
STEP 15: INSTALLING THE NATURAL GAS
HOSE
See Figure 19.
Reassemble the ignitor, control panel, bezel and knobs by
reversing the instructions in STEPS FIVE through NINE.
NOTE: It may be necessary to leave the screws securing
the control panel loose until after the two center bezels
are installed. With the screws loose, move the manifold
until the holes in the manifold are aligned with the holes
in the bezels. Install the bezels, then tighten the screws
securing the panel in place.
NOTE: Install AA battery into the ignitor as described in
your grill’s operators manual.
Remove the rubber cap from the stem of the natural gas
manifold and valve assembly.
Using a wrench (not provided), screw the collar of the
natural gas hose to the natural gas manifold and valve
assembly located behind the control panel. Tighten
securely.
Fig. 17
Fig. 18
VALVES
NATURAL GAS MANIFOLD
AND VALVE ASSEMBLY
MANIFOLD
STEM
MANIFOLD
TIP
BURNER
Fig. 19
NATURAL GAS
HOSE
NATURAL GAS
MANIFOLD AND VALVE
ASSEMBLY

11 - English
ASSEMBLY
STEP 16: CONNECTING NATURAL GAS HOSE
TO NATURAL GAS SUPPLY LINE
See Figure 20.
Disconnect the quick-connect coupler from the natural
gas hose.
WARNING:
Have the quick connect coupler attached to the natural
gas supply line by a certified, licensed professional.
Improper installation of the quick connect coupler can
result in a gas leak, which is a fire hazard.
To connect the natural gas hose:
Make sure the gas is turned off at the supply line.
Pull back the collar on the quick-connect coupler and
push the natural gas hose into coupler.
Push the collar forward so that the hose is secured properly.
Gently pull the hose to see that it is secure.
To disconnect the natural gas hose:
Make sure the gas is turned off at the supply line.
Pull back and hold the collar on the quick-connect coupler.
Remove the natural gas hose by pulling it from the quick-
connect coupler.
WARNING:
DO NOT smoke or use an open flame during leak test. If
a leak is present, the gas could ignite and result in serious
personal injury.
WARNING:
To avoid serious personal injury, always check for gas
leaks any time the natural gas hose is disconnected and
then reconnected.
STEP 17: TESTING VALVES AND HOSE FOR
LEAKS
Turn all control knobs on the control panel OFF ( O ).
Make sure the natural gas hose is properly connected to
the natural gas supply line.
Turn on the gas supply line.
If you hear a rushing sound, immediately shut off the gas
supply and call your gas supplier or your fire department.
This sound means there is a major leak at the connection.
Using a clean paint brush and a 50/50 mixture of mild soap
and water, brush soapy solution over all the connections
and fittings on the grill.
“Growing” bubbles indicate a leak. Turn off the gas at
the supply line. Disconnect the natural gas hose then
retighten all connections.
NOTE: If leaks cannot be stopped, do not try to repair.
Call for replacement parts.
If you are not using the grill immediately after the leak
test, disconnect the natural gas hose.
Fig. 20
NATURAL GAS
HOSE
QUICK-CONNECT
COUPLER
NOTE: QUICK-CONNECT
COUPLER MUST BE
INSTALLED TO SUPPLY
LINE BY LICENSED
PROFESSIONAL
SUPPLY
LINE

12 - English
ASSEMBLY
STEP 18: BURNER FLAME CHECK
See Figure 21.
Light burners and turn the control knobs from high to
low. (See the Operations section later in this manual.)
A smaller flame should be seen on low while the high
positions flame should be approximately 1 in. in height.
If only a low flame is seen, you may have low gas
pressure. If so, check your natural gas hose for kinks or
obstructions.
Fig. 21
LOW
HIGH
STEP 19: REASSEMBLE GRATES AND HEAT
TENTS
See Figure 22.
Carefully place the heat tents over the gas elements on
the gas burners.
Replace the grates, grate inserts, and warming rack. Refer
to the grill operator’s manual.
Fig. 22
STEP 20: ATTACH NATURAL GAS LABEL TO
CABINET DOOR
See Figure 23.
Open cabinet doors.
Place the Natural Gas Data Label on the inside of the
cabinet door.
Equipped for use with Liquid
Propane Gas only.
Read Instructions
Before Lighting:
1. Open Lid during lighting.
2. Pushinandturnthecontrol
knobtotheON position for
the burner you wish to light.
3. Press and hold ignitor until
the burner lights. When the
burner is lit, turn the control
knob tothe desired setting.
4. To light other burners, repeat
steps 2 and 3. To light an adjacent
burner, simply push in and turn
adjacent control knob to ON
once the prior burner is lit.
5. If ignition does not occur in 5
seconds, turn the burner
control(s)
nutes,
and repeat the lighting
procedure.
1. Ouvrez le couvercle avant
d’allumer l’appareil.
2. Enfoncer et tourner le bouton
de commande à la position
« ON » pour le brûleurà
allumer.
3. Appuyer sur l’allumeur et
le maintenir enfoncé jusqu’à
ce que le brûleur s’allume.
Quand le brûleur est allumé,
tourner le bouton de commande
au réglage désiré.
4. Pour allumer les autres brûleurs,
répéter les étapes 2 et 3. Pour
allumer un brûleur adjacent,
simplement appuyer sur les
boutons de commande et les
tourner à la position « ON »
quand le brûleur précédent est
allumé.
5. Si l’appareil ne s’allume pas en
5 secondes, fermez le robinet
du brûler, attendez 5 minutes,
et procédez de nouveau à
l’allumage.
Lisez les instructions avant
d’allumer l’appareil:
1. Abra la tapa durante el encendido.
2.Presione y gire la perilla de
control a la
posición “ON”
del quemador que desea
encender.
3. Oprima y no suelte el botón de
encendido hasta que el
quemador se encienda. Cuando
se encienda el quemador, gire
la perilla de control a la posición
deseada.
4. Para encender otros quemadores,
repita los pasos 2 y 3.Para
encender un quemador adyacente,
simplemente presione y gire la
perilla de control adyacente a la
posición “ON” cuando ya se
haya encendido el quemador
anterior.
5. Si no se enciende en 5 segundos,
gire los controles del quemador
a la posición de apagado ,
espere 5 minutos y repita el
procedimiento de encendido.
Lea las instrucciones antes
del encendido:
?
1-800-847-5993
www.stokgrills.com
One World Technologies, Inc.
1428 Pearman Dairy Road
Anderson, SC 29625
ANSZ21.58a-2008, CSA 1.6a-2008. Aparatos
a gas para cocinar al aire libre. Para utilizar al
aire libre solamente. Si guarda el aparato en un
espacio cerrado, retire el cilindrio de gas y
déjelo en el exterior. Apague el suministro de
gas propano líquido en el cilindro cuando el
aparato no esté en uso.
ANSZ21.58a-2008, CSA 1.6a-2008. Appareils
pour la Cuisson à l’Exterieur Seulement. Si
l’appareil est gardé à l’interieur, détachez et
laissez le cylindre à gaz à l’extérieur.
Fermez l’alimentation de gaz au niveau du
cylindre quand l’appereil n’est pas utilisé.
ANSZ21.58a-2008, CSA 1.6a-2008.
Outdoor Cooking Gas Appliances. For Outdoor
Use Only. If stored indoors, detach and leave
at cylinder when appliance is not in use.
Turn controls and gas or tank OFF when not in
use.
Do not store a spare LP-gas cylinder under or
near this appliance.
Minimum clearance from sides and back of unit
to combustible construction: 36 inches
(914.4 mm) from sides and 36 inches (914.4
mm) from back
Do not allow the LP-gas tank to tip or turn over.
WARNING
AVERTISSEMENT
ADVERTENCIA
Flammable gas under pressure.
if ignited.
Contact LP-gas supplier for repairs or disposal
of cylinder or unused LP-gas.
Do not store cylinder in a building, garage
or enclosed area.
Failure to follow these instructions could result
Do not use this appliance under overhead
combustible surfaces.
DANGER
DANGER
PELIGRO
Use only the gas pressure regulator supplied
with this appliance. This regulator is set for
an outlet pressure of 11 iwc (28 cm).
CAUTION
ATTENTION
PRECAUCIÓN
The operator’s manual contains important information regarding the safe use and
assembly of this appliance. Read and follow all warnings and instructions.
Le manuel d’utilisation contient les renseignements essentiels pour procéder à un
assemblage approprié de l’appareil et pour l’utiliser de façon sécuritaire. Lire et
respecter tous les avertissements et toutes les instructions.
El manual del operador contiene información importante sobre el uso y montaje seguros
de este aparato. Lea y siga todas las advertencias e instrucciones.
Equipado para ser usado con
Gas Propano Líquido solamente.
Equipé pur utilisation avec du
Gaz Propane Liquide seulement.
Le gaz propane s’échappant d’une fuite peut
provoquer un incendie ou une explosion s’il
est allumé.
Communiquer avec le fournisseur de gaz
propane à propos des réparations ou de
l’élimination de cette bouteille ou du gaz
propane non utilisé.
Ne pas entreposer cette bouteille dans un
Le non-respect de ces instructions pourrait
entraîner des BLESSURES GRAVES ou la
MORT.
Ne pas utiliser cet appareil sous une surface
combustible.
La pérdida del gas LP puede ocasionar un
incendio o una explosión si se enciende.
Comuníquese con el proveedor de gas LP para
reparar o eliminar este cilindro o gas LP sin
usar.
o espacios cerrados.
La inobservancia de estas instrucciones puede
provocar un incendio que resulte en la
MUERTE o en LESIONES GRAVES.
N
combustibles.
Éteindre lescommandesetlegazou le réservoir
lorsque l’appareil est inutilisé.
Ne pas entreposer de bouteille de propane
liquide de rechange à proximité de l’appareil
ou en-dessous de celui-ci.
Ne jamais remplir la bouteille au-delà de 80 %
de sa capacité.
Dégagement minimal entre les parois latérales
et l’arrière de l’appareil et la construction
combustible : 914,4 mm (36 pouces) à partir
de parois laterales et 914,4 mm (36 pouces)
de l’arrière.
S’assurer que le réservoir de gaz propane ne
bascule pas et qu’il ne se renverse pas.
Gire los controles para apagar el gas o el
tanque cuando no estén en uso.
No almacene un cilindro de gas LP de repuesto
debajo o cerca de este aparato.
Nunca llene el cilindro más allá del 80 por
ciento.
Distancia mínima desdeloslateralesy laparte
trasera de la unidad para la construcción
de combustible: 914,4 mm (36 pulg.) para los
laterales y 914,4 mm (36 pulg.) para la parte
trasera
No permita que el tanque de gas LP se incline
ni se vuelque.
Util
isez uniquement le régulateur de pression
fourni avec cet appareil. Le régulateur est
réglé pour une pression de sortie de 28 cm
(11 punces de colonne d’eau).
Sólo use el regulado de presión de gasolina
suministrado con este aparato. Este
regulador está ajustado para una presión
de salida de 28 cm (11 iwc).
One World Technologies, Inc.
1428 Pearman Dairy Road
Anderson, SC 29625
One World Technologies, Inc.
1428 Pearman Dairy
Road
Anderson, SC 29625
Made in China / Fabriqué en Chine / Fabricado en China
Serial No:
Numéro de Série :
Nùmero de Serie :
D
E
S
I
G
N
C
E
R
T
I
F
I
E
D
Quattro Grill
Model / Modèle / Modelo : SGP4033N
Input Rating / Taux d’Entrée / Índice de Entrada : 48,000 BTU/Hr
Equipped for use with Liquid
Read Instructions
Before Lighting:
1. Open Lid during lighting.
2. Pushin and turn the control
knob tothe ON position for
the burner you wish to light.
3. Press and hold ignitor until
the burner lights. When the
burner is lit, turn the control
knob to the desired setting.
4. To light other burners, repeat
steps 2 and 3. To light an adjacent
burner, simply push in and turn
adjacent control knob to ON
once the prior burner is lit.
5. If ignition does not occur in 5
seconds, turn the burner
control(s)
nutes,
and repeat the lighting
procedure.
1. Ouvrez le couvercle avant
d’allumer l’appareil.
2. Enfoncer et tourner le bouton
de commande à la position
« ON » pour le brûleur à
allumer.
3. Appuyer sur l’allumeur et
le maintenir enfoncé jusqu’à
ce que le brûleur s’allume.
Quand le b rûleur est allumé,
tourner le bouton de commande
au réglage désiré.
4. Pour allumer les autres brûle urs,
répéter les étapes 2 et 3. Pour
allumer un brûleur adjacent,
simplement appuyer sur les
boutons de commande et les
tourner à la position « ON »
quand le brûleur précédent est
allumé.
5. Si l’appareil ne s’allume pas en
5 secondes, fermez le robinet
du brûler, attendez 5 minutes,
et procédez de nouveau à
l’allumage.
Lisez les instructions avant
d’allumer l’appareil:
1. Abra la tapa durante el encendido.
2.Presione y gire la perilla de
control a la posición “ON”
del quema dor que desea
encender.
3. Oprima y no suelte el botón de
encendido hasta que el
quemador se encienda. Cuan do
se encienda el quemador, gire
la perilla de control a la posición
deseada.
4. Para encender otros quemado res,
repita los pasos 2 y 3. Para
encender un quemador adyacente,
simplemente presione y gire la
perilla de control adyacente a la
posición “ON” cuando ya se
haya encendido el quemador
anterior.
5. Si no se enciende en 5 segundos,
gire los controles del quemador
a la posición de apagado ,
espere 5 minutos y repita el
procedimiento de encendido.
Lea las instrucciones antes
del encendido:
?
1-800-847-5993
www.stokgrills.com
Equipado para ser usado con Equipé pur utilisation avec du
Fig. 23
NATURAL GAS
DATA LABEL
0
0
0
0
GRATE
INSERTS
HEAT TENTS
BURNERS
GRATES
WARMING
RACK

13 - English
OPERATION
WARNING:
Do not allow familiarity with grill to make you careless.
Remember that a careless fraction of a second is
sufficient to inflict severe injury.
WARNING:
Do not use any attachments or accessories not
recommended by the manufacturer of your grill. The use
of attachments or accessories not recommended can
result in serious personal injury.
WARNING:
If ignition does NOT occur within 5 seconds, turn the
control knobs OFF ( O ) and wait 5 minutes. Repeat
lighting procedures. If burners do NOT ignite gas will
continue to flow to the burner and could accidently ignite
and result in serious personal injury.
IGNITING THE MAIN BURNER
See Figures 24 - 25.
NOTE: Never lean over the grill while lighting burners.
The first time you use your grill after converting to natural
gas, it is recommended the grill run on the highest setting
for 15 - 20 minutes.
To ignite burners using the electric ignitor:
Open the hood.
Turn all control knobs on the control panel OFF ( O ).
Make sure the natural gas hose is tightly connected
to the natural gas supply line and a leak test has been
performed.
Push in the far left control knob and turn to ON .
Press and hold the electric ignitor until the burner lights.
When burner is lit, turn the control knob to the desired
setting.
If burner fails to light within five (5) seconds, release the
electric ignitor. Turn the control knob off and wait five (5)
minutes then repeat the step.
0
0
Fig. 24
NOTE: Place burner on high and observe flame height
which should be approximately 1 in. If the flame is too
high or too low, burner adjustment is required. See the
Maintenance section later in this manual.
To light adjacent burners: push in and turn on the control
knob next to the lit burner to light; or, repeat the lighting
procedures for non-adjacent burners.
Refer to the grill’s operator’s manual for additional
safety and cooking tips.
CONTROL
KNOB
ELECTRIC
IGNITOR

14 - English
To ignite burners using match lighting:
Open the hood.
Turn all control knobs on the control panel OFF ( O ).
Make sure the natural gas hose is tightly connected to
the natural gas supply line and a leak test has been per-
formed.
Using a match holder, place a match between the circular
wire.
Light the match and place into lighting hole on the side
of the firebox.
Push in the far right control knob and turn to ON .
When burner is lit, turn the control knob to the desired
setting.
If burner fails to light, extinguish the match then turn the
control knob off and wait five (5) minutes then repeat the
step.
NOTE: Place burner on high and observe flame height
which should be approximately 1 in. If flame is too high
or too low, burner adjustment is required. See the Main-
tenance section later in this manual.
To light other burners: push in and turn on the control
knob next to the lit burner.
Refer to the grill’s operator’s manual for additional
safety and cooking tips.
MATCH
HOLDER
Fig. 25
OPERATION
LIGHTING
HOLE

15 - English
MAINTENANCE
CLEANING BURNER ASSEMBLY AND
CHECKING VENTURI FOR INSECTS
See Figures 26 - 29.
DANGER:
Failure to clean the burner assembly and checking the
venturi as described can result in a fire or explosion
resulting in serious injury or death.
Burners should be cleaned when the grill has been idle
for some time. In some parts of the country, spiders and
other insects can spin webs, build nests, and lay eggs in
the venturi blocking gas flow and causing fire in the tubes
known as “flashback”. Flashback can damage the grill and
even cause injury.
Turn all control knobs on the control panel OFF ( O ).
Remove natural gas hose from natural gas supply line.
Lift and remove cooking and heat grates from inside the
grill.
Remove hitch pin securing the burner(s) to the bottom of
the grill.
Pull electrode wire from the electronic ignitor.
Lift burner up and away from the gas valve openings.
Fig. 27
Fig. 28
Fig. 26
HITCH
PIN
ELECTRODE
WIRE
ELECTRONIC
IGNITOR

16 - English
MAINTENANCE
Clean burner tubes using one of the following three ways:
1. Bend a stiff wire into a small hook. Run the hook
through each burner tube several times.
2. Use a narrow bottle brush with flexible handle and run
through burner tubes several times. DO NOT use a wire
brush.
3. Wear eye protection then use an air hose to force air
into the burner tube and out through the burner port.
Clean any clogged port with an opened paper clip.
Once burner tubes are clear of debris, use a wire brush to
remove food and dirt from the outer surface of the tubes.
Check burner for damage. Normal wear and corrosion
may cause some holes to enlarge. Replace burners if this
happens.
NOTE: Burner tubes must reengage valve openings.
Verify that the gas valve orifice is correctly positioned
inside burner inlet.
Attach the electrode to the burner and carefully replace
the burners.
Slide burners into brackets inside the grill and secure
burners using hitch pins.
Reattach electrode wires to the electronic ignitor.
Fig. 29
HOSE CHECK
Inspect all hoses before each use. Replace any damaged
hoses before using the grill.
NOTE: Only use parts recommended by the manufacturer.
IGNITOR CHECK
Remove natural gas hose from natural gas supply line. Press
and hold the ignitor. “Click” should be heard and a spark
seen between the burner and electrode. If no spark, see the
Troubleshooting section later in this manual.
VALVE CHECK
Control knobs lock in place when turned off. To check valves:
push in knobs and release. If knobs don’t spring back,
replace the valve assembly before using grill.
ELECTRODE
BURNER
BURNER
GAS VALVE
ORIFICE

17 - English
PROBLEM CAUSE SOLUTION
TROUBLESHOOTING
Smell of gas Hose or valve leaking. Check for damaged hose or valve. Perform leak
test, see Testing Valves and Hose for Leaks in
the Assembly section.
Flame flashback beneath
control panel
Fire in burner tube due to
blockage.
See Cleaning Burner Assembly and Checking
Venturi for Insects in the Maintenance section.
Gas leak detected from natural
gas hose or other connection
Improper installation and loose
connections.
Tighten fittings and see Testing Valves and Hose
for Leaks in the Assembly section.
Grease fire or continuous
excessive flames above
cooking surface
Grease build up in burner area. Turn off control knobs. Leave hood open allowing
flames to extinguish. Once cool, clean grill
thoroughly.
Burners will not light Trying to light wrong burner.
Burner not connected to control
knob.
Venturi blocked.
Ignitor wire(s) are loose, dirty, or
not connected.
Dead battery in ignitor.
See Igniting the Main Burner in the Operation
section.
Make sure valves are inside the burner tubes.
See Cleaning Burner Assembly and Checking
Venturi for Insects in the Maintenance section
Reconnect burner electrode wires or replace the
ignitor wire assembly. Clean wires and/or electrode
with rubbing alcohol and a clean swab. Tighten all
connections.
Replace the battery in the ignitor.
Decreasing heat or popping
sound
Venturi blocked. See Cleaning Burner Assembly and Checking
Venturi for Insects in the Maintenance section
Hot spots on cooking surface Venturi blocked. See Cleaning Burner Assembly and Checking
Venturi for Insects in the Maintenance section
Yellow flame Venturi or burners may be
blocked.
See Cleaning Burner Assembly and Checking
Venturi for Insects in the Maintenance section

5 - Français
Quattro Grill
Model / Modèle / Modelo : SGP4033N
Input Rating / Taux d’Entrée / Índice de Entrada : 48,000 BTU/Hr
Equipped for use with Liquid
Propane Gas only.
Read Instructions
Before Lighting:
1. Open Lid during lighting.
2. Push inand turn the control
knob to the ON position for
the burner you wish to light.
3. Press and hold ignitor until
the burner lights. When the
burner is lit, turn the control
knob to the desired setting.
4. To light ot her burners, re peat
steps 2 and 3. To light an adjacent
burner, simply push in and turn
adjacent cont rol knob to ON
once the prior burner is lit.
5. If ignition does not occur in 5
seconds, turn the burner
control(s)
nutes,
and repeat the lighting
procedure.
1. Ouvrez le couvercle avant
d’allume r l’appareil.
2. Enfoncer et tourner le bouton
de commande à la position
« ON » pour le brûleu r à
allumer.
3. Appuyer sur l’allumeur et
le maintenir enfoncé jusqu’à
ce que le brûleur s’allume.
Quand le b rûleur est allumé,
tourner le bou ton de commande
au réglage désiré.
4. Pour allumer les autres brûle urs,
répéter les étapes 2 et 3. Pour
allumer un brûleur adjacent,
simplement appuyer sur les
bout ons de commande et les
tourner à la position « ON »
quand le brûleur précédent est
allumé.
5. Si l’appareil ne s’allume pas en
5 secondes, fermez le robinet
du brûler, attendez 5 minutes,
et procédez de nouveau à
l’allumage.
Lisez les instructions avant
d’allumer l’appareil:
1. Abra la tapa durante el encendido.
2. Presione y gire la perilla de
control a l a posición “ON”
del quema dor que desea
encender.
3. Oprima y no suelte el botón de
encendido hasta que el
quemador se encienda. Cuan do
se encienda el quemador, gire
la perilla de control a la posición
deseada.
4. Para encender otros quemado res,
repita los pasos 2 y 3. Para
encender un quemador adyacente,
simplemente presione y gire la
perilla de control adyacente a la
posición “ON” cuando ya se
haya encendido el quemador
anterior.
5. Si no se enciende en 5 segundos,
gire los controles del quemador
a la posición de apagado ,
espere 5 minutos y repita el
procedimiento de encendido.
Lea las instrucciones antes
del encendido:
?
1-800-847-5993
www.stokgrills.com
ANSZ21.58a-2008, CSA 1.6a-2008. Aparatos
a gas para cocinar al aire libre. Para utilizar al
aire libre solamente. Si guarda el aparato en un
espacio cerrado, retire el cilindrio de gas y
déjelo en el exterior. Apague el suministro de
gas propano líquido en el cilindro cuando el
aparato no esté en uso.
ANSZ21.58a-2008, CSA 1.6a-2008. Appareils
pour la Cuisson à l’Exterieur Seulement. Si
l’appareil est gardé à l’interieur, détachez et
laissez le cylindre à gaz à l’extérieur.
Fermez l’alimentation de gaz au niveau du
cylindre quand l’appereil n’est pas utilisé .
ANSZ21.58a-2008, CSA 1.6a-2008.
Outdoor Cooking Gas Appliances. For Outdoor
Use Only. If stored indoors, detach and leave
at cylinder when appliance is not in use.
Turn controls and gas or tank OFF when not in
use.
Do not store a spare LP-gas cylinder under or
near this appliance.
WARNING
AVERTISSEMENT
ADVERTENCIA
Flammable gas under pressure.
if ignited.
Contact LP-gas supplier for repairs or disposal
of cylinder or unused LP-gas.
Do not store cylinder in a building, garage
or enclosed area.
Failure to follow these instructions could result
Do not u se this app liance under overhead
combustible surf a ces.
DANGER
DANGER
PELIGRO
Equipado para ser usado con
Gas Propano Líquido solamente.
Equipé pur utilisation avec du
Gaz Propane Liquide seulement.
Le gaz propane s’échappant d’une fuite peut
provoquer un incendie ou une explosion s’il
est allumé.
Communiq uer avec le four nisseur de gaz
propane à propos des réparations ou de
l’élimination de cette bouteille ou du gaz
propane non utilisé.
Ne pas entreposer cette bouteille dans un
Le non-respect de ces instructions pourrait
entraîner des BLESSURES GRAVES ou la
MORT.
Ne pas utiliser cet appareil sous une surface
combustible.
La pérdida del gas LP puede ocasionar un
incendio o una explosión si se enciende.
Comuníquese con el proveedor de gas LP para
reparar o eliminar este cilindro o gas LP sin
usar.
o espacios cerrados.
La inobservancia de estas instrucciones puede
provocar un incendio que resulte en la
MUERTE o en LESIONES GRAVES.
N
combustibles.
Éteindre les commandes et le gaz ou le réservoir
lorsque l’appareil est inutilisé.
Ne pas entreposer de bouteille de propane
liquide de rechange à proximité de l’appareil
ou en-dessous d e celui-ci.
Gire los controles para apagar el gas o el
tanque cuando no estén en uso.
No almacene un cilindro de gas LP de repuesto
debajo o cerca de este aparato.
Nunca llene el cilindro más allá del 80 por
Fig. 1
VIS
ÉTIQUETTE DE
CARACTÉRISTIQUES DU GAZ
NATUREL
FICHE TECHNIQUE
Source de combustible ...............gaz naturel (non compris)
Longueur du boyau de gaz naturel ............304,8 cm (10 pi)
CARACTÉRISTIQUES
Coupleur de gaz naturel .................................... 3/8 po NPT
Presión máxima .............Colonne d’eau de 177,8mm (7 po)
CONNAÎTRE SON ACCESSOIRE
Voir la figure 1.
L’utilisation sûre de ce accessoire exige une comprehension
des renseignements figurant sur gril, le accessoire, et
contenus dans le manuel d’utilisation, ainsi qu’une bonne
connaissance du projet entrepris. Avant d’utiliser ce
accessoire, se familiariser avec toutes ses caractéristiques
et règles de sécurité.
CONVERSION AU GAZ NATUREL - La conversion du gaz
propane au gaz naturel du barbecue Quattro LP et simple
et peut être faite à l’aide d’un tournevis à tête cruciforme et
d’une clé à ouverture variable.
BRÛLEURS AU
GAZ NATUREL
COLLECTEUR DE GAZ
NATUREL ET SOUPAPE
COUPLEUR
À RESSORT
TUYAU DE GAZ
NATUREL
GOUPILLE
FENDUE
Les outils suivants (non inclus ou dessiné pour escalader) sont nécessaires pour effectuer l’assemblage et les
réglages :
TOURNEVIS PHILLIPS
OUTILS NÉCESSAIRES
Fig. 2
CLÉ A MOLETTE

5 - Español
Quattro Grill
Model / Modèle / Modelo : SGP4033N
Input Rating / Taux d’Entrée / Índice de Entrada : 48,000 BTU/Hr
Equipped for use with Liquid
Propane Gas only.
Read Instructions
Before Lighting:
1. Open Lid during lighting.
2. Push inand turn the control
knob to the ON position for
the burner you wish to light.
3. Press and hold ignitor until
the burner lights. When the
burner is lit, turn the control
knob to the desired setting.
4. To light ot her burners, re peat
steps 2 and 3. To light an adjacent
burner, simply push in and turn
adjacent cont rol knob to ON
once the prior burner is lit.
5. If ignition does not occur in 5
seconds, turn the burner
control(s)
nutes,
and repeat the lighting
procedure.
1. Ouvrez le couvercle avant
d’allume r l’appareil.
2. Enfoncer et tourner le bouton
de commande à la position
« ON » pour le brûleu r à
allumer.
3. Appuyer sur l’allumeur et
le maintenir enfoncé jusqu’à
ce que le brûleur s’allume.
Quand le b rûleur est allumé,
tourner le bou ton de commande
au réglage désiré.
4. Pour allumer les autres brûle urs,
répéter les étapes 2 et 3. Pour
allumer un brûleur adjacent,
simplement appuyer sur les
bout ons de commande et les
tourner à la position « ON »
quand le brûleur précédent est
allumé.
5. Si l’appareil ne s’allume pas en
5 secondes, fermez le robinet
du brûler, attendez 5 minutes,
et procédez de nouveau à
l’allumage.
Lisez les instructions avant
d’allumer l’appareil:
1. Abra la tapa durante el encendido.
2. Presione y gire la perilla de
control a l a posición “ON”
del quema dor que desea
encender.
3. Oprima y no suelte el botón de
encendido hasta que el
quemador se encienda. Cuan do
se encienda el quemador, gire
la perilla de control a la posición
deseada.
4. Para encender otros quemado res,
repita los pasos 2 y 3. Para
encender un quemador adyacente,
simplemente presione y gire la
perilla de control adyacente a la
posición “ON” cuando ya se
haya encendido el quemador
anterior.
5. Si no se enciende en 5 segundos,
gire los controles del quemador
a la posición de apagado ,
espere 5 minutos y repita el
procedimiento de encendido.
Lea las instrucciones antes
del encendido:
?
1-800-847-5993
www.stokgrills.com
ANSZ21.58a-2008, CSA 1.6a-2008. Aparatos
a gas para cocinar al aire libre. Para utilizar al
aire libre solamente. Si guarda el aparato en un
espacio cerrado, retire el cilindrio de gas y
déjelo en el exterior. Apague el suministro de
gas propano líquido en el cilindro cuando el
aparato no esté en uso.
ANSZ21.58a-2008, CSA 1.6a-2008. Appareils
pour la Cuisson à l’Exterieur Seulement. Si
l’appareil est gardé à l’interieur, détachez et
laissez le cylindre à gaz à l’extérieur.
Fermez l’alimentation de gaz au niveau du
cylindre quand l’appereil n’est pas utilisé .
ANSZ21.58a-2008, CSA 1.6a-2008.
Outdoor Cooking Gas Appliances. For Outdoor
Use Only. If stored indoors, detach and leave
at cylinder when appliance is not in use.
Turn controls and gas or tank OFF when not in
use.
Do not store a spare LP-gas cylinder under or
near this appliance.
WARNING
AVERTISSEMENT
ADVERTENCIA
Flammable gas under pressure.
if ignited.
Contact LP-gas supplier for repairs or disposal
of cylinder or unused LP-gas.
Do not store cylinder in a building, garage
or enclosed area.
Failure to follow these instructions could result
Do not u se this app liance under overhead
combustible surf a ces.
DANGER
DANGER
PELIGRO
Equipado para ser usado con
Gas Propano Líquido solamente.
Equipé pur utilisation avec du
Gaz Propane Liquide seulement.
Le gaz propane s’échappant d’une fuite peut
provoquer un incendie ou une explosion s’il
est allumé.
Communiq uer avec le four nisseur de gaz
propane à propos des réparations ou de
l’élimination de cette bouteille ou du gaz
propane non utilisé.
Ne pas entreposer cette bouteille dans un
Le non-respect de ces instructions pourrait
entraîner des BLESSURES GRAVES ou la
MORT.
Ne pas utiliser cet appareil sous une surface
combustible.
La pérdida del gas LP puede ocasionar un
incendio o una explosión si se enciende.
Comuníquese con el proveedor de gas LP para
reparar o eliminar este cilindro o gas LP sin
usar.
o espacios cerrados.
La inobservancia de estas instrucciones puede
provocar un incendio que resulte en la
MUERTE o en LESIONES GRAVES.
N
combustibles.
Éteindre les commandes et le gaz ou le réservoir
lorsque l’appareil est inutilisé.
Ne pas entreposer de bouteille de propane
liquide de rechange à proximité de l’appareil
ou en-dessous d e celui-ci.
Gire los controles para apagar el gas o el
tanque cuando no estén en uso.
No almacene un cilindro de gas LP de repuesto
debajo o cerca de este aparato.
Nunca llene el cilindro más allá del 80 por
Fig. 1
ETIQUETA DE DATOS
DE GAS NATURAL
ESPECIFICACIONES DEL PRODUCTO
Fuente de combustible .................. gas natural (no incluido)
Longitud de la manguera de gas natural....304,8 cm (10 pi)
CARACTERÍSTICAS
Acoplador para gas natural ........................... 3/8 pulg. NPT
Pression maximale ..Columna de agua de 177,8 mm (7 pulg.)
FAMILIARÍCESE CON EL ACCESORIO
Vea la figura 1.
Para usar este accesorio con la debida seguridad se
debe comprender la información indicada en la parrilla, el
accesorio, y en este manual. Antes de usar este accesorio,
familiarícese con todas las características de funcionamiento
y normas de seguridad del mismo.
CONVERSIÓN A GAS NATURAL – Convertir la parrilla a gas
propano líquido Quattro a gas natural es un proceso simple
que se puede completar con un destornillador Phillips, y
una llave ajustable.
QUEMADORES
A GAS NATURAL
TORNILLOS
PASADOR DE
CHAVETA
CONJUNTO DE MÚLTIPLE
Y VÁLVULAS DE GAS
NATURAL
COLLARIN DE
CONEXIÓN RÁPIDO
MANGUERA DE GAS NATURAL
Para armar la unidad y efectuar ajustes se necesitan las siguientes herramientas (no incluido o dibujado para escalar):
DESTORNILLADOR
PHILLIPS
HERRAMIENTAS NECESARIAS
Fig. 2
LLAVE AJUSTABLE

995000008
8-22-16 (REV:01)
ONE WORLD TECHNOLOGIES, INC.
1428 Pearman Dairy Road, Anderson, SC 29625
1-800-847-5993
www.stokgrills.com
Customer Service Information:
For parts or service, please call 1-800-847-5993 or visit us online at www.stokgrills.com.
The model number and serial number of this kit is found on the data label. Please
record the serial number in the space provided below. When ordering repair parts,
always give the following information:
Model No.
Serial No.
Service après-vente :
Pour acheter des pièces ou pour un dépannage, téléphoner au 1-800-847-5993 ou visiter
notre site www.stokgrills.com.
Les numéros de modèle et de série du trousse sont inscrits sur le étiquette de données.
Noter ci-dessous le numéro de série. Lors de toute commande de pièces détachées,
fournir les informations suivantes :
No. de modèle
No. de série
Información sobre servicio al consumidor:
Para piezas de repuesto o servicio, le suplicamos llamar al 1-800-847-5993 o visitar
nuestro sitio en la red mundial, en la dirección www.stokgrills.com.
El número de modelo y el número de serie de esta kit se encuentran en la etiqueta
de datos. Le suplicamos anotar el número de serie en el espacio suministrado abajo. Al
pedir piezas de repuesto siempre proporcione la siguiente información:
Núm. de modelo
Núm. de serie
OPERATOR’S MANUAL
MANUEL D’UTILISATION
MANUAL DEL OPERADOR
Natural Gas Conversion Kit
Trousse de conversion au gaz naturel
Kit de conversión a gas natural
SGA7040
/