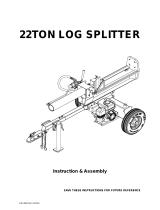
Texas Power Split 2100V User manual

Category
Log splitters
Type
User manual
Power Split 2100 V
DK Betjeningsvejledning
GB User manual
DE Benutzerhandbuch
FR Guide d’utilisation
Texas A/S - Knullen 22 - DK-5260 Odense S - Denmark Version 19.1
Tel. +45 6395 5555 - www.texas.dk - po[email protected]
HUSK AT PÅFYLDE HYDRAULIK OLIE
FØR START (CA. 11 L.)
REMEMBER TO ADD HYDRAULIC OIL
BEFORE USE (APPROX 11 L.)
VOR DEM GEBRAUCH HYDRAULIKÖL
HINZUGEBEN (CA. 11 L)
VEILLEZ A AJOUTER DE L'HUILE
HYDRAULIQUE AVANT UTILISATION
(ENVIRON 11 L.)
18
Table of contents
Safety warnings ............................................................................................................... 18
Engine is shipped without oil. .......................................................................................... 19
Identification of parts ........................................................................................................ 22
Maintain and storage ....................................................................................................... 23
Troubleshooting ............................................................................................................... 23
Specifications .................................................................................................................. 24
Assembly ......................................................................................................................... 25
Operation ......................................................................................................................... 29
For vehicle towing ............................................................................................................ 32
CE declaration of conformity ............................................................................................ 70
Spare parts
Parts list and explosive drawings for the specific product, can be found
on our website www.texas.dk
If you can find part numbers yourself, this will speed up the service.
To purchase spare parts, please contact your dealer.
19
Safety warnings
Read this manual. Serious injury or death can result if safety instructions are not
followed.
Engine is shipped without oil.
Before starting engine, fill with SAE 30 motor oil.
See engine manual for engine oil capacity.
Hydraulic reservoir is shipped without oil.
When adding oil, check oil level using the oil dipstick.
The oil tank should be filled up to the L line on the dipstick. There should be
added around 11 liters.
Closely inspect all log splitter components.
If you have damaged components then: Contact the freight company that
delivered the unit and file a claim.
DANGER (red) indicates an imminently hazardous situation which, if not voided,
will result in death or serious injury.
WARNING (orange) indicates a potentially hazardous situation which, if not
avoided, could result in death or serious injury
CAUTION (yellow) indicates a potentially hazardous situation which, if not
avoided, may result in minor or moderate injury.
CAUTION (yellow) used without the safety
alert symbol indicates a potentially hazardous situation which, if not avoided,
may result in property damage.
You must be 16 or older to operate this machine.
Keep untrained people away.
Never leave the log splitter unattended, while the engine is running.
Wedge can cut through skin and break bones. Keep both hands away from
wedge and endplate. Serious accidents can happen when other people are
allowed inside the work zone. Keep everyone else out of the work zone while
operating control valve.
Do not wear loose clothing. It can get tangled in moving parts of log splitter.
20
Never wear loose clothing, which can get caught in the moving parts of the log
splitter.
Only operate the log splitter in daylight.
Pieces of log may fly out while splitting. Wear safety glasses. Serious eye injury
can occur.
High pressure fluid can inject under skin resulting in serious injury including
amputation.
Make sure all fittings are tight before applying pressure. Relieve system
pressure before servicing.
Do not check for leaks with hand. Instead, use a piece of cardboard to check for
leaks.
If skin injection happens, seek immediate “Surgical Treatment”.
Serious injury or death can occur if towing safety rules are not followed.
Review towing safety warnings in your towing vehicle manual.
Drive safely. Be aware of the added length of the log splitter.
Never ride or transport cargo on the log splitter.
Drive the vehicle with the log splitter securely attached.
Turn off the vehicle before leaving the log splitter unattended.
Choose a level surface to operate the log splitter.
21
Block the log splitter wheels to prevent unintended movement.
Never tow or operate this splitter while under the influence of alcohol, drugs, or
medication.
Risk of fire and explosion.
Hot exhaust fumes from engine can cause fire. Gasoline is highly flammable and
explosive. You can be burned or seriously injured when handling fuel.
Position muffler at least 7 feet from combustible objects.
Before adding fuel, stop the engine and keep heat, sparks, and flame away. Do
not add fuel when engine is running or still hot. No smoking near engine.
Do not pump fuel directly into engine at gas station. Static charge can build and
ignite fuel. Use a safety approved fuel container to transfer gas to the engine.
Wipe up fuel spills immediately.
Only store and handle fuel outdoors. Gasoline vapors can ignite if they
collect inside an enclosure. Explosion can result.
Do not change or add to exhaust system. Fire can result.
Do not change or add fuel tanks or fuel lines. Fire can result.
Before each use, check fuel tank and fuel lines for leaks. Any fuel leak is a
fire hazard. Fix any fuel leaks before starting engine.
During transportation take precautions to make sure machine will not tip over
and cause a fuel leak fire hazard.
Poisonous fumes from engine can kill you. Do not operate indoors even if
Ventilated. For outdoor use only.
You can be burned by muffler.
Do not touch.
22
Identification of parts
1. Tire / Wheel Assembly
2. Fenders
3. Safety Chains
4. 50mm Coupler
5. Manual Canister
6. Switch
7. Engine
8. Lifting Bracket Release Handle C
9. Split Control Handle A
10. Control Valve
11. Cylinder
12. Split Control Handle B
13. Log Fixture
14. Log Cradle
15. Beam
16. Lifting Bracket
17. Gear Pump
18. Hook
19. Rotate Handle
23
Maintain and storage
Before performing maintenance, the log splitter must be placed in maintenance mode.
1. Turn off engine.
2. Move the control valve handle forward and backward to relieve hydraulic pressure.
After performing maintenance, make sure all guards, shields, and safety features are put
back in place. Failure to follow this warning can result in serious injury.
Refer to the engine owner’s manual for engine maintenance.
What When How
Hoses Each Use Inspect for exposed wire mesh and leaks. Replace
all worn or damaged hoses before starting engine
Hydraulic Fittings Each Use Inspect for cracks and leaks. Replace all damaged
fittings before starting engine
Nuts and Bolts Each Use Check for loose bolts
Beam Each Use Apply grease to beam surface
Moving Parts Each Use Clear debris
Troubleshooting
Problem
Cylinder rod will not move SOLUTION: A,D,E,H,J
Slow cylinder rod speed when extending or
retracting
SOLUTION: A,B,C,H,I,K,L
Wood will not split or splits extremely
slowly
SOLUTION: A,B,C,F,I,K
Engine bogs down during splitting SOLUTION: G,L
Engine stalls under low load condition SOLUTION: D,E,L,M
24
Cause Solution
A-Insufficient oil to pump Check oil level in reservoir
B-Air in oil Check oil level in reservoir
C-Excessive pump inlet vacuum Check pump inlet hose for blockage or
kinks
D-Blocked hydraulic lines Flush and clean the splitter hydraulic
system
E-Blocked control valve Flush and clean the splitter hydraulic
system
F-Low control valve setting Adjust control valve with a pressure gauge
G-High control valve setting Adjust control valve with a pressure gauge
H-Damaged control valve Return control valve for authorized repair
I-Internal control valve leak Return control valve for authorized repair
J-Internal cylinder leak Return cylinder for authorized repair
K-Internally damaged cylinder Return cylinder for authorized repair
L-Engine Control out of adjustment Adjust idle control nuts
M-Engine is loaded during idle down mode Use shorter log length (24” or less) to allow
engine to speed up before contact.
Specifications
Model Power Split 2100 V
Engine Texas TG725B (212 cc).
Maximum Pressure 20 ton
Hydraulic Fluid Capacity
Approx. 14,5 liters
Hydraulic Fluid Type
10wt AW32, ASLE H-150, or ISO32
Maximum Towing Speed
30 km/h
Maximum Log Length
61 cm
25
Maximum Log Diameter
30 cm
Maximum Log Weight
45 kg
Hydraulic Cylinder Bore
11,5 cm
Net weight
246 kg
The manufacturer reserves the right to make improvements in design and/or changes in
specifications at any time without incurring any obligation to install them on units
previously sold.
Assembly
Open Shipping Crate
1. Set the shipping Crate on a solid, flat surface.
2. Carefully cut the shipping bands and remove lid of shipping crate.
3. Using two people to lift all parts out of the box
4. Locate all hardware before beginning assembly.
Step 1
Wheel Assembly
1. Attach the wheels (#4) to the
wheel stand secure using flat
washer Ø20 (#6), thin hex slotted
nut M20x1.5 (#8) and cotter pin
Ø4x36 (#5). Install the axle cap
(#7) on the end using rubber
hammer.
26
Step 2:
Attach Tow bar and Support Leg
1. Attach the tow bar (#2) to the
hydraulic reservoir using hex bolt
M12x35 (#35), flat washer Ø12
(#20) and hex lock nut M12 (#25).
2. Attach fenders (#89 & #90) to
the hydraulic reservoir using hex
bolt M8x25 (#69), flat washer Ø8
(#37), lock washer Ø8 (#57) and
hex lock nut M8 (#38). Attach
rubber washer (#131) between
fender and hydraulic reservoir.
Step 3:
Attach Beam and Manual Canister
1. Attach the beam to the tow bar
using Hitch Pin (#50) and R Pin
(#71).
2. Attach rear support leg (#85) to
the tow bar using hex bolt
M10x70(#137) and hex lock nut
M10 (#114). When standing,
secure the beam with a pull handle
(#82) and an R pin (#71).
3. Remove hex bolt M6x65 (#104),
large flat washer Ø6 (#105) and
nylon lock nut M6 (#102) from tow
bar, secure manual canister (#101)
to the tow bar by items #104, #105
and #102.
4. Attach three plastic handles
(#14) to the control handle and two
plastic handles (#14) to the beam
control valve mounting plate by hex
lock nut M10 (#114).
27
Step 4:
Attach Engine and the Oil Pipe
1. Attach the engine (#11) to the
wheel stand using polyurethane
block (#12) and large flat washer
Ø10 (#58), hex bolt M8x65
(#36),flat washer Ø8(#37), lock
washer Ø8 (#57), hex lock nut M8
(#38).
2. Attach the clear oil pipe (#43) to
the gear pump oil inlet connector,
positioning by clamp (#44).
3. Attach the high pressure oil pipe
(#39) to the gear pump oil outlet
connector, sealing with O ring
Ø11.2x2.4 (#32).
4. Attach hydraulic hose (#42) to
hydraulic reservoir connector,
sealing with O ring Ø11.2x2.4
(#32).
Note: Tighten hydraulic hose
connector between torque of 80-
90N·m. Adjust the hydraulic hose
to a non-kinked state and the
connector should be upright.
Step 5:
Electric Breaking Switch
1. Attach two wires of engine to the
electric breaking switch and tighten
with two bolts.
Note: There’s no difference
between the two wires.
28
Step 6:
Attach the Log Cradle
1. Attach log cradle (#53) to the
beam using hex bolt M10x35
(#129) and hex lock nut M10
(#114). The tightness is
appropriate for log cradle rotation.
Step 7:
Add Engine Oil
1. Make sure the log splitter is on a level surface.
2. Remove oil fill cap to add oil.
3. Refer to the separate owner’s engine manual for the amount needed of SAE10W-
30 engine oil; replace oil fill cap/dipstick.
4. Check engine oil level before use and add if needed.
NOTE: During the break-in period check the engine oil level often.
Step 8
Add Gasoline to the Engine
1. Use only clean, fresh, regular unleaded fuel with a minimum 86 octane rating.
2. DO NOT mix oil with fuel.
3. Remove the fuel cap and slowly add fuel to the tank. DO NOT overfill allow
approximately ¼ inch of space for fuel expansion.
4. Screw on the fuel cap and wipe away any spilled fuel.
29
Step 9
Add Hydraulic Oil
1. The log splitter needs to be on a flat, level surface before adding the hydraulic oil.
2. Remove the oil cap from the hydraulic reservoir.
3. Add 11 liters of hydraulic oil AW32, AW46 & universal hydraulic oil are all
acceptable types of fluid. Automatic transmission fluid should be used when
operating in temperatures below 32 degrees
(all units are tested and have excess oil in the ram).
4. Check the hydraulic oil level.
5. Start engine and use the control lever to extend and retract wedge several times to
remove air from the lines.
6. With the wedge retracted, check hydraulic oil level again and fill if necessary.
Operation
Step 1: Press split control handle A and split control handle B at the same time and take
the lifting bracket release handle C with slightly (it can be released after the lifting rack
comes down). Do not touch the lifting control hand if you don’t want to release the lifting
rack.
30
Step 2: Put the wood on the lifting bracket, then push the split control handle A upward.
The wood will be lifted slowly along with the cylinder.
Step 3: When the wood is lifted in place, place the wood in the center of the wedge, and
press split control handle A and split control handle B to split wood.
31
WARNING
1. DO NOT at any time carry passengers, sit or stand on the log splitter.
2. Check the hydraulic oil level and visually inspect all hoses and attachments for
problems.
3. Inspect the engine and make sure the engine oil level is correct.
4. Before towing the log splitter the tires need to be fully inflated.
5. Refer to the vehicle owner’s manual for proper safety and towing instructions.
6. The log splitter must have at least seven feet of clearance from combustible
material. It needs to be on a dry and level surface with good footing. Do not work
on mud, ice, brush or snow. When using the log splitter the work zone must be
maintained at all times
NOTE: Serious accidents can happen when other people are allowed inside the work zone.
Keep everyone else outside the work zone while operating the control lever.
7. Always wear safety gear, eye protection, gloves and work boots when operating
the log splitter
8. The hydraulic oil needs to be above -12C° before starting the engine. Cold
hydraulic oil can damage the hydraulic pump. If outdoor air temperature is below
0C° allow the log splitter to warm up by extending and returning the wedge
several times before splitting wood.
9. Put both support legs in the down position to prevent the log splitter from moving
during operation and block both tires.
32
10. Load a log onto the beam against the endplate (Max Log Length-25”)
11. Make sure hands are clear from the wedge and crush hazard areas
12. Always keep work zone clean and free of split wood and debris.
For vehicle towing
When vehicle towing, pull the log cradle back in
the direction of the arrow and stick the spring pin.
Stick the spring pin when using.
When vehicle towing, pull the lifting
bracket back in the direction of the arrow,
and stick the spring pin. Loose the spring
pin when using. Just separate the lifting
bracket from the
p
in hole.
CE Overensstemmelseserklæring DK
CE Certificate of conformity GB
CE Överensstämmelse SE
CE Certificado de conformidade PT
CE Konformitätserklärung DE
CE Certificat de conformité FR
EU-importer EU-importer EU-importør EU-importador Der EU-importeur
EU-importateu
Texas Andreas Petersen A/S
Erklærer herved at materiel Hereby certifies that the following Undertecknad förklarar på
företagets vägnar att Certifico que a máquina abaixo indicada Bescheninigt hiermit da die
nachfolgenden Certifie par la présente que les machines décrites ci-dessous
Brændekløver Logsplitter Vedklöver Rachador Holzspalter Fendeuse
Power Split 2100 V
Er fremstillet i overensstemmelse med følgende direktiver Is in compliance with the specifications
of the machine directive and subsequent modifications Är i överensstämmelse med de gällande
EU-riktlinjerna Está em conformidade com as especifiaçôes da directiva máquinas e sucessivas
In Übereinstimmung mit den folgende Direktiven Conforme aux directives suivantes
2006/42/EC
Materiellet er udført i henhold til følgende standarder Conforms with the following standards För
att kunna garantera överensstämmelse och nationella standarder, är följande standarder
harmoniserade Conforme as normas aplicadas In Übereinstimmung mit den folgende
Standards Conforme aux directives suivantes
EN ISO 12100:2010, EN 609-1:2017, EN 349:1993+A1:2008,
EN ISO 14120:2015, EN ISO 13857:2008
Serial numbers: 1905221001 - 2105229999
Texas Andreas Petersen A/S Responsible for documentation
Knullen 22 DK-5260 Odense S Johnny Lolk
28.05.2019
Johnny Lolk
Managing Director
  • Page 1 1
  • Page 2 2
  • Page 3 3
  • Page 4 4
  • Page 5 5
  • Page 6 6
  • Page 7 7
  • Page 8 8
  • Page 9 9
  • Page 10 10
  • Page 11 11
  • Page 12 12
  • Page 13 13
  • Page 14 14
  • Page 15 15
  • Page 16 16
  • Page 17 17
  • Page 18 18
  • Page 19 19
  • Page 20 20
  • Page 21 21
  • Page 22 22
  • Page 23 23
  • Page 24 24
  • Page 25 25
  • Page 26 26
  • Page 27 27
  • Page 28 28
  • Page 29 29
  • Page 30 30
  • Page 31 31
  • Page 32 32
  • Page 33 33
  • Page 34 34
  • Page 35 35
  • Page 36 36
  • Page 37 37
  • Page 38 38
  • Page 39 39
  • Page 40 40
  • Page 41 41
  • Page 42 42
  • Page 43 43
  • Page 44 44
  • Page 45 45
  • Page 46 46
  • Page 47 47
  • Page 48 48
  • Page 49 49
  • Page 50 50
  • Page 51 51
  • Page 52 52
  • Page 53 53
  • Page 54 54
  • Page 55 55
  • Page 56 56
  • Page 57 57
  • Page 58 58
  • Page 59 59
  • Page 60 60
  • Page 61 61
  • Page 62 62
  • Page 63 63
  • Page 64 64
  • Page 65 65
  • Page 66 66
  • Page 67 67
  • Page 68 68
  • Page 69 69
  • Page 70 70
  • Page 71 71
  • Page 72 72

Texas Power Split 2100V User manual

Category
Log splitters
Type
User manual

Ask a question and I''ll find the answer in the document

Finding information in a document is now easier with AI