J802

Apexis J802, J011, J012, J0233, J602 Quick Installation Manual

  • Hello! I am an AI chatbot trained to assist you with the Apexis J802 Quick Installation Manual. I’ve already reviewed the document and can help you find the information you need or explain it in simple terms. Just ask your questions, and providing more details will help me assist you more effectively!
Quick Installation Guide
(For MAC OS)
More Security, More Convenience
www.apexis.cc / www.apexis.com.cn
tech@apexis.com.cn
. Check Packing List:
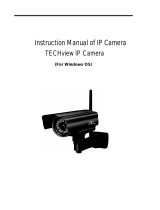
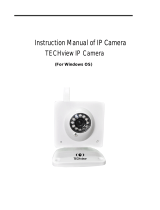
Camera * 1
Cable * 1
Power Supply * 1
Antenna * 1
CD * 1
Bracket * 1
Screw * 1 set
Installation Guide * 1
(Note: Antenna is for WIFI model only)
This Quick Installation Guide is for below models:
J011 J012 J802 J803
J0233 J601 J602
J901
. How to Connect
Connect Power Adapter to device. Connect Camera to Router with
Cable ,Connect Antenna to WIFI port and screw it.
. LAN view
Step 1:
Put the supplied CD into the CD-ROM.
Step 2:
Find the folder , copy the total file to your MAC, and
then you can use the IP Camera Tool.
Step 3
Double click the IP Camera Tool and you could see the following picture.
The IP camera tool could find the cam’s IP automatically after you plug the
network cable. If not, Please make sure that DHCP is enabled in your router.
Don’t enable MAC address filter. Or disable firewall or antivirus to try again.
Double click the IP address on the IP camera tool and you will enter the login
UI.
Note : if your PC IP address is on 192.168.0.* segment , please
change the PC IP add to 192.168.1.* segment first , for the default
setting of IP camera is 192.168.1.* .
Steps as below
Go to : , From internet and WIFI area ,click
From , you can find the below info .
change the IP address to 192.168.1.155, then apply .
Step4:
Double click the IP address to view the camera, you can find below:
Step 5:
Choose “Server Push Mode” to view the camera
WAN View
Step 1 :
Go to Network Basic Network Settings to find the IP address and http port
of the camera . you can change the setting here and then click Submit .
Please make sure only the blue area of the IP camera is differ as PC , other
setting should be exactly the same .
Step 2Login Router (Port mapping/Port forwarding)
1. Please refer to the router's specifications, Access your router and find
theVirtual SeverorPort Forwarding settings (Below taking D-link
for example)
2. As shown on above figure, enter the IP address and port you set, then
save the settings .
Note:
Different routers have different setting interfaces, please refer to the routers
manual
For most routers, users can find "virtual server" in the setting page, if not, do
"port forwarding". For specific settings, please refer to router manual.)
Step 3
Input the product labels DDNS (Numbers and letters must be correct) into the
browser, you may access the network video camera, For example:
Step 4
After setting is ok, you can view the network camera. If you want other
settings, please reset other parameters according to the user manual in the
CD .
/