Page is loading ...

INSTALLATION INSTRUCTIONS
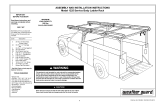
Aluminum and Steel Cross and Saddle Boxes Models 114 thru 159
IMPORTANT
BEFORE YOU BEGIN
Read these instructions and
warnings completely before
installation.
Periodically lubricate the
Cover Striker with a heavy
white grease, all pivot
points on the Latch Mecha-
nism, Latch Rod Rubber
Grommets (Saddle Boxes
only) and Hinge with a me-
dium weight oil. Light-
weight oil is too light for
this application, unless ap-
plied more frequently.
BOLT KIT
Bolt Kit #32-0005 is provided with
your box. Check this bolt kit to be
sure the following parts are in-
cluded:
Qty. Description
4 5/16-18 Nylon Lock Nut
4 Fender Washer
4 Retaining Washer
4 "J" Bolt
PARTS LIST
• 1- Cross box or Saddle box
• 1- Bolt Kit
• 2 Mounting Pads (20" or 27")
• 2- Keys
TOOLS REQUIRED
• Ratchet Wrench with 1/2" Deep
Well Socket
• Ruler
• Tape
INSTALLATION INSTRUCTIONS
NOTE: Cover closure will vary
from the flexing of the box, until
the box is bolted (using two "J"
bolts per side) to the truck bed.
DANGER
Danger of explosion. Do not use this product for storing or trans-
porting flammables, explosives, hazardous materials, or hazardous
waste, such as containers of gasoline, solvents, gun powder,
dynamite, propane tanks, acetylene tanks and cutting torches.
This product is only intended and safe for use in storing and trans-
porting small tools, equipment and other similar materials. Any
modifications made to, or unintended use of this product, could
create a hazardous condition that can cause death, serious
personal injury or property damage.
NOTE: Some mounting configura-
tions may result in interference
between the "J" bolt and the
stake pocket. If this occurs, it will
be necessary to drill a hole at the
top of the stake pocket at the front
"J" bolt mounting location. Place
unit in desired location and mark
the front slots on the mounting
pad, drill the stake pocket with a
1/2" drill bit, at an upward angle,
where the stake pocket and the
top of the bed meet
(see Figure 4.) at this location.
Rev. H 11/99 Part No. 24-0128
1. Park vehicle on level ground. Place
Mounting pads on vehicle & tape them,
so they won't move.
NOTE: If installing on a Toyota Tun-
dra with "J" bolts, you will have to
turn box over and drill 3/8" dia.
holes 3/8" in from the Partition and
stagger 3/8" in from the slots (see
Figure 5.) Assemble "J" bolts onto
box before setting the box into the
truck. (See Figure 1) Turn "J" bolts
to the side to avoid hitting top of
bed when placing box into bed.
2. Set the box into position on the top
sides of the bed an equal distance from
the front of the bed. Also adjust equal
side to side placement. Open the
cover.
NOTE: If your pickup has a
bedliner, you may need to drill,
trim, or cut the liner for proper
installation of this product.
NOTE: If installing the box on a
1997 or newer Ford Full Size truck,
it will be necessary to assemble
the "J" bolt on the box before
placing the box on the truck.
Follow Step 3. for "J" bolt
assembly.

Bed Lip
- NOTICE -
Any modification or unintended use of this product shall immediately void all manufacturers warranties. Manufac-
turer disclaims all liability for injuries to persons or property resulting from any modification to, or unintended use
of this product.
If you have any questions, please give us a call.
Call Toll Free 1-800-456-7865
WEATHER GUARD® products are protected by one or more of the
following patents or trademarks:
U.S. - 5145087, 5308126, 842268, 1661625, 1663369, 1676545,
2228051; Canada - 282725; U.K. - 1400720; N.Z. - B296049 other
patents and trademarks pending.
KNAACK MANUFACTURING COMPANY
420 E. TERRA COTTA AVENUE
CRYSTAL LAKE, ILLINOIS, 60014 USA
815-459-6020
©1999 Knaack Manufacturing Company
WEATHER GUARD® PRODUCT REFINISHING PROCEDURES
Figure 2.
Figure 4.
Fender
Washer Retaining
Washer
"J" Bolt
Mounting
Pad
5/16-18 Nylon
Lock Nut
Figure 1.
End Panel
Slot
Figure 3.
3. Attach the Retaining Washer, Fender Washer and Nylon
Lock Nut finger tight to the top threads of the “J” bolt (
see
Figure 1.
). Insert the “J” bolt through the end panel slot (
see
Figure 2.
). Pull the “J” bolt upward by the Nylon Lock Nut so
that it hooks under the bed lip. For a Dodge pickup with a
cab protector, lead the "J" bolt into the drilled hole. Slide the
Retaining Washer further onto the “J” bolt by pushing it down
with the Fender Washer to hold it in place. Tighten the Nylon
Lock Nut (
see Figure 3.
). Repeat this for the remaining three
"J" bolts.
All WEATHER GUARD® products are finished with a polyester
powder coating, and it is important to follow these procedures to get
proper adhesion. As Knaack Manufacturing Co. cannot control the
finishing of the products, the warranty for
WEATHER GUARD® products on paint is not applicable on
refinished products.
1. Sand the surface to be painted with 180-200 grit sand paper to
rough up the surface. This should be followed by wet sanding with a
400 grit wet or dry paper.
2. Wipe down the sanded surface with ketone based thinner.
This removes the dust and softens the powder coating for better
paint adhesion.
3. Wipe sanded area with a tack rag to remove loose dust and
particles before painting.
NOTE: Do not use a lacquer over the powdered coating.
Drill 3/8" dia. hole
2 places
3/8" 3/8"
Figure 5.
Special Mounting for Toyota Tundra
with "J" bolts
NOTE: Periodically check the tightness of "J" bolts to insure
proper attachment.
/