Page is loading ...

QuickGuide
US
“PlayStation” and the “PS” Family logo are registered trademarks of
Sony Interactive Entertainment Inc.
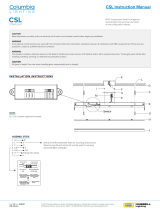
CONNECTIONS
In H-pattern mode or SQ mode Only in SQ mode
Use only the USB cable (F) with straight plug packaged with
the CSL Elite Racing Wheel to avoid damage to the USB port.
* also to PC
PC compatibility not tested nor endorsed by Sony Interactive Entertainment LLC.
H-PATTERN SHIFTERS STATIC SHIFTER / SEQUENTIAL SHIFTER
PEDALS
HANDBRAKE
USB to PlayStation®4*
IMPORTANT!
CONTENTS
A
• CSL Elite Wheel Base (PS4™ version) (A)
• Table clamp (B)
• Table clamp screw with handle (C)
• Power supply unit (D)
• Power cord (regional) (E)
• USB connection cable (F)
• O-Ring (G)
• CSL Elite Steering Wheel (H)
• Allen key 5 mm (I)
• Fixation screw M6 x 18 mm (at head) (J)
• Racing style button caps for CSL Elite Steering Wheel (K)
• PS4™ button caps for (optional)
ClubSport steering wheels (L)
• Black washers (M) (for mounting ClubSport Static Shifter Paddles)
B C
H I JG
D
K
For detailed information please download the user manual
from www.fanatec.com/support. This is just a QuickGuide
and you will miss a lot of features if you don’t read the user
manual.
This product is under warranty of Endor AG, E.ON-Allee 3,
84036 Landshut, Germany,
US/CAN Support Telephone: +1 (424) 343-8129,
Email: [email protected].
Refer to the chapter ‘warranty’ of the user manual as well as
the terms & conditions of Endor AG on
https://www.fanatec.com/us-en/terms-and-conditions-us.html.
Please send Fanatec product returns to this address:
Fanatec Service Center c/o Ronay McClay 14221 Artesia Blvd
La Mirada, CA 90638 USA
MANUAL
The CSL Elite Racing Wheel comes fully functional out-
of-box but we recommend to update the rmware. This
requires a PC for the update procedure and an internet
connection to download the latest driver and rmware from
www.fanatec.com/downloads. Follow the user manual
instructions.
Compatibility to PlayStation®4 games is a case-by-case basis.
Compatible titles are listed on
https://www.fanatec.com/us-en/support/faq/details&id=103.
ATTENTION
L
To turn on the CSL Elite Racing Wheel, connect it to power
and press the “ ” button for about one second, on the right
side of the CSL Elite Racing Wheel.
To turn off the CSL Elite Racing Wheel, press and hold the “
” button for 5 seconds.
ON AND OFF
NOTE: Only use the power supply (D) and power cord (E)
included with this product.
F
E
www.fanatec.com
7 8 9 10 11
M

1
3
2
TUNING OPTIONS
To enter tuning menu press button . To navigate inside
the menu, use the directional stick:
• Press directional stick up or down to access 5 setups
• Press directional stick right or left to go through the op-
tions and press or hold it up or down to change option
values
SHIFTER CALIBRATION
To enter shifter calibration mode, simultaneously press the
two buttons + , highlighted below.
For the detailed process read shifter manual.
CENTER CALIBRATION
If a center calibration is needed (e. g. after rmware update of
wheel base) you need to enter the tuning menu by pressing
button as shown on the graphic “S_...” will appear on
the display. Now turn the wheel to its center position and
press two buttons + at the same time to calibrate the
wheel center.
S_...
1 Press tuning button
2 Turn the steering wheel to the
center position
3 Press the two buttons +
at the same time
DETACHING THE RIM
Slide CSL Steering Wheel (H) off
CSL Elite Wheel Base (A) axle.
Turn out the xing screw (J) and open
clamp ring mechanism.
Use only the Allen Key (I) which comes
with the CSL Elite Racing Wheel!
Store xation screw (J) and Allen key (I) safely
for later use.
1 1
2
3
2
3
4
5
6
ATTACHING THE RIM
Align CSL Elite Wheel Base (A) axle
to correct position.
Slide CSL Elite Steering
Wheel (H) onto CSL Elite
Wheel Base (A) axle.
Use xation screw (J) and Allen key (I)
from box contents.
Push CSL Elite Steering Wheel (H)
until the screw hole matches with hole
on CSL Elite Wheel Base (A) axle.
Turn the CSL Elite Steering Wheel (H) top side down to see
the bottom side of the clamp ring to follow next step below.
Turn in xation screw (J) to x clamp
ring mechanism.
Use only the included Allen key (I).
1 2 3 4 5 6
IMPORTANT: Tighten only by using the
short lever of Allen key!
The CSL Elite Racing Wheel will start in “PlayStation®4 Mode”
by default when the CSL Elite Racing Wheel (H) is attached to
the CSL Elite Wheel Base (A). To switch to other modes press
the ‘Mode’ button once. The LED above the “ ” button will
indicate the current operation mode:
Blue indicates “PlayStation®4 mode”
Red indicates “PC mode”*
Purple indicates “ClubSport Wheel
Base V2 Compatibility Mode”
* PC compatibility not tested nor endorsed by
Sony Interactive Entertainment LLC.
MODES
Mode
LED
EXCHANGEABLE BUTTON CAPS
To detach the button caps, simply pull them out by hand.
They can be replaced with the included set of racing style
button caps for CSL Elite Steering Wheel (K).
Fanatec® is a registered trademark of Endor AG
Designed and developed by Endor AG in Germany
Manufactured by
Manufactured & distributed under license by Sony Interactive Entertainment LLC.
E.ON-Allee 3 - 84036 Landshut - Germany
US/CAN Telephone: +1 (866) 292-6226
Email: [email protected]
Internet: www.fanatec.com - www.endor.ag
Turn the table clamp screw (C)
into the bottom centre of the
CSL Elite Wheel Base (A).
TABLE CLAMP
Insert the table clamp screw
with handles (C) into the table
clamp (B).
1
2
Slide the CSL Elite Wheel Base
(A) onto the table top until the
limiter blocks stop sliding at
the edge of the table.
NOTE: Table clamp (B) has to
be below table top.
3
Tighten the table clamp (B)
by turning the table clamp
screw (C). Ensure that the
table clamp’s feet remain well
aligned with the bottom of the
table plate.
4
HARD-MOUNTING
To hard-mount the wheel base, rst disassemble the two blocks from the underside (lower left picture) using a 3 mm Allen key (not included). The CSL Elite Wheel Base +
offers a three-point hard-mount location on the underside (lower right picture):
IMPORTANT: Use only good quality M6 bolts. Choose the correct bolt
length to prevent the thread from reaching more than 16 mm into the wheel
base. Example: If your table is 20 mm thick, the bolts must not exceed a
total thread length of 36 mm! Always use all three hard-mount points as this
allows for a proper and stable installation and avoids damage! Table
max 16mm
X
NOTE: To hard-mount
the CSL Elite Wheel
Base + to a table or rig
with bolts please, nd
the printable drilling
template in the down-
load area of our web-
site:
www.fanatec.com
/