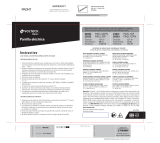
BACKFRONT
INSTRUCTIVE
YOU MUST PUT IT INSIDE THE COLOR BOX
INSTRUCTIVO
Lea las siguientes instrucciones de uso cuidadosamente antes de instalar.
Serie de luces 49994
SL-7I
49993
SL-14I
Importado por Truper, S.A. de C.V. Parque Industrial 1, Parque Industrial Jilotepec,
Jilotepec, Edo. de Méx. C.P. 54257 Made in/Hecho en China, Tel.: 76 1782 9100.
www.truper.com 02-2021 AD
Tensión:
Frecuencia:
Potencia:
Flujo luminoso:
Fuente de Luz:
Vida:
Tipo:
Base:
Temperatura de color:
IP65
Largo:
Distancia entre cada portalámpara:
127 V~
60 Hz
264 W (11 W por bombilla) SL-14I
132 W (11 W por bombilla) SL-7I
40 lm por bombilla
Incandescente
2 000 h
S14
E26 / E27
2 200 K
14.6 m - SL14I
7.3 m - SL-7I
55 cm
ESPECIFICACIONES
IMPORTANT:
INSTRUCTIVE MUST BE PRINTED ON REGULAR
PAPER IN PANTONE BLUE 072 C INK.
Instructive
Fold the instructive
sheet and put it
inside the color box.
“Condential Information property of Truper, S.A. de C.V."
TECHNICAL DATA
IMAGES / LINKS
SOFTWARE: Illustrator CC
MAC & PC Platform compatible
21 x 27 cm
Instructive
INKS & die cuts
Packaging:
Dimensions:
CUT-LINE
(Do not print)
PANTONE Blue 072 C
El cable de alimentación tiene sujeta-cables tipo: Z
El cordón de alimentación no puede sustituirse.
En caso de deterioro, el aparato debe desecharse.
Fusible incluido en clavija.
CAMBIO DE LAS BOMBILLAS
RIESGO DE DESCARGA ELÉCTRICA - Desconecte el suministro eléctrico antes de
cambiar las bombillas.
Para series de luces NO cambie las bombillas durante la lluvia o cuando estén
mojadas.
1. Cambie las bombillas solamente en condiciones de clima seco y tranquilo.
2. Desatornille las bombillas existentes sosteniendo ligeramente el portalámparas
en una mano y girando en dirección contraria a las manecillas del reloj.
Las bombillas pueden estar apretadas en el portalámparas. Esto es normal, y
previene que entre humedad en el portalámparas.
3. Reemplace con bombillas de base E26 / E27. Atornille la bombilla en el
portalámparas en dirección a las manecillas del reloj hasta que la parte superior
del portalámparas haga un sellado apretado alrededor de la bombilla y la bombilla
haga contacto con el portalámparas. Es adecuado para bombillas incandescentes
CFL o LED.
Las bombillas que se instalan de manera incorrecta no hacen un sello adecuado y
pueden ser causa de lesiones o la muerte debido a una descarga eléctrica.
La serie de luces no debe de ser utilizada por niños ni por personas con capacidades
físicas, sensoriales o mentales reducidas; tampoco por personas sin experiencia o
conocimientos en su uso, a menos que estén supervisadas por una persona
responsable de su seguridad o reciban instrucciones previas sobre el uso de la serie
de luces.
Los niños deben de estar bajo supervisión para asegurarse de que no jueguen con
la serie de luces. Se debe de mantener una estricta supervisión si niños o personas
discapacitadas llegan a utilizar cualquier tipo de aparato electrodoméstico o estén
cerca de él.
INSTALACIÓN
1. Si se instala en el cable guía, instale el anillo que se encuentra en la parte trasera
del sostén de la bombilla al cable guía utilizando un cable de gancho en “S” o una
brida para cables.
2. Si no se utiliza un cable guía, conecte con seguridad a la estructura al principio,
en el medio y al final de CADA serie de luces.
Cuando se utilizan las luminarias portátiles para exteriores, se deben seguir medidas
básicas de seguridad. Reduzca el riesgo de incendio, descarga eléctrica y lesiones
personales que incluye lo siguiente:
1. No utilice estos productos en exteriores, a menos que estén etiquetados como
adecuados para uso en exteriores.
2. Cuando se utilizan productos para aplicaciones en exteriores, conecte el
producto a un tomacorriente con interruptor de circuito de falla a tierra (GFCI).
En caso de no tenerlo, contacte a un electricista certificado para la instalación
correcta.
3. No instale el producto cerca de calentadores de gas o eléctricos, chimeneas,
velas o fuentes de calor similares.
4. No sujete el cableado del producto con grapas o clavos. No lo coloque sobre
ganchos afilados o clavos. Instale solamente con los accesorios de montaje
proporcionados.
5. No coloque las bombillas sobre su cable u otros cables.
6. No cuelgue objetos del cable, alambrado o serie de luces.
7. No utilice este producto para propósitos diferentes a los cuales está diseñado.
8. No cierre puertas o ventanas sobre el producto o cable de extensión ya que se
daña el aislamiento.
9. No cubra el producto con tela, papel u otro material cuando esté en uso.
10. Lea y siga todas las instrucciones que se describen en el producto o que se
entregan con el producto.
11. Riesgo de descarga eléctrica. No utilice un cable de extensión cerca del agua o
donde se pueda acumular agua. Mantenga la serie de luces al menos a 4.88 m
de albercas o spas. Mantenga las clavijas y receptáculos secos.
12. No sumerja la serie de luces.
13. Desconecte del suministro eléctrico antes de colocar cables, cambiar las
lámparas o llevar a cabo cualquier tipo de servicio. El kit de serie de luces se
entrega con una clavija de 3 patas que solamente cabe en un tomacorriente
igual.
14. No altere la clavija.
15. Para reducir el riesgo de incendio use focos tipo S14.
16. Para reducir el riesgo de incendio no cambie de manera deliberada el contacto
del sostén de la serie de luces.
Se surte con 24 portalámparas y 36 bombillas de 11 W c/u tipo S14 (SL-14I)
Se surte con 12 portalámparas y 18 bombillas de 11 W c/u tipo S14 (S L-7I)
17. Sustituya el fusible, solamente por otro de la misma capacidad. (incluye fusible
de repuesto).
Sume las potencias de cada serie de luz conectado de manera continua.
LA POTENCIA NO DEBE DE EXCEDER 600 W
NO CONECTAR MÁS DE 2 SERIES - SL-14I
NO CONECTAR MÁS DE 4 SERIES - SL-7I
Proteja las conexiones de la exposición directa a la lluvia.
ADVERTENCIA
PARA REEMPLAZAR EL FUSIBLE
Sujete el enchufe y retírelo del receptáculo u otro dispositivo
de toma de corriente. No desenchufe tirando del cable.
Extraiga la cubierta del fusible en el cable y utilice un pequeño
desarmador de cabeza plana para quitar el fusible.
Riesgo de incendio. Reemplace el fusible sólo con fusibles de
5 A y 125 V (suministrado con el producto). Cierre la cubierta
de acceso del fusible en la parte superior del enchufe de
fijación.
Ancle el cable guía
a la estructura Ancle el cable guía
a la estructura
Cable guía Utilice un gancho en “S”
o una brida para cables
ESTRUCTURA ESTRUCTURAESTRUCTURAAdjunte al soporte
estructural Adjunte al soporte
estructural
SL-7I
12 Portalámparas
18 Bombillas incandescentes
1 Fusible de repuesto
Contiene
SL-14I
24 Portalámparas
36 Bombillas incandescentes
1 Fusible de repuesto
INSTRUCTIVE
Read the following instructions for use carefully before installing.
String lights 49994
SL-7I
49993
SL-14I
Imported by Truper, S.A. de C.V. Parque Industrial 1, Parque Industrial Jilotepec,
Jilotepec, Edo. de Méx. C.P. 54257 Made in/Hecho en China, Tel.: 76 1782 9100.
www.truper.com 02-2021 AD
Voltage:
Frequency:
Power:
Luminous flux:
Light source:
Life:
Type:
Base:
Color temperature:
IP65
Length:
Distance between each lamp holer:
127 V~
60 Hz
264 W (11 W per bulb) SL-14I
132 W (11 W per bulb) SL-7I
40 lm per bulb
Incandescent
2 000 h
S14
E26 / E27
2 200 K
48 ft - SL14I
24 ft - SL-7I
2 ft
TECHNICAL PARAMETER
The power cord has cable clamps type: Z
The power cord cannot be replaced.
In case of damage, the device must be discarded.
Fuse included in plug.
BULBS REPLACEMENT
ELECTRICAL SHOCK HAZARD - Disconnect the power supply before changing bulbs.
For series of lights DO NOT change bulbs during rain or when wet.
1. Change bulbs only in dry, calm weather conditions.
2. Unscrew the existing bulbs by lightly holding the bulb holder in one hand and
turning in a counterclockwise direction. The bulbs may be tight in the bulb holder.
This is normal, and prevents moisture from entering the bulb holder.
3. Replace with E 26 / E 27 base bulbs. Screw the bulb into the socket in a clockwise
direction until the top of the socket makes a tight seal around the bulb and the
bulb makes contact with the socket. It is suitable for CFL or LED incandescent
bulbs.
Improperly installed bulbs do not make a proper seal and can cause injury or death
due to electric shock.
The light string should not be used by children or by persons with reduced physical,
sensory or mental capabilities, or by persons with no experience or knowledge in
its use, unless they are supervised by a person responsible for their safety or have
received prior instruction in the use of the light string.
Children should be supervised to ensure that they do not play with the string of
lights. Close supervision should be maintained if children or handicapped persons
come in contact with or near any appliance.
INSTALLATION
1. If installed on the guide wire, install the ring on the back of the bulb holder to the
guide wire using an "S" hook wire or cable tie.
2. If a guide cable is not used, securely connect to the structure at the beginning,
middle and end of EACH series of lights.
When using portable outdoor luminaires, basic safety precautions should be followed.
Reduce the risk of fire, electric shock and personal injury including the following:
1. Do not use these products outdoors unless they are labeled as suitable for
outdoor use.
2. When using products for outdoor applications, connect the product to a ground
fault circuit interrupter (GFCI) outlet. Otherwise, contact a certified electrician
for proper installation.
3. Do not install the product near gas or electric heaters, fireplaces, candles or
similar heat sources.
4. Do not fasten the product wiring with staples or nails. Do not place on sharp
hooks or nails. Install only with mounting hardware provided.
5. Do not place the bulbs on its cable or other wires.
6. Do not hang objects from the cable, wiring or light string.
7. Do not use this product for purposes other than those for which it is designed
for.
8. Do not close doors or windows on the product or extension cord as this will
damage the insulation.
9. Do not cover the product with cloth, paper or other material when in use.
10. Read and follow all instructions described on the product or delivered with the
product.
11. Risk of electric shock. Do not use an extension cord near water or where water
can accumulate. Keep the light series at least 16 ft away from pools or spas.
Keep plugs and receptacles dry.
12. Do not submerge the light series.
13. Disconnect from power supply before wiring, changing lamps, or performing
any service. The light series kit is supplied with a 3-prong plug that will only fit
into a matching outlet.
14. Do not alter the plug.
15. To reduce the risk of fire, use S 14 type bulbs.
16. To reduce the risk of fire, do not deliberately change the contact of the light
series holder.
Supplied with 24 lamp holders and 36 bulbs of 1 W each, type S 14 (SL-14I)
Supplied with 12 lamp holders and 18 bulbs of 1 W each, type S 14 (SL-7I)
17. Replace the fuse with a fuse of the same rating only (includes spare fuse).
Add the wattage of each continuously connected light series.
POWER SHOULD NOT EXCEED 600 W
DO NOT CONNECT MORE THAN 2 SERIES - SL-14I
DO NOT CONNECT MORE THAN 4 SERIES - SL-7I
Protect the connections from direct exposure to rain.
WARNING
TO REPLACE THE FUSE
Hold the plug and remove it from the receptacle or other
outlet device. Do not unplug by pulling on the cord. Remove
the fuse cover on the cord and use a small flathead screwdriver
to remove the fuse.
Risk of fire. Replace the fuse only with 5 A, 125 V fuses
(supplied with the product). Close the fuse access cover on
top of the fixing plug.
Anchor guide wire to
the structure
Anchor guide wire
to the structure
Guide wire Use an “S” hook or a
cable tie
STRUCTURE STRUCTURESTRUCTUREAttach to the
structure support Attach to the
structure support
SL-7I
12 Lamp holders
18 Incandescent Bulbs
1 Spare fuse
Contains
SL-14I
24 Lamp holders
36 Incandescent Bulbs
1 Spare fuse
Incandescentes Incandescents
-
 1
1
Volteck SL-7I Owner's manual
- Type
- Owner's manual
- This manual is also suitable for
Ask a question and I''ll find the answer in the document
Finding information in a document is now easier with AI
in other languages
Related papers
Other documents
-
Insignia NS-STRL48FT3 User guide
-
 Volteck Lait ARB-201L Owner's manual
-
 Volteck Lait VAP-001L Owner's manual
-
optonica 5054 User manual
-
 Volteck Lait ARB-101L Owner's manual
-
 Volteck Lait EMP-201LC Owner's manual
-
 Volteck Lait COL-101L Owner's manual
-
 Volteck Lait EMP-104S Owner's manual
-
 Volteck Lait EMP-401LC Owner's manual
-
 Volteck Lait EMP-202LC Owner's manual

