Page is loading ...

Instruction manual
Important Safety Instructions:
1. Read these instructions thoroughly and retain for future reference.
2. Follow all instructions.
3. Do not expose this speaker to water, corrosive liquids or gases. Store the speaker in a clean, dry place.
4. Do not use the speaker near windows, or near heat sources like radiators, gas stoves or other apparatus that
produce heat.
5. Do not place any naked flame sources such as lit candles on or near the speaker.
6. Clean only with a soft, dry cloth.
7. Do not expose the speaker to rain or moisture.
8. Do not cover the speaker during use.
9. No user-serviceable parts inside. Do not open.
10. This product is not a toy! Keep away from children.
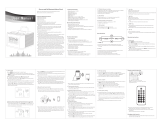
Over view
Charging the Battery
Before using, fully charge the battery using the supplied USB cable. Plug in to any USB port supplying power
(Laptop, Computer, AC Charger, Car Charger, etc.).
A solid red LED light indicates that the speaker is charging, when fully charged it will turn off.
Power on/off
Switch the “ON/OFF” button to power on/off the unit.

Wireless charging
With the speaker turned on, press and hold the “Phone/play/pause” button (rotation control button), it will show the
red & blue lights flashing together. Then red & blue flashing lights change to solid blue LED light, put your device
(which with wireless charging function) on it to charge.
Press and hold the “Phone/play/pause”button again to power off wireless charging function.
Note: Please power off wireless charging function when you are using FM radio
Bluetooth Pairing
With the speaker turned on, it comes to clock mode with time displayed on LED area. Press “M” button, the
Bluetooth symbol is flashing (this means that the Bluetooth mode has been activated). Open the Bluetooth® settings
on your phone, tablet or other Bluetooth enabled audio device, make sure Bluetooth is on and search for
“AR-1936”. Once found, click on it. You may be required to enter a password. If so, please enter 0000.
Once paired, the Bluetooth symbol will stop flashing.
Playing Music
Select desired song or playlist on your phone, tablet or other Bluetooth enabled audio device.
Press “play/pause” button (rotation control button) to start or pause the music.
Press the “Pre” button or “Next” button to go to previous or next song.
Revolve the “Volume +/-” button (rotation control button) to adjust the volume.
Hands-free for calling
Pick up or hang up a call by pressing the rotation control Button.
Press and hold the rotation control Button to reject when a new call comes in.
Press the rotation control Button twice to redial the last phone call.
Using the AUX / TF card / USB drive Inputs
Insert a TF card / USB drive directly into the unit to play music from the TF card / USB drive via the speaker.
Playable Format: MP3. Max size of TF card / USB drive that can be connected: 32GB
FM Radio Mode
Press M button to enter FM Radio Mode.(The device have built-in antenna. You also can plug in Micro USB Cable to
extend the antenna.)
Long Press M button , the radio will search channels automatically. Channels will be stored after auto search ends.
Press “Pre” button or “Next” button to go to previous or next channel.
Clock
Long press “Time mode” button to enter Clock Mode, the hour digital will flash, press the “Next song / Time
setting” or “Pre song/ Time setting” button to adjust the hour, Press the “Time mode” again for setting the
minutes. After all setting, long press the “Time mode” button to confirm.
Short press “Time mode” button to turn off/on the LCD display.
Alarm clock 1
Long Press “Alarm Clock1” button to enter the alarm clock 1 setting. The hour digital will flash, press the
“Next” or “Pre” button to adjust the hour. Press the “Alarm Clock 1” button again for setting the minutes.
After all setting, press the “Alarm Clock 1” button to confirm time, and you will enter the 5 options for the
alarm rings, press the “Next” or “Pre” button to select the ring you like, long press the “Alarm Clock 1” button
to confirm.
When the alarm clock rings, press the “ SNOOZE” button to snooze it, press “Alarm clock 1” or “Alarm clock
2” buttons on the top to stop the ring.
Press “Alarm Clock1” button to turn off/on the Alarm clock as you setting.

Alarm clock 2
Long Press “Alarm Clock 2” button to enter the alarm clock 2 setting. The hour digital will flash, press the
“Next” or “Pre” button to adjust the hour. Press the “Alarm Clock 2” button again for setting the minutes.
After setting time, press Alarm Clock 2” button and you will enter the 5 options for the alarm rings, press the
“Next” or “Pre” button to select the ring you like, long press the “Alarm Clock 2” button to confirm.
When the alarm clock rings, press the “SNOOZE” button to snooze it, press any other buttons on the top to
stop the ring.
Press “Alarm Clock 2” button to turn off/on the Alarm clock as you setting.
SNOOZE
Long press “SNOOZE” button to adjust the bright of LCD display to dark/middle bright/bright.
SLEEP TIMER
When you palying music by Bluetooth/TF card/Aux in/FM radio, you can open the sleep timer functionality:
Short press the “SNOOZE” button that it will display the number 30, after 3 seconds, it will automatically turn
on the timer for after 30 minutes to stop playing music and return to the clock mode.
Short press the “SNOOZE”button can be selected: 30→60→120→180(minutes)→OFF
Alarm clock ringtone:
Option 1-3, Built-in Speaker ringtone
Options 4 from FM
Options 5 from TF card
Specifications:
Input: 1 x 3.5mm Aux
Audio Sources: Bluetooth®, USB, microSD, FM Radio
Bluetooth® Version: 5.0+EDR
Transmission Range: Up to 10m
Speaker: 2 x 5W
FM Frequency: 87.5-108.0MHz
USB/microSD Capacity: Up to 32GB
Playback Time: 3-8 Hours
Charging Time: Up to 6.5 Hours
Qi Standard: 1.2.4
Time Format: 24 Hour
Charging Efficiency: 73% (Max)
Charging Distance: ≤8mm
Battery Capacity: 4000mAh
Wireless Charging Output Power: 5W
Power: 5VDC, 2A
Power Consumption: 700mA (Max)
Dimensions: 210(W) x 125(D) x 85(H)mm
/