Page is loading ...

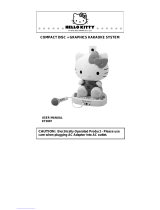
iSM-1010
Pedestal CDG karaoke system with built-in video camera,
7” TFT LCD color monitor, iPod docking and AM/FM
radio.
Wireless & wired microphone included.
Sistema Karaoke CDG de Pedestal con cámara de video
integrada, monitor en colores TFT LCD de 7”,
acoplamiento a dock de iPod, y radio AM/FM.
Incluye micrófono inalámbrico y con alambre.
Appareil de Karaoke sur pied avec caméra de vidéo
intégrée, moniteur LCD TFT de 17,8cm, port pour iPOD
et radio Am / Fm.
Micro sans fil & avec fil compris.

WARNINGS
CAUTION
RISK OF ELECTRIC SHOCK
DO NOT OPEN
E1
TO PREVENT FIRE OR SHOCK HAZARD. DO NOT EXPOSE THIS APPLIANCE TO RAIN
OR MOISTURE.
THIS APPLIANCE SHALL NOT BE EXPOSED TO DRIPPING OR SPLASHING WATER AND
THAT NO OBJECT FILLED WITH LIQUIDS SUCH AS VASES SHALL BE PLACED ON
APPARATUS.
The lightning flash with
arrowhead symbol, within an
equilateral triangle, is
intended to alert the user to
the presence of unisulated
“dangerous voltage” within the
product’s enclosure that may
be of sufficient magnitude to
constitute a risk of electric
shock to people.
WARNING: TO REDUCE THE
RISK OF ELECTRIC SHOCK, DO
NOT REMOVE COVER (OR
BACK). NO USER-SERVIC-ABLE
PARTS INSIDE. REFER
SERVICING TO QUALIFIED
SERVICE PERSONNEL.
The exclamation point within
an equilateral triangle is
intended to alert the user to
the presence of important
operating and maintenance
(servicing) instructions in the
literature accompanying the
appliance.
IMPORTANT SAFETY INSTRUCTIONS
1. Read these instructions.
2. Keep these instructions.
3. Heed all warnings.
4. Follow all instructions.
5. Do not use this apparatus near water.
6. Clean only with dry cloth.
7. Do not block any ventilation openings. Install in accordance with the manufacturer's
instructions.
8. Do not install near any heat sources such as radiators, heat registers, stoves, or other
apparatus (including amplifiers) that produce heat.
9. Do not defeat the safety purpose of the polarized or grounding-type plug. A polarized plug
has two blades with one wider than the other. A grounding type plug has two blades and a
third grounding prong. The wide blade or the third prong are provided for your safety. If the
provided plug does not fit into your outlet, consult an electrician for replacement of the
obsolete outlet.
10. Protect the power cord from being walked on or pinched particularly at plugs, convenience
receptacles, and the point where they exit from the apparatus.
11. Only use attachments/accessories specified by the manufacturer.
12. Use only with the cart, stand, tripod, bracket, or table specified by the
manufacturer, or sold with the apparatus. When a cart is used, use
caution when moving the cart/apparatus combination to avoid injury
from tip-over.
13. Unplug this apparatus during lightning storms or when unused for long periods of time.
14. Refer all servicing to qualified service personnel. Servicing is required when the apparatus
has been damaged in any way, such as power-supply cord or plug is damaged, liquid has
been spilled or objects have fallen into the apparatus, the apparatus has been exposed to
rain or moisture, does not operate normally, or has been dropped.
ENGLISH

E2
15. Grounding or Polarization - This product may be equipped with a polarized alternating-
current line plug (a plug having one blade wider than the other). This plug will fit into the
power outlet only one way. This is a safety feature. If you are unable to insert the plug
fully into the outlet, try reversing the plug. If the plug should still fail to fit, contact your
electrician to replace your obsolete outlet. Do not defeat the safety purpose of the
polarized plug.
Alternate Warnings - This product is equipped with a three-wire grounding-type plug, a
plug having a third (grounding) pin. This plug will only fit into a grounding-type power
outlet. This is a safety feature. If you are unable to insert the plug into the outlet, contact
your electrician to replace your obsolete outlet. Do not defeat the safety purpose of the
grounding-type plug.
16. Ventilation - Slots and openings in the cabinet are provided for ventilation and to ensure
reliable operation of the product and to protect it from overheating, and these openings
must not be blocked or covered. The openings should never be blocked by placing the
product on a bed, sofa, rug, or other similar surface. This product should not be placed
in a built-in installation such as a bookcase or rack unless proper ventilation is provided
or the manufacturer's instructions have been adhered to.
17. The MAINS plug or an appliance coupler is used as the disconnect device, the disconnect
device shall remain readily operable.
IMPORTANT SAFETY INSTRUCTIONS
CAUTION: USE OF ANY CONTROLS, ADJUSTMENTS, OR PROCEDURES OTHER THAN
THOSE SPECIFIED HEREIN MAY RESULT IN HAZARDOUS RADIATION
EXPOSURE
Class ll equipment symbol
This symbol indicates that the unit
has a double insulation system.
CAUTION: Invisible laser radiation when open and inter locks defeated. Avoid exposure to beam.
Warning: Changes or modifications to this unit not expressly approved by the party responsible
for compliance could void the user's authority to operate the equipment.
NOTE: This equipment has been tested and found to comply with the limits for a Class B digital
device , pursuant to Part 15 of the FCC Rules. These limits are designed to provide reasonable
protection against harmful interference in a residential installation. This equipment generates,
uses, and can radiate radio frequency energy and, if not installed and used in accordance with the
instructions, may cause harmful interference to radio communications. However, there is no
guarantee that interference will not occur in a particular installation. If this equipment does cause
harmful interference to radio or television reception, which can be determined by turning the
equipment off and on, the user is encouraged to try to correct the interference by one or more of
the following measures:
- Reorient or relocate the receiving antenna.
- Increase the separation between the equipment and receiver.
- Connect the equipment into an outlet on a circuit different from that to which the receiver is
connected.
- Consult the dealer or an experienced radio TV technician for help.
ENGLISH

INTRODUCTION
Your Singing Machine Pedestal CD/CDG Karaoke System will provide you with fun and
entertainment. You will be the “star” while singing with your favorite recordings as well as
listening to your voice with the music through the system’s speakers.
This karaoke center is compact and designed to include many features, yet it is easy to use.
After just a few simple instructions, you will become an expert. Before you attempt to use your
unit, please read this manual thoroughly to familiarize yourself with all the features available and
the sections of the manual that describe their operation. Next, go to the section for the specific
operation you wish to perform.
For your easy reference, listed here are some of the main features of this karaoke center:
Lyrics on TV screen - displays the lyrics with the tempo of the music when playing CD+G discs.
Auto Voice Control (A.V.C.) - allows you to replace the original singer's voice with your own
voice when any prerecorded, multiplex disc is played. To activate, just rotate mic volume to a
comfortable listening level, and Auto Voice Control for the best balance between playback and
microphone levels.
Balance Control - allows you to adjust the balance between the prerecorded original singer's
voice and the music when using a multiplex karaoke disc.
Echo Control - allows you to add an echo to enrich your voice for a concert hall effect.
Master Volume Control - allows you to turn the volume control clockwise or counter - clockwise
until desired volume level is obtained.
built-in camera lens will display your image on the Singing Machine’s monitor or
TV.
Built - In Speaker - allows you to share the music with your family or friends.
Auxiliary Output Jacks - allows you to connect another audio output component, such as an
equalizer/booster or a PA system.
Headphone Jacks - allows you to connect headphones as an alternative for listening through
the system's built-in speaker.
iPod Docking Station - the iPod docking station is compatible with iPod with video models, the
cradle audio system for the iPod allows you to simply plug in and press play to stream the entire
library of stored music from your iPod music player. Your Singing Machine's speaker system will
provide a pleasurable sound.
-
E3
ENGLISH

INSTALLATION
E4
1. Join the speaker (middle) into the stand
(bottom) according to the installation
illustration.
2. Tighten a self tapping screw at the bottom of
the speaker (middle).
STEP 1
1
2
STEP 2
ENGLISH

3. Join the control panel (top) into the speaker
(middle) according to the installation
illustration.
Following the labels (A to A & B to B) to plug the
connectors.
INSTALLATION
E5
STEP 3
STEP 4
4. Tighten a self tapping screw at the control
panel (top).
AB
B
B
1
2
A
A
ENGLISH

INSTALLATION INSTRUCTIONS FOR TOWER SPEAKERS
5. Join the speaker into the stand according to
the installation illustration.
STEP 5
6. Tighten six screws at the bottom of the
speaker.
STEP 6
E6
Stands are located
at the bottom of gift box
under the polyfoam.
Gift Box
Polyfoam at the top
Polyfoam at
the bottom
Stands
ENGLISH

See control locations as indicated on the next few pages.
CONTROL LOCATIONS
E7
FRONT VIEW
WIRELESS
MICROPHONE
SIDE VIEW
ENGLISH

CONTROL LOCATIONS
FRONT VIEW
1. Camera Lens Open 16. CD Door 32. REPEAT Button
Button 17. MIC Holder 33. PROGRAM Button
2. Adjustable Camera Lens 18. Release iPod Buckle 34. AUTO VOICE CONTROL
19. iPod Docking Station 35. RANDOM Button
3. 7" TFT LCD Color Screen
36. SKIP Button
20. iPod dock Releaser
4. ON/OFF Button
37. BALANCE Control
5. ON/OFF LED 21. MIC 1 Jack
38. SKIP Button
6. TUNING Knob 22. HEADPHONE Jack
39. STOP Button
7. Dial Pointer 23. LCD ADJ. Buttons
40. PLAY/PAUSE Button
8. BAND Selector 24. Model Number
41. OPEN/CLOSE Point
9. Monitor Selector 25. PROGRAM LED
42. MASTER VOLUME
10. Video Out Selector 26. LED Display
Control
11. Function Selector 27. PLAY/PAUSE LED
43. iPod Compartment
12. Key Control LEDs 28. MIC VOLUME Control
44. MIC Holder
13. Key High 29. CDG LED
45. MIC 2 Jack
14. Key Flat 30. REPEAT LED
15. Key Low 31. ECHO Control
E8
1
2
4
5
6
7
8
9
10
11
12
14
15
16
17
21
22
23
24
25
27
28
29
31
32
33
34
35
36
37
38
39
40
41
43
44
45
iSM-1010
13
26
30
3
18
19
20
42
ENGLISH

CONTROL LOCATIONS
SIDE VIEW
46. 51. AUX OUTPUT Jack (R)
47. AUX INPUT Jack (L) 52. AUX OUTPUT Jack (L)
48. VIDEO IN Jack 53. VIDEO OUT Jack
49. AC Power Cord Jack 54. Speaker Jack (R/L)
50. Speaker
AUX INPUT Jack (R)
E9
47
48
49
53
46
50
51
52
54
ENGLISH

WIRELESS MICROPHONE CONTROL LOCATIONS
WIRELESS MICROPHONE
55. ON Position 58. STANDBY Position
56. Battery Compartment 59. OFF Position
57. LED Indicator
E10
56
57
58
59
55
ENGLISH

MAKING THE CONNECTIONS
CONNECTING POWER
You can power the system from a standard AC outlet by using the supplied power cord.
CAUTION: The supplied AC power cord has a polarized plug that fits into the wall outlet only one
way. If the plug does not fit properly, turn it over and try again. Do not force it.
CONNECTING TO YOUR HEADPHONE
A headphone jack is provided for using headphones instead of the built-in speaker.
(Headphones are sold separately.)
WARNING: Excessive sound pressure from headphones can cause hearing loss.
CONNECTING TO YOUR TV
The Singing Machine includes RCA cords to provide you the option of either connecting an
external audio/sound system and/or video device. The cords have three RCA plugs at each end;
the White and Red are for left and right audio connections, the Yellow is to connect the video.
It is recommended that a CDG disc is playing while connecting your TV or VCR. The display of
the Singing Machine logo or lyrics on your TV screen will insure you have connected your TV or
VCR properly.
VIDEO CONNECTION
Please follow the steps below to display CDG lyrics on the TV screen:
(1) Locate the multicolored patch cords.
(2)
(3) Connect the other end of the Video Cable (yellow) to the Video Input on your TV or
VCR.
Connect video cable (yellow) to the Video Out jack on the side of the Singing Machine.
E11
IN
OUT
VIDEO
AUX
R
L
VIDEO OUTPUT
(YELLOW JACK)
VIDEO INPUT
(YELLOW JACK)
SIDE VIEW OF
SINGING MACHINE
REAR VIEW OF TV
R
L
VIDEO IN
AUDIO IN
ENGLISH

If your television or VCR does not have the required Video Input, you will need an RF Modulator
(Radio Frequency Modulator), which connects through your TV Antenna or cable line and
serves as Video Input.
An RF Modulator can be purchased at almost any consumer electronics retailer. If you are
connecting the video from the Singing Machine to either a television or a VCR video input jack,
you must specify the source the TV or VCR is to display. Your TV or VCR user guide can tell you
how to display the video signal from the ‘Video In’ jack.
If you don’t have the manual for your TV or VCR, we suggest calling the TV or VCR,
manufacturer’s customer service department. Only the manufacturer will be able to tell you very
quickly how to configure your TV or VCR to display the video signal coming from the ‘Video
Input’ jack.
* Note: Some projection TV sets do not properly display the standard blue background when
using most CDGs. If the background color is inconsistent or flashing, please try connecting your
Singing Machine to a standard tube television.
COMMON WAYS TO CONFIGURE YOUR TV OR VCR
(1)
(2)
Your Singing Machine is designed to connect to your TV the same way you would connect a
video camera, VCR or video game. The Singing Machine is constantly sending the video and
audio signals to the 'Video Out' and 'AUX OUT' jacks whenever you play a CDG. We
recommend playing a CDG on your Singing Machine prior to making these connections. You will
have the ability to view lyrics on your TV screen as soon as you complete the set up correctly.
We refer to TV/VCR because manufacturers use very similar ways to connect TVs and VCRs
and you can connect your Singing Machine to a TV, VCR or satellite system (contact your
satellite company for instructions). The setup of your TV/VCR is the most difficult part of making
the connection for displaying your Singing Machine lyrics. In most homes, the TV has either a
cable connected or antennae in use. Once you connect your Singing Machine to the TV/VCR,
choose the correct input on your TV/VCR to display lyrics from The Singing Machine instead of
the usual input from the cable or antennae.
Check your TV/VCR user manual for the easiest way to setup your particular entertainment
system. If you don't have your manual please contact your TV/VCR manufacturer for
information either by phone or by viewing their website for online assistance. We've listed below
the most common ways of setting up a TV/VCR:
In the setup menu for configuring the TV/VCR there may be an option on 'Input Selection'
where you may choose between 'Cable/Ant’, 'Video 1', or 'Video 2' etc. as the input source.
Try looking for a 'Video' channel between the highest channel and the lowest channel on
your TV or VCR. (i.e. between 99 and 2 also could be one of the following: 'VIDEO',’INPUT'
or 'GAME')
(3) Look for a button on the remote control for the TV/VCR you are connecting to which notes
'VIDEO', 'VIDEO 1', 'Game', 'AUX', 'EXT', 'LINE1', 'LINE-IN' or occasionally the 'VCR'
button will display the Video input source.
MAKING THE CONNECTIONS
E12
ENGLISH

CONNECTING A VIDEO COMPONENT FOR INPUT
Please follow the steps below to display CDG lyrics on the Singing Machine’s monitor from
another video source:
AUDIO CONNECTION
Connect the unit to your TV or home stereo system using the White and Red connections on the
supplied RCA cords. Plug the white end of the patch cord into the white AUX OUT jack on the
unit. Plug the red end of the RCA cord into the red AUX OUT jack on unit. Now connect the other
end of the cable’s white (left channel) and red (right channel) plugs to your TV or home stereo
system’s ‘AUDIO IN’ or ‘AUX IN’ jacks.
(1) Locate the multicolored patch cords.
(2) Connect video cable (yellow) to the video in jack on the side of the Singing Machine.
(3) Connect the other end of the video cable (yellow) to the Video Output on another video
source such as a VCR.
(4) Set the Function Selector to AUX mode and the Monitor Selector to AUX.
MAKING THE CONNECTIONS
E13
SIDE VIEW OF
SINGING MACHINE
REAR VIEW OF VCR
R
L
VIDEO OUT
AUDIO OUT
VIDEO OUTPUT
(YELLOW JACK)
VIDEO INPUT
(YELLOW JACK)
IN
OUT
VIDEO
AUX
R
L
SIDE VIEW OF
SINGING MACHINE
REAR VIEW OF TV
R
L
VIDEO IN
AUDIO IN
AUX OUTPUT
R
(RED JACK)
AUDIO INPUT
L
(WHITE JACK)
AUDIO INPUT
R
(RED JACK)
AUX OUTPUT
L
(WHITE JACK)
IN
OUT
VIDEO
AUX
R
L
ENGLISH

MAKING THE CONNECTIONS
CONNECTING AN AUDIO COMPONENT FOR INPUT
To connect another audio source (such as a Tuner, an AV Receiver or a VCR) so you can sing
along with its music, simply connect the Audio Output jacks (Red & White RCA jacks) to the
Singing Machine’s AUX IN L & R jacks.
MONITOR SELECTOR
To play a CDG disc, set the Monitor Selector to either CAMERA, iPod/CDG , AUX or OFF
mode.
To display CDG lyrics on the Singing Machine’s monitor, set the Monitor Selector to
iPod/CDG mode.
To display your image on the Singing Machine’s monitor, set the Monitor Selector to
CAMERA mode.
To display a video signal from another A/V component, set the Function Selector to AUX
mode and Monitor Selector to AUX mode.
To turn off the TFT on the Singing Machine, set the Monitor Selector to OFF mode.
Adjust the LCD ADJ. buttons located under the LCD monitor of the Singing Machine for the
best picture quality. (#23 noted on the control locations on page E8)
VIDEO OUT SELECTOR
To display image on the TV, set Function Selector to iPod, CDG or AUX position and set the
Video Out Selector to CAMERA mode.
To display CDG lyrics on the TV, set Function Selector to CDG position and set the Video Out
Selector to iPod/CDG mode.
E14
ANOTHER
AUDIO COMPONENT
R
L
VIDEO OUT
AUDIO OUT
SIDE VIEW OF
SINGING MACHINE
AUDIO OUTPUT
L
(WHITE JACK)
AUDIO OUTPUT
R
(RED JACK)
AUX INPUT
L
(WHITE JACK)
AUX INPUT
R
(RED JACK)
IN
OUT
VID
EO
AUX
R
L
ENGLISH

MAKING THE CONNECTIONS
CONNECTING TO THE SINGING MACHINE
1. Before connecting the speakers, turn off the Singing Machine and adjust both the Master
Volume and Mic Volume to minimum.
2. Connect the speakers to the Singing Machine according to the illustration below.
3. Power on the Singing Machine. Adjust both the Master Volume and Mic Volume on your
Singing Machine to a comfortable level.
EXT.
SPEAKER
R
L
SIDE VIEW OF
SINGING MACHINE
REAR VIEW OF
RIGHT SPEAKER
REAR VIEW OF
LEFT SPEAKER
E15
ENGLISH

Warning - Tapping or dropping the microphone while it is on can permanently damage
your microphone. Resist the urge to swing the microphone around by the cord!
PREPARATION
This unit is designed to play CD’s/CD+G’s bearing the identification logo . If
CD’s/CD+Gs do not conform to particular standards, they may not play properly.
Fingerprints and dust should be carefully wiped off with a soft cloth. Wipe in a straight motion
from the center of the disc to the outside edge.
Never use chemicals, such as record cleaning sprays, antistatic sprays or fluids, benzene or
thinner to clean compact discs. These chemicals will permanently damage the plastic
surface of the disc.
Always place the compact disc on the disc tray with the label facing upward. Compact discs
can be played on only one side.
To remove a disc from its storage case, press down on the center of the case and lift the disc
out, holding it carefully by the edges.
Discs should be returned to their cases after use to protect them from dust and scratches.
To prevent warping the disc, do not expose it to direct sunlight, high humidity or high
temperatures for extended periods of time.
Do not apply paper or write anything on either side of the disc. The inks used in some felt-tip
pens may damage the surface of the disc.
PLAYING CD OR CD+G DISC
Adjust MASTER VOLUME control on your unit, TV or audio system to a comfortable level.
Adjust MIC/ECHO/BALANCE controls as needed to achieve the desired mix of music and
vocals through your TV or sound system.
Do not press the disc cover of the CD compartment while it’s playing.
Never place anything on top of the Singing Machine. Foreign objects can damage the unit.
Do not apply excessive force to the disc cover.
Only place one disc in the CD compartment at a time.
TURNING POWER ON/OFF
To power on the karaoke center, press the ON/OFF button, the ON/OFF LED will illuminate.
To turn off the system, press the ON/OFF button again, the ON/OFF LED will turn off.
FUNCTION SELECT
Set the Function Selector to CDG.
LOADING A DISC
Lift the CD door at the OPEN/CLOSE point. Place a disc in the compartment with the printed
side facing upward and the shiny side facing down.
Close the CD compartment. The LED window will display the total number of tracks. (If no
disc is loaded, it will display “ ”).
(Refer to the Trouble Shooting Guide on page E22 if a disc is loaded but the total tracks
do not appear.)
" / "
CD OR CD+G OPERATION
E16
ENGLISH

CD OR CD+G OPERATION
PLAY/PAUSE MODE
To start playing, press the PLAY/PAUSE button. The first track [ ] and the PLAY/PAUSE
LED will illuminate.
To temporarily stop playing, press the PLAY/PAUSE button. The PLAY/PAUSE LED
Indicator will flash.
To resume play, press this button again.
PLEASE NOTE: Pressing pause when a CDG is playing may cause distorted lyrics on the
monitor. Any distortion will remain until the whole screen is refreshed during
an instrumental break or you stop the song and start it from the beginning.
STOP MODE
If the STOP button is pressed in the course of playing, the disc will cease to play. (The total
number of tracks will be shown on the LED display).
SKIP PLAY (For both CD and CDG discs.)
During STOP mode, you can skip up or down to your desired track number by pressing a
SKIP button( - SKIP - ).
To resume playing the selected song, press PLAY/PAUSE button.
SEARCH (For audio CD disc only.)
When playing any audio CD, press and hold the SKIP button ( -SKIP- ). The CD will
search at high speed in the forward or backward direction. Normal play will continue when you
release the button.
REPEAT
To repeat the track currently playing, press the REPEAT button once. The REPEAT LED will
start to flash.
To repeat all tracks, press the REPEAT button twice. The REPEAT LED will remain
illuminated.
To clear the repeat function. Press the REPEAT button again. The REPEAT LED will no
longer illuminate.
PROGRAM
Use this button to program and play back songs in a preselected order.
Step 1: Programming should be done in the stop mode only. Press the PROGRAM key
until the PROGRAM LED flashes, the track will read [ ].
Step 2: Press the double arrow keys ( -SKIP- ) to select a desired track.
Step 3: Press PROGRAM key to confirm entry. You can repeat the same steps up to a
maximum of 20 tracks.
Step 4: Press PLAY to activate PROGRAM.
Press the STOP button to clear all the programmed entries.
RANDOM
Press the RANDOM button to enable all tracks on a disc to be played in random sequence.
Press the STOP button to cancel the random play mode.
KEY CONTROL
Pressing the KEY HIGH/ KEY LOW button will allow different ranges to be adjusted as shown
on LED.
KEY FLAT button is used to adjust the key level back to default level.
KEY HIGH is used to raise the key level.
KEY LOW is used to lower the key level.
E17
ENGLISH

iPod OPERATION (for iPod with video)
E18
1
2
3
INSTALL iPod with video - for 30G (iPod not included)
1. Pull the iPod dock releaser down.
2. Put an iPod into the iPod docking station.
3. Push the iPod dock releaser up.
FEATURES FOR YOUR iPod
Play video content of your iPod on the 7” widescreen TFT LCD
Capable of displaying your favorite videos on your iPod to your TV
Charge your iPod
Integrated dock for your iPod with video (30G, 60G and 80G)
CHARGING YOUR iPod
1. Place your iPod into the docking station carefully.
2. Press the ON/OFF button on the unit, it will automatically charge your iPod.
WATCHING YOUR iPod VIDEOS ON THE 7” COLOR
LCD TFT SCREEN
To power the unit on, slide the MONITOR Selector switch to the iPod/CDG position.
To see your favorite iPod videos on the 7” color LCD screen, follow the instructions
below:
1. On the menu screen of your iPod, select the “Videos” option.
2. On the next menu screen, select the “Video Settings” option.
3. On the next menu screen, select the “TV Out” option and set it on.
4. Install your iPod into the iPod docking station.
5. Navigate the menu screen of your iPod to your favorite video.
6. Play the video file and watch it on the 7” color LCD screen. Use the iPod to open
and control your desired songs, photos, and video files. The system will then
respond to the given command.
INSTALL iPod with video - for 60G or 80G (iPod not included)
1. Remove the adaptor.
2. Pull the iPod dock releaser down.
3. Put an iPod into the iPod docking station.
4. Push the iPod dock releaser up.
1
3
4
2
ENGLISH

RADIO AND OTHER OPERATIONS
AM/FM RADIO
1. Press the ON/OFF button.
2. Switch Function Selector to RADIO position.
3. Switch Band Selector to either AM or FM radio position.
4. Turn tuning knob to select desired station as indicated on dial.
5. Adjust Master Volume to the desired level.
6. To turn the radio off, set Function Selector to iPod, CDG or AUX position.
SING ALONG - RADIO
1. Follow operating instructions for AM/FM radio.
2. Connect the supplied Microphone to either one of the Mic input jacks.
3. Adjust Master Volume and Mic Volume. Your voice will be combined with the radio
station output and will be heard through the speakers.
PUBLIC ADDRESS - USING A MICROPHONE
The unit can be used as a PA (Public Address System).
Public Address (PA) Operation Procedures
1. Connect the supplied Microphone to either one of the MIC input jacks.
2. Press the ON/OFF button to turn the unit on.
3. Set the Function Selector to AUX. Move the MIC VOLUME control to central position.
4. Move the ON/OFF switch located on the Microphone to the ON position and speak or
sing into the Microphone. The Microphone sensitivity and loudness could be adjusted as
required by turning the MIC VOLUME control and/or MASTER VOLUME control.
5. To add depth or ambiance to your voice, adjust the ECHO control until the desired effect
is obtained.
Note: To prevent feedback or whistling from occurring, please be sure that the
microphone is not too close to the unit.
1) Open the battery compartment.
2) Place a 9V battery in the compartment as indicated by the polarity symbols (+ and -) marked
inside the compartment of the wireless microphone.
NOTE: 9V battery is not included.
3) Close the battery compartment.
4) The wireless microphone has three settings:
1. ON - The switch is in the top position. The microphone will function. The red indicator
illuminates.
2. STANDBY - The switch is in the middle position. The microphone will not function. The
red indicator illuminates.
NOTE: The purpose of this setting is to maintain a connection between the microphone
and the Singing Machine when moving around the area in which it is being used. (This
function could also be considered a mute function)
3. OFF - The switch is in the bottom position. The microphone will not function. The red
indicator light is off.
NOTE: To ensure long battery life, please make sure that the wireless microphone is set to the
OFF position when not in use. When not in use for a long period of time, we recommend
that you remove the DC 9-V battery.
SMM-107A WIRELESS MICROPHONE OPERATION
E19
ENGLISH
/