Page is loading ...

Instructions for use
Trisa Gelateria, Art. 7713
Thank you for buying our product "Gelateria". The Trisa Electro crew hopes that you
will enjoy working with our device. Bon appetit!
Before use
Please read carefully all information given in this instruction manual. It provides you with
important instructions concerning use, safety and maintenance of the device. Please keep
the instruction manual in a safe place and pass it on to the next user, if the occasion
should arise.
The device may only be used for the intended purpose according to this instruction manu-
al.
Please pay attention to the safety instructions.
Please dispose of packaging material properly.
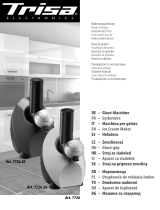
Description
1 Mixer ON / OFF switch
2 Drive housing
3 Lid with filler opening
4 Connection bolt of lid and drive housing
5 Beater
6 Removable tank
7 Plug connection
8 Lid opening button
9 Cooling ON / OFF switch
10 Display
11 Display cooling temperature
12 Time display
13 Start / Stop button
14 Select button
15 Air outlet
16 Fixed tank
Technical data
Fill-in quantity: 0.7 l = 1.4 l ice-cream
Voltage: 230 V
Output: 150 Watt
Weight: 10.8 kg
- 28 -

- 29 -
Before initial use
Please check already when unpacking the device if all accessory parts, as stated in the
instruction manual, are included and if the device is not damaged.
Cleanness and hygiene are very important when processing food. Wash up all parts that
come into contact with ice cream (stainless steel and aluminium tank, beater and lid) and
dry them carefully.
Attention!
During transportation the device may have been fallen over or put upside down - the
cooling liquid then may be spread out in the cooling cycle and the compressor may
not work.
Place the device on an even surface for 12 hours so that the cooling liquid will accu-
mulate. Please also repeat this process if the device will be in wrong position in the
future.
First use
Connect mains plug. (Only connect to alternating current with a voltage of 230 Volt).
Always place the device on a solid and even surface.
The ventilation opening on front and back must not be covered.
Keep a distance of at least 20 cm.
Use
Attention
- Please always use only fresh and impeccable ingredients when making ice cream.
- Fruits must always be fresh and washed.
- Ingredients should be pre-cooled for processing.
- Never fill hot ingredients into the device!
20cm
20cm

1. Place the empty removable aluminium tank
(6) in the fixed stainless steel tank (16) of
the device.
2. Connect the lid (3) and the drive housing (2)
with the connection bolt (4).
3. Place the beater (5) in the intended opening
of the drive housing.
The beater must be in a loose position.
4. Put on the drive housing (2) in a way so that
the plug connection on the drive housing (2)
is placed opposite the fixed plug connection
(7) of the device. Turn the lid clockwise that
the plug connections click into each other
and the locking device will click into place.
If the plug connection is not connected
properly, the drive motor will not work
- 30 -
Preparation of ice cream in the removable aluminium tank

- 31 -
5. Switch on the device by pressing down
the cooling ON / OFF switch (9).
Tip:
At first, switch on device and then start
preparing ice cream.
So cooling is already at full power when
filling in.
After switching on the mixer motor the cooling aggregate may only be switched off
when the preparation of the ice cream has been finished. In case of switching-off or
power failure during ice-cream preparation, the compressor will start cooling after rerunning
only with a waiting period of 5 minutes. This is caused by an integrated safety circuit. This
may result in an insufficient preparation of the ice cream
6. Now slowly fill in the prepared mixture into
the ice cream maker through the filler
opening of the lid (3).
Important
Only fill in the mixture up to 3 cm below the edge of the bowl, as the mixture will
increase in volume because of the cooling!
7. Select the desired period of time on the
display by pressing the select button (14)
(possible period of time are 5, 10, 20, 35
or 40 minutes). The desired period of time
will now flash in green.
Remark:
Depending on recipe, temperature and quantity, the period of time for preparation
may vary. It takes approx. 20 - 40 minutes.
If the ice cream is not solid enough, another period of time, e.g. 5 minutes, may be selec-
ted after completion.

- 32 -
8. Now press the mixer ON / OFF button (1)
to start the mixing procedure
The statement on the left side of the display shows current cooling temperature (starts at
approx. -18 °C up to a maximum of approx. -22 °C). Indication on display "18".
9. Start the mixing procedure by pressing the
Start button (13).
10.If the period of time has been expired, a
signal tone will sound for 30 seconds.
Press the mixer ON / OFF switch (1) to
stop the mixing procedure.
Remark
The mixer will turn off automatically.
Important
Before removing the mixer, please
ensure that the mixer ON / OFF switch
is in the OFF position.
Important:
If the consistency of the ice cream is too strong for the beater and the drive motor, it
will turn into opposite direction.
Turn off the mixer (4) to remove stress from mixer and motor. We do not accept any
warranty in case of disregard.

- 33 -
11. In order to take ice-cream from the device,
remove the drive housing (2) by pressing
the lid opening button (8) und simultane-
ously turning the drive housing (2) coun-
ter-clockwise. Lift the drive housing. The
beater (5) remains in with tank.
12. Pull out the tank (6).
13. Remove the beater (5) right after termina-
tion of the mixing procedure.
Serve the ice cream immediately after pre-
paration or fill the ice cream into a suitable
container for deep-freezing.
Important
Never use pointed or solid objects
to remove the ice cream. It may
scratch the tank. Use a plastic scra-
per instead.
Keeping time
Ice cream with raw ingredients approx. 1 week in the freezer
Sorbets approx. 1 - 2 weeks in the freezer
Ice cream with cooked ingredients approx. 2 weeks in the freezer

- 34 -
Right after, new ice cream can be made again. Keep the cooling working and fill in the new
mixture into the empty removable tank or into the fixed tank and continue the procedure.
When the preparation of the ice cream is finis-
hed, switch off the cooling ON / OFF switch,
disconnect the mains plug and carefully clean
the device.
Remark
Never leave ice cream with the device with running cooling compressor,
because the ice cream will freeze to the device.
Preparation of ice cream in the fixed tank
1. Place the device on an even and solid sur-
face.
Remove the empty removable aluminium
tank (6) from the stainless steel tank (16) of
the device.
Directly fill in the mixture into the fixed tank.
Now you may proceed as stated in the pro-
cedures 2 - 12 that are mentioned above.
Preparation of 2 different kinds of ice-cream
First prepare ice cream in the removable tank (6). When this procedure is finished you can
fill in the second mixture directly into the fixed tank and execute the procedure as mentio-
ned above.

Cleaning and care
- Always disconnect mains plug before cleaning.
- Remove lid by pressing the lid opening button and simultaneously turning the lid coun-
ter-clockwise. Remove beater from lid by just pulling it out. Remove the transparent
part of the lid by loosening the connection bolt. Wash up all parts carefully and dry them
thoroughly.
- Wipe the housing, if necessary, with a damp cloth and dry it. Do not use scouring
agents or solvents like benzine, petroleum, furniture cleaner or thinner.
Disposal
Make worn out appliances unusable. Pull out the mains plug and sever the cord.
Electric appliances are to be returned to a shop of sale or handed over to an official
dump.
Safety regulations
Plug the appliance only in an outlet as mentioned on the rating plate.
An electric appliance is not a children's toy. Children are not aware of the hazards
of electrical appliances. Therefore close supervision is necessary when the appliance
is used by children.
Never put the device upside down.
Never use sharp objects to remove ice cream.
Never hang down the main cable. Keep children away from packing material, e.g.,
plastic bags.
Do not use this appliance near the water contained in bath-tubs, washbasins or other
receptables nor expose it to rain or other humidity.
Should however the appliance fall into water, only take it out after pulling the plug.
Then do not use the appliance anymore, but first have it checked by an authorized
service department.
Never use the appliance outdoor.
Regulary check if the main cable is defective. In this case the appliance must not be
put into operation (immediately pull the plug). Send it to the manufacturer for repair.
The appliance must not be operated (disconnect the mains plug immediately) when:
* the appliance, casing or cable is damaged.
* the appliance shows visible signs of damage.
* a fault is suspected after a fall or the like.
* in case of faults during use.
* before cleaning or moving the appliance from place to place.
* after use.
- 35 -

Never pull the plug out of the socket with wet hands.
Never carry nor pull the appliance by the flex.
Don't pull the flex over sharp edges. Don't wedge it.
Do not bend the flex nor wind it around the appliance.
Never put the appliance on hot surfaces nor near open flames. Lay the cord so that it
does not touch hot or sharp-edged objects. Do not use the appliance while standing on a
humid floor or when your hands or the appliance are wet.
Do not leave the appliance unattended while it is connected to the power source.
This appliance is not meant for commercial use only exclusively for private use.
Only trained personnel should repair electrical appliances. Unskilled repairs can cause
considerable danger to the user.
In case of damage to the power cable this may only be replaced by a customer service
authorized by the manufacturer.
No warranty for any possible damage can be accepted if the appliance is used for
impro per purpose, wrongly operated or unprofessionally repaired. In such a case,
any warran ty claim is void.
- 36 -
/