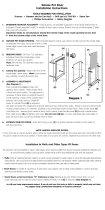
A
Approx. 6” (15.2cm)
Tools required for installation:
Straight edge/ruler • Drill • 1/2” (1.3 cm) Drill Bits • Key Hole or Scroll Saw • Phillips Screwdriver
Simple 6-Step Installation
Letters in ( ) correlate to diagram above:
Step #1:Determine pet door height. The distance between bottom of door and bottom of template should be 6” (15.2 cm).
Center template (width) in middle of door and tape in place.
Step #2:With template in place (A), draw around edge of template onto door. Mark corner holes with a nail or awl.
Step #3:Using corner locations as your guide, drill four individual holes, using a drill no larger than 1/2” (1.3 cm).
Step #4:Starting on the inside of one of the drilled holes (B), cut just inside of the line using a key-hole or scroll saw.
Step #5:Insert inner frame (C) (with flap) into the opening from interior side (inside and outside frames have been clearly
marked for easier assembly). Make certain frame is flush with door surface. Caulking is recommended under outer
frame. Place outer frame (D) (no flap) into opening from outside door, hold in place, then install screws and
tighten until snug. Do not over-tighten.
Step #6:To use the Four-Way Lock, see instructions on Cat Flap frame.
Uneven surfaced doors:
After cutting the rough opening, build up the lowest area(s)
with wood frame thick enough to create an even door surface.
The Cat Flap can be installed in walls, steel doors, and storm doors. Note that additional materials,
such as wood framing, plaster, touch-up paint, longer frame screws, and extra tools may be required.
When extended to its maximum opening, it is advisable to cover any gaps with tape and seal with caulking
to create a water-tight seal on the bottom ledge.
Walls:
Once wall opening has been made, it will be necessary to build a frame to cover the exposed area between
wall surfaces. Use wood screws to attach interior and exterior frame to wall surfaces.
When cutting through walls, extreme caution must be used to not cut any
concealed electrical wires, gas lines, or water pipes.
Steel doors:
Use a jigsaw with a hacksaw blade to cut the opening, starting at pre-drilled corner holes.
7-1/4” (18.4 cm) Outside Dimension
7-1/4”
(18.4 cm)
O.D.
Cat Flap
Lockable
Installation Instructions
and Template
B
C
D


