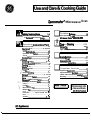
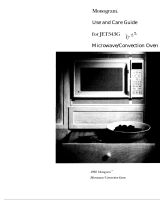
GE Spacemaker JVM239 User manual
- Category
- Microwaves
- Type
- User manual
This manual is also suitable for

SpacemakeP
Microwave
n
!
w
,i~~
,
...:;
,
.:.
.
,.
...::
. . . . .
.
. . . . . .
:..
.
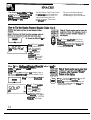
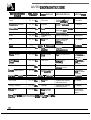
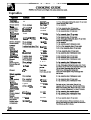
S~lnatru~ons....................3-5
Precautions to Avoid Possible
~sura
to
&cassiva
Microwave
Energy.............2
Operating
Inh-ions,
~ps
Add 30 Seconds
. . . . . . . . . . . . . . . . . . . . . . . . . . . . . . . . . . . . . . . . . .
13
Numinum
Foil
...........................4, 20,21.23
Auto DA
M
............ . . . . . . . . . . . . . . . . . . . . . . . . . . . . . . . . . . . . .
.
19
Auto
Dtiost
Guide......................................2O
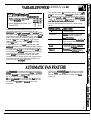
Automatic Fan
Feature.............................5,
7
Clock
..................................................................8
tintrol
Panel...............................................8,
9
-k
. . . . . . . . . . . . . . . . . . . . . . . . . . . . . . . . . . . . . . . . . . . . . . . . . . . . . . . . . . . . . .
.
17
-king
by
Time...................................l
2, 13
tioking
timpiete
Reminder ...................10
tioking
Guide ..............................................24
Detiing
by Time. . . . . . . . . . . . . . . . . . . . . . . . . . . . . . . . . . . . . . 18
Ddrosting
Guide ..........................................23
Delay
Sti~...........
. . . . . . . . . . . . . . . . . . . . . . . . . . . . . . . . . . . . . . . . .
.
13
Delayed
tiking
. . . . . . . . . . . . . . . . . . . . . . . . . . . . . . . . . . . . . . . . . .
11
~aust
Fan ..................................5, 7,27,28
~ress
Cook
Featura.................................l
3
Featuma........
. . . . . . . . . . . . . . . . . . . . . . . . . . . . . . . . . . . . . . . . . . . . . . . . .
.
10
Gloese~
d
Microwave
Terma..................2
1
Heating or Reheating
Guide......................22
Hold Tree............ . . . . . . . . . . . . . . . . . . . . . . . . . . . . . . . . . . . . . . . . . .
.
11
Kitchen
~mer...........
. . . . . . . . . . . . . . . . . . . . . . . . . . . . . . . . . . . .
.
11
Microwaving
Tips...........................................6
Minute
Pad.......................................................8
Popcorn . . . . . . . . . . . . . . . . . . . . . . . . . . . . . . . . . . . . . . . . . . . . . . . . . . . . . . . . .
.
13
Power ala.. . . . . . . .
7,6,11,12,18. 22–24
Reheat . . . . . . . . . . . . . . . . . . . . . . . . . . . . . . . . . . . . . . . . . . . . . . . . . . . . . . . . . . .
.
16
Snacks
....................................................l
4,15
❑
●
❑
✍✍✍✍
✎✎✚✎
✎
✎ ✎
✎
❑
❑
Oven
Problem
Solver...............................28
More questions
?...call
Edtiw
~.62&_
tim
and
Cleaning
...................2*28
&haust
Fan............................................27,
28
Grease
Fibr
..................................................27
tight Bulb Replacement.............................26
lntiallation..........................................27
Adapter
Pluga
. . . . . . . . . . . . . . . . . . . . . . . . . . . . . . . . . . . . . . . . . . . . . .
27
~nsion
tirds
...........................................27
Grounding
lnatructions...............................27
Consumer Services
...................3l
Appliance
Regi~ation..................................2
Important Phone
Numbers........................3l
Model and Serial Number bcation...........2
Warranty
........................................Back
-r
I
(lEC-~TetiPmedum)
,.

~LP
US
~LP
YOU...
It is intended to help you operate
and maintain your new microwave
oven properly.
=p
it handy for answers to your
questions.
H
you don’t understand something
or
nd
mom
help,
cdl:
GE
Amwer
tibr”
m.~
U
hours a
tiy,
7 days
a
W*
Wfih
down
tie
modd
and
=ti
numbem.
You’ll find them on a label inside
tie
oven.
~se
numbers are
dso
on the
Consumer Product Ownership
Registration Card that came with
your microwave oven. Before
sending in this card, please
wrik
these numbers here:
Satial
Numbr
Use these numbers in any
comspondence
or service calls
con-g
your microwave oven.
It is important that we know
the location of your
mimwave
oven should a need occur for
adjustments.
Your
supptier
is responsible for
registering you as the owner.
Hease
check with your supplier
to be sure he has done so;
dso
send in your Consumer Product
Ownmhip
Registration Card.
If you move, or if you are not
the
origimd
purchaser, please
write to us, stating model and
serial numbers.
W
appkce
must
b
~
-he
-
that it
k
write
to:
GE Applian~s
Range Product Service
Applianm
Park
Louisville, KY
~M
tiediately
mntact
tie
deder
(or builder) that sold you the oven.
Ch=k
the Problem Solver in the
back of this guide. It lists causes of
minor operating problems that you
can correct yourself.
●
S-
or vapor escaping from
around the door.
●
Light
refl-tion
around door or
outer case.
. Dimming oven light and change
in blower sound may
wur
while
-g
at
power
levels other
than high.
●
Dull
thumping sound while oven
is operating.
.
Some W-Radio interference
might be noticed while using
your microwave oven. It’s
simih
to the interference
caused by other
sdl
appliances and does not
indicate a problem with
your oven.
P~CA~ONS
TO AVOD
POSSDLE
EXPOS~
TO
EX~Sm
MCROWA~
ENERGY
(a)
h
Not
A-@to
operate this
oven with
(c)
W
Not
~mtithe
oven
ifit
is
tiged.
It is
the door open
sin=
open-door operation
ean
partictily
important that the oven door close
restit in
_
exposure to mimwave
-Y
mdbtti
is no damage to the:
energy. It is important not
to
defeat or
tamper
(1)
door~t)
with
the
safety
interlh.
~)
W
Not
%
any
obj@
between the oven
(2) hinges
and
khes
-k
or loosened)
front f-and the door or
Wow
SOU
or cleaner
(3)
tiSdS
and
Setig
Sal-S.
residue to
accumtite
on
tig
surf~s.
(d) me&en
Shoti
Not be
adjusted or repaired
by anyone
ex=pt
properly
qutied
smice
-Mel.
2

-
using
dectrid
apphces,
basic safety
~UtiW
shodd be
fo~ow~
including the
fouowing:
Aw~
G–Totiucetiri&of
burns,
eltic
shock
fm,
injury
to
persons
or
exposm
to
exmsive
ticrowave energy:
●
Read and
fo~ow
the specific
“Precautions to
Avoid Possible
~posure
to
Wcessive
~crowave
~ergy”
on the previous page.
●
W
apptim
must
be
grounded. Connect
ody
to
properly grounded
outiet
See
tiunding
hstructions
section in the back of this guide.
●
Use
W
appbee
ody
for
its
btended
-
as
-bed
h
*-A
~
not use
cmsive
chemids
or vapors in this
appbceo
This
ndcrowave
oven is
spectic~y
designed to heat
or cook food, and is not intended for
~bm~
or
industi
use.
●
~
OV~b-~
OV~
W=
designed
for use over ranges no
tider
than 42
hch=
It
my
be
insti
over both gas and electric
cooking
quip-t.
●
For
Mt
operation, phg
ti
appb=
into its
own
-d
outi~
to prevent
flckering
of
M@@
blo~
of
fose
or tripping
oftit
breaker.
●
Do
not mount
W
apphce
over a
G
M
or
lmte
W
apphce
ody
h
-*
tith
the
ptided
~tion
-dons.
●
Do
not cover or
block
any
o-
on the
apphce.
●
Do not stem this
ap~e
outdoo-
W
not
use this product near water-for
ex~le,
in
a wet
basemen$
near as
~g
pool or near a sink.
●
W
d-wave
oven
k
not approved or
tited
for
_
use.
●
Do not store anything_ on top of the
dcrowave
oven* when the oven is
in
Operadom
●
Do not
tieme
power cord or plug
h
water.
o
-p
power
cod
away from heated
au-
●
Do
not
let power cord hangover edge of table
or counter.
●
Do not
opemte
this
ap~ce
if it has a
_
w~r
cord
orpu~
ifit
is not
wotig
pro-y,
or
M
it has been damaged
or
drop-
●
See
door
surf=
cleaning instictions
in
the
h
and cleaning section(s) of
W
guide.
●
W
app-
ahodd
be
seticed
ordy
by
q~ed
aetice
pmonn~
Contact nearest
autha
service
facitity
for
e*tion,
repair or
adjustrnenL
●
A
tith
any
apph~
dose
m-on
k
n~
when
W
by
tidrem
●
❞
reduce the*
ofh
in
the oven
=tity:
—Do not overcook
f-
~y
attend
apptiance
if paper,
pktic
or other
combustibk
dds
m
pm
inside the oven to
facwtate
cooking.
—Remove *tides and
mti
Mea
tim
paper or
p=
contim
before
PM
th~
b
the
o-
—Do not use your microwave oven
to
dry
newspapem
—Do not use recycled paper
ph-
Recy*
PF
~X
MP~
and
W-
paper
~
conti
meti
fl-
tich
may
_
fig
or
@te.
Paper prod-con-nylon or
nylon
*ents
shoti
be
avoi~
as they
may
*
~te.
—Do not pop
popm
in your
dcrowave
oven
dess
in
as-
microwave popcorn
mssory
or
dess
you use popcorn
kbe~
for use
in
microwave ovens.
—Do not overcook
pota-
They
muld
dehydrate and catch fire, causing damage
to your oven.
—Do
not operate
the
oven
wMe
empty to avoid
damage to the oven and the danger
ofti
E
by accident the oven
shotirun
e~ty
a
tiute
or two, no harm is done. However,
~
to avoid
operating the oven
em
at
~
tbne+it
saves
energy and prolongs
the
We
of the oven.

-RT~
S~m
~STRUCmONS
(contiud)
—W
not
uae
the oven for storage
p~
Do not leave paper products, cooking
utensfls
or food in the oven when not in use.
—Umatew
Mde
oven
ahoti
i~te,
*
oven door
clo@
tum
oven off, and disconnect
power
~
or shut
tipower
at the fuse or
Ctiuit
*
-.
●
Some
ptiu~
~
as whole eggs and
~ed
conti~for
example, closed
j~w~
explode and
shotid
not be heated in this
mimwave oven. Such use of the mimwave
oven
coti
mstit in injury.
●
Avoid heatig baby
fd
in
ghss
jars,
even with
the
fid
off. Make
~
dl
infant food is thorou@y
cmked.
Stir food to distibute the
ht
evedy.
Be
careti
to
~vent
scalding when
W-
formula or
&st
*.
The container may
f~l
cooler than the
*My
is.
Nways
test the
mik
before
fag
the baby.
●
Don’t
dtit
tiaen
beve~
in
narrow
necked
boties
(es-y
carbonated beverages).
Even if the containers opened,
pressm
can
bti
up. This
~
cause the container to
burs~
possibly
resulting in
inj~.
●
use
fofl
Ordy
as
~
b
W
@de.
W
dinners
may
be
microwaved in
fofl
trays less than
3/4”
bigh;
remove the top
fofl
cover and return
the
tray to the box.
-
using
fofl
in the microwave
ova
keep the
fofl
(other than
meti
sh~
at
ht
1
hch
away
fi
the
Mea
of the
ova
●
Cookware
may become
hot-use
of heat
transfd
from the heated
food. Pot holders may be needed to
hande the cookware.
●
Foods cooked
ti
tiq~
(such as pasta) may tend
to
bofl
over
mom
rapfly
than
foods containing
less moisture.
Shotid
this occur, refer to the Care
and
Cltig
section(s) for instructions on how to
cla
the inside of
b
oven.
●
WrmometekDo
not use a thermometer in
food you
m
microwatig
dms
the thermometer
is designed or
mommended
for use
in
the
micmwave
oven.
~Wtic
cookware designed
●
MC
cook
forticrowave
-king
is
vw
use~,
but
shotid
be used-my. Even microwave-safe
pktic
may not
be
as tolerant of
overcootig
conditions
SS
~
@SS
Or
WtiC
-S
and
my
soften or char if subjected to short periods of
ov-king.
h
longer exposms to overcooking,
the food and cookware could ignite. For these
reasons: 1) Use
microwavesafe
pktics
ordy
and
use them in strict
comphce
with the cookware
manufacturer’s
mo~ndations.
2)
Do
not
subject empty cookware to microwaving.
3) Do not permit
ctidren
to use
pktic
cookware without complete supervision.
●
men
coo-
por~
fo~ow
the directions
-y
and always cook the meat to an
inti
te~
of at least
170°F.
This assures
~
in the remote
possibfity
that trichina maybe
present in the-~ it
@
be
Wti
and meat
wfi be safe
to
eat.
●
~
not
bofl
eggs had-wave oven.
Pressure
WM
btid
up inside egg
yok
and
wti
cause it to
but
possibly
restiting
in injury.
-
c
Foods tith unbroken outer
“ti”
such as potatoes, sausages, tomatoes,
appks,
chicken
fivera
and
othm
giblets, and egg
yob
(see
pvious
caution)
shotid
be pierced to
Wow
steam to escape during cooking.
●
Not
M
~tic
wrap
b
dtabk
for use
b
dcrowave
ovens.
Check
tie
package for
proper use.
●
Spontaneow
bo~Under
_s-
CirCU~ti~,
tiquids
my
SW
to
bed
during
or
Shdy
*
mmovd
from the microwave oven.
To prevent burns
tim
spltig
tiquid,
we
recommend the
fo~owing:
before removing the
container
tim
the
ove~
Wow
it to stand in the
oven for 30
to
40
~onds
after the oven has shut
off.
Do
not
bofl
Uqtids
h
narrow-necked
contiem
auch
as
*
H
bo~
tie
~ks
and
W-y
narrow-necked coffee
cu~
Even if the container is opened, excessive
s-can
bdd
up and cause it to
bmt
or
Ovdow.
4

● f~~~blefi
ma
poud~
d
@tiy
~~
pWc
b-
shotid be
stig
pimed
or vented
as~
by
~bge.
~they
m
no~
phtic
codd burst during or
~
.
ly
afterm~,
possibly resulting in injury. fro,
phtic
storage
con-
should beat
bt
ptiy
uncovered
bause
they forma tight
sd.
men
cootig
with containers
tightiy
mvd
with plastic wrap,
remove
cove~
care~y
and
-ts-
away
tim
hands and
f-.
*
~.,
-
●
Hot foods
-d
steam
-
-use
burns. Be*
when
ope~
my
containers of hot food, including
po~om
bags,
cootig
pouches and
boxes. To prevent possible injury,
-s-
away from hands
and
f=.
&
—h
the event
of
a
~
ti,
smother
-g
pan on
surf=
unit by covering pan
compktely
with
we~-fitting
u
cootie sheet
or
fit
tray.
<la
the vent hood
oftem
h
not
dow
pse
to
btid
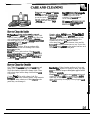
up on the hood or the flter.
—Uae
m
when
_
the vent hood
~ter.
Cmsive
cleaning agents, such as lye-basal
oven cleaners, may damage the falter.
—men
_
f-
m
under the hood,
turn the
h
ti.
The
fm
if operating, may
s-the
k.
SAW
T~SE
~STRUCTIONS
This
micmwave
oven is
~
fisted
for
initiation over
e~c
and gas ranges.
5

~
YOU
~ED
SERWCE...
To obtain
service,s=
the
Consumer Services page in
the back of this guide.
We’re
mud
of our service and
want you to be
plaed.
If for
some
~n
you are not happy
with
tie
service you receive,
here are 3 steps to follow for
further help.
~ST,
contact the people who
serviced your appliance. Explain
why you are not
pl~d.
In most
cases, this
wi~
solve the problem.
~UY,
if
your problem is
still
not resolved, write:
Major Appliance Consumer
Action Panel
=,
if you are still not
ple
~
North
Wacker
Wve
write
dl
the
detail+including
chic~o,
~
6H
your phone
number+:
Manager, Consumer Relations
GE Appliances
Appliance Park
~uisville,
KY
4225
MCROWAmG
~
●
me
m
W
~kware
used
h
your
d-wave
o-h
dhble
for
mhwa~.
Most
ghs
casseroles, cooking dishes, measuring cups, custard
cups, pottery or china dinnerware which does not
have
metilic
trim or
gl~
with a
dtic
sheen
can be used. Some cookware is labeled “suitable
for microwaving.”
●
Myou
m
nd
sure
tia
*
h
tiwavdq
m
M
H:
mace
in
tie
oven
both
tie
dish you are
testing and a glass
measuring cup
filled
witi
1
cup
of
●
Paper
tiwti,
-d
paper md
p~c
wrap
can be
used to cover
dishw
in order to retain
moisture and prevent spattering. Be
sum
to vent
plastic wrap so steam can escape.
●
Some
dcrowaved
foods
qtire
-*-
or
~.
Check the Cooking Guide.
“
Sk
btids
Up
p~
b
foods Winch are
~tiy
covti
by a
sti
or
membr~.
Pie~
potatoes, egg
yo~
md chicken
tivers
to prevent
bursting.
I
Eyou use a meat thermometer
wtie
cooking, make
sure it is safe for use in microwave ovens.
I
water+et
the
tiuring
cup either in or next to
tie
dish. Microwave 1 minute at high. If the dish heats,
it should not be
usd
for microwaving.
Hthe
dish
remains
-l
and only the water in the cup heats,
then the dish is microwave-safe.
6

V~LE
~~R
LEVELS
(1-10)
How
ti
C-
pow-
hVd
1. Press
MICRO COOK
or
_
D_OST.
2.
Sel-cooking ordefisting time.
~Tl~W]
3. Press
Pow
mm.
EQm
4. Select desired power level
1-10.
❑ mm
5. Press START.
❑ mn
Variable power levels add flexibility to your
microwave cooking. The power levels on your
micmwave
oven
ti
be
timpti
to the
stiace
units
on a range. High
@wer
kvel
10) or full power is
tie
fastest way to cook and gives you 100% power.
kh
power level gives you microwave energy a certain
percent of
*e
time. Power
hvel
7 is microwave
energy 70% of the time. Power
Uvel
3 is energy
30% of
*e
time.
A high setting (10) will
cmk
faster but may need
additiond
attention such as frequent stirring, rotating
or turning over. Most of your cooking will be done
on High (Power
hvel
10). A lower setting
wfll
cook
more evenly and
witi
1=s
attention given to stirring
or rotating the food. Some foods may have better
flavor,
texti
or appearance if one of the lower
settings is used. You may wish to use a lower power
level when cooking foods that have a tendency to
boil over, such as
scdlo@
potatoes.
Rest periods (when
tie
microwave energy cycles
o~
tive time for the food to
“wu*”
or transfer heat
~
the inside of the food. An-example of this is shown
with Power
bvel
34e
defrost cycle.
H
mimwave
energy did not cycle off,
tie
outside of the food wotid
Here are some examples of uses for various power
levels:
,
High 10
I
Fish, bacon, vegetables,
—
boiling liquids.
Meal-High 7
&nde
cooking of meat and
I
poultry; baking casseroles
‘d
reh~g.
Medium 5
Slow cooking and
tendetig
such as stews and less tender
cuts of meat.
hw
3
Defrosting without
-king;
simmering; delimte sauces.
Warml
~ing
id
warm without
overcooking;
softening
butter.
This
micmwave
oven has an automatic fan feature to
pro-
it from too much heat rising
tim
the
cooktop
or range
ben-ti
it. It
autornatidly
turns on at a low
s@ if it senses too much
ht.
E
you have
tid
the fan on you may
fmd
that you
cannot
tum
it off. This is because the automatic fan
has come onto
protit
the intemd parts of the
microwave.
The fan will
automatidly
~
off when the internal
parts are
cml.
It may
shy
on for 30 minutes or more
after the range and microwave controls have
bmn
turned off.
7

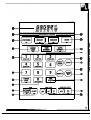
The Touch
@nhl
Pand
dom
you
h
~
tie
own
contib
titi
tie
huch of
a
b.
It’s
designti
to be easy to use and understand.
1.
DISPLAY. Displays time of day, cooking time,
power level being
ud,
cooking mode and
instructions.
2.
REHT.
Use Reheat for quick reheating of
a variety of foods using different
ti~
and
power levels.
3.
POPCO~.
Touch
thiS
Pd
to
-k
~packaged
mimwave
popcorn weighing 3.0 to 3.5 ounces.
No need to touch
ST~T,
the oven
wills~
immediately.
4.
MCRO
COOK
Wcrowave
for a selected amount
of time using automatic Power
bvel
10
(Mgh).
5. EKPRESS COOK. Touch number pads 1 through
5 for 1 to 5 minutes of-king. No
n~
to touch
STMT,
the oven will start
_iately.
&
N~ER
PADS. Touch these pads to program the
rnimwave.
7.
PO~R
LE~.
Touch this pad before entering
another power level number if you want to change
from automatic Power Level 10
(Mgh)
for cooking
or Power
Uvel
3 (Low) for defrosting.
8. CLOCK DISPLAY
ONOFF.
Touch the O number
pad to
tum
the clock display on or off. The Clock
Display
Wmfeature
cannot be used while
a
cooking feature
is in use.
9.
~C~
T-
This
f~ture
uses no
microwave energy. It functions as either a kitchen
timer, as a holding period after defrost or as a delay
timer before time cooking.
10.
~CK
Touch this
pad to
en~r
time of
daY
or
check time of day
w~le
microwaving. To
sit
clock,
fmt
touch CLOCK pad and then enter time
of day. For example, if time is
1:30,
touch number
pads 1,3 and O
md
“1:30”
will appear in display.
Then touch START or CLOCK pad. To reset or
change time, simply
~peat above process.
11. SNACKS.
Touch this
d.
a code number and
weight or quantity of
f~”to
warm a
varie~
of
snack foods.
12.
COOK
Touch this pad, a code number and
weight of food for quick cooking of a variety of
foods using different times and power levels.
13. AUTO DEFROST. Touch
thiS
Pd
and food
weigh~
then START. The oven automatically
sets power levels and
detisting
time.
14.
=
DEFROST.
Gentie
thawhg at automatic
Power Level 3
@w).
15. DELAY START.
~lows
YOU
to
~~
YOW
oven to
begin cooking at a preset time of
day—
up to a 12-hour delay.
16. START. After
dl
seldons
are made, touch this
pad to
sti
the oven.
17. mm. Use this with number pads to enter
whole minutes. For example, for 4 minutes touch
4 and
~.
18.
CLEAW~.
men
touc~,
it shuts off the
oven and erases
d]
setings (except time of day).
19. ADD
30
Sm.
Press this pad for 30 seconds
of cook time, to add 30 seconds to the cook
time as it’s counting down or for an
‘fnstant
on”
for 30 s-rids.
~.
SURFACE
LIG~.
Touch ON to turn on the
Sti-
light.
21.
~NT
FAN. Press
~,
LO or OFF for the
different fan speeds.
men
You Plug
h
tie
Wen
The display panel displays “88888”, “18
POWR”
and
dl
of the oven
functions. After 15 s-rids,
dl
lights
disap~
and “RESET” appears
OFF pad, set the Clock and ovenin the upper potion. Touch the
C~
is ready for use.
This
wfil
happen any time there is
a
power outage.
8


~AmS
OF
YOm
OWN
1111
I
I
!
I
=
Ill
1-
W
Ill – — —.– II
—
1. Door-tie. Pull to open door.
hr
must be
s~ly
latihed for oven to
o~te.
3.
W]ndow
tith
Ma
SMdd.
S~
allows
cooking to be viewed
wtie
kmping
microwaves
mtined
in oven.
A
Tou& Control
Pmd
and
D@ti
~hy.
For
&tied
information on
-h
f~ture,s=
Your
Towh
Control Panel
s~on.
5. Hood
Controh.
Vent Fan. Press
~,
~
or OFF.
Surf-
L~L
Press ON or OFF.
7.
Cooktip
H@L
9.
&en
moor.
NO~:
tig
plate, oven vent(s) and oven
fight
are
l~ti
on the inside walls of the
mimwave
oven.
To remind you that you have food in the oven,
the oven will display
“fid”
and beep
on=
a minute
until you either open
tie
oven door or touch the
CWOFF
pad.
This
is to
ce~
that this unit has
been
&sted
in
coti~ce
with
AMCA
Bulletin No. 210.
C.F.M.
sows
at 0.10
WG
7.2
Vert.
300
Vert.
6.8 Her.
300 Her.
10

HOW
TO USE
~
~C~N
MR
The
R-m
mm
b
--
btiom:
The Ktchen
Timer
cm
dso
be used to program a
s
It
opera-
as
a
mhuh
her.
“holding time” between microwave
-king
functions.
The time
a
range from one
-nd
to 99 minutes
“It
m
be set to
d~y
coo-
and 99 rends. A holding or standing time maybe
“It
a
be
med
as a hold
_
_
d~g.
found in some of your own recipes or in a
cookbook
The Kitchen T-operates without mimwave
e-.
-~
Stip
1: Touch
~~N
~~
pd.
n
To delay cooking up to 99
minu-
and 99 rends,
mm
touch
~CRO
COOK and enter cook time. Touch
mm
~
and enter number of minutes to
S@
2: Touch number pads 3,0 and O (for 3 minutes
delay cooking. Touch START.
T-
til
count down
and no seconds).
to
=ro
and cooking will begin.
o
Step 3:
Touch
ST~T.
Display shows time
mm
counting down. The timer
si@s
when
time is up.
bt’s
say you want to
&frost
a
fro=n
casserole for 15
minutes, hold for 10 minutes and then Micro Cook for
25 minutes. Here’s how to do it:
Step 1:
Take casserole from
~nr
and place in oven.
m
‘*
2: Touch
-DmosT.
m
Step 3:
Touch pads 1,5,0 and O for 15 minutes
defrosting time. Defrosting is automatically set
on Power
hvel
3 but can be changed by touching
the
PO-
~=
pad and the desired power
level 1-10.
Stip
5:
Touch 1,0,0 and O to hold for ten minutes.
m
Step
6:
Touch WCRO COOK.
M~~
Step
7: Touch 2,5,0 and O for 25 minutes of
-king
time.
o
Step 8:
Touch START. As
-h
function is
WM
automatidly performed, oven display
shows
ins~ctions
entered and the function.
men
time is up, the oven signals
md
flashes
“fid”.
m
Step
4: Set standing or hold time by
*mm
touching
mm
mm.
11

Mm
Cmk
I
Mcro
Cook
Wom
you to
dmwave
for a
p-
Baause
automatic Power
bvel
10 is
mmmended
amout
of tie.
for this
mp
of
mff~,
there is no need to change the
%wer
hvel
10
@gh)
is
~omme
nded
for most
power level. (If Power
hvel
10 is not appropriate,
-king,
but you may change this for more flexibility.
S*
“How to Change Power
hvel”
below.)
See the Cooking
Ouide.
o
Stip 4:
Touch START.
To
kome
better uquainted with time
cmking,
make
mm
a
~p
of
mffe
by following the steps below.
Step 1:
Fill a
ap
~
full of water,
add 1 teaspoon of
instant
wff~
and
stir to dissolve.
Use a
eup
that has
no
meti
*ration
ad
is
mierowave-
safe (refer to
Mic~wavihg
Tips
~tion).
MU
ap
in
oven and close door.
m
Step 2:
Touch
~CRO
COOK.
M~~
Step 3:
Select your time. Touch pads 1,0 and O for
1 minute.
Step 5:
men
time is up, the oven
sigmds
and flashes
“End”. The oven, light and fan shut off.
Step 6: Open the door.
H
you
in~pt
Mim
Cook to chink
tie
food,
skply
close
tie
door and press START to resume
~king.
If there is not time
remainin
g on the timer you must
reset the timer to resume cooking.
I
How to
Q
power
bVd
mm
S-
Mm Cmk I
I
1. Press
WCRO COOK.
❑ BR
2.
Select
-king
time.
❑ Bm
3. Press
POmR
Mm.
Emm
4.
Sel*destipowerlevel
1-10.
•~n
I
5. Press START.
I
The Micro Cook
~
feature lets you set 2 time
-king
fictions
within one
~~
This is
iti
if you
want
to
change power levels during your cooking
operations. Here’s how to do it.
Step 1:
Pk
the
food in the oven in a
mimwave-
safe container and close the door.
m
Step 2:
Touch
MCRO
COOK.
M-m
Step 3:
Sel-
your first cook time. For example,
touch 2, 1 and 5 for 2 minutes and 15
swonds.
Step
4: Now is the time to change the power level if
you don’t want full power for
MCRO
COOK. (Press
PO=
~=.
Selm
desired power level 1-10.)
S&p
5:
Touch MICRO COOK again.
Stip
6: Set your
=ond
-k
time.
Step
7: Change the power
level
for
~CRO
COOK.
@ss
PO-Mm. Sel@ desired
power level 1–10.)
n
‘tip8:wssT~T
.
The
mimwave
oven will start and the time set for
‘COOK
~
r’
wfil
aunt
down.
NSO,
“mm
10” or the power level
sel~ted
for
‘COOK
~
P’
will be displayd.
At the end of “COOK
~
r’,
the
~ond
power
level is displayed and the time for
‘~OOK
~
~“
is shown
munting
down.
men
time is up, the oven
sigmds
and flashes “End”.
The oven, light and fan shut off. Open
the
door.
Hyou
in~pt
Micro Cook to
ch~k
fie
food,
s~ply
close the door and press START to resume-king.
If there is no time remaining on the timer you must
~set
the timer to resume
-king.
12

To Express Cook your food or beverage:
The oven will
si@
and turn off automatically
when finished.
The Add 30
Scconda
f-
pviti
a
mnvenient
way to extend
-king
time
by
30
-nda
wtie
the oven
*
is
munting
down.
It
wtil
add 30 seconds to the time
shown
mh
time the pad is
touchd.
This
pad may
dso
be used as an express
-k
for 30
mnda
of cooking. Non-to
touch STMT, the oven will
sm
i~
.
tely.
How to Use
Dekty
Start
The
My
S-
f=ture
~om
you to program
S&p
2: Enter the time you want the oven to start.
your
o-b
b-
-~
at a preset
tie
of
@e
sure your microwave oven
clwk
shows the
tiy+p
to
a
l~hour
d~y.
co-
time
of day.)
@
Step
1:
Touch
D~Y
STWT
pd.
Step 3: Enter your desired cooking program.
.
.
Step 4: Touch
ST~T
pad. The oven will
automatically start at the desired time.
a
The Popcorn
f-is
d=ignd
to be used
ody
with prepackage
mimwave
popcorn weighing
3.0 to 3.5
Ounms.
Step 1:
*move
the outer wrapper from the
microwave popcorn.
Step 2:
Open oven door and place
~kage
of
w~m
~
tie
Cmw
of the oven
flwr
m
da
by the package instrufions. Close oven door.
Step
3:
Touch
POXOM
pad.
m
- ---
No
nd
to touch
ST~T,
the oven
wfil
~
‘~i~
-ately.
How to
Adjmt
the Popmm
~
to
Protide
a
Shorter or
bnger
Cook
Me
Eyour
favorite
po~om
is not
mmpletely
pop@,
E
your favorite
pop
is
ovemked,
them
is a
here
is a simple adjustment you
cm
make.
simple adjustment you can make.
Touch the
PO~OM
~.
me
oven will
Sm
E
Touch the
PONO~
immediately.) Then
P~P+
@“me
Oven will
sw
touch number pad 9. A
immediately.) Then
touch number pad 1. A
n
Pn?-
plus sign will appear on
the display beside the
minus sign will appear
on the
dispky beside the
word
“POP’. The plus sign indicates 20 s=onds more
word
‘~~’.
The minus sign indicates 20
=onds
less
cooking time is being
provi~.
-king
time is being
provti.
13

The Snacks
feafi
~
he
used
h
Use the
Snacks Code Guide. Touch
The oven calculates time and
warm a**
dpop*
-
the
SNAC~
pad. For codes 1 to
changes power levels during
fti.
The oven
au~y
4 enter the quantity of food. For
microwaving to give even results.
*b
dma~
ties
and
codes 5 and 6 enter the food
per
Ie*
for
ym
weight in ounces. Then touch
the
ST~T
pad.
.
0
Stip 5:
Touch
tie
ST~T
pad. Oven
mm
will
kgin
microwaving. Touching the
SNAC~
pad during microwaving will
S&p
3:
Touch
nu~r
display
the
m
maining
time.
-n
done,
pad of desired food oven displays “End”.
code. For example,
touch
nutir
pad 1
for
hread,
rolls or
mtins.
The*
numk
md food
w
YOU
selected will
appear
on
tie
display.
“ENTER” will flash.
How
h
Use
tie
SM~
F~ti
(Smh
Codes 5
nd
6)
NO~:
See
ahve
on how
b
H
Snacks
C*
1
m
4.
~~~~
S~p4:Touchnumkr@m~krfd
weight. For example, touch
1
and 2 for
Stip
1:
Remove
tie
food from
tie
package, place in
•=~
120~~s.~5_n&’’ST~~’
the oven on
microwav~safe
dish or container. Close
•~~
fl~heson~e~splay.
the oven door.
❑ mn
H
S&p
2:
Touch the
SNAC~
pad.
StiP
5: Touch the
STfiT
~.
Oven will
u
mm
kg-h
microwaving.
Toucfig
the
SNAC~
pad during microwaving will
display the remaining time.
men
done,
Stip
3: Touch
numher
oven displays “End”.
pad of
desti
food
code. For example,
touch
numk
pad 5
for soup. The code
numk
and food type
you
sel-
will appear
on the display. “ENTER
mG~’
will flash.
14

SNAC~
CODE
G~E
coda
1
ti4
For warming foods with Snacks Codes 1 to 4 use
tie
following guide:
Quantity
Food
We
Display
Limit
(QW)
Comments
B~,
mk,
1
bWAd
1
to4
Use paper towel or
mtins
microwave-safe phte.
Sandtieh-
2
SMdW
1
to 2
Use paper towel or
microwave-stie plate.
-
3
PE
1
to4
Use microwave-safe plate.
(leftover slices)
~
hppings
4
mP
1
to4
Use microwave-safe dish.
Coda
5
md
6
For
wting
foods with Snacks Codes 5 and 6 use the following guide:
.
.
weight
Food
Me
~
Dispky
Limit
(OZ)
Comments
soup
5 SOUP
8 to
a
oz.
Use
mierowavesafe
dish.
Cheeae
Dip
6
c-
4 to 16 OZ.
E
mntainer
is microwaveable,
follow
institions
on container;
or use mimwave-safe dish.
15

The Reheat feature is designed to reheat 1 to 3 Touch just 3 pads to use
Reh~t
codes 1 to 6 to reheat
servings of a previously
COOH
food. The oven turns
many popular foods. See the Reheat Guide
klow.
off automatically after a preset amount of time.
The
Reheat program
*Sit
a snap to reheat many
popub
foods. Choose a code number from 1 to 6
(see Reheat
Gui& below).
Sbp
2: Touch a number pad from
1
to 6 to
sel~
a
food group.
Stip
3:
Touch START pad. Oven will
sigmd
and
~
off automatically when
finishd.
Rehat
codes 1 through 5 let you heat up to three
servings. To add more than one serving, just touch
number pad 2 or 3 right before touching START.
:::?’”
w
displayed to show how
many servings have
The serving
size may even be changed or added
after touching START. Just touch number pad 2 or 3.
=
me
per
Cde
-lay
seti~
Fti
R~mmmH
1
PASTA
1-3
2 min. 10 sec.
Pasta
2
~TS
1-3
1
min. 30
~.
Meats, casseroles, pizza
3
VEGS 1-3
1
min. 15
Sw.
Fruits
ad
vegetables
4
bEV
1-3
1 min. 30 sec.
Beverages
5
SAUCE 1-3 1 min. 15 sec. Sauces and gravies
6
PMTE
3 min. 45
s.
2
to
3 foods, 4 OZ. each
CA~ON:
Reheated foods may have wide variations
*removing food from the oven, we
=mmend
in temperature. Some areas maybe
ex~mely
hot.
that
dl
reheati
foods be
sti,
if possible, to even
out the temperature.
16

COOK
Use the Cook
fea-
when coo-a
vdety
of
The oven
cddates
cooking time and changes power
dcrowaved
foods. The oven
autornatidy
sets
levels during cooking to give even cooking resdts.
the m-ties and power
lev~
for
you
Use
tbe
Cook Code Guide. Touch the COOK pad.
Touch a number pad
tim
1 to 9 to select the desired
food group. Enter the food weight in
ounms,
then
touch the
ST~T
pad.
Step 1:
Wmove the food
tim
tie
package, place in
the oven on microwave-safe dish and close door.
m
Step 2: Touch the COOK pad.
1
A
J
Step 3:
Touch number
pad of desired food code.
For example, touch
r
IIEL
I
1
number pad 1 for canned
vegetables. The code
WE
number and food type you
selected
wtil
appear on the
display.
“~
=G~’
will flash.
Step
4: Enter weight. For example, touch 1 and 8
for 18 ounces. After 5 seconds
“ST~’
flashes
on the display.
o
Step 5:
Touch
tie
STMT
pad. Oven will
WM
begin cooking. Touching the COOKpad
during cooking will display
tie
remaining
Cook time. Oven displays “End” when
cooking is done.
Cook Code Gtide
—
Cook
wd@t
Food
Code
Ltit
(OZ)
Cements
canned
1
4 to 20 oz.
Use
mimwav~safe
casserole or bowl.
V~bl=
Cover with
tid
or plastic wrap.
2
4
to
16 OZ.
Use microwav-safe
cassale
or bowl.
Vegetables
I I I
Follow package
ins~tions
for adding water.
Cover with
fid
or Plastic
wraP.
,
,
.
I
3
I
4
to
16 OZ.
I
Use micmwav~safe casserole or bowl.
V~bles
Add 2 tablespoons water for-h serving.
Cover with
tid
or plastic wrap.
Pohtoes
4
8
to
~
OZ.
Pierce skin with fork. Place side by side on oven floor.
~h
5
4
to
16 OZ.
Use oblong,
WU-
or round dish.
Cover with plastic wrap.
cMcken
6
4
to
40
oz.
Use oblong, wuare or round dish.
meces
Cover with wax paper.
Gm@
Meat
7
8 to 48 OZ.
Use round casserole dish. Crumble meat into dish.
@eef,
Pork,
Cover with wax paper.
rekey)
Bacon
8
2 to
10
oz.
hyer
strips on a plate, 4 to a layer.
Cover each layer with a paper towel.
m
9
4
to
16
OZ.
Follow package instructions to prepare pizza for
(ti=n
microwaving.
microwaveable)
17

w
..’
DE~OS~G
BY
m
We
M-
is des@ed for speedy
ti~
of
_
food
-d
is
one of the-tad-~ of a
microwave oven.
Use the Time Defrost setting to quickly thaw foods
such as bread, rolls, vegetables, fruits and
fromn
dinners. The Auto Defrost setting is
pferred
for
meat and poultry
kause
the oven sets the defrosting
time and power levels for you.
●
Power
kvel
3
is
automatidly
set when you
press
~
DEFROST pad, but you may change
this for more flexibility.
●
S=
the Defrosting Guide for defrosting help.
How to
C-
Power
bVd
1.
%ss
_
DEFROST.
❑ BB
2.
Seleet
defrosting time.
❑ Qm
3. Press
PO~R
~~.
Hmm
4.
Sel*
desti
power level 1–10.
❑ mu
5. Press
STMT.
To become better
Auainted
with the defrost
funtion,
defrost a 10 oz.
pwkage
of
fro=n
strawberries by following the steps below.
Step 1:
~ue
a package of
fromn
straw~ea
in
the oven
md
close door. Be sure
pmkage
contains
no
meti.
m
Step
2: Touch
~
DEFROST.
1
A
J
Step
3:
Sel~
one
~f
of the
toti
defrosting time
mmmeti.
For example, touch pads 4,0 and O
for 4 minutes.
o
Step
4: Touch START.
men
the cycle is
~M
completed, the oven signals and
tihes
“End”, then automatically shuts off.
Step
5:
h
the
pmkage
over, close
the
door and
rept
Steps 2 and 3 to set remaining
W
of
detisting
time. Touch
ST~T.
Step
6:
men
the oven signals
ad
flashes
‘Bd”,
open the door, remove the
pmkage
and separate
straw~es
to finish defrosting.
-
●
Foods frozen in
paper or
-O
For even defrosting, some
plastic can be
&-tisted
in foods need to be broken up
the
-e.
Tlghtiy
closed
or separated part of the way
pukages
should be
sti~
tiugh
the defrosting time.
Piereed
or vented,
~
iOOd
has partially
&tiSti,
as~
by
phge.
●
Foods that spoil easily, such as
mik,
eggs, fish,
Plastic storage containers
stuffings, poultry and pork
shotid
not be allowed to
should beat least partially
sit out for more
-
one hour after defrosting. Room
uncovered.
tempemture
pmo-
the
Pwth
of harmful
be.
●
Family-size,
pre-~kaged
kzen
dinners can be
. Check the Defrosting Guide for other defrosting tips.
defrosted and
timwaved.
H the food is in a
fofl
container, transfer it to a
mimwavesafe
dish.
Q.
men
I press START, I hear
add
th-p~
Q. Can
I
d-
-
items in a hurry?
noise.
-t
is
it?
A. Yes,
but
hey
will need more
~uent
attention
A. This
sound
is
nd.
It is letting you know the
than usual. Raise the power level after entering
magnetron is in operation.
the time by touching the
desti
power level pad.
Power
bvel
7 cuts the
toti
&frosting
time in
about
l~;
Power
bvel
10 cuts the
toti
defrosting
-
to
approxirna~ly
1~.
During either, rotate or
stir food
*uentiy.
18

A~O
DE~OST
Auto
Ddmst
Wth the Auto-f=- the oven
Use the
Auto
Detist
Guide.
hter
the food weight in
mti=tidy
*
the
d~
●
ti=
-d
power
pounds and tenths of a pound (see Conversion Guide
le+
for you.
blow).
Then touch
ST~T
pad.
The oven
d-s
-sting
time and chang= power
levels during defrosting to give even
debsting
restits.
How to Set Auto
Dtimt
Before
you
~
chti
the
-de
lmted
on the
tide
front of oven when you open the door.
It shows minimum and maximum food weights for
a variety of foods. You will need to
how
your food
weight
bfore
setting Auto
-st.
Step 1:
Wmove food from
pachge,
place in oven on
microwave-safe dish and close door.
m
step
2:
Touch
Am
D~OST
pd.
Sbp
3:
fiter
weight. For example, touch
numk
pads 1 and 2 for weight of 1.2
pouds
(1
pou~
3 ounces). See Conversion Guide
blow.
After
appm
ximately
5
s-tis
“ST~T’
flashes.
o
Step
4:
Touch
STMT
pad. Display shows
=M
defrost time
CO~@
down.
Twice during
detisting,
the oven
kps
4 times
E
andfc-ssflaahes.
7
~
~
?
Follow*e-onsin
~
~
~
~
the Auto
-st
Guide
for what to do at the
fmt
and
=ond
sigti.
Then close the door and touch
ST~T
pd.
men
debsting
time is
mmpleted,
“~d”
flashes
and oven
bps
4 times.
“~d”
remains on display
and oven
bps
every minute until door is opened or
C-OFF
pad is
touchd.
S-d
me
Convemion
Guide
After
Auto Defrosting, meat needs to stand in order to
let the inside defrost. You may
*the
food out of
tie
If the weight of food is
stati
in
dations
m
oven if you wish. Stand time
Hmmen
pounds and ounces, the ounces
given in the Auto Defrost Guide.
must
&
convti
to tenths (.1)
of a pound.
ounces
Pounds
1-2
.1
3
.2
65
.3
67
.4
8
.5
%10
.6
11
.7
12-13
.8
1415
.9
19

AUTO
DE~OST
G~E
mco~m
I
m.w.
~ODS
WG~
-T
SIGNAL
SECOND SIGNAL
STAND
=
Chops
I
0.1 -6.0
lbs.
I
Turn over.
I
Separate
md
shield
5 minutes
where
neces~.
F~,
Sausage
0.1 -6.0
lbs.
Separate.
Remove
deksted
2 minutes
pieces.
tiund
Mea
0.1 -6.0
lbs.
fim
over.
Remove defrosted
~as
5 minutes
and break
apti.
Beef Patties
0.1 -6.0
lbs.
I
Turn over.
I
Separa*
pties.
5
minutes
Roast
0.1 -6.0
lbs.
I
hover
and
Shield if necessary.
30
minutes
shield.
Ribs
0.1 -6.0
lbs.
h
over.
Remove defrosted
10 minutes
pi=es.
Shield if
n~~sary.
Sti
I
0.1 -6.Olbs.
I
tiOVti.
I
I
5minutes
stew
I
0.1 -6.0
lbs.
I
b
over and
I
Sep-
and remove
5 minutes
WD-&.
dehsted
uieces.
mole
Chicken
0.1 -6.0
lbs.
h
over and
b
over and shield.
10
tiutes;
shield.
run cold water
in cavity.
tihy
Bmt
0.1 -6.0
lbs. Turn over.
Shield where
20
tiutes;
~-t
side up)
necess~.
mn
cold water
in cavity.
Chicken Pieces
0.1 -6.0
lbs. Turn over.
Separate and remove
5 minutes
defrosti
pieces.
Cornish
Hens (whole)
0.1 -6.0
lbs.
Remove wrapper
10 minutes;
and
turn
OV=.
mn
cold water
in cavity.
Comish
Hens
(sDlit)
I
0.1 -6.Olbs.
I
fimover.
I
I
5minutes
Fish Fillets
I
0.1 -6.0
lbs.
I
k
over.
I
Separate and remove
5 minutes
defrosted pieces.
Shrimp, Scallops
I
0.1 -6.0
lbs.
I
Separate.
I
Separate and remove
5 minutes
defrosted pieces.
mole
Fish
0.1 -6.0
lbs.
Tum
over and
Hold under
shield tail and
cold running
hd.
water.
Uges
or thin
=as
of meat will defrost
mom
rapidly
tha
other
mas.
*
fimt
or second signal, shield warm
sreas
with
sdl
pieces of foil.
m
Page is loading ...
Page is loading ...
Page is loading ...
Page is loading ...
Page is loading ...
Page is loading ...
Page is loading ...
Page is loading ...
Page is loading ...
Page is loading ...
Page is loading ...
Page is loading ...
-
 1
1
-
 2
2
-
 3
3
-
 4
4
-
 5
5
-
 6
6
-
 7
7
-
 8
8
-
 9
9
-
 10
10
-
 11
11
-
 12
12
-
 13
13
-
 14
14
-
 15
15
-
 16
16
-
 17
17
-
 18
18
-
 19
19
-
 20
20
-
 21
21
-
 22
22
-
 23
23
-
 24
24
-
 25
25
-
 26
26
-
 27
27
-
 28
28
-
 29
29
-
 30
30
-
 31
31
-
 32
32


GE Spacemaker JVM239 User manual
- Category
- Microwaves
- Type
- User manual
- This manual is also suitable for
Ask a question and I''ll find the answer in the document
Finding information in a document is now easier with AI
Related papers
Other documents
-
witi Anti Theft GPS Tracking Installation guide
-
 witi 616748 Anti Theft Security System User guide
-
 witi 326 Wireless Electric Brake Controller Installation guide
-
witi Motorhome Installation guide
-
 witi 210708 Wireless Electric Brake Controller Installation guide
-
witi 784 Anti Theft System Installation guide
-
 witi 2AC7Z-ESP32 Wireless Electric Brake Controller Installation guide
-
Emerson MW8985WSD User manual
-
 Frost King V447H Installation guide
-
 GE Monogram JET343G User manual


