Page is loading ...

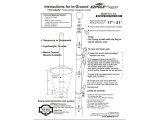
Football Goal Posts
MODEL SERIES: FGP400 and FGP600 series
Installation and Maintenance Instructions
Please read all instructions before
attempting installation of these units
SAVE THESE INSTRUCTIONS FOR FUTURE USE
P
UBLICATION
N
O
. Revised
9 4 1 7 5 2 6 3 5 rev5 Jan 2016

FGP Series Football Goal Posts
2
Table of Contents
Section Page No.
Introduction/Liability Disclaimer 3
Parts Checklist 4
Tools Required 6
Preparation for Installation 7
Post Installation – Permanent Mount 8
Post Installation with Ground Sleeves 9
Post Installation – Plate Mount 11
Crossbar Installation 13
Wind Flag Installation 13
Upright Installation 14
Optional equipment 14
Maintenance 15

FGP Series Football Goal Posts
3
Introduction/Liability Disclaimers
Thank you for your purchase of a Gared Sports FGP Series Football Goal Post. To ensure that
our equipment will provide years of use to you, we are including this installation and
maintenance guide. This guide will provide information on the proper assembly and installation
methods and preventative maintenance of your football goal post.
Please note that a Bill of Materials is being included with this guide. Please check that all of the
parts called out on the Bill of Materials are present prior to beginning assembly. Please do not
substitute for factory parts. Please contact the Gared Sports customer service department and
allow them to determine if substitute parts are acceptable.
It is recommended that an individual who has been properly trained perform assembly and set up
of the Football Goal Post. No one under the age of 18 should attempt assembly or set up of the
unit, unless properly supervised.
To prevent normal wear and tear from shortening the life of the unit, preventative maintenance
inspections and repairs should be performed at least once per year. If the units are subject to
high or unusual usage, inspections should be scheduled to occur more frequently. If items are
found to be nonconforming, replacements can be ordered from Gared Sports or one of our
authorized dealers. When contacting Gared Sports, please have information regarding the
dealer/installer who sold the unit, the name of the project, and any applicable warranty
information.
!
WARNING
Before proceeding with assembly, read all instructions and assembly procedures. Make
sure all parts have been received and are not damaged.
Do not allow persons to hang on Football Goal Post. Serious
injury may occur from a fall. All football goal posts must be
installed properly to avoid injury from tip over. Read and
understand all assembly instructions.

FGP Series Football Goal Posts
4
Parts Checklist
Verify all parts listed on packing list are present prior to installation.
Football Goal Post Components
PERMANENT/SLEEVE MODELS
FGP401S
FGP402S
FGP601S
FGP602S
POST DIA.
POST OFFSET
UPRIGHT SPACING
23'-4"
18'-6"
23'-4"
18'-6"
HS.
COLLEGE
HS
COLLEGE
ITEM
PART NUMBER
DESCRIPTION
QTY
QTY
QTY
QTY
1
155752729
WINDFLAG ENDCAP ASSEMBLY (PAIR)
1
1
1
1
945751120
CROSSBAR WELDMENT, 4.5 HS X 4.5 POST
1
945751121
CROSSBAR WELDMENT, 4.5 COLL X 4.5 POST
1
945751719
CROSSBAR WELDMENT, 4.5 HS X 5.56 POST
1
945751713
CROSSBAR WELDMENT, 4.5 COLL X 5.56 POST
1
3
945751122
BRKT WLDMT, UPRIGHT, 4-1/2" CROSSBAR
2
2
2
2
945752116
POST WELDMENT, 4 1/2" DIA, 5 FT FGP
1
1
945751711
POST WELDMENT, 5 9/16" DIA, 5 FT FGP
1
1
5
945755242
UPRIGHT-ALUMINUM, 20' GOAL POST
2
2
2
2
155752638
KIT, HARDWARE-FGP401S AND FGP402S
1
1
155752640
KIT, HARDWARE-FGP601S AND FGP602S
1
1
101152132
THREADED ROD, 1/2-13 X 10" LG
1
1
945751724
THREADED ROD, 3/4" DIA X 12-1/2" LONG
1
1
9.2
502-8-13-60
HEX BOLT, 1/2-13 UNC X 3.75
4
4
4
4
502-8-13-88
HEX BOLT, 1/2-13 UNC X 5.5
1
1
502-8-13-104 HEX BOLT, 1/2-13 UNC X 6.5 1 1
9.4 502-8-13-96 HEX BOLT, 1/2-13 UNC X 6 2 2 2 2
9.5
511-6-16-8Z
SET SCREW, CUP POINT 3/8-16 UNC X 0.5 Z
4
4
2
2
9.6
515- 8-13-16
SET SCREW, SQ HEAD 1/2-13 UNC X 1
6
6
6
6
541-8-13
HEX NUT 1/2-13
2
2
541-12-10
HEX NUT 3/4-10
2
2
9.9
545-8-13
HEX NUT, NYLON LOCK 1/2-13
7
7
7
7
9.10
561-8
FLAT WASHER 1/2
8
8
8
8
9.11
941752635
INST'L INSTR FGP SERIES GOAL POSTS
1
1
1
1
*Note: Quantities shown are for one goal. FGP goals sold in pairs.
9.7
4 1/2" OD
60"
5 9/16" OD
72"
2
4
9.3
9
9.1
Note: Part numbers that have a “Y” added to the end of the number indicate the crossbar and uprights are painted yellow.
Part numbers that have a “W” added to the end of the number indicate the crossbar and uprights are painted white.

FGP Series Football Goal Posts
5
PLATE MOUNT MODELS FGP401P FGP402P FGP601P FGP602P
POST DIA.
POST OFFSET
UPRIGHT SPACING
23'-4"
18'-6"
23'-4"
18'-6"
HS.
COLLEGE
HS
COLLEGE
ITEM
PART NUMBER
DESCRIPTION
QTY
QTY
QTY
QTY
1
155752729
WINDFLAG ENDCAP ASSEMBLY (PAIR)
1
1
1
1
945751120
CROSSBAR WELDMENT, 4.5 HS X 4.5 POST
1
945751121
CROSSBAR WELDMENT, 4.5 COLL X 4.5 POST
1
945751719
CROSSBAR WELDMENT, 4.5 HS X 5.56 POST
1
945751713
CROSSBAR WELDMENT, 4.5 COLL X 5.56 POST
1
3
945751122
BRKT WLDMT, UPRIGHT, 4-1/2" CROSSBAR
2
2
2
2
945752125
POST WELDMENT, 5' OFFSET, PLATE MOUNT
1
1
945751725
POST WELDMENT, 6' OFFSET, PLATE MOUNT
1
1
5
945755242
UPRIGHT-ALUMINUM, 20' GOAL POST
2
2
2
2
6
945751195
THREADED ROD, 3/4" X 40" LG
4
4
4
4
7 945751728 PLATE, GROUND TEMPLATE 1 1 1 1
8
945751734
RE-BAR, 1/2 X 4' LONG
4
4
4
4
155752639
KIT, HARDWARE-FGP401P AND FGP402P
1
1
155752641
KIT, HARDWARE-FGP601P AND FGP602P
1
1
9.2
502-8-13-60
HEX BOLT, 1/2-13 UNC X 3.75
4
4
4
4
502-8-13-88
HEX BOLT, 1/2-13 UNC X 5.5
1
1
502-8-13-104
HEX BOLT, 1/2-13 UNC X 6.5
1
1
9.4
502-8-13-96
HEX BOLT, 1/2-13 UNC X 6
2
2
2
2
9.5
511-6-16-8Z
SET SCREW, CUP POINT 3/8-16 UNC X 0.5 Z
4
4
4
4
9.6
515- 8-13-16
SET SCREW, SQ HEAD 1/2-13 UNC X 1
6
6
6
6
9.7
541-12-10
HEX NUT 3/4-10
12
12
12
12
9.8
561-12
FLAT WASHER 3/4
8
8
8
8
9.9
545-8-13
HEX NUT, NYLON LOCK 1/2-13
7
7
7
7
9.10 561-8 FLAT WASHER 1/2 8 8 8 8
9.11
941752635
INST'L INSTR FGP SERIES GOAL POSTS
1
1
1
1
*Note: Quantities shown are for one goal. FGP goals sold in pairs.
9
9.3
9.1
4
4 1/2" OD 5 9/16" OD
60" 72"
2
Note: Part numbers that have a “Y” added to the end of the number indicate the crossbar and uprights are painted yellow.
Part numbers that have a “W” added to the end of the number indicate the crossbar and uprights are painted white.
ITEM PART NUMBER DESCRIPTION QTY
1.1 1280-30-00 UNIVERSAL SNAP LINK, 1/4" 2
1.2 1406-11-00 EYEBOLT, 5/16" X 1" STAINLESS 2
1.3 541-5-18SS HEX NUT 5/16-18 SS 2
1.4 545-5-18Z HEX NUT, NYLON LOCK 5/16-18 2
1.5 945751760 WIND FLAG, FOOTBALL GOAL POST 2
1.6 945752727 END CAP, FOOTBALL UPRIGHTS 2
155752729 WINDFLAG ENDCAP ASSY (PAIR)

FGP Series Football Goal Posts
6
Ground Sleeve Components
Check the chart for the proper parts that match the Ground Sleeves you received.
GROUND SLEEVE PKG, MODEL
FGP400GS
FGP600GS
OD
6 5/8"
8 5/8"
LENGTH
60"
60"
ITEM
PART NUMBER
DESCRIPTION
QTY
QTY
101152131
THREADED ROD, 1/2-13 X 5.88 LG
3
945751721
THREADED ROD, 3/4" DIA X 7 7/8" LONG
3
101152132
THREADED ROD, 1/2-13 X 10" LG
1
945751724
THREADED ROD, 3/4" DIA X 12-1/2" LONG
1
541-8-13
HEX NUT 1/2-13
10
541-12-10
HEX NUT 3/4-10
10
945752124
TUBE, GROUND SLEEVE, 4-1/2" POST
1
945751723
TUBE, GROUND SLEEVE, 5 9/16" POST
1
*Note: Quantities shown are for one sleeve. Sleeve package sold in pairs.
23
21
24
22
Required Tools
Also required is necessary equipment to dig hole for posts, ground sleeves, or
post supports. Concrete working tools will be required.
½” electric or cordless drill 1/8” Allen Wrench
17/32” drill bit pliers
½” drive ratchet cutting pliers
¾” socket mallet
1 1/8” socket hammer
½” open end wrench level
¾” wrench tape measure
1 1/8” open end wrench chalk line or string

FGP Series Football Goal Posts
7
Preparation for installation
1.
Layout the location for the holes on the field. For the FGP401 or 402 series goals (4 ½”
diameter post), the center of the hole must be 5’-2 ¼” behind the front of the end zone
end line as shown above. For the FGP601 or 602 series goals (5 9/16” diameter posts),
the center of the hole must be 6’-2 3/4” behind the front of the end zone end line as
shown above.
2.
Dig hole as shown in Figure 1, Figure 2, or Figure 3 depending on the type of post
installation required. Figure 1 shows dimensions for a permanent mounting, Figure 2
shows dimensions for ground sleeve mounting, and Figure 3 shows dimensions for the
plate mounted goals.
FIGURE 1 (permanent) FIGURE 2 (sleeve mount)
FIGURE 3 (plate mount)

FGP Series Football Goal Posts
8
Post Installation – Permanent Mount (Figure 1)
NOTE: This section provides information for proper location and installation of the permanent mounted goal
post. If your installation requires a sleeve mount or plate mounted post, proceed to the appropriate section.
1.
Stretch a string the length of the field centered on the playing field. This string should be
over the center of the holes on each end of the field dug for the sleeve mounts.
2.
Add 6” of gravel to the bottom of the hole.
3.
Insert a drainage tube approximately 8-10” long in the center of each.
4.
Install one the threaded rods, item 9.1, through one of the bottom holes in the post and
secure with a nut, item 9.7, on each side. Tighten nuts by hand.
5.
Set the post, item 4, into the center of the hole with the horizontal portion of the
gooseneck aligned with the centerline of the playing field. Make sure the post is plumb
and the center of the post is 5’-2 ¼” behind the front of the end zone end line for the 4 ½”
post or 6’-2 3/4” for the 5 9/16” post.

FGP Series Football Goal Posts
9
6.
Support the post to maintain its position while the concrete cures. This may require some
scaffolding and bracing. Measure from the playing surface to the center of the open end
of the pipe at the gooseneck. The measurement taken should be 9’-9 3/4”.
7.
Fill the hole around the post with concrete to approximately 2” below the ground surface.
Slope the concrete away from the post to promote drainage.
8.
Concrete should cure for a minimum of 5 days before removing bracing and installing
crossbar and uprights.
Ground Sleeve Installation (Figure 2)
NOTE: This section provides information for proper location and installation of the optional ground sleeves. If
your installation requires a permanent mounted post or plate mounted post, proceed to the appropriate section.
1.
Stretch a string the length of the field centered on the playing field. This string should be
over the center of the holes on each end of the field dug for the sleeve mounts.
2.
Add 6” of gravel to the bottom of each hole.
3.
Set the ground sleeve, item 24, into the center of the hole with the slots at the top. Align
slots with the string line. Make sure the sleeve is plumb and the center of the sleeve is 5’-
2 ¼” behind the front of the end zone end line for the FGP400GS or 6’-2 3/4” behind the
front of the end zone end line for the FGP600GS.
4.
Measure from the playing surface down to the top of sleeve. Make sure this
measurement is 3 1/2” for the FGP400GS and 3” for the FGP600GS. Adjust height of
sleeve in the hole to achieve the proper dimension. Bottom of sleeve should be setting on
gravel or shimmed with a stone or brick.

FGP Series Football Goal Posts
10
5.
Fill the hole around the ground sleeve with concrete to approximately 7” below the turf
surface. Slope the concrete away from the sleeve to promote drainage.
6.
Concrete should cure for a minimum of 5 days before installing goal posts.
After concrete has cured completely proceed with installing the post
into the sleeve.
1.
Install the long threaded rod, item 22, through the top hole of the
gooseneck post, item 4, in line with the gooseneck. Center the
rod and secure with a nut, item 23 on each side.
2.
Install the three short threaded rods, item 21, in the remaining
three holes. Center each rod and secure with one nut, item 23, on
each side.
3.
Set the post into the sleeve and lower until the long threaded rod
engages in the slot at the top of the sleeve.
4.
Place a level on the post and check for plumb (check both
directions).
5.
If post requires adjustment to plumb, remove the post from the
sleeve and loosen the nuts on the threaded rods. Tighten one of
the nuts on one side of the threaded rod to shift the rod to the side.
Tighten the nuts on both sides and set the post back into the
sleeve. Recheck for plumb. Continue this process until the post is
plumb.
6.
Measure from the playing surface to the center of the open end of
the pipe at the gooseneck. The measurement taken should be 9’-9
3/4”
7.
Adjust the threaded rods in line with the gooseneck to tilt the post.
Tilting the post will adjust height of the gooseneck to achieve the
correct measurement.
8.
Once the post has been plumbed and adjusted to the correct
vertical measurement, check the gooseneck alignment to the
center of the field.
9.
Rotate the gooseneck to make sure the horizontal portion of the
gooseneck is accurately lined up with the centerline of the playing
field.
10.
Install a nut, item 23, on each side of the threaded rod in the slots
and tighten all nuts securely to prevent movement of the post.

FGP Series Football Goal Posts
11
Post Installation – Plate Mount (Figures 3)
NOTE: This section provides information for proper location and installation of the plate mounted goal post. If
your installation requires a permanent mounted post or sleeve mount, proceed to the appropriate section.
1.
Stretch a string the length of the field centered on the playing
field. This string should be over the center of the holes on each
end of the field dug for the post mounts.
2.
Add 6” of gravel to the bottom of each hole.
3.
Install a ¾” nut, item 9.7 onto each anchor rod, item 6. Screw the
nut onto the rod 4 ¼”. Make sure 4 ¼” of thread is exposed
above the nut.
4.
Install each rod into the ground template plate, item 7, then add
another ¾” nut, item 9.7. Make sure the bent portion of the rods
are turned outward from the plate at approximately a 45º angle.
Tighten the nuts by hand.
5.
Fill the hole with concrete to approximately 7” below the ground
surface. Level a spot in the center of the hole about 10” in
diameter. Slope the concrete away from the center to promote
drainage.

FGP Series Football Goal Posts
12
6.
Insert the plate and rod assembly into the concrete and work
it down until the bottom of the plate is touching the concrete.
Make sure the center of the plate is directly under the string
line, square with the field, and the center of the plates is the
correct distance behind the front of the end zone end line.
5’-2 ¼” for the 4 ½” diameter post, 6’-2 ¾” for the 5 9/16”
post.
7.
Insert the four pieces of re-bar, item 8, vertically into the
concrete about 4” out from the plate and 90º from each other.
Work the bars down until they are approximately 3” below
the surface of the concrete.
8.
Smooth surface of concrete and allow to cure.
9.
Concrete should cure for a minimum of 5 days before
installing goal posts.
After concrete has cured completely proceed with installing the post onto the base.
1.
Install a ¾” flat washer, item 9.7 on each
threaded rod.
2.
Set post over the threaded rods being careful to
not damage the exposed threads.
3.
Install another ¾” flat washer, item 9.7 on each
rod and then install a ¾” nut, item 9.9 on each
rod.
4.
Tighten all four nuts enough to make sure the
post is firmly seated on the base.
5.
Place a level on the post and check for plumb
(check both directions).
6.
If post requires adjustment to plumb, loosen the
nuts and adjust the nuts under the post plate to
raise the edge of the plate. Tighten the top nuts
and recheck for plumb. Continue adjusting until
the post is plumb.
7.
Measure from the playing surface to the center
of the open end of the pipe at the gooseneck. The measurement taken should be 9’-9
3/4”. Adjust the height of the post to achieve the correct measurement by adjusting the
nuts at the base of the post.
8.
Once the post has been plumbed and adjusted to the correct vertical measurement, check
the gooseneck alignment to the center of the field.
9.
Rotate the gooseneck to make sure the horizontal portion of the gooseneck is accurately
lined up with the centerline of the playing field.
10.
Tighten all nuts securely to prevent movement of the post.

FGP Series Football Goal Posts
13
Crossbar Installation
1.
Make sure inside diameter of post is clean
and free of burrs.
2.
Raise crossbar, item 2, to the post making
sure it is supported on each end.
3.
Slide the crossbar stub into the post, item 4,
and push in approximately 12”.
4.
Drop a plumb bob from the front edge of the
crossbar to the ground.
5.
The front of the crossbar should be directly
above the inside edge of the end zone end
line.
6.
Move the crossbar in or out of the post until the plumb bob is lined up correctly on the
end zone end line.
7.
Place a level on the cross bar and rotate the crossbar in the post until it is level.
8.
Install the two setscrews, item 9.6, and tighten securely.
9.
Recheck crossbar for level and recheck alignment to the end zone end line.
10.
Using the hole on the post as a guide, drill a 17/32” hole through the crossbar stub.
11.
Install the ½” bolt, item 9.3, with a flat washers, item 9.10, and secure with a ½” locknut,
item 9.9.
12.
Tighten the locknut securely and retighten both setscrews.
Wind Flag Installation
1.
Install the 5/16” nut, 1.3, onto the eyebolt, item 1.2.
2.
Insert the eyebolt into the end cap, item 1.6, and
secure with the 5/16” locknut, item 1.4.
3.
Repeat for each cap assy.
4.
Tap the end cap assembly onto the top (end of
upright without a hole) of each upright, item 5.
5.
Install the snap link, item 1.1, through the eyebolt to
attach the wind flag, item 1.5.

FGP Series Football Goal Posts
14
Upright Installation
1.
On the ground, install the upright mounting
bracket, item 3, onto the upright, item 5,
2.
Insert the ½” bolt, item 9.2 with flat washers,
item 9.10, through the bracket and upright and
secure with a ½” locknut, item 9.9.
3.
Raise the upright (bracket end) to the level of
the crossbar and slide the bracket onto the
crossbar, item 2.
4.
Make sure the upright mounting bracket is
pushed onto the crossbar completely.
5.
Rotate the upright to the vertical position and
snug the two setscrews, item 9.6, in the bracket.
6.
Using a level, adjust the upright for plumb.
7.
When the upright is plumb, tighten both
setscrews securely, item 9.6 and item 9.5.
8.
Using the hole in the bracket as a guide, drill a 17/32” hole through the crossbar.
9.
Install the ½” bolt, item 9.4, with a flat washers, item 9.10, and secure with a ½” locknut,
item 9.9.
10.
Tighten the locknut securely and retighten both setscrews.
11.
Repeat the process for the other upright.
Optional Equipment
1.
Install optional pads to gooseneck post.
GSPPAD3 Protective post pad for posts up to 4 1/2” O.D.
GSPPAD4 Protective post pad for posts up to 6” O.D.

FGP Series Football Goal Posts
15
Maintenance
1)
General inspection of equipment when used should be performed to ensure no
catastrophic failures have occurred during the course of use between yearly inspections.
2)
It is recommended that yearly inspections be conducted to determine if any bolts or other
hardware has become worn or loosened.
3)
During yearly inspections, check all joints to make sure they are tight and secure. Check
the wind flags for general condition and wear.
4)
Any loose bolts or nuts should be tightened.
5)
Replace any components that are missing or worn.

Gared Holdings, LLC
Performance Sports Systems Gared Sports
9200 E. 146
th
Street 9200 E. 146
th
Street
Noblesville, IN 46060 Noblesville, IN 46060
800-848-8034 800-325-2682
www.perfsports.com www.garedsports.com
/