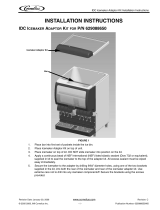
92254
Revised: October 8, 2001
Rev E
April 1998
EIMI Cornelius Inc; 1998
IMI CORNELIUS INC.
One Cornelius Place
Anoka. MN 55303-6234
Telephone (800) 238–3600
Facsimile (763) 422–3246
FOR
KIT PART NUMBERS 08027 AND 08030
FOR MODEL ED300 DISPENSER AND THE FOLLOWING 30” WIDE ICEMAKER MODEL
SERIES:
MANITOWOC QQ1400C, Q–DUAL
SCOTSMAN CME 806/865/1002/1056
Table 1. Loose-Shipped Parts
Item
No. Part No. Name Qty.
1 29505 Lid Assembly 1
2 22127 Icemaker Mounting Bracket 2
3 50904 RTV. 3Oz Tube 1
4
52946 Manual Ice Fill Cover – Black (08027) 1
52964 Manual Ice Fill Cover – Gray (08030)
5 91957 Label, “Disconnect Power Before Cleaning” 1
6 620042919 ED300 Ice Baffle 1
7 620701601 #10 x 1/2” LG. Sheetmetal Screw 12
8 620701902 #8–32 Nylon Acorn Nut 4
9 620701901 Sealing Washer 4
10 620701903 #8 Nylon Washer 4
11 92254 Installation Instructions 1
WARNING: The dispenser must be secured with 3/8–16 bolts (6) to the counter before
installing this icemaker adapter kit. Refer to the installation manual and figure 2 for the
counter mounting template.
CAUTION: Disconnect electrical power to the dispenser before proceeding with this
installation.
NOTE: Adjust the automatic agitation timer located in the dispenser’s electrical control box to 5 sec-
onds on, 20 minutes off. Access to the timer is provided by removing the merchandiser/upper front
panel.
1. Remove the top plastic bin covers (2) from the dispenser

2
92254
2. Place the icemaker adapter lid assembly (item 1) on top of the dispenser and position it flush with the rear
and sides of the dispenser as shown in Figure 1.
3. Install the ice baffle on the lid assembly as shown in Figure 3.
IMPORTANT: The baffle prevents ice from over–filling the manual fill area during agitation/dispensing
with a full storage bin and forcing the manual fill cover off.
4. Using the slotted holes in the lid as a template, drill (4) .147 diameter holes (#26 drill) at the bottom of the
slots (see Figure 1 Detail A). BE CAREFULLY NOT TO DRILL INTO THE ICE STORAGE BIN. Secure the
lid to the dispenser with (4) #10 sheetmetal screws.
5. Seal the icemaker to the dispenser lid as follows (see Figure 1).
A. Run beads of RTV around the opening in the lid and inside of the perimeter of the ice maker outline so
that the ice maker will set on the RTV.
B. Set the ice maker onto the lid and position it as shown in Figure 1.
C. Wipe away the excess RTV.
6. Drill .147 diameter holes into the ice maker cabinet and the dispenser lid using the icemaker mounting
brackets as templates. USE CAUTION SO AS NOT TO DRILL INTO ANY ICEMAKER COMPONENTS
(CONDENSER, TUBING, ETC.). Secure the brackets using the #10 sheetmetal screws provided.
7. Follow the icemaker manufacturer’s instructions to complete the installation of the ice maker including the
bin thermostat if so equipped or required.
IMPORTANT: For Scotsman CM series icemakers with sonic ice level control, Bin Thermostat Kit KSB1
must be ordered with the icemaker.
CAUTION: The bin thermostat location must not interfere with agitator rotation.
8. Locate the cleaning caution label (item 5) on the manual ice fill cover (item 4) as shown in Figure 1. Place
the manual fill cover in position over the flange on the lid assembly and the front access hopper opening.

922543
SEE
DETAIL A
ICEMAKER
SEAL TO ITEM 1
WITH ITEM 3
REFER TO
STEP 5
30
DETAIL A
DRILL Ø .147 HOLES
USING BOTTOM OF
SLOTTED HOLES IN
LID AS A TEMPLATE
7
5
7
4
2
1
3
POSITION ICEMAKER
FLUSH WITH REAR OF
LID AND CENTERED
ON DISPENSER
7¼
FIGURE 1. DISPENSER

4
92254
4 PLC.
ICEMAKER SHOWN
FOR REFERENCE
ONLY
4 PLC.
BAFFLE
(ITEM 6)
SHOWN
IN PLACE
4 PLC.
1
9
8
6
10
FIGURE 2. ED300 BAFFLE KIT

922545
Ø
7/16
(6) PLCS
OPENING
18 5/8
8 5/8
22 3/8
3 3/16
44 3/8
29 3/4
31 1/2
15
3 1/2
20 3/8
40 3/4
1 13/16
1 5/16
6 11/16
21 1/4
15
12
4 1/2
REMOVABLE
SINK
RECOMMENDED COUNTER OPENING SIZE 12” X 15”
FOR UTILITIES AND BEVERAGE TUBING. OPENING
CAN BE LOCATED ANYWHERE WITHIN THE SHADED
AREA.
16 1/8
2 9/16
8 1/2
TO FRONT OF DRIP TRAY
ON COUNTER
TOP
TO FRONT TOP OF
DRIP TRAY
FIGURE 3. MOUNTING TEMPLATE
/