Page is loading ...

Infinity Power Camel™
Instruction Manual

1 | P a g e
Contents
2) Overview
Getting Started – Unpacking
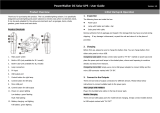
3) Getting to know your Power Camel
Key Features
4) Storing your Power Camel
Prolonging battery life
5) Charging your Power Camel – three different ways to charge
8) Using your Power Camel
12) Viewing the battery capacity (Charge Level)
13) Extending the capacity of the Power Camel – Using the Power
Bump
14) Adapter Tips and applications
15) Warranty information
16) Specifications
17) Customer Support

2 | P a g e
Overview
You can use the Power Camel as your universal rechargeable battery—to
power just about any portable device. Simply connect the Power Camel to your
laptop computer, portable DVD player, digital camera, digital camcorder,
portable CD player, PDA, mobile phone, or other portable device to extend the
battery life. As an added bonus, the Power Camel will charge the internal
battery on some devices, while also powering the device.
The Power Camel can be used alone, or with the optional extended battery,
the Power Bump, to double the capacity to a massive 100 Watt Hours. That’s
enough power to run your average laptop for an extra 4 to 5 hours! The
extended battery with mounting brackets is sold separately.
Getting Started
Unpacking
Your Power Camel
TM
includes the following:
• Power Camel Battery Pack
• AC battery charger
• Protective Cover
• Various Out Put Adapters and bag
• Output Cable

3 | P a g e
Key Features
5 – 19V DC out port, can charge or power a massive range of portable
electronics with the extensive range of adapter tips
LED Capacity Indicators, indicates the state of charge of the Power
Camel
Full sized USB power port to power any USB powered device
Can be charged by solar panel or AC adapter
Team the Power Camel up with the Power Bump and have double the
capacity, a massive 100 Watt hours
Light weight and very durable, with a compact body it is easily
transported in your laptop carry bag
Suitable for passing Airport security inspection

4 | P a g e
Storing your Power Camel™
Lithium polymer batteries must be used periodically for maximum
performance. If you do not use the battery pack regularly, to keep the internal
battery in top condition, once a month you should fully discharge the battery
pack and recharge the battery pack to 70% (for storage), and store it in a cool
and dry environment at a temperature between 10° and 30°C. You may
permanently damage your battery’s capacity by storing the battery without
any capacity in the cell. It is important that you do not leave the battery in the
interior of a vehicle parked in the sun, or exposed to direct sunlight for
extended periods of time.
Prolonging Battery Life
Extreme heat and cold will affect your battery’s performance. At temperatures
above 27°C, the battery will discharge more quickly, and in colder
temperatures, the battery won’t charge well. Therefore, it is recommended
that the battery is used at room temperature, or between 20°C to 25°C. The
battery must be used at temperatures between 0°C to 50°C.
It is not recommended that the battery is charged in temperatures above 40°C,
and the battery capacity may be permanently reduced if you use your battery
in temperatures higher than 50°C. You may permanently damage the battery if
you charge the device in these temperatures. You may find that using the
battery in a very cold environment decreases the battery capacity. Unlike the
effects of a hot environment, this is a temporary condition. Once warmed, the
battery will return to its previous capacity.

5 | P a g e
Charging your Power Camel
There are three different ways that you can charge your Power Camel:
1. Using the included AC charger
2. Using your laptops AC charger
3. Using a portable Solar Panel
Charging your Power Camel™ with the included AC charger
The Power Camel™ will charge in approximately four hours, using the AC
Power Adapter, from a completely empty state. The green Charge indicator
will turn on after the battery is 80% charged. Therefore, you should view the
actual battery capacity before disconnecting the power adapter to stop
charging. (Before using Power Camel™ for the first time, you must charge the
device for a minimum of four hours.)
1. Plug the power adapter into the DC IN jack on the end of the Power
Camel™.
2. Plug the power adapter into a wall outlet. The red LED Charge indicator
on the Power Camel will turn on to indicate the battery is charging and is
less than 80% charged.
3. When the green LED Charge indicator turns on, you can check charge
level two ways:
4. With the Power switch set to OFF, press the voltage selector to view the
battery capacity. If the capacity does not indicate full (all blue LEDs on),
continue to charge the battery until the battery capacity indicates full.
5. Or with the Power switch set to ON and the device connected, press the
voltage selector to view the battery capacity. If the capacity does not
indicate full (all blue LEDs on), continue to charge the battery until the
battery capacity indicates full.
(For additional information, see “View the Power Camel’s Battery Capacity”)
NOTE: The Power Camel™ will automatically shut down the power input when
fully charged, so you can charge it overnight without damaging the unit.

6 | P a g e
Charging with your Laptops AC charger
You can use a third party power supply to charge your Power Camel as long as
it has a DC output voltage range from 12V to 20V, with a minimum 1.5A output
current. The Power Camel will not charge its internal battery if the input
current is lower than 1.5A. To fit the DC jack, the DC plug must have an outside
diameter of 5.5mm and an inside diameter of 2.1mm (5.5 x 2.1mm).
If you would like to use one power supply for both your laptop and Power
Camel, use the power supply with the highest output current (Amps). For
example, if the output of your laptop’s power supply is 19V 4.0A, while the
output of the Power Camels power supply is 20V 3.0A, use your laptops power
supply to charge both your Power Camel and your laptop.
If your laptop power supply plug does not fit into the Power Camel DC IN port,
you can use an optional input adapter tip, available direct from Infinity Power
Systems Ltd.
Charging with a Solar Panel
The Power Camel can be charged by solar power when using a compatible
solar panel. You can charge the device using the DC IN port (5.5 x 2.1mm), or
by the 6-Pin Input Port using the Smart 6-Pin Solar Charger.
The DC IN port is designed for use with a DC power adapter with constant
current input. Charging the Power Camel requires a minimum of 1.5A current
output from the solar panel. In general, a 25W or higher solar panel should
provide sufficient power to charge the Power Camel. (The Sunlinq
TM
5 25 W
Solar Panel product match the Power Camel’s input power requirements.)
The 6-Pin Input Port is designed to allow charging by smaller solar panels
(lower than 25W), and requires an optional Smart 6-Pin Solar Charger available
as an additional accessory. To use the solar panel with this port, the solar panel
must have a minimum open circuit voltage of 12V.
Note: there is no minimum output current requirement from the solar panel
when using the 6-Pin Solar Charger.

7 | P a g e
To Charge through the DC IN Port using a Solar Panel
1. Connect the solar panel output cable into the DC IN port the Power
Camel.
2. Verify that the red LED charging indicator turns on to indicate the
battery is charging and is less than 80% charged.
3. After approximately four hours, press the Capacity Display button to
view the battery capacity. If the capacity does not indicate full (all blue
LEDs on), continue to charge the battery until the battery capacity
indicates full.
4. When the battery capacity indicates full, unplug the connected charging
cable.
To Charge through the Smart 6-Pin Solar Charger
1. Connect the 6-Pin end of the 6-Pin Solar Charger into the 6-Pin Input
Port of the Power Camel.
2. Plug the Solar Panel into the 6-Pin Solar Charger
3. Verify that the red LED charging indicator next to the input jack on the
Smart 6-Pin Adapter turns on to indicate the battery is charging.
4. After approximately four hours, press the Capacity Display button to
view the battery capacity. If the capacity does not indicate full (all blue
LEDs on), continue to charge the battery until the battery capacity
indicates full.
5. When the battery capacity indicates full, unplug the connected charging
cable.

8 | P a g e
Using the Power Camel
The Power Camel can be used to power and/or charge up to two portable
devices simultaneously. With devices that require higher voltage levels, like
laptop computers and portable DVD players, however we recommend that you
use the Power Camel to power only a single device, and not to try and
simultaneously charge a second device. You will find that only powering,
without charging (this is explained in full later) your higher voltage device, you
will maximize the battery run-time of the Power Camel, thus letting you use
your portable device even longer.
To use the Power Camel to power and/or charge your device, take these steps
which are described in detail in the following sections.
Select an adapter plug for your portable device and connect the plug to
the output cord.
Connect the power output cord to the Power Camel.
Slide the Power switch to the “on” position.
Adjust the voltage level to match that of your portable device.
Connect the adapter plug/output cord to your portable device.
Connect a second 5V device (e.g. Mobile phone) to the USB port if you
want to charge two portable devices at once.
Select/Connect the Adapter Plug
1. Select the adapter plug that fits securely into the power jack on your
portable device.
2. Locate the polarity symbol on your device in the area around the power
connector jack:

9 | P a g e
WARNING: The Power Camel supports Centre Positive polarity only. If your
device has a Centre Negative polarity, do not power or charge your device
with the Power Camel; please contact support@infinitypower.co.nz for help.
3. Connect the adapter plug to the power output cord (but not to your
portable device just yet).
NOTE: If you change the adapter plug while the power adapter cord is
connected to Power Camel, the voltage setting will reset to the lowest voltage,
which is the default voltage.
Connect the Power Output Cord
1. Plug the large end of the power output cord into the DC OUT jack on the
end of the Power Camel. This connector has one flat surface with an
arrow “ ->” moulded into it. (If you have previously selected a voltage,
the voltage selection will be returned to the lowest setting.)
Adjust the Voltage Level
2. Locate the voltage specification for your portable device. This can be
found on the device power adapter label or device specification label
which typically is found on the bottom of the unit. (If available, use the
voltage specification shown on the power adapter.)
3. Slide the power switch to ON. The 5V voltage indicator will turn on to
indicate that the voltage is set to the lowest setting.
4. Connect the output cable to the DC OUT port.
5. Press the voltage selector until the voltage indicator for your voltage
selection (5, 6, 7.5, 9, 12, 14, 16, 19) turns on. Set the voltage output to
the selection that is equal to, or one step lower or higher (whichever is
closer) than the voltage identified for your device. For example, if your
device requires 6V, set the voltage to 6V. If you device requires 7.2V, set
the voltage to 7.5V. The voltage will be automatically locked when the
device is connected. The light under the voltage selector will glow to
indicate the voltage is locked. (Please note, if the light stops glowing, the
voltage has become unlocked.)
6. To change the voltage, disconnect the output cable from the device, and
select a new voltage. The voltage will be automatically locked after the
new device is connected.

10 | P a g e
CAUTION: It is important to set the voltage selector NO MORE than one step
higher than the voltage requirement for the portable device as an incorrect
setting may prevent the Power Camel from working with your device, or may
harm your device in the rare instance that the device accepts the higher
voltage. However, for all devices, adjusting the voltage ONLY one step higher
than required will not harm the device.
TIP: You can optimize the use of the Power Camel with your laptop computer
or portable DVD player by setting the voltage on the Power Camel to less than
the required voltage shown on the laptop computer power supply. This
prevents the Power Camel from charging the device, thus extending the
amount of time you can use the Power Camel to power your laptop computer.
Most laptop computers have a battery voltage of 11.1V or 14.8V, allowing
them to be powered with 12V or 14V. Therefore, it is recommended that you
set the voltage to 12V first, and then test to see if it will power your laptop. If
not, increase the voltage to 14V, and retest. Repeat this process until you
reach the voltage that will power your laptop. Most portable DVD players
require 9 or 12 volts. Set the voltage to 7.5V and test to see if the Power Camel
will power your device at this setting. If not, increase the voltage by one level
and retest.
Connect the Portable Device

11 | P a g e
1. Connect the adapter plug into the power jack on the portable device.
The voltage selection will be locked automatically and cannot be
changed until the power output cord is disconnected from the device.
2. Turn on the portable device and use it as you would normally. While
connected, the Power Camel will power and charge your device. (As
mentioned earlier, the Power Camel will not charge a device if the
voltage setting is lower than that required.) Leave the portable device
turned off and the Power Camel will charge the device battery.
3. When finished, slide the Power switch to OFF to turn off the power
when the Power Camel is not in use.
NOTE: If your portable device displays a low voltage/low capacity or double-
beep warning while the Power Camel is connected, adjust the voltage setting
to one level higher.
TIP: For most portable devices, the Power Camel can be used to power the
device even when the device battery is not installed.
Connecting a USP powered device
1. Connect your devices USB cable into the USB port on the Power Camel
2. Connect your devices UDB cable to your device.
3. Slide the Power switch to ON to turn on the power. While connected,
the Power Camel will power and charge your device.
4. Slide the Power switch to OFF to turn off the power the Power Camel is
not in use.
NOTE: The USB port provides only 5V of power, the voltage cannot be
changed. When using this port, you will not select the voltage.

12 | P a g e
Viewing the Battery Capacity of the Power Camel
The capacity of the Power Camel will decrease as the battery powers and/or
charges your devices. The remaining capacity is shown on the voltage
indicator, which is accessed as described below. As the remaining capacity
decreases, the lights will turn off in sequence from right to left. When the
Power Camel’s battery capacity is low, only the first capacity indicator will be
on. You should recharge you Power Camel at this time if possible. When the
Power Camel is completely out of battery, all lights will be off. At this point,
you must charge the Power Camel.
With the output cable disconnected from the Power Camel and the
power switch in either position, press and hold the voltage
selector/capacity button to check the capacity.
Or
With the output cable connected to the Power Camel and the power
switched to OFF, press and hold the voltage selector.
Or
With the device connected, the power button switched to ON, and the
light under the voltage selector glowing to indicate the voltage is locked,
press and hold the voltage selector. (Please note that if the voltage
indicator is unlocked, indicated by the absence of the glowing light
under the voltage indicator, pressing the voltage selector will change the
voltage which may cause harm to the connected device.)
To view the voltage selection, release the voltage select and the battery
capacity indicators will turn off. One indicator will remain on to indicate
the voltage selection.

13 | P a g e
Extending the capacity of the Power Camel
You can double the capacity of the Power Camel by attaching the Power
Bump™ extended battery to the Power Camel.
Using the Power Bump Extended Battery
1. Place the Power Camel on top of the Power Bump with both of the flat
silver stripe ends facing in the same direction.
2. Connect the bracket with the 3-Pin plugs inside to the silver panel ends
of the battery packs. The 3-Pin plugs will mate with the 6 pin battery
port on each of the devices, and the controls on the end of Power Camel
will show through the bracket opening.
3. Connect the second bracket on the opposite end of the devices to hold
the units together securely.
4. Use the Power Camel as you would normally.
All batteries will be charged/discharged at the same time (in parallel)

14 | P a g e
Adapter Tips and Applications
The Power Camel comes standard with 9 adapter tips that fit the most
common DC adapter jacks on a large variety of laptops and other portable
devices., A mini USB tip and USB cable are also included. The following table
shows each adapter tip model number, marking, and compatible devices and
manufacture. If your device is not listed, please compare the tip specifications
to that of your devices original tip to see if there is a match. If not, please
contact us as we can supply you with additional tips.
Tip List
Adapter Tip Marking
Compatible Device and Manufacture
A
Laptops: Acer, Asus eeePC, HP/Compaq (4.75 (OD) x 1.7 (ID)
x 10.5 (L) mm)
B
Laptops: Acer, IBM/Lenovo (5.5 (OD) x 2.1 (ID) x 10.5 (L) mm)
C
Laptops: Acer, Asus, Fujitsu, Gateway, HP/Compaq,
IBM/Lenovo, NEC, Panasonic, Toshiba, Winbook (5.5
(OD) x 2.5 (ID) x 10.5 (L) mm)
D
Laptops: Toshiba (6.3 (OD) x 3.0 (ID) x 10.5 (L) mm)
E
Laptops: Fujitsu, Panasonic, Sony (6.5 (OD) x 4.3 (ID) x 10.5 (L)
x 1.35 (inner pin) mm)
V
Panasonic Digital Camcorders, Sony PSP, Portable DVD
players (4.0 (OD) x 1.7 (ID) x 10.5 (L) mm)
Z
Canon Digital Camcorders (3.5 (OD) x 1.3 (ID) x 10.5 (L) mm)
K1
Laptops: Dell models (7.4 (OD) x 5.0 (ID) x 12 (L), 0.6mm inner pin)
K3
Laptops: HP models (7.4 (OD) x 5.0 (ID) x 12 (L), 0.6mm inner pin)
I6
Laptops: IBM and Lenovo (7.9mm (OD) x 5.5mm (ID) x 12.0mm
(L), 1.0mm inner pin)
03
Cell Phones, MP3 and Portable Media Players (2.3 (OD) x
0.7(ID) x 10 (L)mm)
Adapter Tip marking

15 | P a g e
Warranty Information
All Infinity Power System Ltd products are warranted to be free of operational
defects for a period of one year from the date of purchase. In the event of a
defect in operation during the warranty period Infinity Power Systems Ltd, will
replace or repair the defective product when the owner returns the original
product along with all the original product contents. The limited warranty will
be considered void if the unit is tampered with, subject to misuse, negligence
or accidental damage, has been improperly serviced, or if the security seal is
removed. This warranty is limited to replacement or repairs only, and shall not
cover any other damages. Any product returned to Infinity Power Systems Ltd,
with no fault found will be returned to the owner at the owner's expense. IPS
Ltd must issue a Return Merchandise Authorization (RMA) number for all
exchanges or refunds. Any product returned without an RMA will not be
processed.
Disclaimer of Warranties
Any user of this product does so at their own risk. To the maximum extent
permitted by the law, Infinity Power Systems Ltd and its suppliers provide the
hardware and any support services on an "as is" basis; and hereby disclaim all
warranties and conditions, whether express, implied or statutory, including,
but not limited to implied warranties of merchantability, fitness for a particular
purpose, or correspondence to description, except for those warranties
specifically and expressly provided in the Limited Warranty.
With respect to the use of this product, in no event shall Infinity Power
Systems Ltd be liable for any loss of profit or any other commercial damage,
including but not limited to special, incidental, consequential and any other
damages.

16 | P a g e
Specifications
Size and Weight
Weight: 430 g
Size: 17.4CM (L) x 8.4CM (W) x 2.3CM (D)
Electrical Specifications
Battery Cell Type: Rechargeable Lithium Polymer
Voltage Supported: 5V, 6V, 7.5V, 9V, 12V, 14V, 16V, 19V
Total Energy Capacity: 50 Wh (Watt Hours)
Output Current: Up to 4.0A (continuous) 4.5A (Peak)
USB Output Port: 5V 1.5A (continuous) 2.0A (Peak)
Charging Time: 3.5 hrs (using the AC charger) 4.5 hrs (using 25w Solar
Panel)
Input Charging Voltage: 12 - 20VDC
AC Charger Input: 100 - 240VAC
AC Charger Output: 20VDC/3.00A
Included Accessories: Output cord, various Adapters, Adapter pouch,
Battery cover, Retractable USB cable
Temperature Specifications
Storage Temperature: 15 - 35°C
Operating Temperature Range
Charge: 0 - 40°C
Discharge/In Use: 20 - 60°C

17 | P a g e
Customer Support Information
If you are having any problems or experiencing any issues with Infinity Power
Systems Ltd products please look at the resource links below or contact us:
www.infinitypower.co.nz/support
support@infinitypower.co.nz
Toll Free: 0800 002 033
Infinity Power Systems Ltd
PO Box 6704
Upper Riccarton
Christchurch 8442
/