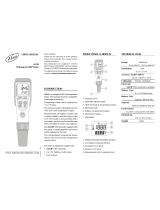
ADWA AD100 Operating instructions
- Category
- Measuring, testing & control
- Type
- Operating instructions

Instructions ADWA AD100 pH meter
Preparation
Remove the protective cover.
The pH meter has to be soaked once before using it to remove the protective gel. When
soaking, the electrode has to be set in keep-in solution (KCL= potassium chloride) or
calibration solution pH 7,01. You can also let it soak in warm water, in that case leave it
soaking for about 2 hours.
If white crystals have formed around the electrode, these will dissolve leaving the electrode
to soak.
Calibrating
Calibrate the tester at least once a week, or at any other
time that you suspect a false measurement value.
ADWA testers can be calibrated at pH 4, and pH 10.
Always calibrate first pH 7,01
1. Set the meter in the calibrating solution pH 7,01 and set
the meter with “ON/OFF” on.
2. Press on “CAL”, in the display menu “7,0” and “pH” will
blink.
3. When “pH” stops blinking the measurement is stabilized.
4. Press on “READ”.
5. The meter will jump to the next calibrating point pH 4,01.
6. Rinse the electrode in clean water, dry it and put it in
calibrating solution pH 4,01.
7. When “pH” stops blinking, the measurement is stabilized.
8. Press on “READ”.
9. If the display doesn’t blink any more, the measurement is
stabilized.
Automatic buffer recognition
It is always wise to start each calibration with fresh
calibration solution.
The ADWA AD-100 is equipped with Automatic Buffer Recognition.
This means that the tester itself has the capacity to recognize the calibrating solution.
If the tester is put in a calibrating solution while in the “Calibration mode”, then the tester
will recognize a calibrating solution with a value around pH 4, 7, or 10.
This means that the AD-100 will still recognize a contaminated calibration solution as one
of the 3 pre-programmed calibration points, and the meter will calibrate exactly at that
value.
This prevents inaccurate measurements due to contaminated calibration solutions.

Performing a measurement
1. Press on “ON/OFF”.
2. Remove the protective cover and set the tester in the solution to be measured.
3. Stir with the tester in the solution until the value in the display has stabilized.
4. The pH measurement is complete.
5. Rinse the electrode with clean water and the tester is ready for the next measurement.
Maintenance
The electrode has to be kept moist at all times.
This can be done easily by dripping a couple of drops of the keep-in solution (KCL), pH 7 or
pH 4 in the protective cover.
DO NOT USE DISTILLED OR DEIONIZED WATER AS KEEP-IN SOLUTION.
Replacing the batteries
If the display shows the error message “Eb”, then the batteries should be replaced.
Open the battery compartment on the top of the tester.
Place the batteries according to the polarity (the + and the -), as indicated in the battery
compartment.
ERROR messages
“Er” - The value is outside the range of the meter.
“Ec” - The calibration solution is (too) dirty, use clean calibration solution.
“Eb” - The batteries should be replaced.
-
 1
1
-
 2
2
ADWA AD100 Operating instructions
- Category
- Measuring, testing & control
- Type
- Operating instructions
Ask a question and I''ll find the answer in the document
Finding information in a document is now easier with AI
Related papers
Other documents
-
Oakton WD-35634-54 Owner's manual
-
Oakton pHTestr 30 Owner's manual
-
Apera PC60-Z User manual
-
Apera Instruments PH20 User manual
-
Lamotte TRACER pH PockeTester 1741 User manual
-
Lamotte TRACER pH PockeTester Operating instructions
-
 Hach H170 User manual
-
Hanna Instruments HI 221 Owner's manual
-
Lamotte PockeTester 1766 User manual
-
Hanna HI981033 Owner's manual


