Page is loading ...

Installation Guide Customer Care: 877.765.4783
How To Install Your New Vanity Top
Supplies Required:
• 1 tube of color-matching or clear silicone caulk
• Tapered shim material
• Clean, white cotton cloth
• Masking tape
• Denatured alcohol
• Safety glasses
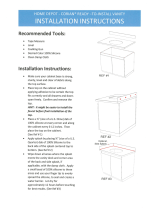
Tools Required
• Caulking gun
• Tape measure
• Utility knife
• Level
Vanity Top Inspection
1. Without lifting the vanity top, visually inspect surface for obvious shipping or material damage.
2. In the event of damage, immediately report any problems to your place of purchase before proceeding further with installation.
Cabinet Preparation
1. Inspect installation area to make sure cabinetry is properly secured and stable.
2. Cabinet surface must be flat and level prior to installation of vanity top.
Safety Notes
• Please wear safety glasses to protect your eyes from any possible contact with debris and chemicals.
• Follow all manufacturers’ instructions and safety information when using silicone caulk and denatured alcohol. Ensure that area has
• adequate ventilation before using these products.
Vanity Top Installation
1. Trial-fit vanity top to cabinet and wall to make sure it fits properly. Follow the
• • steps below:
a) Carefully remove vanity top from packaging. Stand vanity top upright, with
• • backedge facing down
b) Carry the vanity top in vertical position to prevent damage
c) Carefully place the back edge of vanity top about 2 inches from or as close to
• • the wall as possible. Lower the vanity top into place while
• • carefully supporting the center of the vanity top. As the vanity top is lowered,
• • carefully slide the vanity top back until it fits tightly against wall
d) Use a utility knife to carefully cut away interfering drywall as necessary.
2. If vanity top is not level and stable insert a shim between cabinets and
• • underside of vanity top until it is steady and level. Remove vanity top and
• • secure shims to vanity cabinet with masking tape.
3. Wipe top of cabinet and vanity top with a damp cloth to remove dust
• • and dirt andlet dry. Then apply dime-sized dabs of silicone approximately
• • six inches along all perimeter edges of the cabinet.
4. Carefully place vanity top on back edge of cabinet. Lower vanity top onto
• • cabinet. (It is recommend that this be done by two people.) It is important that
• • the vanity top be supported evenly on all sides of the cabinet. If there are voids
• • between top of cabinet and bottom of vanity top, insert shims as required.
5. Run a thin bead of clear silicone around perimeter of vanity top to fill any
• • visible voids between cabinet and vanity top. Remove excess silicone.
Splash Instructions
Solieque® Installation Guide http://www.solieque.com/HTML/installationGuide.html
1 of 2 9/30/10 9:25 AM

Backsplash and Side Splash Installation
1. Backsplash should be installed before side splash. The finished sides
• • denotethe top and front edge of the splash and should face toward the bowl.
2. Hold all splashes on their side/edge. DO NOT HOLD A SPLASH FLAT.
3. Clean bottom edge of splash and edge of vanity with denatured alcohol.
4. Apply dime-sized dabs of silicone to bottom edge and backside of splash and
• • set splash into place. Repeat for other splash.
5. To ensure a clean silicone joint, use masking or painter’s tape to tape along
• • joint between splash and vanity, leaving approximately 1/16" gap along joints.
• • Apply a thin bead of silicone along joint between splash and the vanity.
6. Smooth bead with a clean, white rag dampened with denatured alcohol. Then
• • wipe off any excess silicone. Remove tape when silicone is dry.
Caulking Splashes
1. Apply a fine bead of silicone along the joint between the side splashes and
• • the vanity top.
2. Caulk along the wall and the top edge of the side splashes and along the
• • backsplash to fill any gaps.
3. Smooth bead with a clean, white rag dampened with denatured alcohol.
• • Carefully wipe off any excess silicone on the cabinets.
4. Wait 24 hours before using vanity top to allow silicone to fully cure.
Special Notes
• Follow all manufacturer instructions and safety information.
• Ensure adequate ventilation before applying.
Close Window
Solieque® is sold exclusively at The Home Depot.
© 2010 Solieque brand, Masco Builder Cabinet Group
Solieque® Installation Guide http://www.solieque.com/HTML/installationGuide.html
2 of 2 9/30/10 9:25 AM
/