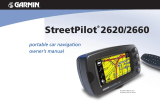
StreetPilot 2720

Garmin StreetPilot 2720, Polaris Victory StreetPilot 2720, StreetPilot® 2720 Reference guide

  • Hello! I am an AI chatbot trained to assist you with the Garmin StreetPilot 2720 Reference guide. I’ve already reviewed the document and can help you find the information you need or explain it in simple terms. Just ask your questions, and providing more details will help me assist you more effectively!
Mounting Your 2720
1. Align the power plug on the vehicle adapter to the connector and slide
the plug into the connector until fully seated, as shown to the right.
2. Slide the locking lever on the mounting base to the left, in the
unlocked position.
3. Slide the bottom of the StreetPilot into the mounting base until it
clicks into place.
4. Slide the locking lever to the right.
5. Plug the power adapter into an available cigarette lighter receptacle
in your vehicle. Route the cable so it does not interfere with vehicle
operation.
6. Flip the power switch on the side of the StreetPilot down.
Following Your Route
Follow the route to your destination using the map. As you travel, your StreetPilot guides you to your destination with voice
prompts, arrows, and directions along the top of the map. If you depart from the original route, your StreetPilot recalculates
the route and provides new route instructions.
Read the driving
directions along the top
of the map.
Your route is marked with
a magenta line.
Follow the arrows. A checkered flag marks
your destination.
Finding Your Destination
Touch Where To?
Enjoy the route!
Touch Food, Hotel….
Touch Food & Drink.
Touch a food category.
Touch the place.
Touch Go To.
StreetPilot
®
2720
quick reference guide
Warning: For use in vehicles, it is the sole responsibility of the owner/operator of a vehicle with the 2720 installed to place and secure the device so it will not interfere with the vehicle
operating controls and safety devices, obstruct the drivers view of driving conditions, or cause personal injury in the event of an accident.
Locking lever Release tab
Viewing the Map Page
From the Menu page, touch View Map to open the map, or press the MAP key. Touch an area of
the map to see additional information, as shown below. The position icon shows your current
location.
Saving Places You Find
Touch the place you
want to save.
Touch Add As Favorite.
Touch Advanced.
Finding Saved Places
Your saved places are stored in the Favorites category in My Locations. Press the FIND key > My Locations > Favorites.
Editing or Deleting a Saved Place
Press the MENU key. Touch Tools > My Data > Favorites > Edit/Review Favorites or Delete Favorites.
Setting a Home Location
You can set a Home Location for the place you return to most often. Press the FIND key.
Touch Go Home.
Select an option.
Touch Save Home.
Going Home
After you set your Home Location, press the FIND key and touch Go Home.
Adjusting the Backlight Brightness
Press the MENU key. Touch Settings > Screen > Brightness > Manual
Brightness. Touch the to decrease the brightness of the backlight or
to increase it. Select Auto for automatic brightness adjustment.
Adjusting the Volume
Press the MENU key and then touch Volume. Touch and to adjust the volume of the speaker.
Using the Unit Keys
FIND—opens the Find menu.
MENU—opens the Menu page.
MAP—opens the Map page.
SPEAK—announces voice directions.
Power switch—turns on and off the unit.
Infrared (IR) window—receives remote control signals.
© Copyright 2005 Garmin Ltd. or its subsidiaries
June 2005 1
90-00475-01 Rev. A Printed in Taiwan
Trip ComputerTurn List
Map while Navigating a Route
Touch the Speed or Arrival data
field to open the Trip Computer.
Touch
to zoom in.
While navigating a route, touch the
green text bar to open the Turn List.
Touch
to zoom out.
/