Sony DSLR-A330L Owner's manual

Category
Security cameras
Type
Owner's manual
S OMY 4-137-175"11 (I)
function
function
computer
I dditional infbrmation on this product and
answers to f)cequently asked questions can be
%mid at our Customer Support Website.
http://www.sony.net/
Printed on 7(}% or more recycled paper using
VOC (Volatile Organic (ompomld) free
vegetable oil based ink.
Printed in Japan
Illllllllllllllllllllllllll
4137175110
o{330 o{380
Digital Single Lens Reflex Camera
Instruction Manual
DSLR-A330/A380
_ InfoLITHIUM _
,o,.....o....._--,......H.'_rnl
© 2009 Sony Corporation
5",_P
Owner'sRecord
The model and '_erial i]/llnb_.,rs art.` located
on the bottom.
Record the serial number in the space
provided below.
Refer to these numbers whenever you call
upon your Sony dealer regarding this
product.
Model No. DSLR-A330/A380
Serial No.
_iliil _i_i_i_iiiii!ii:ii_ii_!_i!!!ii_iiii_i_ii_ii_ii_iii_ii_iii!iii{i_:i!!ii_iiii_i!ii
To reduce fire or shock hazard, do
not expose the unit to rain or
moisture.
IMPORTANTSAFETY
INSTRUCTIONS
SAVETHESE
INSTRUCTIONS.
DANGER- TO
REDUCETHERISK
OFFIREOR
ELECTRICSHOCK,
CAREFULLY
FOLLOWTHESE
INSTRUCTIONS.
If the shape of the plug does not fit the
power outlet, use an attachment plug
adaptor of the proper configuration for the
power outlet.
Batterypack
If the battery pack is mishandled, the
battery pack can burst, cause a fire or even
chemical bums. Observe the following
cautions.
Do not disassemble.
Do not crush and do not expose the
batte U pack to any shock or force such as
hammering, dropping or stepping on it.
Do not short circuit and do not allow
metal objects to come into contact with
the battery terminals.
Do not expose to high temperature above
60°C (140 F) such as in direct sunlight or
in a car parked in the sun.
Do not incinerate or dispose of in fire.
Do not handle damaged or leaking
lithium ion batteries.
Be sure to charge the battery pack using a
genuine Sony battery charger or a device
that can charge the battery pack.
Keepthebatterypackoutofthereachof
smallchildren.
Keepthebatterypackdry.
Replace only with the same or equivalent
type recommended by Sony.
Dispose of used battery pack promptly
described the instructions.
Batterycharger
Evt:ll it" the ( HARGE lamp is not lit. the
batte U charger is not disconnected from the
A( power source (mains) as long as it is
connected to the wall _utlet (wa_L socket).
If some trouble occurs while using the
batte U charger, immediately shut off the
power by disconnecting the plug from the
wall outlet (wall socket).
UL is an intern_Jtionally recognized saf<'ty
organization.
This product has received UL Listing.
If you have any questions about this
product, you may call:
Sony Customer Information Services
Center
1-800-222-SONY (7669)
The number below is lk)r the FCC related
matters only.
RECYCLINGLITHIUM-ION
BATTERIES
Lithium-loll batterk's are
recyclable.
You can help preserx e
our environment by
returning your used
rechargeable batteries to
the collection and
recycling Iocmion nearest yon.
For mor<. information regarding recycling
of rechargeable batteries, call toll free
1-8()0-822_8837. or visit http:fl
www.rbrc.org/
Caution: Do not handle damaged or
leaking Lithiumqon batteries.
Batterypack
This device complies with Part /5 of the
F(C Rules, Operation is su_iect to the
following two conditions:
(1) This device may not cause harml)d
interference, and (2) this device must
aJccept any interf<.mnce received, including
interference that may cause undesired
operation.
This Class B digital apparatus complies
with Canadian ICES-003.
3
RegulatoryInformation
Declaration of Contormity
Trade Name: SONY
Model No.: DSLR-A331)
Responsible Party: Sony Electronics
Inc.
Address:1653/) Via Esprillo,
San Diego, CA 92127 U.S.A.
Telephone No.: 858-942-223/)
This device complies with Part 15 of tile
FCC Rules. Operation is subject to the
following two conditions: (1) This
device may not cause harmful
interference, and (2) this device must
accept any interference received,
including interference that may cause
undesired operation.
Declaration of Conlormity
Trade Name: SONY
Model No.: DSLR-A381)
Responsible Party: Sony Electronics
Inc.
Address:16530 Via Esprillo,
San Diego, CA 92127 U.S.A.
Telephone No.: 858-942-2230
This device complies with Part 15 of the
FCC Rules. Operation is subject to the
following two conditions: ( 1) This
device may not cause harmful
interference, and (2) this device must
accept any interference received,
including interference that may cause
undesired operation.
CAUTION
You ale cautioned that any changes or
modifications not expressly approved in
this manual could void your authority to
operate this equipment.
Note:
This equipment has been tested and found
to comply with tile limits for a Class B
digital device, pursuant to Part 15 of tile
FQC Rules.
These limits ale designed to provide
reasonable protection against harmful
interference in a residential installation.
This equipment generates, uses. and can
radiate radio frequency energy and. if not
installed and used in accoMance with tile
instructions, may cause harmful
interfclence to radio communications.
However. there is no guarantee that
interference will not occur in a particular
installation. If this equipment does cause
harmful interl'clence to radio or television
reception, which can be determined by
turning the equipment off and on. the user
is encouraged to tW to correct the
interference by one or more of the
following measures:
Reorient or relocate tile receiving
antenna.
lncrease the separation between tile
equipment and receiver.
Connect the equipment into an outlet
on a circuit dill)lent from that to which
tile receiver is connected.
Consult the dealer or an experienced
mdio/TV technician for help.
The supplied interface cable must be used
with tile equipment in order to comply with
the limits for a digital device pursuant to
Subpart B of Part 15 of F(C Rules.
Noticeforthe customersinthe
countriesapplyingEUDirectives
The manufacturer of this product is Sony
(orl_oration. l-7q Konan Minato-ku
Tokyo. 108-0075 Japan. The Authorized
Representative l\_r EM( and product safety
is Sony Deutschland GmbH. Hedelfinger
Strasse 61. 70327 Stuttgart. Germany. For
any service or guarantee matters please
mfcr to the addresses given in separate
service or guarantee doculnents.
This product has been tested and l\mnd
compliant with tile limits set out in tile
EMC Directive for using connection cables
shorter than 3 meters (9.8 feet).
Attention
The electromagnetic fields at the specific
frequencies may infhlence tile picture and
sound of this unit.
Notice
If static electricity or electromagnetism
causes data transfer to discontinue midway
(fail), restart tile application or disconnect
and connect the communication cable
(USB, etc.) again.
Disposalof OldElectrical&
ElectronicEquipment(Applicable in
the EuropeanUnionandother
Europeancountrieswithseparate
collectionsystems)
This symbol on the prod'act or oil its
packaging indicates that this product shall
not be treated as household waste. Instead it
shall be handed over to tile applicable
collection point l\_r the recycling of
electrical and electronic equipment. By
ensuring this product is disposed of
correctly, you will help prevent potential
negative consequences for tile environment
and human health, which could otherwise
be caused by inappropriate waste handling
of this product. Tile recycling of materials
will help to conserve natural resources. For
more detailed inlk)rmation about recycling
of this product, please contact your local
Civic Office. your household waste
disposal service or the shop where you
purchased tile product.
Disposalofwaste batteries
(applicableinthe EuropeanUnion
andotherEuropeancountrieswith
separatecollectionsystems)
This symbol on tile battery or on the
packaging indicates that tile battery
provided with this product shall not be
treated as household waste.
By ensuring these batteries arc disposed of
correctly, you will help prevent potentially
negative consequences l_r tile environment
and Imman health which could otherwise be
caused by inappropriate waste handling of
tile batte W. The recycling of the materials
will help to conserve natural resources.
In case of products that l\_r safety,
perlkmnance or data integrity reasons
require a permanent connection with an
incorporated battery, this battery should be
replaced by qualified service staff only.
To ensure that the battery will be treated
properly, hand over tile product at end-ol-
life to the applicable collection point for tile
recycling of electrical and electronic
equipment.
For all other batteries, please view tile
section on how to remove tile battery fl'om
tile product safely. Hand the battery over to
tile applicable collection point lk_r the
recycling of waste batteries.
For mole detailed information about
recycling of this product or battery, please
contact your local Civic Office, your
household waste disposal service or tile
shop where you purchased tile product.
A moulded plug complying with BS 1363
is fitted to this equipment lk_ryour safety
and convenience.
Should tile fuse in the plug supplied need to
be replaced, a fuse of the same rating as the
supplied one and approved by ASTA or
BSI to BS 1362, (i.e., marked with an @ or
mark) must be used.
If tile plug supplied with this equipment has
a detachable fuse cover, be sure to attach
the fuse cover after you change the fuse.
Never use tile plug without tile fuse cover.
If you should lose the fuse cover, please
contact your nearest Sony service station.
Notes on using your camera
Shootingprocedure
This L-:lln_2rHhils two modes for shooting:
the Live View mode using the LCD
monitor, and the viewfinder mode using
the viewfinder (OVF).
Them may be difl\.rences between an
image recorded in Live View mode and
an image recorded in viewfinder mode.
such as exposure, white balance, or D-
range optimizer, depending on the
method used of metering or the exposure
mode.
In Live View mode. the recorded image
may be difl'erent from the image you
monitored with the LCD monitor. The
difference becomes larger in the
following or other cases:
When firing the flash.
When shooting a low-intensity subject,
such as night scenery.
When the difl'erence of the intensity of
a subject is too large.
When attaching a Circular PL Filter.
Nocompensationforcontentsofthe
recording
Tile contents of tile lecording cannot be
compensated for if lecording or playback is
not possible due to a mallimction of your
calnera or a inelnory card. etc.
Backup recommendation
To avoid the potential risk of data loss.
always copy (back up) data to other
medium.
Notesonthe LCDmonitorandlens
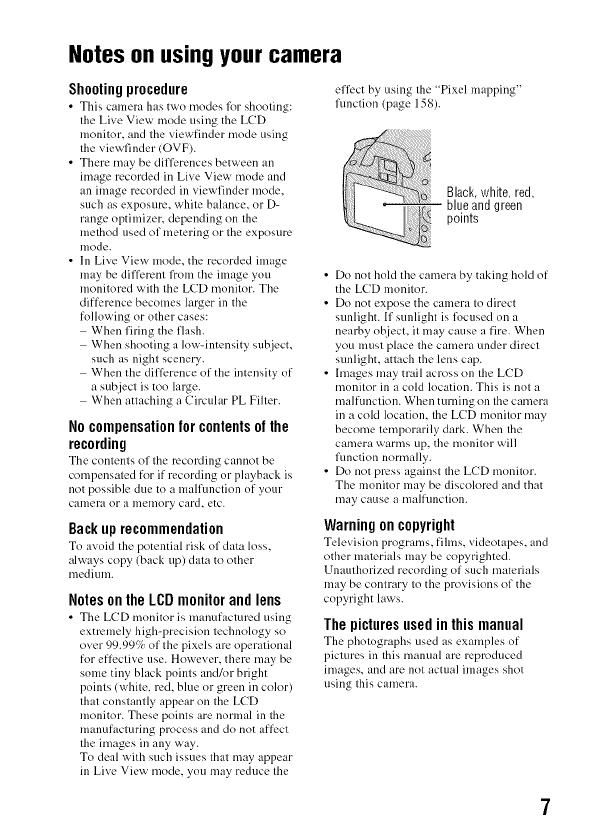
The LCD monitor is manufm:turcd using
extlemely high-precision technology so
over 99.99c'_ of the pixels are operational
for effective use. However. thele may be
some tiny black points and/or bright
points (white. led. blue or green in color)
that constantly appear on the LCD
monitor. These points are normal in the
manufacturing process and do not affect
the images in any way.
To deal with such issues that may appear
in Live View mode. you may reduce the
elTect by rising tile "Pixel mapping"
limction (page 158).
_4iii;iiiii_;_ii_iiii_iiii#iiiiiiiiiiiiiiiiiiiiij{!j!ij
BlacLwhite, red,
blueandgreen
points
Do not hold the camera by taking hold of
the LCD monitor.
Do not expose the camera to direct
sunlight. If sunlight is l\_cused on a
nearby o[_iect, it may cause a fire. When
you must place the camera under direct
sunlight, attach the lens cap.
Images may trail across on the LCD
monitor in a cold location. This is not a
malfunction. When turning on tile camera
in a cold location, the LCD monitor may
become temporarily dark. When the
camera warms up, the monitor will
limction nora/ally.
Do not press against the L(D monitor.
The monitor may be discolored and that
may cause a malfunction.
Warningoncopyright
Telex ision programs, fihns, videotapes, and
other materials may be copyrighted.
Unauthorized recording of such materials
may be contrary to the provisions of the
copyright laws.
The pictures usedinthis manual
The photographs used as examples of
pictures in this manual ale reproduced
images, and are not actual images shot
using this camera.
Onthe dataspecificationsdescribed
inthisInstructionManual
The data on l_erform:mce and specifications
is defined under tl_e following conditions,
except as described in this Instruction
Manual: at an ordinary ambient
temperature' of 25°(7 (77 F), and using a
fully charged battery pack.
TableofContents
Preparingthe
camera
Beforeyour
operation
Shootingimages
Notes on using your camera .............................................. 7
Checking the accessories supplied .................................. 13
Preparing the battery pack ............................................... 14
Attaching a lens ............................................................... 20
Inserting a memory card .................................................. 22
Preparing the camera ....................................................... 25
Using the accessories supplied ........................................ 27
Checking the number of recordable images .................... 29
Cleaning ........................................................................... 32
Identifying parts and screen indicators ............................ 35
Front side .................................................................... 35
Rear side ..................................................................... 36
Sides/Bottom .............................................................. 37
LCD monitor .............................................................. 38
Selecting a function/setting ............................................. 40
The fimctions selected by the Control button ............ 41
The functions selected by the Fn (Function) button ... 42
The fimctions selected by the MENU button ............. 42
Adjusting the angle of the LCD monitor ......................... 44
Shooting an image without camera shake ....................... 45
Correct posture ........................................................... 45
Using the SteadyShot function ................................... 46
Using a tripod ............................................................. 47
/@ Shooting with the automatic setting ............... 48
Shooting with a suitable setting for the subject (Scene
Selection) .................................................................... 50
[] Taking portrait photos .......................................... 51
[_ Taking landscape photos ...................................... 52
[] Taking small-sutziect photos ................................ 53
Taking moving-subject photos ............................. 54
[] Taking sunset photos ........................................... 55
[] Taking night view photos .................................... 56
Usingthe
shootingfunction
Shooting an image the way you want it (Exposure mode)
..................................................................................... 57
P Shooting with program auto .................................. 59
A Shooting by controlling the blur of the background
(Aperture priority) ............................................. 60
S Shooting a moving subject with various expressions
(Shutter speed priority) .......................................
M Shooting with the exposure adjusted manually
(Manual exposure) ............................................ 64
M Shooting trails with long exposure (BULB) .......... 66
Shooting with the viewfinder (OVF) ............................... 68
Switching to the viewfinder ....................................... 68
Adjusting the focus of the finder (diopter adjustment)
............................................................................ (,9
Switching the recording information display (DISP)
............................................................................ 70
LCD monitor (Graphic Display) ................................ 71
LCD monitor (Standard Display) ............................... 73
Viewfinder .................................................................. 75
Selecting the focus method .............................................. 76
Using autofocus .......................................................... 76
Shooting with your desired composition (Focus-lock)
............................................................................ 78
Selecting the focus method to suit the movement of the
subject (Autot_cus mode) ................................. 79
Selecting the t_cus area (AF area) ............................. 80
Adjusting the t_cus manually (Manual l_cus) ........... 81
Zooming in in one step ......................................................
Using the flash ................................................................. 84
Performing wireless flash shooting ............................ 87
Adjusting the brightness of the image (Exposure, Flash
compensation, Metering) ............................................ 88
Using brightness compensation t_r the entire image
(Exposure compensation) .................................. 88
Adjusting the amount of flash light (Flash compensation)
............................................................................ 90
Selecting the method t_r measuring the brightness of a
subject (Metering mode) ................................... 91
10
Usingthe viewing
function
Changingyour
setup
Viewing images
on a computer
Printing images
Setting ISO ...................................................................... 92
Adjusting the color tones (White balance) ...................... 93
Adjusting the white balance to suit a specific light source
(Auto/Preset white balance) .............................. 93
Registering the color tones (Custom white balance) .. 94
Image processing ............................................................. 96
Correcting the brightness of the image (D-Range
Optimizer) ......................................................... 96
Selecting your desired image processing (Creative Style)
............................................................................ 96
Changing the range of color reproduction (Color Space)
............................................................................ 98
@/_ Selecting the drive mode .................................... 99
Shooting single shot ................................................... 99
Shooting continuously ................................................ 99
Using the self-timer .................................................. 100
Shooting images with the exposure shifted (Exposure
bracket) ............................................................ 101
Shooting with the Remote Commander ................... 103
Playing back images ...................................................... 104
Checking the int_rmation of recorded images .............. 108
Protecting images (Protect) ........................................... 111
Deleting images (Delete) ............................................... 112
Viewing images on a TV screen .................................... 114
Setting image size and image quality ............................ 118
Setting the method for recording on a memory card ..... 120
Changing the noise reduction setting ............................ 122
Changing the flmctions of the control dial .................... 123
Changing other settings ................................................. 124
Setting the LCD monitor ............................................... 126
Confirming the version of the camera ........................... 128
Resetting to the default .................................................. 129
Copying images to your computer ................................ 131
Viewing images on your computer ............................... 135
Using the software ......................................................... 139
Specifying DPOF .......................................................... 145
Printing images by connecting the cmnera to a PictBridge
compliant printer ...................................................... 147
11
Others Specifications ................................................................ 150
Troubleshooting ............................................................. 154
Warning messages ......................................................... 164
Precautions .................................................................... 167
Index.............................................................................. 169
12
Checkingthe accessoriessupplied
The number ill parentheses indicates tile number of pieces.
BC-VH1 Battery charger (1) Body cap (1) (Attached on the
can'lera)
Power cord (mains lead) (1) (not Eyecup (1) (Attached on the
supplied ill the U.S.A. and
camera)
Canada) CD-ROM (Application Software
,,,,__ for 0_camera) ( 1)
Quick Start Guide (1)
[ustruction Manual (This manual)
(1)
Rechargeab]e battery pack NP-
FH50 (1)
E
-g
-..,.
g
USB cable (1)
Shoulder strap (1)
Eyepiece cover (1)
13
Preparingthebatterypack
When using the camera for the first time, be sure to charge the NP-FH50
"InfoLITHIUM" battery pack (supplied).
The "InfoLITHIUM" battery pack call be charged even when it has not
been fully depleted.
It call also be used when it has not been fully charged.
1Insertthebatterypackonthe
batterycharger.
Push the battery pack until it clicks.
14
2 Connectthebatterychargertothe
walloutlet (wallsocket).
Light on: Charging
Light off: Normal charge completed
One hour alter the lamp is turned off: Full
charge completed
ForcustomersintheU.S.A.and
Canada
Plug
To the wall
outlet (wall
socket)
g
CHARGElamp
g
Forcustomers in countries/regions ==
otherthan the U.S.A. and Canada
Aboutchargingtime
Time required to charge a fully depleted battery pack (supplied) at a
temperature of 25°C (77°F) is as follows.
Full charge _ge
Approx. 265 rain. Apptx_x. 205 min.
The charging time differs depending on the remaining capacity of the
battery back or charging conditions.
When the CHARGE lampflashes
The CHARGE lamp of the supplied battery charger flashes in either way:
- Fast flashing: Turns the light on and off repeatedly at the interval of
0.15 seconds.
- Slow flashing: Turns the light on and off repeatedly at the interval of
1.5 seconds.
15
When the CHARGE lamp flashes fast, remove the battery pack being
charged, and then insert the same battery pack into the battery charger
securely again. When the CHARGE lamp flashes fast again, this may
indicate a battery error or that a battery pack other than the specified type
has been inserted. Check that the battery pack is the specified type. If the
battery pack is the specified type, remove the battery pack, replace it with
a new' one or another one and check if the battery charger operates
correctly. If the battery charger operates correctly, a battery error may
have occurred.
When the CHARGE lamp flashes slowly, it indicates that the battery
charger stops charging temporarily on standby. The battery charger stops
charging and enters the standby status automatically when the
temperature is outside of the recommended operating temperature. When
the temperature gets back within the appropriate range, the battery
charger resumes charging and the CHARGE lamp lights up again. We
recommend charging the battery pack in an ambient temperature of
between 10°C to 30°C (50°F to 86°F).
Notes
Connect the b;_tter_ charger to the nearest wall outlet (wall socket).
When charging is finished, disconnect the power cord (mains lead) from the wall
outlet (wall socket), and remove the battery pack from the battery charger. If you
leave the charged battery pack on the charger, battery lillz may be decreased.
Do not charge any battery pack other than the "lnfk_LITHIUM" H series battery pack
in the battery charger (supplied) with your camera. Batteries other than the specifed
kind may leak, overheat, or explode if you attempt to charge them, posing a risk of
injury from electrocution and bm'ns.
If the battery charger is dirty, charging may not be performed successfi/lly. Clean the
battery charger with dry cloth, etc.
To useyourcamera abroad-- Powersources
You can use your camera and the battery charger and the AC-PWIOAM
AC Adaptor (sold separately) in any country or region where the power
supply is within 100 V to 240 V AC, 50/60 Hz,
Note
Do not use an electronic transformer (travel converter), as this may cause a
malRmction.
16
1 Whileslidingthebatterycover
openlever,openthebattery
cover.
2 Firmlyinseflthebatterypackall
thewaywhilepressingthelock
leverwiththetip ofthebattery.
3 Closethebatterycover.
!!!!!!iiiJ!i_!!_!!!i_!i_!i_!_i_i_i!!i!_i!iiiiiiii!i!_!!!i_i_i!i!_!_i!i_!_ii_!ii
LOCK lever
Toremovethebatterypack
Turn off the camera and slide the lock
lever in the direction of the arrow. Be
careful not to drop the battery pack.
Locklever
17
Tochecktheremainingbatterylevel
Set the power switch to ON and check the level on the LCD monitor.
I_ _ _ _ _ "Battery
exhausted"
Battery level You c_[irlllOtshoot
High Low any more pictures.
Whatisan "InfoLITHIUM"batterypack?
All "InfoLITHIUM" battery pack is a lithium-ion battery pack that has
functions for exchanging information related to operating conditions with
your camera.
Neles
The displayed level may not be correct under certain circmnstances.
Do not expose the battery pack to water. The battery pack is not water-resistant.
Do not leave the battery pack in extremely hot places, such as in a cal"or under direct
sunlight.
Available battery packs
Only an NP-FH50 battery pack can be used with the camera. Note that the
NP-FH30 and NP-FH40 cannot be used.
Effectiveuseofthebatterypack
Battery performance decreases in low temperature surrouudiugs. So, the
time that the battery pack can be used is shorter in cold places and the
speed of continuous shooting slows down. We recommend that you put
the battery pack in a pocket close to your body to warm it up, and insert it
in your camera immediately before you start shooting.
The battery pack will run out quickly if you use the flash frequently, use
continuous shooting often, or turn the camera on and off frequently.
The time available in the Live View' mode is shorter than that in the
viewfiuder mode. When you feel that the battery consumption is too fast,
switch to the viewfiuder mode. Doing so makes the battery last longer.
Battery life
The battery life is limited. Battery capacity decreases little by little as you
use it more and more, and as time passes. If the battery operating time
seems shortened considerably, a probable cause is that the battery pack
has reached the end of its life. Buy a new battery pack.
18
The battery life varies according to how' it is stored and the operating
conditions and enviromnent ill which each battery pack is used.
How to store the battery pack
If the battery pack is not to be used for a long time, fully charge it and then
fully use it up once a year on your camera before storing the battery pack in
a dry, cool place to prolong the battery life.
"o
=
g
¢D
19
Attachinga lens
1Removethebodycapfromthe
cameraandthepackaginglid
fromtherearofthelens.
When changing the lens, quickly
change the lens away from dusty
locations so as to keep dust or debris
from getting inside the camera.
Packaginglid
2 Mountthelensbyaligningthe
orangeindexmarksonthelens
andcamera.
3 Turnthelensclockwiseuntilit
clicksintothelockedposition.
Orangeindex marks
N01es
A rear lens cap is not supplied v_qththe DT 18-55mm F3.54.6 SAM Lens Kit. When
ynu store the lens without attaching it to the camera, purchase the Rear Lens Cap
ALC-R55.
When attaching a lens, do not press the lens release button.
Do not use force when attaching a lens.
2O
  • Page 1 1
  • Page 2 2
  • Page 3 3
  • Page 4 4
  • Page 5 5
  • Page 6 6
  • Page 7 7
  • Page 8 8
  • Page 9 9
  • Page 10 10
  • Page 11 11
  • Page 12 12
  • Page 13 13
  • Page 14 14
  • Page 15 15
  • Page 16 16
  • Page 17 17
  • Page 18 18
  • Page 19 19
  • Page 20 20
  • Page 21 21
  • Page 22 22
  • Page 23 23
  • Page 24 24
  • Page 25 25
  • Page 26 26
  • Page 27 27
  • Page 28 28
  • Page 29 29
  • Page 30 30
  • Page 31 31
  • Page 32 32
  • Page 33 33
  • Page 34 34
  • Page 35 35
  • Page 36 36
  • Page 37 37
  • Page 38 38
  • Page 39 39
  • Page 40 40
  • Page 41 41
  • Page 42 42
  • Page 43 43
  • Page 44 44
  • Page 45 45
  • Page 46 46
  • Page 47 47
  • Page 48 48
  • Page 49 49
  • Page 50 50
  • Page 51 51
  • Page 52 52
  • Page 53 53
  • Page 54 54
  • Page 55 55
  • Page 56 56
  • Page 57 57
  • Page 58 58
  • Page 59 59
  • Page 60 60
  • Page 61 61
  • Page 62 62
  • Page 63 63
  • Page 64 64
  • Page 65 65
  • Page 66 66
  • Page 67 67
  • Page 68 68
  • Page 69 69
  • Page 70 70
  • Page 71 71
  • Page 72 72
  • Page 73 73
  • Page 74 74
  • Page 75 75
  • Page 76 76
  • Page 77 77
  • Page 78 78
  • Page 79 79
  • Page 80 80
  • Page 81 81
  • Page 82 82
  • Page 83 83
  • Page 84 84
  • Page 85 85
  • Page 86 86
  • Page 87 87
  • Page 88 88
  • Page 89 89
  • Page 90 90
  • Page 91 91
  • Page 92 92
  • Page 93 93
  • Page 94 94
  • Page 95 95
  • Page 96 96
  • Page 97 97
  • Page 98 98
  • Page 99 99
  • Page 100 100
  • Page 101 101
  • Page 102 102
  • Page 103 103
  • Page 104 104
  • Page 105 105
  • Page 106 106
  • Page 107 107
  • Page 108 108
  • Page 109 109
  • Page 110 110
  • Page 111 111
  • Page 112 112
  • Page 113 113
  • Page 114 114
  • Page 115 115
  • Page 116 116
  • Page 117 117
  • Page 118 118
  • Page 119 119
  • Page 120 120
  • Page 121 121
  • Page 122 122
  • Page 123 123
  • Page 124 124
  • Page 125 125
  • Page 126 126
  • Page 127 127
  • Page 128 128
  • Page 129 129
  • Page 130 130
  • Page 131 131
  • Page 132 132
  • Page 133 133
  • Page 134 134
  • Page 135 135
  • Page 136 136
  • Page 137 137
  • Page 138 138
  • Page 139 139
  • Page 140 140
  • Page 141 141
  • Page 142 142
  • Page 143 143
  • Page 144 144
  • Page 145 145
  • Page 146 146
  • Page 147 147
  • Page 148 148
  • Page 149 149
  • Page 150 150
  • Page 151 151
  • Page 152 152
  • Page 153 153
  • Page 154 154
  • Page 155 155
  • Page 156 156
  • Page 157 157
  • Page 158 158
  • Page 159 159
  • Page 160 160
  • Page 161 161
  • Page 162 162
  • Page 163 163
  • Page 164 164
  • Page 165 165
  • Page 166 166
  • Page 167 167
  • Page 168 168
  • Page 169 169
  • Page 170 170
  • Page 171 171

Sony DSLR-A330L Owner's manual

Category
Security cameras
Type
Owner's manual

Ask a question and I''ll find the answer in the document

Finding information in a document is now easier with AI