Page is loading ...

1/07 1
IMPORTANT UPDATES
ese pages contains important updates to your Owner’s Guide. e
information pertains to the sections noted. Please read and follow the
information.
Section 5
Fuel System
Carver recommends that you contact the engine manufacturer directly
to be sure ethanol-blended gasoline will not cause damage to your
engine.
Section 7
Exterior Wood Table
Exterior wood tables need regular care and maintenance. ere is no warranty
coverage by Carver Yachts or the vender of Carver once the table is exposed to
daily temperature changes. is effects wood when it naturally expands and
contracts.
High Gloss Finish Table
If your table has a high gloss finish it should be cleaned weekly with non
abrasive soap and water. To remove minor scratches and to protect the surface
we recommend using 3M Perfect It Polish applied with a soft polishing pad.
When the table is not in use, it should be kept covered with a water resistant
breathable cover.
e exterior high gloss table is a custom ordered table that is requested by the
dealer when the boat is ordered. e exterior high gloss table comes without a
warranty because it is used on the exterior of the boat.
Teak Table
If you have a teak table it should be oiled on a regular basis. We recommend
monthly to keep the wood from drying out. When the table is not in use, it
should be kept covered with a water resistant breathable cover to protect it from
the elements.
e exterior teak table is an optional part and the warranty period for the table
is the same as your boats limited warranty period which starts from the date of
delivery to the original owner.
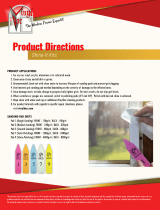
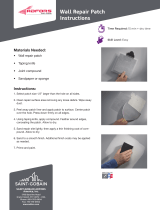
Finish Repair Procedures
Although the process will allow damaged areas to be repaired with
amazing results, it is only a repair procedure. Items repaired may not be
restored to their original pristine condition.
Wood Finish Buffing Procedure
1. Clean surface with 3M cloths (3M #23589).
2. Identify the problem area & start sanding with 1200, 1500 & 2000 grit sandpaper.

2 1/07
IMPORTANT UPDATES
3. Clean area with alcohol and confirm area is ready to be buffed - if not, repeat
steps 1 thru 3.
4. Start buffing with a small amount of 3M Extra Cut Compound using the 3M
Perfect It Buffing Pad #05737 (White Color).
5. Next apply a small amount of 3M Finesse It Final Finish Compound using
the 3M Perfect It Buffing Pad #05725 (Black/Grey Color).
6. Repeat if necessary if swirl marks appear.
7. Clean up area with 3M cloths
(3M #23589) and 3M Clean and Shine.
Removing Dents in Wood Finish
1. Apply water to the wood with a wet rag.
2. Apply heat to the wood with either an iron or a hand steamer.
3. Sand area with 400 grit sandpaper.
4. Replace color with Triclad Water Base Stain 13-9810, being careful not to get
any material outside of the sanded area (this will result in a dark ring around
the patch).
5. Apply Poly Sealer TH-20: 3 to 4 coats with a paintbrush, allow 15 minutes
between coats, allow 2 hours to dry.
6. Apply Poly Topcoat SC-4185: 3 to 4 coats with a paintbrush, allow 15
minutes between coats, let dry for at least 8 hours.
7. Level patch with a razor blade and sand with 1200, 1500 and 2000 grit
sandpaper.
8. Following buffing procedure.
Filling Dents in Wood Finish
1. Locate the correct Burn Sticks color to match finished wood.
2. Apply Burn in Balm around area of patch to protect wood from heat.
3. Melt material into dented or chipped area.
4. Even the patch with an iron and remove any excess Burn Stick material.
5. Scuff material with 600 grit sandpaper.
6. Apply Poly Sealer TH-20: 3 to 4 coats with a paintbrush, allow 15 minutes
between coats, and let dry for at least 8 hours.
7. Level patch with a razor blade & sand with 1200, 1500 & 2000 grit sandpaper.
8. Following buffing procedure.
Repairs for Surface Damage of Topcoat/Sealer
1. Soften material by applying Butyl Acetone.
2. Remove white scratch mark with razor blade.
3. Scuff area where patch is needed and sand with 600 grit sandpaper.
4. Apply Poly Sealer TH-20 to fill patch: 3 to 4 coats with a paintbrush, allow
15 minutes between coats to dry, and then sand with
600 grit sandpaper.
5. Apply Poly Topcoat SC-4185 to patch: 3 to 4 coats with a paintbrush, allow
15 minutes between coats.

1/07 3
IMPORTANT UPDATES
6. Let patch dry for at least 8 hours.
7. Level patch with a razor blade and then sand with 1200, 1500 and 2000 grit
sandpaper.
8. Following buffing procedure.
Repairs for Major Damage that Affect Wood Color
1. Remove all damaged areas: sand with 400 grit sandpaper until damage is
gone.
2. Replace color to patch area: brush on color Triclad Water Base Stain 13-9810,
dab to blend out being careful not to go outside the patch area (this will cause
a dark ring around the patch area.)
3. Replace Poly Sealer TH-20: 3 to 4 coats with a paintbrush, allow 15
minutes to dry between coats, let dry for at least 2 hours, sand with 600 grit
sandpaper.
4. Replace Poly Topcoat SC-4185: 3 to 4 coats with a paintbrush, allow 15
minutes between coats, let dry for at least 8 hours.
5. Level patch with a razor blade first, then sand with 1200, 1500 and 200 grit
sandpaper.
6. Following buffing procedure.
Material List
8103261 Triclad Water Base Stain 13-9810
8103203 Poly Topcoat SC-4185
8103210 Poly Sealer TH-20
8103213 Butyl Acetone
8103214 Polyurethane Sealer Spray Catalyst
8103211 Toner Catalyst TH-720
8103212 Topcoat Catalyst TH-2537
8697610 400 Grit Sanding Disk
8697229 600 Grit Sanding Disk
8697188 800 Grit Sanding Disk
8697618 1200 Grit Sanding Disk
8601218 1500 Grit Sanding Disk
8697496 15 Micron Polishing Disk
---- Burn in Balm from Mohawk
---- Burn Sticks from Mohawk
8601207 3M Extra Cut Compound (1st Buff)
8619411 3M Finesse It Final Finish Compound (Final Buff)
---- 3M Perfect It Buffing Pad #05737 (White Color)
---- 3M Perfect It Buffing Pad #05725 (Black/Grey Color)
/