Whirlpool WHE39392 T User guide

Category
Freezers
Type
User guide

The Whirlpool WHE39392 T freezer offers multiple features to keep your food fresh and organized. With its spacious interior and adjustable temperature settings, you can customize the storage conditions for different types of food. The Turbo Freeze function is great for quickly freezing fresh items, while the Shopping function helps maintain the ideal temperature for keeping your groceries fresh. The appliance also features an indicator light to alert you when the temperature is not optimal for food preservation.

The Whirlpool WHE39392 T freezer offers multiple features to keep your food fresh and organized. With its spacious interior and adjustable temperature settings, you can customize the storage conditions for different types of food. The Turbo Freeze function is great for quickly freezing fresh items, while the Shopping function helps maintain the ideal temperature for keeping your groceries fresh. The appliance also features an indicator light to alert you when the temperature is not optimal for food preservation.

INSTRUCTIONS FOR USE
1
GB
DIAGRAM OF THE APPLIANCE (Fig. 1)
A. Handle.
B. Safety lock (if provided).
C. Gasket.
D. Separator (if provided).
E. Defrost water drain plug.
F. Control panel.
G. Side motor cooling grille.
DIAGRAM OF THE CONTROL PANEL (Fig. 2)
1. Red indicator lamp: ashes to indicate an alarm
condition (see section “TROUBLESHOOTING GUIDE”).
2. Yellow indicator lamp: when on, indicates that the
Turbo freeze function has been activated (see section
“TURBO FREEZE FUNCTION”).
3. Green indicator lamps: indicate that the appliance in
ON, the set temperature and activation of the fast freeze
function (“Shopping”).
4. Setting button: to update the set temperature, to
activate/deactivate the fast freeze function (“Shopping”)
and to activate/deactivate the “Turbo freeze” function.
INSTALLATION
Unpack the appliance.
Remove the 4 spacers inserted between the door
and the appliance. (Fig. 3)
Make sure the defrost water drain plug (if provided) is
correctly positioned (E).
For optimum appliance operation and to avoid damage
when the door is opened, leave a space of at least 7 cm
from the rear wall and 7 cm at the sides. (Fig. 4)
Fit the accessories (if provided).
Clean the inside of the appliance before using it.
SWITCHING ON THE APPLIANCE
Plug in the appliance.
The green LED lights up (“Normal”).
The red LED ashes to indicate that the temperature
inside the appliance is not yet suciently low for food
storage. The red LED will normally switch o within the
rst six hours after the appliance is switched on.
Place food inside the product only when the red LED
has switched o.
Note: As the seal is tight, the appliance lid cannot be
reopened immediately after closing. Wait a few minutes
before re-opening the lid of the appliance.
This appliance features “skin condenser”
technology: the condensing unit is integrated into
the walls of the freezer. For this reason the side and
front walls of the product may become hot while
the product is running. This is entirely normal and
also reduces the risk of condensation forming in
particularly critical environmental conditions (see
paragraph “Troubleshooting guide”).
TEMPERATURE ADJUSTMENT
lect the desired temperature using the button (4).
To adjust the internal temperature, proceed as follows:
Press button (4) as required. With each touch of the
button, the set temperature is updated, toggling between
the values “Eco”, “Normal”, “Max” and “Shopping”.
Select “Max” for a colder storage temperature.
When the appliance is only partially full, it is advisable
to select “Eco” to optimize energy consumption.
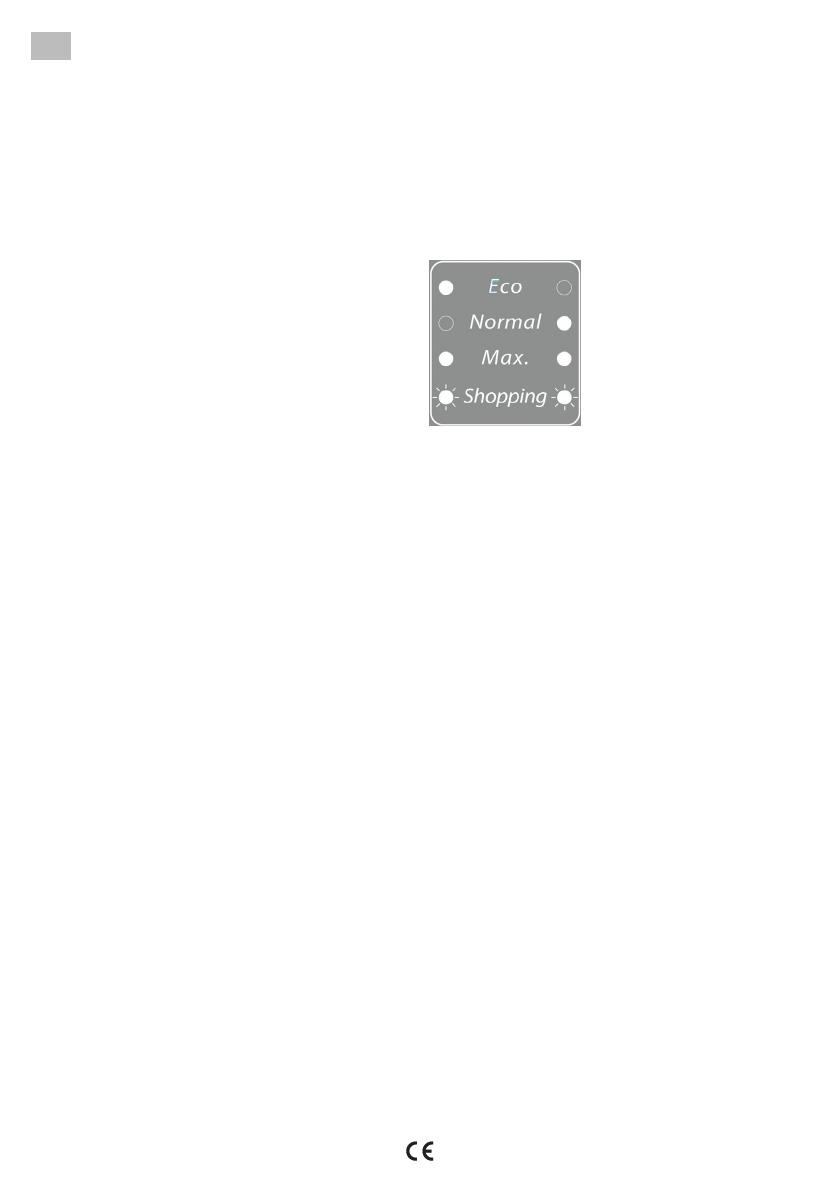
The green indicator lamps (3) indicate the selected setting
according to the following diagram:
Eco: least cold temperature
(left indicator lamp lit).
Normal: intermediate
temperature
(right indicator lamp lit).
Max: extra low temperature
(both indicator lamps lit).
Shopping: Fast Freezing
(both indicator lamps lit). See
section “Freezing fresh food”.
Note: In the event of a power failure, the settings (except
for the “Turbo Freeze” function) remain memorised. The
time required for the freezer to reach the set temperature
depends on climatic conditions and the temperature setting
selected.
TURBO FREEZE FUNCTION
The Turbo Freeze function enables a reduction of up to
50% in the time required to freeze fresh food placed inside
the basket provided.
To use the function, proceed as follows:
1. Position the basket provided to the right of the adhesive
sticker shown in the gure.
2. The basket comes complete with a separator panel,
which splits the basket it into 2 areas. The smaller area
of the basket (to be positioned below the fan), must be
left empty in order to allow the fan to operate properly.
Place the food to be frozen in the larger section of
the basket (to be positioned towards the front of the
appliance).
3. Close the lid.
4. Activate the Turbo Freeze function from the control
panel, holding down button (4) for around 3 seconds.
The yellow indicator lamp (2) lights up. The lit yellow
indicator lamp (2) indicates that the function is active.
The function is deactivated automatically after the
time required to freeze food properly has elapsed
(approx. 6 hours).
When the Turbo Freeze indicator lamp switches o, it
means that the function is no longer active, and that food
can be removed from the basket. When the function is
deactivated, the yellow indicator lamp (2) switches o and
the previously selected temperature setting is restored.
Note:
- When the function is active, it is perfectly normal for the
appliance to produce a more audible running noise.
- When the function has been activated, it can be
deactivated manually by pressing button (4) again for
around 3 seconds.
2
Adhesive sticker
for basket
positioning
Basket area
Turbo Freeze Fan
Small area of basket
(for fan only)
Basket separator panel
Large area of basket
(for food to be frozen)
FREEZING FOOD
Preparing fresh food for freezing
Wrap and seal fresh food in: aluminium foil, cling lm,
air and water-tight plastic bags, polyethylene containers
with lids, provided they are suitable for freezing foods.
Food must be fresh, mature and prime quality.
Fresh vegetables and fruit should preferably be frozen
as soon as they are picked to maintain the full original
nutritional value, consistency, colour and avour.
Always leave hot food to cool before placing in the
appliance.
Freezing fresh food
Place foods to be frozen in direct contact with the walls
of the appliance:
A) - food to be frozen,
B) - food already frozen.
Avoid placing foods to be frozen in direct contact with
food already frozen.
For better and faster freezing, foods should be split into
small portions; this will also be useful when the frozen
items are to be used.
1. At least 24 hours before storing fresh food in the
appliance, activate fast freezing (“Shopping”) by
repeatedly pressing button (4) until both green indicator
lights (3) ash.
2. Place the food to be frozen inside the appliance and
keep the lid closed for 24 hours. Food will be fully frozen
after this period of time.
The fast freezing function (“Shopping”) can be deactivated
by pressing button (4) and selecting a dierent temperature
setting.
If the function is not deactivated manually, the appliance
automatically deactivates the function after 50 hours,
restoring the last setting selected (which was active for at
least 1 minute) before the “Shopping” setting was selected.
FOOD STORAGE
Refer to the table on the appliance.
Classication of frozen foods
Load and classify the frozen foods; it is advisable
to indicate the storage date on the packs, to ensure
consumption before the expiry dates listed in months in
Fig. 6 for each type of food.
Advice for storing frozen food
When buying frozen food, make sure that:
The packaging is intact (food in damaged containers
may have deteriorated). If a package is swollen or has
damp patches, the product may not have been stored
in optimum conditions and therefore undergone partial
defrosting.
When shopping, leave frozen food purchases until last
and carry them in a thermally insulated bag.
On arriving home, immediately place the frozen food in
the appliance.
Avoid or minimise temperature variations. Observe the
expiry date on the packaging.
Always follow the storage instructions on frozen food
packages.
Note:
Eat fully or partially defrosted foods immediately.
Do not refreeze unless the food is cooked after it
has thawed. Once cooked, the food can be refrozen.
In case of a prolonged power failure: Do not open
the appliance door, except to place ice packs
(if provided) over the frozen foods on the right and
left side of the appliance. This will slow down the
rise in temperature.
APPLIANCE DEFROSTING
The appliance should be defrosted when the thickness of
ice on the walls reaches 5-6 mm.
Disconnect the appliance from the power supply.
Remove food from the appliance and put it in a very
cool place or a thermally insulated bag.
Leave the appliance door open.
Remove the internal defrost water drain plug
(depending on model) (Fig. 8).
Remove the external defrost water drain plug
(depending on model) and reposition it as shown in
g. 8.
Use the separator (depending on model) inside the
product as a recipient for any remaining water, (D) as
shown in g. 8. If there is no separator, use a shallow
container.
Defrosting can be sped up by using a spatula to detach
the frost from the appliance walls.
Remove the frost from the bottom of the appliance.
In order to avoid permanent damage to the
appliance interior, do not use pointed or sharp
metal instruments to remove the ice.
Do not use abrasive products or heat up the
interior articially.
Dry the inside of the appliance thoroughly.
Ret the plug after defrosting.
HANGING THE LID LIGHT BULB (if provided)
Disconnect the appliance from the mains power supply.
Remove the diuser by following the sequence of steps
3
shown in the gure.
Unscrew the light bulb and replace it with an identical
bulb of the same wattage and voltage.
Ret the diuser and plug in the appliance.
TROUBLESHOOTING GUIDE
1. The red indicator light ashes.
Is there a power failure?
Has defrosting been carried out?
Is the appliance lid properly closed?
Is the appliance positioned near a heat source?
Are the ventilation grille and condenser clean?
2. All the led indicators ash at the same time.
Contact After-sales Assistance.
3. The appliance is too noisy.
Is the appliance perfectly horizontal?
Is the appliance in contact with other furniture of objects
that may cause vibrations?
Has the packaging been removed from under the
appliance?
Note: Slight gurgling noises from the refrigerating circuit
after the compressor cuts out are perfectly normal.
4. The indicator lights are o and the product is not
working.
Is there a power failure?
Is the plug properly inserted in the socket?
Is the electrical cable intact?
5. The indicator lights are o and the product is
working.
Contact the After-sales Service.
6. The compressor runs continuously.
Have hot foods been put in the appliance?
Has the lid of the appliance been left open for a long
time?
Is the appliance positioned in a very warm room or near
heat sources?
Has someone activated the “Shopping” function? (green
indicator lamps (3) ashing) and/or the Turbo Freeze
function (yellow indicator lamp on)?
7. Too much ice forms on the upper edges.
Are the defrost water drainage plugs correctly
positioned?
Is the appliance lid properly closed?
Is the appliance lid seal damaged or deformed? (See
section “Installation”)
Have the 4 protection pieces been removed? (See
section “Installation”)
8. Condensation forms on the external walls of the
appliance.
It is normal for condensation to form under certain
atmospheric conditions (humidity above 85%) or if the
appliance is located in a damp or poorly ventilated
room. However, this in no way aects appliance
performance.
9. The layer of ice on the internal walls of the
appliance is not uniform.
This is perfectly normal.
AFTER-SALES SERVICE
Before contacting After-Sales Service:
1. See if you can solve the problem yourself.
2. Switch the appliance on again to see if the problem
has been solved. If it has not, disconnect the appliance
from the power supply and wait for about an hour before
switching on again.
3. If the problem persists after this course of action, contact
After-Sales Service.
Specify:
the nature of the fault,
the model,
the service number (the number after the word SERVICE
on the rating plate on the rear of the appliance),
your full address,
your telephone number and area code.
ELECTRICAL CONNECTION FOR GREAT BRITAIN AND IRELAND ONLY
Warning – this appliance must be earthed.
Fuse replacement
If the mains lead of this appliance is tted with a BS 1363A 13amp fused plug, to change
a fuse in this type of plug use an A.S.T.A. approved fuse to BS 1362 type and proceed as
follows:
1. Remove the fuse cover (A) and fuse (B).
2. Fit replacement 13A fuse into fuse cover.
3. Ret both into plug.
Important:
The fuse cover must be retted when changing a fuse and if the fuse cover is lost the
plug must not be used until a correct replacement is tted.
Correct replacement are identied by the colour insert or the colour embossed in words
on the base of the plug.
Replacement fuse covers are available from your local electrical store.
For the Republic of Ireland only
The information given in respect of Great Britain will frequently apply, but a third type of plug and socket is also used, the 2-pin,
side earth type.
Socket outlet / plug (valid for both countries)
If the tted plug is not suitable for your socket outlet, please contact After-sales Service for further instruction.
Please do not attempt to change plug yourself. This procedure needs to be carried out by a qualied technician in compliance
with the manufactures instructions and current standard safety regulations.
4
400011231181
3
4 5
1
1
2
3
4
2
8
9
6
CLASE/KLASSE
CLASSE/CLASS
°C °F
SN 10 - 32 50 - 90
N 16 - 32 61 - 90
ST 16 - 38 61 - 100
T 16 - 43 61 - 110
7
  • Page 1 1
  • Page 2 2
  • Page 3 3
  • Page 4 4

Whirlpool WHE39392 T User guide

Category
Freezers
Type
User guide

The Whirlpool WHE39392 T freezer offers multiple features to keep your food fresh and organized. With its spacious interior and adjustable temperature settings, you can customize the storage conditions for different types of food. The Turbo Freeze function is great for quickly freezing fresh items, while the Shopping function helps maintain the ideal temperature for keeping your groceries fresh. The appliance also features an indicator light to alert you when the temperature is not optimal for food preservation.

Ask a question and I''ll find the answer in the document

Finding information in a document is now easier with AI