Noise, excessive vibrations and water leakages
can be caused by incorrect installation of washing
machine.
For freestanding models: NEVER move the
washing machine by carrying it at the worktop.
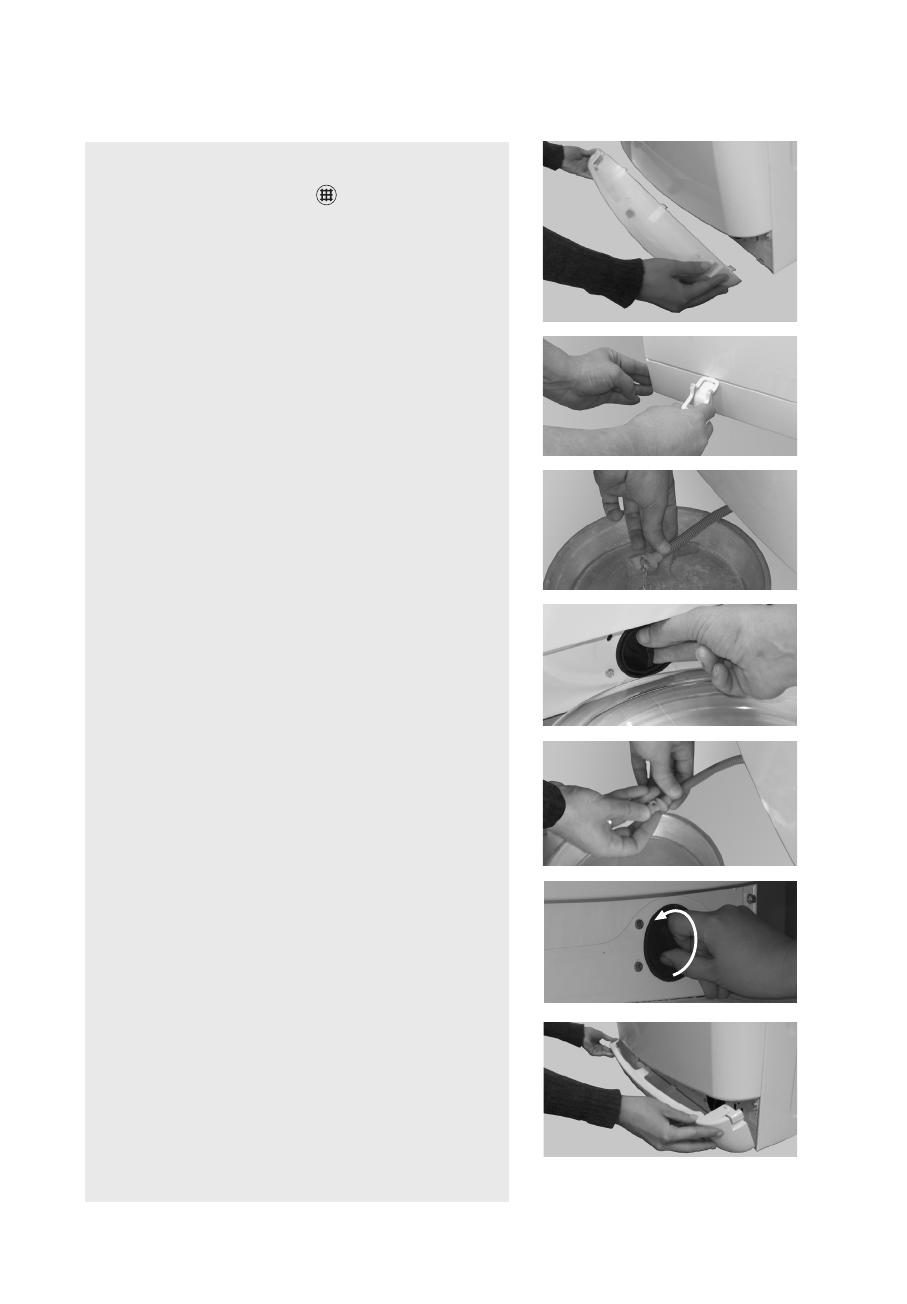
REMOVE TRANSPORT BOLTS! (pict.1)
Important:
- Not removed transport bolts cause damages
to the appliance!
- Keep the transport bolts for further
transporting of the appliance; in this case
refit the transport bolts in reverse order.
1.Loosenthescrewsofall4transportboltsby
about35mm;use12mmwrench(pict.2a).
2.Pushscrewinsideofmachinetostopposition
(min.20mm)(pict.2b).
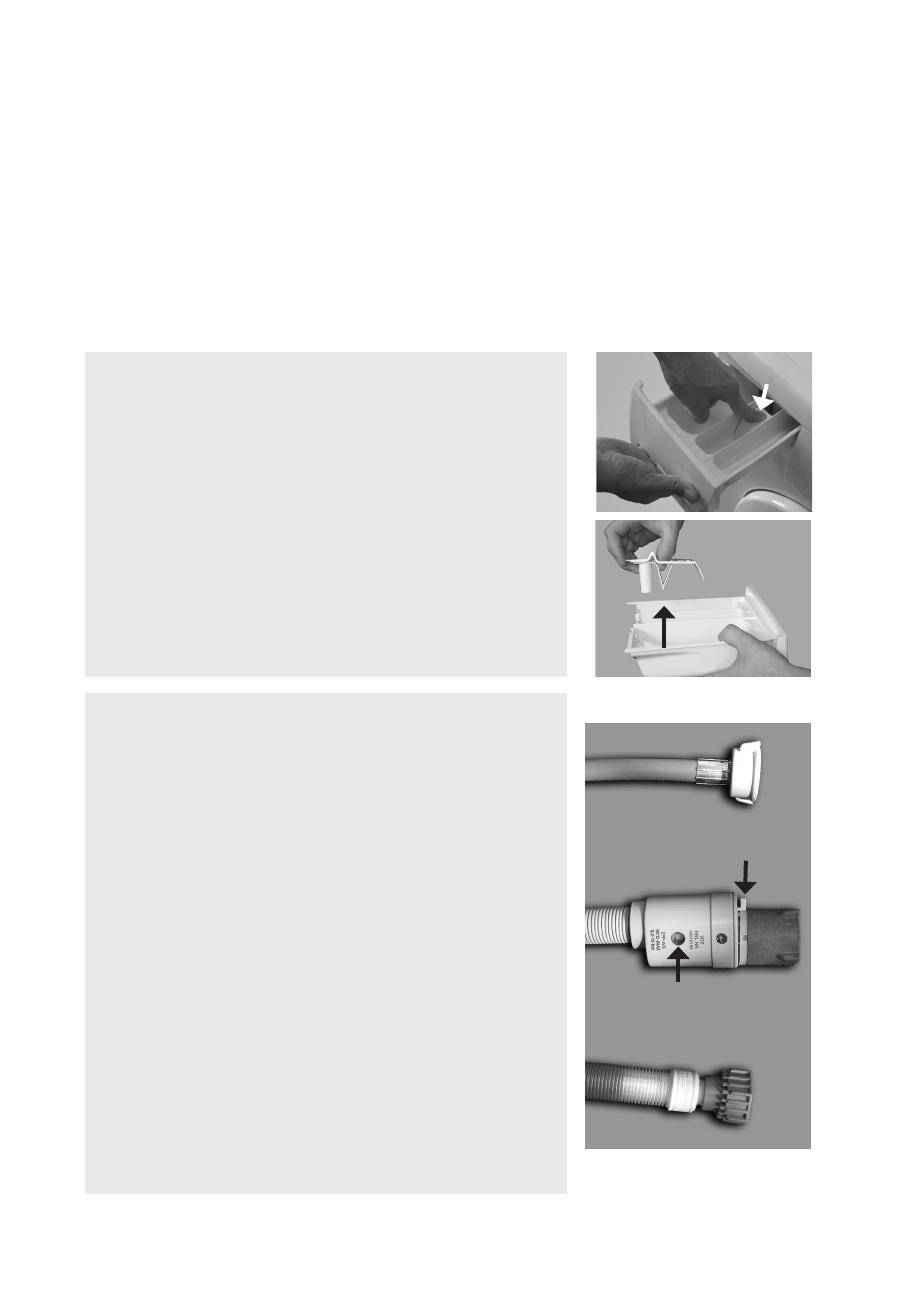
3.Pullouttherubberringsfromtheholes(donot
pullthescrews!).Thewholetransportboltcan
beremovednow(pict.2c).
4.Pushtheplasticcapsdeliveredwithyour
washingmachineontheholestoclosethem
(pict.2d).
ADJUSTMENT OF THE FEET
Theappliancemustbeinstalledonasolidandlevel
floorsurface(ifnecessaryuseaspiritlevel).
Iftheapplianceistobeinstalledonawoodenor
floatingfloor,distributetheweightbyplacingitona
sheetofplywoodmeasuringatleast60x60cmand
thicknessofatleast3cmwhichissecuredtothe
floor.Ifthefloorisuneven,adjustthe4levellingfeet
asrequired;donotinsertpiecesofwoodetc.under
thefeet.
Screwoutthewashingmachine´sfeetbyhandwith
2-3anticlockwiseturnsandthenslackenthelocknut
by13mmwrench(seepict.3,4).
Slightlyliftthemachineandadjusttheheightofthe
footrevolvingit(pict.4).
Important:tightenthelocknutbyturningitanti-
clockwisetowardstheappliancecasing(pict.5, 6).
CONNECT THE WATER INLET HOSE
Ifthewaterinlethoseisnotalreadyinstalled,screw
byhandthebentendoftheinlethosetothevalveon
thewashingmachine‘sback(pict.7, 8).
Screwbyhandthestraightendoftheinlethoseto
thetap,tighteningthenut.
Attention:
• Nokinksinthehose!
• Theappliancemust not beconnectedtothe
mixingtapofanun-pressurizedwaterheater.
• Checkwater-tightnessofconnectionsbyturning
thetapcompletelyon.
• Ifthehoseistooshort,replaceitwithasuitable
lengthofpressureresistanthose(1000kPamin,
EN50084approvedtype).
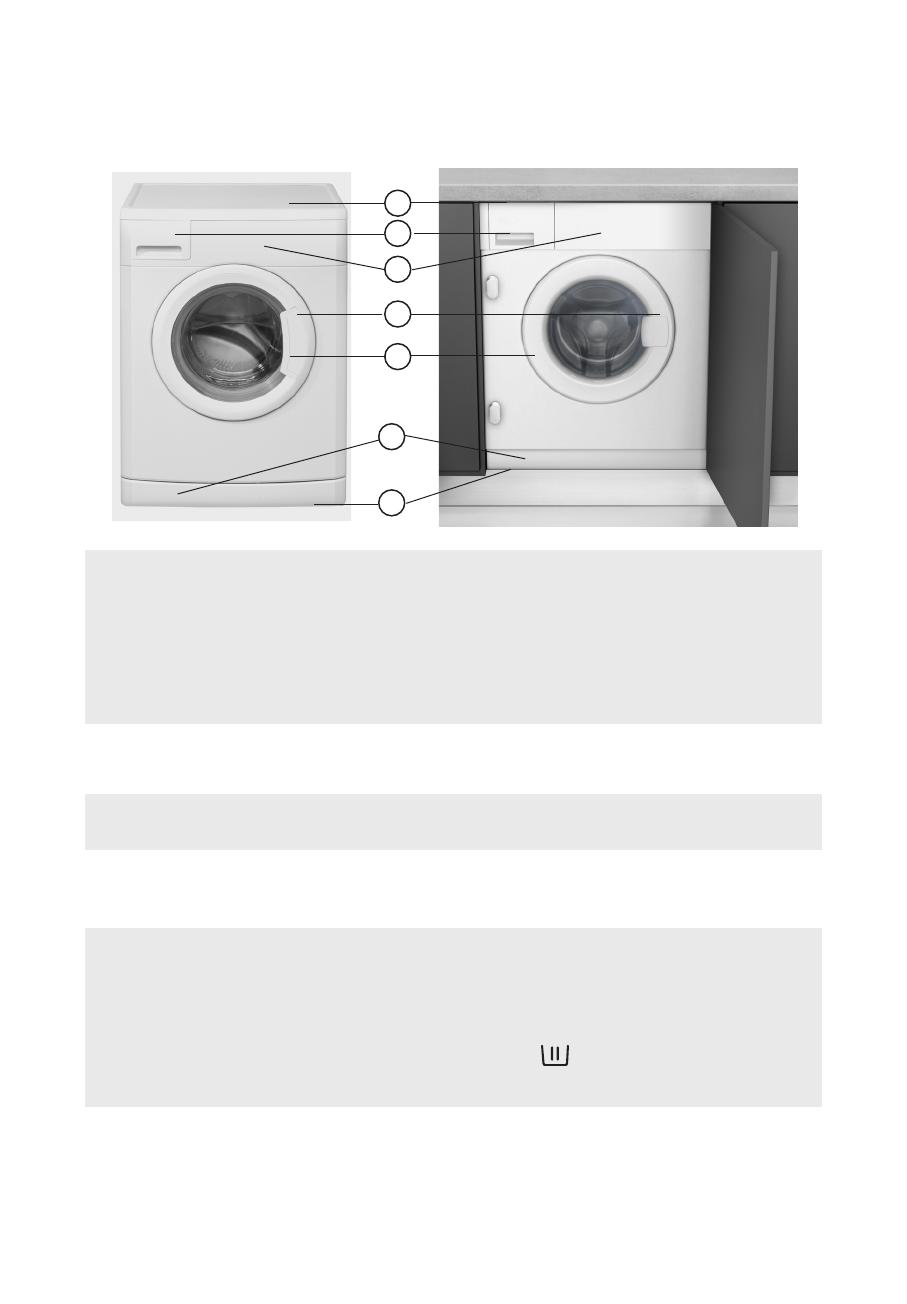
INSTALLATION GUIDE
Pictures are on the cover of this Instruction for Use.
For built-in washing machines: observe the separate Built-in Instructions
GB15
Ifyouneedalongerwaterstophose,contact
ourAfterSalesServiceoryourdealer.
• Checktheinlethoseregularlyforbrittleness
andcracksandreplaceifnecessary.
• Thewashingmachinecanbeconnectedwithout
abackflowvalve.
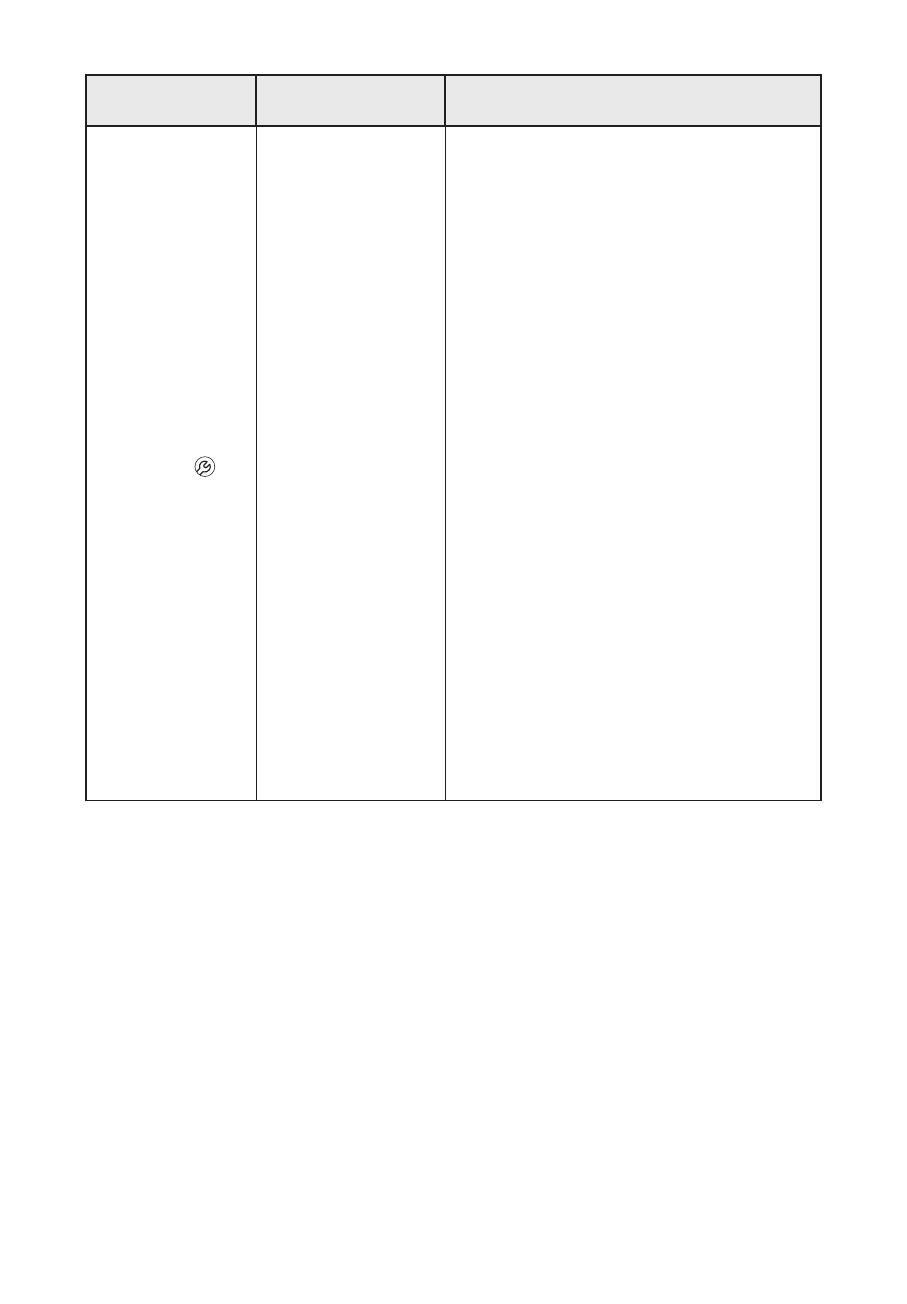
CONNECT THE DRAIN HOSE
1.Incasethedrainhoseisinstalledasshownon
pict.9:Unclipitfromtheholdersmarkedwith
arrows.
2. Incasethedrainhoseisinstalledintheupper
partofthewashingmachine(pict.10):Unclipit
frombothholdersmarkedwitharrows
(dependingonthemodel).
3.Firmlyconnectthedrainhosetothesiphonor
anotheroutletfordrainwater.
• Makesuretherearenokinksinthedrainhose.
• Securethehosesothatitcannotfalldown.
• Smallhandbasinsarenotappropriate.
• Tomakeanextension,useahoseofthesame
typeandsecuretheconnectionswithclips.
• Heightforsiphon-drainhoseconnectionmust
beminimum60cmandmaximum125cm
• Max.Overalldrainhoselength:2,50m(inthis
case,themaximumheightforfixationis90cm).
ELECTRICAL CONNECTION
• Useasocketwithanearthconnection.
• Donotuseextensionleadsormultisockets.
• Theelectricalpowercablemustbereplaced
exclusivelybyalicensedelectrician.
• Electricalconnectionsmustbemadeinaccordance
withlocalregulations.
I-2012