English - 9
Most television stations provide written information services
via teletext. The index page of the teletext service gives you
information on how to use the service. In addition, you can
select various options to suit your requirements by using the
remote control buttons.
☛
For teletext information to be displayed correctly,
channel reception must be stable. Otherwise,
information may be missing or some pages may not be
displayed.
Teletext Feature
(depending on the model)
Before contacting the Samsung after-sales service, perform
the following simple checks. If you cannot solve the problem
using the instructions below, note the model and serial
number of the television and contact your local dealer.
No sound or picture
◆ Check that the mains lead has been connected to a
wall socket.
◆ Check that you have pressed the “I” button (On/Off)
and the POWER button.
◆ Check the picture contrast and brightness settings.
◆ Check the volume.
Normal picture but no sound
◆ Check the volume.
◆ Check whether the volume MUTE button on the
remote control has been pressed.
No picture or black and white picture
◆ Adjust the colour settings.
◆ Check that the broadcast system selected is correct.
Sound and picture interference
◆ Try to identify the electrical appliance that is affecting
the television, then move it further away.
◆ Plug the television into a different mains socket.
Blurred or snowy picture, distorted sound
◆ Check the direction, location and connections of your
aerial.
This interference often occurs due to the use of an
indoor aerial.
Remote control malfunctions
◆ Replace the remote control batteries.
◆ Clean the upper edge of the remote control
(transmission window).
◆ Check that the “+” and “-” ends of the batteries are
inserted correctly.
◆ Check that the batteries are drained.
Troubleshooting
11
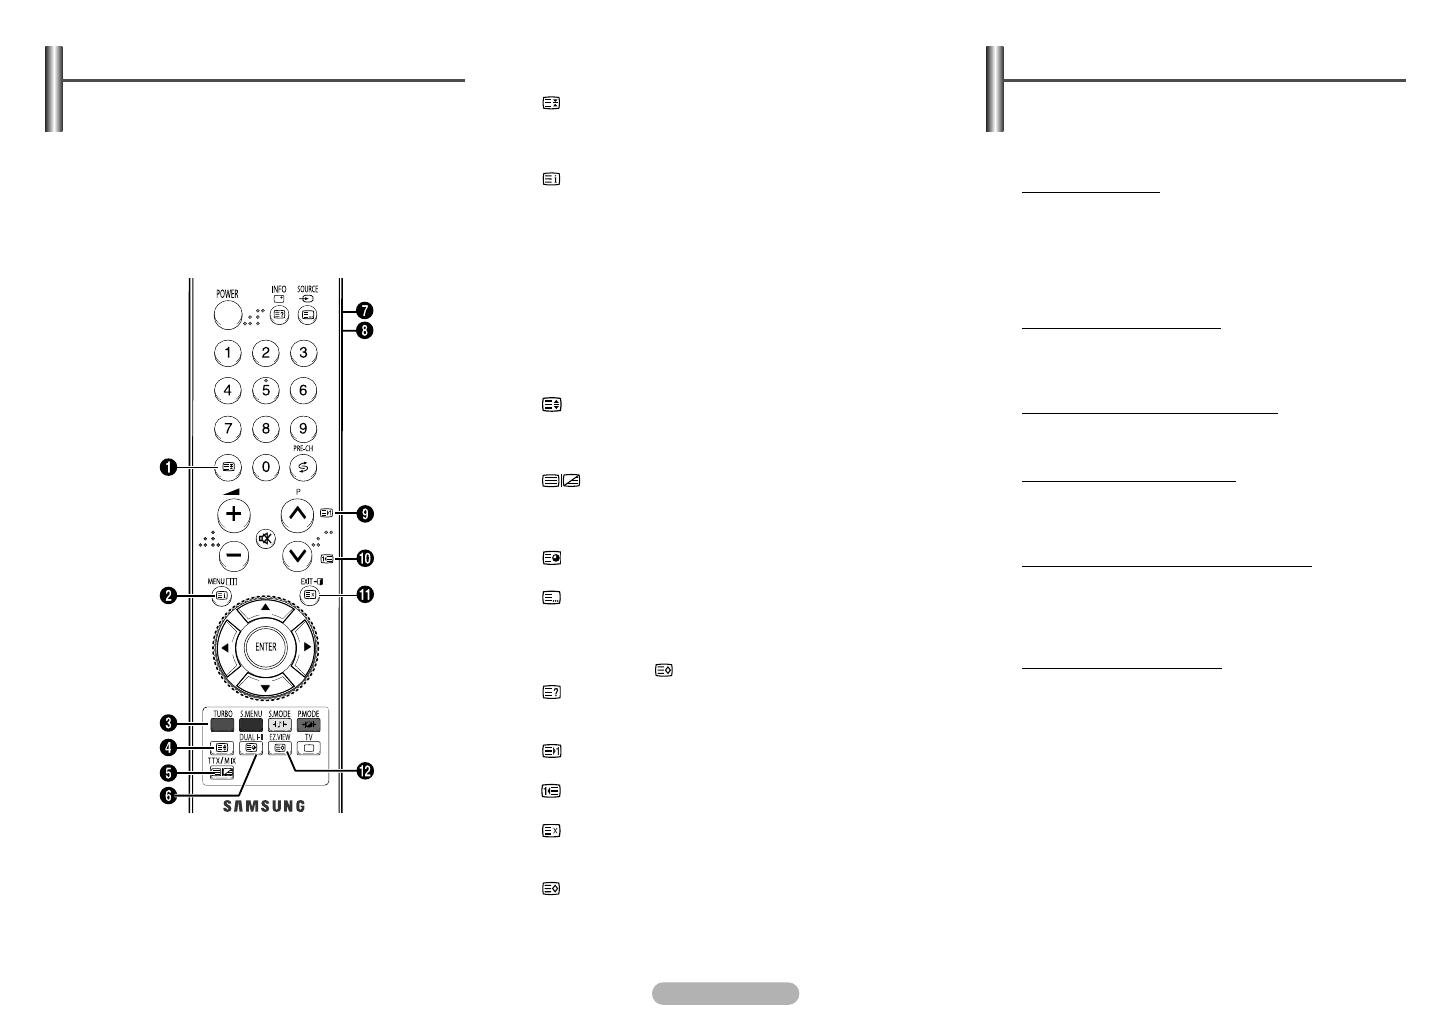
(hold)
Used to hold the display on a given page if the selected
page is linked with several secondary pages which follow
on automatically. To resume, press it again.
22
(index)
Used to display the index (contents) page at any time
while you are viewing teletext.
33
Coloured buttons (red/green/yellow/blue)
If the FASTEXT system is used by a broadcasting
company, the different topics covered on a teletext page
are colour-coded and can be selected by pressing the
coloured buttons. Press one of them corresponding to the
required. The page is displayed with other coloured
information that can be selected in the same way. To
display the previous or next page, press the
corresponding coloured button.
44
(size)
Press to display the double-size letters in the upper half
of the screen. For lower half of the screen, press it again.
To display normal screen, press it once again.
55
(teletext ttx/mix)
Press to activate teletext mode after selecting the
channel providing the teletext service. Press it again to
overlap the teletext with the current broadcasting screen.
66
(sub-page)
Used to display the available sub-page.
77
(mode)
Press to select the teletext mode (LIST/FLOF). If you
press it in the LIST mode, it switches into the List save
mode. In the List save mode, you can save teletext page
into list using the (store) button.
88
(reveal)
Used to display the hidden text (answers to quiz games,
for example). To display normal screen, press it again.
99
(page up)
Used to display the next teletext page.
00
(page down)
Used to display the previous teletext page.
!!
(cancel)
Used to display the broadcast when searching for a page.
@@
(store)
Used to store the teletext pages.
MUTE
LNA
AA68-03967C-00Eng_0506 5/7/08 6:29 PM Page 9


