Page is loading ...

DS‐2CC5173P(N)‐VP(IR)(‐H)
Day&Nigh
tHigh‐definitionColorCamera
User’sManual
V2.1.0
1

Thankyouforpurchasingourproduct.Ifthereareanyquestionsorrequests,please
donothesitatetocontactthedealer.
ThismanualisapplicabletotheDS‐2CC5173P(N)‐VP(IR)(‐H)colorcameras.
This manual maycontaintechnical or printing errors, and the contentis subject to
changewithoutnotice.Updatesmay beaddedtothenewversionofthismanual.We
constantly strivetoimproveor updatethe products orproceduresdesc ribedin the
manual.
2

SafetyInstruction
Theseinstructionsareintendedtoensurethatusercanusetheproductcorrectlyto
avoiddangerorpropertyloss.
Theprecautionmeasureisdividedinto“Warnings”and“Cautions”
Warnings:Seriousinjuryordeathmayoccurifanyofthewarningsareneglected.
Cautions: Injury or equipment damage may occur if any of the cautions are
neglected.
Warnings Follow these
safeguards to
prevent serious
injuryordeath.
Cautions Follow these
precautions to
prevent potential
injury or material
damage.
Warnings
1.In the use of the product, youmustbe in strict compliance with the electrical
safetyregulationsofthenationandregion.
2.Input voltage should meet both the SELV(Safety Extra Low Voltage) and the
Limited Power Source with AC 24V or DC 12V according to the IEC60950‐1
standard.Pleaserefertotechnicalspecificationsfordetailedinformation.
3.Donotconnectsever aldevicestoone poweradapterasadapteroverloadmay
causeover‐heatingorafirehazard.
4.Pleasemakesurethattheplugisfirmlyconnectedtothepowersocket.
5.Whentheproductismountedonwallorceiling,thedeviceshallbefirmlyfixed.
6.If smoke, odor or noise rise from the device, turn off the power at once and
unplugthepowercable,andthenpleasecontactthe servicecenter.
7.Iftheproductdoesnotworkproperly,pleasecontactyourdealerorthenearest
servicecenter.Neverattempttodisassemblethecamerayourself.(Weshallnot
assume any responsibility for problems caused by unauthorized repair or
maintenance.)
3

Cautions
1. Makesurethepowersupplyvoltageiscorrectbeforeusingthecamera.
2. Donotdropthecameraorsubjectittophysicalshock.
3. DonottouchCCD (ChargeCoupledDevice) moduleswith fingers. If cleaningis
necessary,usecleanclothwithabitofethanolandwipeitgently.Ifthecamer a
willnotbe usedfor anextendedperiod,pleasereplacethelenscaptoprotect
theCCDfromdirt.
4. Donotaimthecameraatthesunorextrabrightplaces.Bloomingorsmearing
mayoccurotherwise(whichis notamalfunction), andaffecttheenduranceof
CCDatthesametime.
5. TheCCDmaybeburnedoutbyalaserbeam,sowhenanylaserequipmentisin
using,makesurethatthesurfaceofCCDwillnotbeexposedtothelaserbeam.
6. Donotplacethecamerainextremelyhot,cold(theoperatingtemperatureshall
be‐10Ԩ~+60Ԩ ), dusty or damp locations, and do not expose it to high
electromagneticradiation.
7. To avoid heat accumulation, good ventilation is required for operating
environment.
8. Keepthecameraawayfromliquidwhileinuse.
9. Whileindelivery,thecamerashallbepackedinitsoriginalpacking,orpackingof
thesametexture.
10. Regular part replacement: a few parts (e.g. electrolytic capacitor) of the
equipmentshallbereplacedregularlyaccordingtotheiraverageenduringtime.
Theaveragetimevariesbecauseofdifferencesbetweenoperatingenvironment
andusinghistory,soregularcheckingisrecommendedfor allthe users.Please
contactwithyourdealerformoredetails.
4

5
TableofContents
Chapter1Introduction.............................................................................. 1
1.1ProductFeatures ............................................................................................................................1
1.2ChiefIntroductionaboutFunction .................................................................................................1
1.3Appearance ....................................................................................................................................4
Chapter2Installation............................................................................... 5
2.1Ceilingmountinstallation .............................................................................................................5
2.2Wallmountinstallation .................................................................................................................6
2.3Indoorwallmountinstallation......................................................................................................8
2.4Ceilingembeddedinstallation.....................................................................................................10
2.5Outdoorwallmountinstallation.................................................................................................11
2.6CameraAdjustments ...................................................................................................................13
2.6.1Vari‐focallenszoomandfocusadjustments
...................................................................................................13
2.6.2ServiceConnector
............................................................................................................................... 15
2.6.3Menubutton
....................................................................................................................................15
Chapter3MenuDescription................................................................... 16
3.1MenuInterface ................................................................................. 16
3.2MenuDetails..................................................................................... 16
3.2.1CameraIDSettings ...............................................................................................................16
3.2.2LensTypeSettings ................................................................................................................17
3.2.3WHITEBALSettings ..............................................................................................................18
3.2.4BLC/ECLIPSESettings ............................................................................................................20
3.2.6DAY/NIGHTSettings............................................................................................................21
3.2.7ShutterSettings....................................................................................................................22
3.2.8AGCSettings .........................................................................................................................22
3.2.9Synchr onization ....................................................................................................................23
3.2.10Language ............................................................................................................................23
3.2.11SpecialFunction .................................................................................................................23
3.2.12ExitSetting..........................................................................................................................29
Appendix.........................................................................................................................................30
Specification ...................................................................................................................................30
Dimension.......................................................................................................................................31

1
Chapter1Introduction
1.1ProductFeatures
This series of cameras utilizes a high performance sensor and advanced print circuit board design
technologywithhighresolution,lowdistortionandlownoise,etc.Keyfeaturesare:
HighperformanceSONYCCD,forhighdefinitionandimageclarity.
Lowillumination(Pleaserefertothespecificationsfordetails)
ICRfilterautoswitch
Highlightsuppressionforaclearerimageinstronglight.
OSDmenu,enablesusertoconfiguretheoperatingparameters.
AdvancedsteppingmotorandsleepmodetoavoidICRoscillation.
BLCwithpr
ogrammableBLCarea.
AWB‐Aut
oWhiteBalancewithhighcolorrendition.
HighSNR forclearandpleasingimage.
AutoElectronic Shuttercontroltoadapttodifferentenvironments.
AGC‐AutoGainControl,adaptivebrightness.
AutoIris.
Privacymaskwith8optionalcolorsand8configurableareas.
Advanceddesigntechnologywithhighreliability.
Advanced3‐axisdesigntomeetdifferentmountingrequirements
Convenientbackfocusadjustment.
Advanceddouble‐platedesigntoguaranteeCCDheatdissipationandimagequality.
3Ddigit
alnoisereduction.
IRSMAR
Tpreventclosequarterspicturefromoverexposure.
Impactprotection:IEC60068‐2‐75Eh50J;EN50102,uptoIK10.
1.2ChiefIntroductionaboutFunction
MotionDetection:Inthesurveillancearea,motionwilltriggeralarm.Usercanadjustsensitivity.
Privacy Mask: In the surveillance area, user can cover areas to protect other’s privacy. The number of
privacymaskareasareupto8.

Color B/W auto switch: Thecamera will displaycolor image and become monochrome automatically at
night.
AGC:Whentheobjectbeingshotlooksdim,pleaseturnonAGCtoenhancebrightness.Tooutputstandard
videounderdifferentillumination,therangeofautogaincontrolmustbelargeenough.Whenunderlow
illumination,AGCwi ll increasecamera’ssensitivity,andoutputbrightandclearvideo.
S/Nratio:ItistheratioofSignalvoltageandnoisevoltage.Iftheratioislarger,theeffectofnoise isless,
andtheimageiscleaner.
OSD(OnScreenDisplay):Thecamerasupportsuser‐friendlymenuinterfaceonthescreen,convenientfor
userselectingvariousfunctions.
3‐axisadjustment: Advanced3‐axismechanismdesignmeetsdifferentmountingrequirementby flexibly
adjustingthelensintotherequiredangle.
SynchronousSystem:Internalsynchronizationusessynchronoussignalwhichisgeneratedbythecamera’s
crystaloscillatortocompletesynchronousscan.Powersynchronizationusessynchronoussignalwhichis
generatedbycamera’sadaptortocompletesynchronousscan.
White Balance: A camera cannot adjust the color temperature accordingtolighting changes as well the
humaneye;thiscausescolordeviation.Whitebalanceisthewhiterenditionabilityofthecameratoadjust
theproblemaccordingtotheenvironmentautomatically.
ICR Aut
o Switch: This will filterinfrared light during the daytime andchange tonormal filter at night to
ensureahighsensitivityandclearimage.
BLC:Ifther
eisglaringlightinthebackgroundoftheobjectbeingshot,theobjectwilllookverydim.In
thissituation,turningontheBLC functionwillmaketheobjectlookbrightandclear,butthebackground
scenewillbeoverexposed.
2

3
BLCOFFBLCON
High light suppression: Identify a glare point and suppress it automatica lly in order to see the image
aroundtheglarepointmoreclearly.

1.3Appearance
3‐axis:
Easytoad
justdesiredfocusandscenebyturningandmovingthe3‐axiscamerabracketbyhand.
X‐axis:0~355°Y‐axis:0~90°
4

Chapter2Ins
tallation
2.1Ceilingmountinstallation
Note: Ifyouinstallthecameraontheceiling,ensurethattheceilingisstrongenoughtowithstandthree
timesweightofthecameraandtheninstallthecamerasecurely.Iftheceilingisnotstrongenough,the
camer amayfallandcauseseriousinjury.
1. Loosenthesetscrewswitha
hexagonal screwdriver(attached
withthecamera),andremovethe
domecover.
2. Loosentheinsidesetscrewslocated
aroundthedomecore,andremove
thedomecoregently.
3. Installthedomebasefirst.Tighten
thescrewstothemountingsurface.
4. Installthedome coretothedome
baseandtightenthescrews.
5. Adjust desired focus and scene by
turning and moving the 3‐axis
camerabracketbyhand.
6. Installblackcover.
7. Installthedomecoverandfixwith
domecoverscrew.
Note:
ToMaintainIP66Weatherproofing,itwillbenecessarytoapplyabeadofsealantaroundthedome
base!
Ifitiscementwall,userneedtouseexpansionscrew.Positionofscrewinstallationshouldbesameas
dome.
5

2.2Wallmountinstallation
Note: Ifyouinstallthecameraontheceiling,ensurethattheceilingisstrongenoughtowithstandthree
timesweightofthecameraandtheninstallthecamerasecurely.Iftheceilingisnotstrongenough,the
camer amayfallandcauseseriousinjury.
1. Loosenthesetscrewswithahexagonalscrewdriver(attachedwiththecamera),andremove
thedomecover.
6

2. Loosentheinsidesetscrewslocatedaroundthedomecore,andremovethedomecoregently.
3. Installthesuppliedbracketonthewall.Refertopictureforscrewstobeused.
4. Installthedomecoretothedomebaseandtightenthescrews.
5. Adjustdesiredfocusandscenebyturningandmovingthe3‐axiscamerabracketbyhand.
6. Installblackcover.
7. Installthedomecoverandfixwithdomecoverscrew.
Note:Ifitiscementwall,userneedtouseexpansionscrew.Positionofscrewinstallationshouldbesame
asdome.
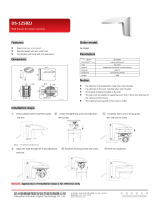
Note:ChoosingDS‐1240ZJcanrealizezeroAnglemonitoring.
TheangleofDS‐1240ZJinstallation:
7

2.3Indoorwallmountinstallation
Note: Ifyouinstallthecameraontheceiling,ensurethattheceilingisstrongenoughtowithstandthree
timesweightofthecameraandtheninstallthecamerasecurely.Iftheceilingisnotstrongenough,the
camer amayfallandcauseseriousinjury.
1. Loosenthesetscrewswithahexagonalscrew
driver(attachedwiththecamera),andremove
thedomecover.
2. Loosentheinsidesetscrewslocatedaround
thedomecore,andremovethedomecore
gently.
3. InstallbracketDS‐1229ZJorDS‐1239ZJonthe
wall.
4. Installthedomebasefirst.Tightenthescrews
tothemountingsurface.
5. Installthedomecoretothedomebaseand
tightenthescrews.
6. Adjust desiredfocus and scene by turning and
movingthe3‐axiscamerabracketbyhand.
7. Installblackcover.
8. Installthedomecoverandfixwithdomecover
screw.
8

DS‐1229
ZJ DS‐1239ZJ(ElectricBoxincluded)
Note:Ifitiscementwall,userneedtouseexpansionscrew.Positionofscrewinstallationshouldbe
sameasdome.
9

2.4Ceilingembeddedinstallation
Note: Ifyouinstallthecameraontheceiling,ensurethattheceilingisstrongenoughtowithstandthree
timesweightofthecameraandtheninstallthecamerasecurely.Iftheceilingisnotstrongenough,the
camer amayfallandcauseseriousinjury.
10
Note:Ifitiscementwall,userneedtouseexpansionscrew.Positionofscrewinstallationshouldbesame
asdome.
1. Loosenthesetscrewswitha
hexagonal screwdriver(attached
withthecamera),andremovethe
domecover.
2. Loosentheinsidesetscrewslocated
aroundthedomecore,andremove
thedomecoregently.
3. Installthedomebasefirst.Tighten
thescrewstothemountingsurface.
4. Installthedome coretothedome
baseandtightenthescrews.
5. Adjust desired focus and scene by
turning and moving the 3‐axis
camerabracketbyhand.
6. Installblackcover.
7. Installthedomecoverandfixwith
domecoverscrew.

2.5Outdoorwallmountinstallation
Note:
Ifyouinstallthecameraontheceiling,ensurethattheceilingisstrongenoughtowithstandthree
timesweightofthecameraandtheninstallthecamerasecurely.Iftheceilingisnotstrongenough,the
camer amayfallandcauseseriousinjury.
1. Loosenthesetscrewswithahexagonalscrew
driver(attachedwiththecamera),andremove
thedomecover.
2. Loosentheinsidesetscrewslocatedaround
thedomecore,andremovethedomecore
gently.
3. InstallbracketDS‐1242ZJorDS‐1243ZJonthe
wall.Inthisstep,asshowninthefigure,you
shouldscrewdomecorescrewsthrough
mountingscrew.
4. Installthedomebasefirst.Tightenthescrews
tothemountingsurface.
5. Installthedomecoretothedomebaseand
tightenthescrews.
6. Adjust desiredfocus and scene by turning and
movingthe3‐axiscamerabracketbyhand.
7. Installblackcover.
8. Installthedomecoverandfixwithdomecover
screw.
Note:Ifitiscementwall,userneedtouseexpansionscrew.Positionofscrewinstallationshouldbe
sameasdome.
Following isDS‐1242ZJandDS‐1243ZJ
11

DS‐1242ZJDS‐1243ZJ(WithGangbox)
12

2.6CameraAdjustments
Toperf
ormthefollowingcameraadjustments,connectamonitor.Thenturnonpower to
thecameraandmonitor.Tousetheserviceconnector,ref erto2.5.2ServiceConnector.
2.6.1V
ari‐focallenszoomandfocusadjustments
Toad
justthefieldofview:
1.Loosenthez
oomlockingscrew.
2.Tu
rnthezoomadjustmentringclockwiseorcounterclockwisetoselectthefieldofview.
3.Ti
ghtenthezoomlockingscrew.
Toadjustthefocus:
1.Loosenthefo
cuslockingscrew.
13

14
2.Turnthefocuslocking screwclockwiseorcounterclockwisetoadjustthefocus.
3.Whenth
eoptimalfocusisreached,tightenthefocuslockingscrew

2.6.2ServiceConnector
Followingpi
cturesshowthepositionofserviceconnector.
2.6.3Men
ubutton
PushtheJo
ystickforonesecond,andtheOSDappearsonthescreen,MovietheJoyStick
up,down,left&righttocontroltheOSDfunctions.
15
/