12
US
Read this first
To prevent the camcorder from malfunctions
and damages
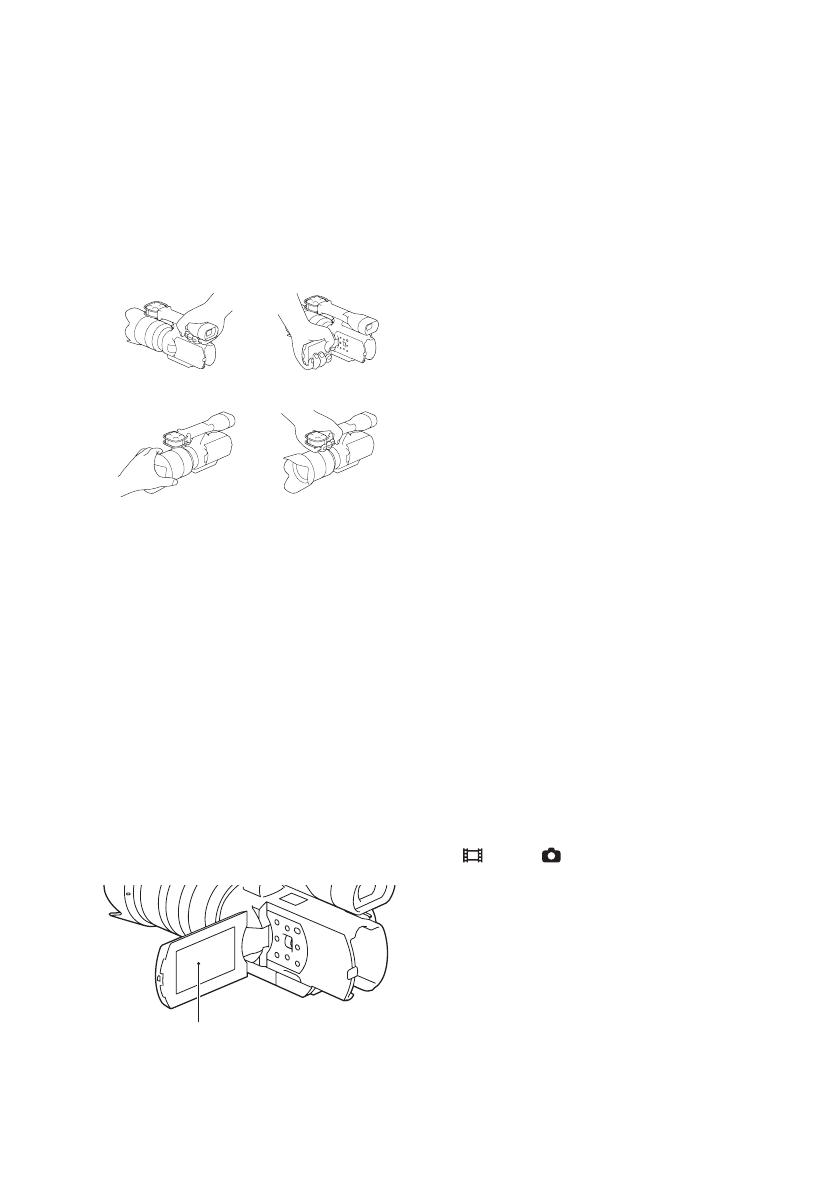
• Do not hold the camcorder by the following parts,
and jack covers.
• This camcorder is neither dust-proof, nor splash-
proof, nor water-proof. See “Precautions”
(page 41).
Notes on the viewfinder, LCD monitor and
lens
• A menu item that is grayed out is not available
under the current recording or playback
conditions.
• The viewfinder and the LCD monitor are
manufactured using extremely high-precision
technology so over 99.99 % of the pixels are
operational for effective use. However, there may
be some tiny black points and/or bright points
(white, red, blue or green in color) that constantly
appear on the viewfinder and the LCD monitor.
These points are normal in the manufacturing
process and do not affect the images in any way.
• Do not record the sun or leave the camcorder
under the sun for a long time. The inside of the
camcorder may be damaged. If sunlight is
focused on a nearby object, it may cause a fire.
When you must place the camcorder under
direct sunlight, attach the lens cap.
• Do not expose your camcorder’s viewfinder, lens,
or LCD monitor to the sun or strong light source
for extended periods.
• Do not attempt to record the sun directly. Doing
so may cause a malfunction of the camcorder.
You may record a sunset, as the light is not as
strong as that at midday.
Notes on recording/playback
• When you use a memory card with this
camcorder for the first time, it is recommended to
format the memory card using the camcorder for
stable performance of the memory card before
shooting. Note that formatting permanently
erases all data on the memory card, and is
unrecoverable. Save precious data on a
computer, etc.
• Before you record one-time events, make a trial
recording to make sure that the camcorder is
working correctly.
• The recorded contents cannot be compensated
for even if recording or playback is not possible
due to a malfunction of the camcorder or memory
card, etc.
• TV color systems differ depending on the
countries/regions. To view your recordings on a
TV, you need an NTSC system-based TV.
• Television programs, films, video tapes, and
other materials may be copyrighted.
Unauthorized recording of such materials may be
contrary to the copyright laws.
• Do not do any of the followings when the
(movie)/ (still image) mode lamps
(page 27) and the access lamp (page 26) are lit
or flashing. Otherwise, the recording media may
be damaged, recorded images may be lost or
other malfunctions could occur.
– ejecting the memory card
– removing the battery pack or the AC Adaptor
from the camcorder
• Do not look at the sun or a strong light through a
removed lens. This may cause irrecoverable
damage to your eyes. Or, it may cause a
malfunction of the lens.
• Do not shake or strike the camcorder. In addition
to malfunctions and an inability to record images,
Viewfinder LCD panel
Lens Built-in microphone
Black, white, red, blue and green points


