Page is loading ...

Coway Air Purier
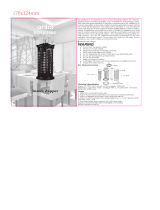
AP-1516D
• This product is for domestic use only. It cannot be used in other overseas countries
where the power voltage is dierent.
• Read and save these instructions.
• English /
یسراف

FEATURES
4. Real-time air purication display
Four colored indicators provide visible notice of current
air quality in real time .
5. Detachable outlet grilles
Detachable outlet grilles are installed on top/front of the
product for easier, more eective cleaning than in other
products with xed covers.
1. Excellent air cleaning
The cleaning lter system has been optimized for
reduction of bacteria and removal of invisible
ultrane dust and others from indoor air.
2. Powerful clean air ow
Quickly circulates puried air in dierent directions
through normal ow, focused ow, and multi-ow.
3. Fine Dust Filter
The ne dust lter eectively captures not only large
dusts but also ne dusts such as pollen, mold, and pet
dander.

English
2
1
DEAR CUSTOMERS
Thank you for using the Coway air purier.
Please be sure to read this user manual to use and maintain your air purier correctly.
If you experience any problems during use, you can refer to this user manual to resolve them.
This user manual contains the product warranty, so please store it safely.
CONTENTS
- Keep your user manual in a readily accessible or visible place. -
FOR INFORMATION
MAINTENANCE
HOW TO USE
OTHERS
| 03 |
SAFETY INFORMATION
Danger
Warning
Caution
| 07 |
PARTS NAME
| 09 |
AIR PURIFICATION PROCESS
| 10 |
BEFORE USE
How to install lter
| 11 |
INDICATORS AND BUTTONS
| 13 |
HOW TO USE
| 16 |
ADJUST PARTICLE SENSOR
| 17 |
CLEANING METHOD
Product
Filter
| 20 |
FILTER REPLACEMENT
| 22 |
TROUBLE SHOOTING
| 23 |
SPECIFICATION

SAFETY INFORMATION
This is safety information. Be sure to follow it!
The warnings are to keep users safe and avoid damage to the product.
Please read them carefully and use the product correctly.
DANGER : Failing to follow the precautions below may result
in serious injury or even death.
•
Do not use damaged power plugs or loose sockets
.
•
The power plug must be plugged into only 220V-240V~50Hz/60Hz
sockets.
•
Do not pull on the power cord to move the product.
•
Do not touch the power plug with wet hands.
• To avoid damaging or warping the power cord, do not use excessive
force to bend the power cord or put heavy objects on top of it.
•
Do not repeatedly connect and disconnect the power plug.
• If water enters the power supply, unplug the power and completely dry
before using again.
•
Be sure to unplug the power during product repair, maintenance or
part replacement.
• If the power plug's pins or contact area become covered in dust or
water, wipe them thoroughly.
• Do not plug several electric appliances into one socket, and use only a
dedicated socket.
• Unplug the power when not being used for a long time.
• Do not carelessly connect or tamper with the power cord.
•
If the supply cord is damaged, it must be replaced by the manufacturer,
its service agent or similarly qualied persons in order to avoid a hazard.
• Do not install near electric heaters.
• Do not put on top of electric products like heaters or televisions.

English
4
3
• Do not install in places with a lot of humidity or dust or places where
water (rainwater) splashes.
• Do not use or store combustible gases or ammable materials near this
product.
•
If there is any strange sound, burning smell or smoke from the
purier, immediately unplug the power plug and contact a service
center.
•
Never immerse the product in water.
•
Do not spray ammable materials such as insecticides or air
fresheners on the intake.
•
Do not open, repair or modify the purier yourself.
•
Do not put bowls of water, chemicals, food, small metal objects, or
ammable materials on top of the purier.
•
Clean after unplugging the power.
•
Do not spray water directly on the purier or use benzene, thinners,
etc. to wipe it during cleaning.
•
Do not insert sharp objects such as picks into the particle sensor.
•
Do not put ngers or foreign matter (pins, sticks, coins, etc.) into the outlet.
•
Do not let children hang from or climb on the purier.
•
Be careful that children do not put their hands in the outlet.
• Be careful that children do not put their hands into the hole of the product.
•
Replace the lter with a new one when the time comes.
•
Do not spray water directly on the purier.

WARNING : Failing to follow the precautions below may
result in considerable physical injury or property
damage.
• Do not unplug by pulling on the power cord.
• Do not use in baths, showers, swimming pools, or other areas where the
purier may be in direct contact with water.
• Children shall not play with the appliance.
• Cleaning and user maintenance shall not be made by children without
supervision.
SAFETY INFORMATION
CAUTION : Failing to follow the precautions below may result
in slight physical injury or property damage.
• Do not unplug the power or move the purier while it is operating.
• If unusual sound, odor, or smoke comes from the purier, immediately
unplug the power and call our service center.
• Do not install on a slope.
• Do not excessively impact or use excessive force on this product.
• Use at least 20 cm away from walls or other objects on each side.
• Install the purier in a place where it is not blocked on any side so air
can circulate well.
• Do not use in BBQ or other restaurants where odor, smoke, or oil may occur.
• Do not use in direct sunlight.
• Do not install in a high place.
• Do not touch the controls while power is turning on.

English
6
5
• Do not push or lean on the purier. The purier may fall over.
• Do not use the product for any purpose other than air purication.
• Do not let a person be exposed to breeze expelled from the front of
purier for a long time.
• Do not allow breeze expelled from the purier front near your face.
• Do not use for a long time in places that are sealed or where children,
the elderly or sick are.
• Do not block the outlet with laundry or curtains.
• Remove dust from the pre-lter with a vacuum cleaner or water.
• Periodically wash the pre-lter and dry it suciently in a shady place
with good ventilation.
• Do not repeatedly push the ow mode or quick cleaning mode buttons.
•
This appliance can be used by children aged from 8 years and above
and persons with reduced physical, sensory or mental capabilities or
lack of experience and knowledge if they have been given supervision
or instruction concerning use of the appliance in a safe way and
understand the hazards involved.
• Children should be supervised to ensure that they do not play with the
appliance.
READ AND SAVE THESE INSTRUCTIONS

PARTS NAME
Top
Rear / Front
Power cord
Top outlet
Particle
sensor
Front cover
Pollution
indicator
Inlet
Detachable
front outlet grille
Detachable
Top outlet
grille
Indicators /
Buttons

English
User manual
8
7
•
•
Components

AIR PURIFICATION PROCESS
■ Pre-lter
Removes relatively large dust and mold, hair, pet fur, etc.
The superne ber net decreases pressure damage to the lter and increases dust collection eciency.
■ Fine Dust lter
The ne dust lter eectively captures not only large dusts but also ne dusts such as pollen, mold,
and pet dander.
∗
When you assemble the ne dust lter, be sure that the blue side of the lter must be at the front.
■ Deodorization lter
The granular activated carbon deodorization lter eectively removes odors including food smells and
musty house smells and harmful gases indoors.
■ HEPA lter
The high-performance synthetic HEPA lter is excellent at removing cigarette smoke and ne dust.
1. Pre-lter
▶
▶
2. Fine Dust lter
3. Deodorization lter 4. HEPA lter
▶

English
10
9
BEFORE USE
3. Reattach the front cover.
Push to reattach the front cover into the two slots on the sides of the purier.
∗
If the front cover is not properly attached, the product will not operate.
FRONT/전면/前
▶
How to install lter
Please check before use
The product is for 220V-240V~50Hz/60Hz.
Make sure to connect the power plug to a grounded electric outlet
(220V-240V~50Hz/60Hz) dedicated to the product.
- Be sure to install the lter after removing the plastic packaging.
- Only use it indoors.
- When not in use, remove the power plug from the socket.
- During lter assembly, check the front of the lters.
▶
Filter assembly order :
HEPA lter → deodorization lter → ne dust lter
→ pre-lter
Tips
1. Open the front cover.
Pull both sides of the front cover to open.
2. Take out the lter and remove
the plastic packaging.
Remove the plastic packaging from lters,
excluding the Pre-lter, and assemble them
in the purier in order.
Install the ne dust lter behind the Pre-lter.
∗
Filter assembly order :
HEPA lter →
deodorization lter → ne dust lter
→ pre-lter
∗
When you assemble the ne dust lter, be sure that the blue side of the lter must be at the front.

Indicators
INDICATORS AND BUTTONS
1
Auto mode indicator
This indicator is illuminated if
auto mode is on.
3
Haze mode indicator
This indicator is illuminated if
Haze mode is on.
5
Multi-ow mode indicator
This indicator is illuminated if
multi-ow mode is on.
7
Quick cleaning mode
indicator
This indicator is illuminated if
Quick cleaning mode is on.
9
Light sensor
This sensor detects light around
the purier.
2
Silent mode indicator
This indicator is illuminated if silent
mode is on.
4
Focused ow mode indicator
This indicator is illuminated if
focused ow mode is on.
6
Air cleaning level indicator
This indicator is illuminated if
Low/Mid/High Air cleaning level
is on.
8
Timer indicator
1 hr, 4 hr, and 8 hr indicators are
illuminated if Timer is on.
10
Pollution indicator
Indoor pollution is shown by LED color.
Clean (blue) → Slight (green) →
Heavy (yellow) → Severe (red)
1
Auto mode
indicator
3
Haze mode
indicator
2
Silent mode
indicator
8
Timer indicator
4
Focused ow
mode indicator
6
Air cleaning level
indicator
5
Multi-ow
mode indicator
7
Quick cleaning
mode indicator
9
Light sensor

English
2
Mode button
1
Power button
4
Air Cleaning
Level button
6
Timer button
7
Mood Light button
3
Air Flow
button
5
Quick Cleaning
mode button
12
11
Buttons
1
Power button
Use when turning the purier on and o.
∗
When you rst start the purier, it runs in auto
mode, and if you turn it o and then on again
while it is operating, it restarts in the mode
operating before it was turned o (however,
it reverts to auto mode if that mode was a Air
Flow or quick cleaning mode)
3
Air Flow button
Press the Air Flow button to cycle
between focused ow → multi-ow →
mode before focused ow.
∗
However, the purier reverts to auto mode if
the previous mode was quick cleaning mode.
-Focused ow : breeze comes from the front of
the purier.
-Multi-ow: Breeze comes from the front and
top of the purier simultaneously.
5
Quick Cleaning mode button
Press the Quick Cleaning mode button
to turn on quick cleaning mode.
∗
Quick cleaning mode is a unied function.
You cannot use it during mode operation
(Auto/Silent/Haze), ow mode, or manual
operation.
6
Timer button
Press the timer button to reserve a
shuto time by cycling between
1 hr → 4 hr → 8 hr → cancel reservation.
All indicators turn o when shuto
reservation is canceled.
7
Mood Light button
Use when turning the indicators and pollution indicator on or o.
Press the Mood Light button while all indicators and the pollution indicator are on to turn
indicators o by cycling between pollution indicator o → all indicators o → all indicators on.
4
Air Cleaning Level button
Press the Air Cleaning Level button to
cycle between Low → Mid → High air
volume.
If you press the Air Cleaning Level button
during mode operation(Auto/Silent/Haze)
or quick cleaning mode operation, the purifier
immediately switches to manual mode.
2
Mode button
Press the mode button to go from
Auto → Silent → Haze mode.

■ To operate manually
Press the power button to turn on the purier and press the air cleaning
level button to select your desired air cleaning level. (Low → Mid → High)
∗ Press the air cleaning level button during mode operation
(Auto/Silent/Haze) to immediately convert to manual operation.
■ To use mode operation
Press the power button to turn on the purier and press the mode
button to select your desired operating mode. (Auto → Silent → Haze)
Normal ow
In normal ow mode, breeze is expelled from the purier's top outlet.
Press the power button to turn the purier on and choose the mode you want
from manual operation or mode operation (Auto/Silent/Haze). Manual and
mode operation (Auto/Silent/Haze) operate as normal ow modes.
▶ Auto mode
Operates eectively by automatically adjusting the purier's air
volume (Low → Mid → High) depending on the indoor
pollution level detected by the sensor. This is a convenient
operating mode for most users.
Pollution
level 1
Pollution
level 2, 3
Pollution
level 4
Air
cleaning
level
Low Mid High
▶ Haze mode
Maximizes air cleaning level during operation to quickly create
a comfortable environment. Haze mode uses a higher air cleaning
level than "high air cleaning level".
▶ Sleep mode (only works in auto mode)
If the area around the purier darkens for at least 3 minutes while it is operating in auto mode, the purier automatically
converts to low air cleaning level, low noise, low power consumption mode.
Sleep mode will be cancelled if the area around the purier lightens for 5 minutes. The indicator for Sleep mode (on/o) varies
depending on the previous status of the indicator. Please refer to the below table.
∗ In Auto/Silent/Haze/Sleep modes, breeze is expelled from the Top outlet in normal ow mode.
▶ Silent mode
Minimizes air cleaning level during operation to create a quiet,
comfortable environment. This operating mode is quiet and
consumes less power.
∗ The air cleaning level indicator is o in silent mode.
HOW TO USE
Tips
- Plug the power plug into a socket before operating the purier.
- When the purier is turned on, it starts in auto mode by default.

English
14
13
■ To select air cleaning level
Select focused ow mode and press the air
cleaning level button to select your desired air
cleaning level. (Low → Mid → High)
∗
Press the mode button or quick cleaning mode
button while in focused ow mode to turn o
the ow mode.
∗
When using focused ow mode, the
pollution indicator LED turns clockwise while turning on.
Focused ow
In focused ow mode, breeze is expelled from the purier's front Outlet.
Press the power button to turn on the purier and press the ow mode
button to select focused ow mode.
(Focused ow → multi-ow → mode before focused ow)
When focused ow is on, it initially operates with low air cleaning level.
In multi-ow mode, breeze is expelled from the purier's front and
top outlet
.
Press the power button to turn on the purier and press the ow mode
button to select multi-ow mode.
(Focused ow → multi-ow → mode before focused ow)
When multi-ow is on, it initially operates with low air cleaning level.
▶
▶
■ To select air cleaning level
Select multi-ow mode and press the air cleaning
level button to select your desired air cleaning
level. (Low → Mid → High)
∗ Press the mode button or quick cleaning mode
button while in multi-ow mode to turn o the
ow mode.
∗ When using multi-ow mode, the pollution
indicator LED turns clockwise while repeating on↔o.
Multi-ow
Operation part/Pollution indicator
before entering Sleep mode
ON / ON
ON / OFF
OFF / OFF
Auto mode indicator/Pollution indicator
when Sleep mode is on
ON / OFF
ON / OFF
OFF / OFF
Operation part/Pollution indicator when
Sleep mode is off
ON / ON
ON / OFF
OFF / OFF
Indicator
status
▶ ▶

▶ ▶
HOW TO USE
∗ Quick cleaning only operates with Haze air cleaning level.
∗
Quick cleaning operates the pollution indicator and air direction to match the mode at each stage.
Only the quick cleaning indicator is on regardless of mode at each stage
.
∗ When all three stages of quick cleaning are complete, the purier reverts to auto mode.
∗ Press the mode/air ow/air cleaning level/quick cleaning mode buttons while in quick cleaning mode to
turn this mode o.
∗ When you press the quick cleaning mode button to turn it o, the purier returns to the previous mode.
However, if the previous mode was a Air Flow(focused/multi), it runs in auto mode.
Quick cleaning
This operating mode can eectively remove dust in your house the
most quickly. It operates in 3 stages for a set time at maximum air
cleaning level(Haze).
Level Mode and operating time
1 Multi-ow (3 minutes)
2 Focused ow (2 minutes)
3 Normal ow (5 minutes)
- Do not repeatedly press the quick cleaning mode button.
The breeze direction may dier from its initial setting.
∗ Choose normal flow to change the breeze direction, then choose the mode you want to use.
Tips
Tips
- Do not repeatedly press the Air Flow button.
The breeze direction may dier from its initial setting.
∗ Choose normal ow to change the breeze direction, then choose the mode you
want to use.

English
16
15
ADJUST PARTICLE SENSOR
1. Press the air cleaning level and mode buttons
simultaneously for at least 1 second while the
purier is operating.
2. The air cleaning level indicator ashes at intervals of
about 0.5 second.
4. Press the air cleaning level and mode buttons
simultaneously for at least 1 second again to
enter your selected sensitivity to operate the
purier normally.
∗
If the air cleaning level button and mode button are not
pressed for 10 seconds after selecting sensitivity, the selected
sensitivity is automatically input.
When you rst turn on the purier, the particle sensor is set to standard. You can adjust the sensitivity as
follows if the pollution indicator stays at severe even after the purier runs for 2 hours or more with high
pollution or the pollution indicator stays at clean even if the pollution is high.
3. Press the air cleaning level button to adjust to your
desired sensor sensitivity.
When sensor sensitivity is selected, the air cleaning
level indicators ash as follows.
Air cleaning
level low
Air cleaning
level mid
Air cleaning
level high
Sensitive Standard Insensitive
1 sec.
1 sec.
How to adjust the sensitivity of the particle sensor

▶
▶
CLEANING METHOD
[Cleaning the grille]
[While grille is opened]
[While grille is closed]
[Cleaning the interior]
When reassembling after cleaning the
front grille, line up the front grille with
the display. Turn the front grille clockwise
to x it in place.
Tips
- Always unplug the power cord before cleaning.
- Do not use detergents containing organic solvents (solvents, thinners, etc.), bleach,
chlorine or abrasives to clean.
- Do not immerse the purier in water or sprinkle water on it.
■ Cleaning the outlet and detachable
outlet grille
Lift the detachable outlet grille on top of the
outlet, then clean the grille and outlet with a
soft brush or vacuum cleaner.
∗ Be careful not to let dust enter the outlet
while cleaning.
∗ When reassembling the upper detachable outlet grille,
put the grille tabs into the purier slots as in the picture
on the right.
■ Cleaning the detachable front grille
Turn the front grille counterclockwise while removing it.
Clean the detached front grille outlet with a soft brush or
vacuum cleaner.
When cleaning inside the purier, wipe with a soft, dry cloth.
∗ If there is severe pollution, wipe with a damp
cloth (do not use abrasives).
∗ Take care that dust does not fall inside the purier
while cleaning.

English
18
17
■ Cleaning the particle sensor (clean every
2 months)
1. Clean the particle sensor air inlet and outlet with a soft
brush or vacuum cleaner.
∗
Take care that dust does not fall inside the purier while cleaning.
2. Open the particle sensor cover on the
upper side of the purier. (Use the particle
sensor cover slots to open the cover.) Wet a
cotton ball with a small amount of water and
wipe the lens, dust inlet and outlet, then
wipe again with a dry cotton ball to remove
moisture.
∗
If cleaning is not done regularly, the performance of
the particle sensor may decrease.
∗
Clean more often in very dusty environments.
■ Cleaning the front cover
Remove the front cover from the purier and then wipe away dust stuck
to the surface with a soft, dry cloth or soft brush.
∗ If there is severe contamination, use a damp cloth
(do not use abrasives).
■ Cleaning the purier
Wipe with a soft, dry cloth.
∗ If there is severe contamination, use a damp cloth
(do not use abrasives).
▶

▶
▶
- Always unplug the power cord before cleaning the lter.
- The pre-lter can be reused after dust removal and cleaning with water.
- If the pre-lter is not cleaned for a long time, the product performance may decrease
and problems may occur.
- The ne dust lter, deodorization lter and HEPA lter cannot be reused after
cleaning. Never clean them with water.
■ Pre-lter (clean every 2-4 weeks)
1. Pull both sides of the front cover to open.
2. Pull the pre-lter handle while taking it out to
separate it from the ne dust lter.
∗ Be careful that dust doesn't fall out during
removal.
3. Remove dust with water or a vacuum cleaner
depending on the degree of contamination.
∗ Be careful not to let dust enter the purier while cleaning.
4. Push the completely dry pre-lter all the way
into the purier to install it. Close the front
cover again.
∗
When you assemble the ne dust lter, be
sure that the blue side of the lter must be at
the front
CLEANING METHOD
Tips
/