Page is loading ...

TG2008214-MM-00 1 of 23 20180910-Ver1
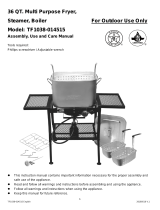
PORTABLE GAS GRILL
Model Number: TG2008214-MM-00
ASSEMBLY & OPERATING INSTRUCTIONS
For Outdoor Use Only
This instruction manual contains important information necessary for
the proper assembly and safe use of the appliance.
Read and follow all warnings and instructions before assembling/using
the appliance.
Failure to follow these instructions and warnings could result in damage
to the product or injury to the user.
Keep this manual for further reference.
Should you encounter any problem,
CALL US FIRST.
DO NOT return product to the retail store.
WE CAN HELP.
For assistance, contact customer service at customerservice@rankam.com
or at 1 – 888 – 837 – 1380, 8:00am – 5:00pm, Pacific Standard Time, Monday to Friday
Tank Not Included

TG2008214-MM-00 2 of 23 20180910-Ver1
WARNINGS
SAFETY LABELS
DANGER: Indicates an imminent hazardous situation which if not avoided will result in
death or serious injury.
WARNING: Be alert to the possibility of serious bodily injury if the instructions are not
followed. Be sure to read and carefully follow all of the messages.
CAUTION: Indicates a potentially hazardous situation, which, if not avoided, may result in
minor or moderate injury.
DANGER
If you smell gas:
1. Shut off gas to the appliance.
2. Extinguish any open flame.
3. Open lid.
4. If odor continues, keep away from the appliance and immediately call
your gas supplier or fire department.
Failure to follow these instructions could result in fire or explosion which
could cause property damage, personal injury or death.
DANGER
1. Never operate this appliance unattended.
2. Never operate this appliance within 10 ft (3.0 m) of any structure,
combustible material or other gas cylinder.
3. Never operate this appliance within 25 ft (7.5 m) of any flammable liquid.
4. Do not fill cooking vessel beyond maximum fill-line.
5. Never allow oil or grease to get hotter than 400°F or 200°C. If the
temperature exceeds 400°F (200°C) or if oil begins to smoke,
immediately turn the burner or gas supply OFF.
6. Heated liquids remain at scalding temperatures long after the cooking
process. Never touch cooking appliance until liquids have cooled to
115°F (45°C) or less.
7. If a fire should occur, keep away from the appliance and immediately call
your fire department. Do not attempt to extinguish an oil or grease fire
with water.
Failure to follow these instructions could result in fire or explosion which
could cause property damage, personal injury or death.

TG2008214-MM-00 3 of 23 20180910-Ver1
WARNING
1. Do not store or use gasoline or other flammable liquids or vapors in the vicinity of
this or any other appliance.
2. An LP cylinder not connected for use shall not be stored in the vicinity of this or any
other appliance.
DANGER
(a) Do not store a spare LP-gas cylinder under or near this appliance;
(b) Never fill the cylinder beyond 80 percent full;
(c) If the information in (a) and (b) is not followed exactly, a fire causing death or serious
injury may occur.
PROP 65 WARNING
WARNING: This product can expose you to chemicals including benzene, which is
known to the State of California to cause cancer and birth defects or other reproductive
harm. For more information go to www.P65Warnings.ca.gov.
WARNING
The appliance shall not be used on or under any apartment or condominium balcony or
deck.
The appliance shall be used
outdoors only, and shall not be used
in a building, garage or any other
enclosed area.
This grill is not intended to be
installed or used in or on a
recreational vehicle or boat.
The appliance shall maintain
minimum 10 feet (305cm) from
combustible materials to the sides
and back of the appliance, and the
appliance shall not be located or
used under overhead unprotected
combustible materials.
This grill is for outdoor use only and should only be operated in a well-ventilated space.
Never operate in an enclosed space, garage or building.
Maintain a minimum clearance of 10 feet
from combustible material.

TG2008214-MM-00 4 of 23 20180910-Ver1
Floor setting
Table top setting
Hose is a trip hazard.
Keep the fuel supply hose away from any heated
surface(s). The gas cylinder should be located away
from the appliance at least 24” (61cm).
Never allow the gas hose to touch with any hot
surface.
When operating the grill on a tabletop, it should
be no higher than 30” (76.2cm).
Place the propane tank on the ground
immediately adjacent to the tabletop, no further
than 24” (60.9cm) from the grill.
Failure to follow these instructions could cause
the propane tank to overheat and vent propane
which could ignite causing serious personal
injuries or property damage and / or a tripping
hazard over the gas hose or propane tank,
pulling the grill off the tabletop causing serious
personal injuries or property damage.
Never allow the gas hose touch with any hot
surface.
This appliance can only be used on a
non-combustible surface like concrete table. Not
on wood or plastic.
This appliance is not intended for commercial use.
This appliance is not for frying turkeys.
When cooking, the appliance must be on a level, stable noncombustible surface in an area
clear of combustible material. An asphalt surface is not acceptable for this purpose.
This appliance is not intended for and should never be used as a heater.
This appliance will be hot during and after use. Use insulated oven mitts or gloves for
protection from hot surface.
Never attempt to attach this grill to the self-contained LP gas system of a camper trailer or
motor home.
Carefully follow all instructions in this manual for proper assembly and leak testing. Do not
use grill until leak test has been completed. If leak is detected at any time, turn OFF gas
supply and do not use until leak source has been corrected.
Cooking area should be kept clear and free from combustible materials, gasoline, bottled
gas in any form, and any other flammable vapors and liquids. Keep free of obstructions
that would prevent ventilation.
Never try to light grill with lid closed. The buildup of gas is very dangerous and could cause
an explosion.
The use of alcohol, prescription or non-prescription drugs may impair your ability to
properly assemble or safely operate the grill.
Keep fire extinguisher readily accessible. In the event of an oil or grease fire, do not
attempt to extinguish with water, immediately call the fire department. Use type BC or ABC
fire extinguisher.
When cooking, the appliance must be on a level, stable noncombustible surface in an area
clear of combustible material. An asphalt surface (blacktop) may not be acceptable for this
appliance.

TG2008214-MM-00 5 of 23 20180910-Ver1
Do not leave the appliance unattended. Keep children and pets away from the appliance
at all times.
Do not move appliance when in use. Allow the appliance to cool down totally before
moving or storing.
This appliance will be hot during and after use. Use insulated oven mitts or gloves for
protection from hot surfaces or splatter from cooking liquids.
USE OF LP GAS CYLINDER AND INSTALLATION
BEFORE INSTALLING:
The installation must conform with local codes or, in the absence of local codes, with either the
National Fuel Gas Code, ANSI Z223.1/NFPA 54, Natural Gas and Propane Installation Code,
CSA B149.1, or Propane Storage and Handling Code, B149.2, or the Standard for Recreational
Vehicles, ANSI A 119.2/NFPA 1192, and CSA Z240 RV Series, Recreational Vehicle Code, as
applicable.
BEFORE EVERY USAGE:
Be sure to inspect the hose for leaks, cuts, wear, abrasion, or damage of any sort before using
this appliance. If any damage is apparent the hose must be replaced with a replacement hose
specified by the manufacturer before it is put in use.
LP GAS CYLINDER
The LP (liquid propane) cylinder specifically designed to be used with this unit MUST have a 20
lb. (9.1kg) capacity with a Type 1 cylinder value and an overfilling protection device (OPD). Only
use LP cylinders with this type of valve.
LP tank valve must have:
Purchase LP tanks only with these required measurements: 12”
(30.5cm) (diameter) x 18” (45.7cm) (tall) with 20lb. (9kg) capacity
maximum.
Type 1 outlet compatible with regulator or appliance.
Safety relief valve.
UL listed Overfill Protection Device (OPD). This OPD safety
feature is identified by a unique triangular hand wheel. Use only
tanks equipped with this type of valve.
LP tank must be arranged for vapor withdrawal.
The LP cylinder must be constructed and marked in
accordance with the Specifications for LP-Gas
Cylinders of the U.S. Department of Transportation
(D.O.T.) or the National Standard of Canada
CAN/CSA – B339, Cylinder, Spheres and Tubes for
Transportation of Dangerous Goods; and Commission
of Dangerous Goods; and Commission, as applicable.
The LP cylinder must include a collar to protect the
cylinder valve.
If the outdoor cooking gas appliance is not in use, the gas must be turned off at the supply
cylinder(s).
The LP cylinder must be stored outdoors out of the reach of children and MUST NOT be
stored in a building, garage, shed, breezeway, or any other enclosed space.
Storage of an outdoor cooking gas appliance indoors is permissible ONLY if the cylinder is
disconnected and removed from the outdoor cooking gas appliance.
The cylinder should ALWAYS be put in an upright position.

TG2008214-MM-00 6 of 23 20180910-Ver1
DANGER
DO NOT connect this grill to an existing #510 POL cylinder valve with Left hand threads.
The Type 1 valve can be identified with the large external threads on the valve outlet.
DO NOT connect to a propane cylinder exceeding its capacity.
DO NOT connect to a cylinder that uses any other type of valve connection device.
Never store a spare LP gas cylinder under or near your grill. This could cause pressure to
be expelled through the vapor relief valve resulting in fire, explosion, or severe personal
injury including death.
Keep the ventilation opening(s) of the LP gas cylinder enclosure free and clear from
obstructions and debris.
DO NOT insert any foreign objects into the valve outlet. Damage to the valve outlet could
result. A valve outlet can cause a leak, possibly resulting in explosions, fire, severe bodily
harm, or death.
WARNING
FOR FILLING THE LP GAS CYLINDER
Allow only qualified LP gas dealers to properly fill or repair your LP cylinder.
DO NOT allow the cylinder to be filled beyond 80% capacity. Over-filled tanks can create a
dangerous condition. Over-filled tanks can build-up pressure and cause the relief valve to
expel propane gas vapors. The vapor is combustible and if it comes in contact with a spark
source or flame an explosion causing severe burns, bodily harm, or death could occur.
Always use a safety cap when grill is not connected to a cylinder.
If you exchange a cylinder with a qualified exchange program, be sure the cylinder has a
Type 1 valve and an over-filling prevention device (OPD).
CONNECTION PROCEDURES
1. Make sure the tank valve is closed (turn valve
clockwise until tight).
2. Check tank valve to insure it has proper external
male threads.
3. Make sure all burner valves are turned OFF.
4. Inspect valve connections, port, and regulator
assembly. Look for any damage or debris. Remove
any debris. Inspect hose for damage. Never attempt
to use damaged or obstructed equipment. See local
LP gas dealer for repair.

TG2008214-MM-00 7 of 23 20180910-Ver1
5. When connecting regulator assembly to the valve, hand tighten the quick coupling nut
clockwise to a complete stop. Do not use a wrench to tighten. Use of a wrench may damage
the quick coupling nut and result in a hazardous condition.
6. Open the tank valve fully (counterclockwise). Use a soapy water solution to check all
connections for leaks before attempting to light the grill (see below). If a leak is found, turn
the tank valve off and do not use the grill until a local LP gas dealer can make repairs.
TO DISCONNECT LP CYLINDER:
1. Turn the burner valves off.
2. Turn the tank valve off fully (turn clockwise to stop).
3. Detach the regulator assembly from the tank valve by turning the quick coupling nut
counterclockwise.
WARNING
FOR FILLING THE LP GAS CYLINDER
If the grill is not in use, the gas must be turned off at the supply cylinder(s). Storage of the
grill is permissible only if the cylinder is disconnected and removed from the grill.
Cylinders must be stored outdoors out of the reach of children and must not be stored in a
building, garage or any other enclosed area.
CAUTION
When installing LP cylinders the pressure regulator and hose supplied by the
manufacturer MUST be used with the appropriate cylinder. Replacement regulators and
hoses need to be specified by the manufacturer of this appliance.
Place dust cap on cylinder valve outlet whenever cylinder is not in use. Only install the
type of dust cap on the cylinder valve outlet that is provided with the cylinder. Other types
of caps or plugs may result in leakage of propane.

TG2008214-MM-00 8 of 23 20180910-Ver1
PRODUCT DIAGRAM

TG2008214-MM-00 9 of 23 20180910-Ver1
COMPONENT LIST
1. Grill Body
Qty: 1pc
2. Flame Tamer
Qty: 2pcs
3. Cooking Grate
Qty: 1pc
4. Left Leg
Qty: 1pc
5. Right Leg
Qty: 1pc
6. Control Knob
Qty: 2pcs
7. Grease Tray
Qty: 1pc

TG2008214-MM-00 10 of 23 20180910-Ver1
Replacement Part List (I)
Replacement Part List (II)
Part
Number
Part Description
Part
Number
Part Description
1a
Grill Lid
1b
Upper Latch
1c
Handle
1d
Grill Body
1e
Gas Regulator Hose Assembly
1f
Manifold with Gas Valves
1g
Igniter Heat Shield
1h
Control Panel
1i
Igniter
1j
Knob Bezel
1k
Match Holder
1L
Burner
1m
Ignition Wire (Right)
1n
Regulator Hook
1o
Rubber Pad
1p
Lower Latch
1q
Ignition Wire (Left)
2
Flame Tamer
3
Cooking Grate
4
Left Leg
5
Right Leg
6
Control Knob
7
Grease Tray

TG2008214-MM-00 11 of 23 20180910-Ver1
ASSEMBLY PROCEDURES
Step 1: Attach the Legs (4 & 5) to the Grill Body (1).
Step 2: Insert the Control Knobs (6) onto the pin coming from the valve. Apply firm pressure
to secure the knob. Make sure the flat end of the pin is aligned with the head of the knob (the
end with the triangle pointing up).

TG2008214-MM-00 12 of 23 20180910-Ver1
Step 3: Unlock the side latch and open the lid. Place the Flame Tamer (2) above each burner
and place the Cooking Grate (3) along the inner ledge.
Step 4: Insert the Grease Tray (7) to the bottom of the grill body.

TG2008214-MM-00 13 of 23 20180910-Ver1
Step 5: Your unit is now fully assembled. Be sure to carefully and fully review the Instruction
Manual before using this appliance.
When transporting or storing the appliance without tank attached, hook the regulator onto the
lid handle to prevent damage to regulator.

TG2008214-MM-00 14 of 23 20180910-Ver1
LEAK TEST
GENERAL
Although all gas connections on the grill are leak tested at the factory prior to shipment, a
complete gas tightness check must be performed at the installation site due to possible
mishandling in shipment, or excessive pressure unknowingly being applied to the unit.
Periodically check the entire system for leaks following the procedures listed below. Before using
your grill you must check for leaks.
BEFORE TESTING
Make sure that all packing material is removed from the grill including the burner tie-down straps.
Make a soap solution of one part liquid detergent and one part water. You will need a spray
bottle, brush, or rag to apply the solution to the fittings. For the initial leak test, make sure the LP
cylinder is full.
WARNING
DO NOT SMOKE WHILE CONDUCTING LEAK TEST.
NEVER PERFORM LEAK TEST WITH AN OPEN FLAME.
If it is evident there is excessive abrasion or wear, or the hose is cut, it must be replaced
prior to the appliance being operational. The replacement hose shall be specified by the
manufacturer.
TO TEST
1. Make sure the control valves
are in the OFF position, then
turn on the gas supply.
2. Check all connections from
the gas cylinder, LP gas
regulator and supply valve up
to and including all
connections to the pipe that
go to the burners (Following
are the points where the soap
water mixture is to be
applied). Soap bubbles will
appear if a leak is present.
Points of leak test:
1. Control valve to manifold
2. Manifold to hose assembly
3. The full length of gas hose
4. Regulator connection to gas hose

TG2008214-MM-00 15 of 23 20180910-Ver1
5. Regulator quick coupling nut to gas tank outlet (OPD)
6. Tank valve to cylinder
7. Gas tank weld
3. If a leak is present, immediately turn off the gas supply and
tighten the leaky fittings.
4. Turn the gas back on and recheck.
5. Should gas continue to leak from any of the fittings, turn off the gas supply and contact
customer service at 1 – 888 – 837 – 1380.
Before Cooking for the First Time
Operate grill 15 minutes with grill lid closed and gas control on HIGH. This will heat-clean internal
components and eliminate odor from oil of grill.
WARNING
Always unfold the legs during cooking and lighting.

TG2008214-MM-00 16 of 23 20180910-Ver1
LIGHTING INSTRUCTIONS
BEFORE LIGHTING
WARNING
Inspect the gas supply hose prior to turning the gas ON.
If there is evidence of cuts, wear, or abrasion, the hose must be replaced prior to use.
Do not use the grill if the odor of gas is present.
Only the pressure regulator and hose assembly supplied with the unit should be used.
Perform the “LEAK TEST” according to the instructions before operating the grill.
ALWAYS keep your face and body away from the burner while lighting.
LIGHTING THE BURNERS OF GRILL
1. Read instructions before lighting.
2. Open lid before lighting burner.
3. Make sure all control knobs are in the "OFF" position.
4. Turn ON gas valve from gas tank.
5. Push and turn burner control knob to "HI" and immediately press the ignition button.
6. If ignition does NOT occur in 5 seconds, turn the burner control knob off, wait 5 minutes to
allow gas to dissipate. Repeat steps 1 to 5.

TG2008214-MM-00 17 of 23 20180910-Ver1
7. To turn burners off, turn the control knobs clockwise until they lock in the "OFF" position.
USING MATCH HOLDER TO LIGHT BURNER
Turn OFF all burner valves.
1. Make sure the lid is open.
2. Take the match holder off the grill.
3. Place a lighted match between the coils on
the match holder and hold next to the burner
through the side panel holes.
4. Turn the control knob(s) to the “HI” position.
Burner should light
immediately.
5. If the burner does
not light in 4
seconds, turn the
knob off, wait 5
minutes and repeat
above procedures.
WARNING
Keep your face and hands as far away from the grill as possible when lighting it.
CAUTION
If burner does not light OR if burner flame is accidentally extinguished, turn control valve
on regulator to OFF, wait 5 minutes, try again. If the burner does not ignite with valve open
OR if burner flame is accidentally extinguished after lighting, gas will continue to flow out of
the burner and could accidentally ignite with risk of injury.
Handle temperatures with grill on HIGH will be too HOT to touch with bare hands. Use hot
pads or mitts to handle the grill when hot.

TG2008214-MM-00 18 of 23 20180910-Ver1
Turning grill off:
After cooking, turn the grill off by rotating the control valve to OFF. Control valve should pop
up in the OFF position. If control valve does not pop up, disconnect cylinder to turn grill off
and replace the regulator.
This appliance will be hot during and after use. Use insulated oven mitts or gloves for
protection from hot surface or splatter from cooking liquids.
Allow grill to cool completely before storing.
Storing your grill
Be sure grill has cooled. Remove propane cylinder and install protective cap over outlet threads.
Remove regulator from grill to help keep dirt out of the propane cylinder probe. Store regulator in
a heavy plastic bag and place inside grill. Fold legs under grill body.
CAUTION
Natural Hazards - Insects and Spiders
A clogged tube can lead to a fire beneath the appliance.
During shipment or storage, it is possible that small insects and spiders
could find their way into the venturi tubes and make nests or webs. This
could block the flow of gas through the venturi tube causing a smoky,
yellowish flame, or prevent a burner from lighting. It could even cause
the gas to burn outside the venturi tube, which could seriously damage
the appliance. If this occurs, turn off the gas flow and wait for the appliance to cool. When the
appliance has cooled, remove the burner and clean out the venturi tube with a brush or pipe
cleaner. Replace the burner and be sure that the venturi tube is seated over the orifice located
on the gas valves. Cleaning of the venturi tube should be conducted periodically, especially at
the start of the season.
Note: Damage resulting from blocked venturi tube is not covered under warranty.
FLAME CHARACTERISTICS
This procedure outlines how to check for proper burner flame
characteristics.
Burner flames should be blue and stable with little yellow tips,
with no excessive noise, or lifting. If the flame is yellow, it
indicates insufficient air. If the flame is noisy and tends to lift
away from the burner, it indicates too much air. If any of these
conditions exist call our customer service line. Visually check
the burner flames prior to each use. The flames should look
like this picture. If not, refer to the burner maintenance part of this manual.

TG2008214-MM-00 19 of 23 20180910-Ver1
MAINTENANCE & CLEANING INSTRUCTIONS
CAUTION
Keep outdoor cooking gas appliance area clear and free from combustible materials,
gasoline and other flammable vapors and liquids.
Do not obstruct the flow of combustible and ventilation air.
Keep the ventilation openings of the cylinder enclosure free and clear of debris.
Check and clean burner / venturi tubes for insects and insect nests. A clogged tube can
lead to a fire beneath the grill.
STEEL SURFACES
There are many different stainless steel cleaners available. Always use the mildest cleaning
procedure first, scrubbing in the direction of the grain. To touch up noticeable scratches in the
stainless steel, sand very lightly with dry 100 grit emery paper in the direction of the grain.
Specks of grease can gather on the surfaces of the stainless steel and bake on to the surface
and give the appearance of rust. To remove, use a soft abrasive pad in conjunction with a
stainless steel cleaner.
GREASE TRAY
The grease tray should be emptied and wiped down periodically and washed with a mild
detergent and warm water solution. Check the grease tray frequently. Don’t allow excess grease
to accumulate and overflow out of the grease tray.
GRILL BURNERS
Extreme care should be taken when removing a burner as it must be correctly centered on the
orifice before any attempt is made to re-light the grill. Frequency of cleaning will depend on how
often you use the grill.
Spiders and small insects occasionally spin webs or make nests in the grill burner tubes during
transit and warehousing. These webs can lead to gas flow obstruction which could result in a fire
in and around burner tubes. This type of fire is known as flashback and can cause serious
damage to your grill and create an unsafe operating condition for the user.
Although an obstructed burner tube is not the only cause of flashback, it is the most common
cause. To reduce the chance of flashback, you must clean the burner tubes before assembling
your grill, and at least once a month in late summer or early fall when spiders are most active.
Also, perform this burner tube cleaning procedure if your grill has not been used for an extended
period of time.
You should inspect the burners at least once a year or immediately after any of the following
conditions occur:
1. The smell of gas in conjunction with the burner flames appearing yellow.
2. The grill does not reach temperature.
3. The grill heats unevenly.
4. The burners make popping noises.

TG2008214-MM-00 20 of 23 20180910-Ver1
WARNING
ENSURE that the gas supply and the knobs are in the OFF position BEFORE cleaning the
burners.
BURNER REPLACEMENT:
1. Turn off the gas supply, and make sure all the knobs are in the OFF position.
2. Wait for the grill to cool.
3. Open lid and remove the cooking grate and flame tamers.
4. Remove the burner fixing bolt.
5. Remove the fixing bolt of the ignition electrode & wire.
6. Remove the burner from the grill body.
Step 4
Step 5
Step 6
/