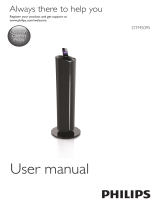
Philips DS1600 User manual

Category
Docking speakers
Type
User manual

Philips DS1600 offers a wide range of functionalities for enjoying your favorite audio content and charging your devices. With its 30-pin and Lightning connectors, it's compatible with various iPod, iPhone, and iPad models. You can effortlessly play audio from your docked Apple device or connect an external audio source via the AUX-IN port. Additionally, the DS1600 conveniently charges your docked device, ensuring it's always ready to go.

Philips DS1600 offers a wide range of functionalities for enjoying your favorite audio content and charging your devices. With its 30-pin and Lightning connectors, it's compatible with various iPod, iPhone, and iPad models. You can effortlessly play audio from your docked Apple device or connect an external audio source via the AUX-IN port. Additionally, the DS1600 conveniently charges your docked device, ensuring it's always ready to go.

www.philips.com/support
User manual
Always there to help you
Register your product and get support at
DS1600
Question?
Contact
Philips
1EN
Contents
1 Important 2
Safety 2
Notice 2
2 Your Docking Speaker 4
Introduction 4
What's in the box 4
Overview of the main unit 4
3 Get started 6
Connect power 6
Turn on 6
4 Play 7
Play audio from iPod/ iPhone/ iPad 7
Play through an audio cable 8
Other features 9
Update the rmware 10
5 Product information 11
Specications 11
6 Troubleshooting 12
2 EN
1 Important
Safety
Read these instructions.
Heed all warnings.
Follow all instructions.
Do not use this apparatus near water.
Do not block any ventilation openings.
Install in accordance with the
manufacturer's instructions.
Do not install near any heat sources such
as radiators, heat registers, stoves, or other
devices (including ampliers) that produce
heat.
Protect the power cord from being
walked on or pinched, particularly at plugs,
convenience receptacles, and the point
where they exit from the device.
Only use attachments/accessories specied
by the manufacturer.
Unplug the device during lightning storms
or when unused for long periods of time.
Refer all servicing to qualied service
personnel. Servicing is required when the
device has been damaged in any way, such
as power-supply cord or plug is damaged,
liquid has been spilled or objects have
fallen into the device, the device has been
exposed to rain or moisture, does not
operate normally, or has been dropped.
The device shall not be exposed to
dripping or splashing.
Do not place any sources of danger on
the device (e.g. liquid lled objects, lighted
candles).
Where the plug of the Direct Plug-in
Adapter is used as the disconnect device,
the disconnect device shall remain readily
operable.
Warning
Never remove the casing of this apparatus.
Never lubricate any part of this apparatus.
Never place this apparatus on other electrical
equipment.
Keep this apparatus away from direct sunlight, naked
ames or heat.
Make sure that you always have easy access to the
power cord, plug, or adaptor to disconnect the
apparatus from the power.
Notice
Any changes or modications made to this
device that are not expressly approved by
WOOX Innovations may void the user’s
authority to operate the equipment.
Disposal of your old product
Your product is designed and manufactured
with high quality materials and components,
which can be recycled and reused.
Do not throw away the product with the
normal household waste at the end of its life,
but hand it in at an ofcial collection point or
recycling. By doing this, you help to preserve the
environment.
Environmental information
All unnecessary packaging has been omitted.
We have tried to make the packaging easy to
separate into three materials: cardboard (box),
polystyrene foam (buffer) and polyethylene
(bags, protective foam sheet.)
Your system consists of materials which can
be recycled and reused if disassembled by
a specialized company. Please observe the
local regulations regarding the disposal of
packaging materials, exhausted batteries and old
equipment.
3EN
The making of unauthorized copies of copy-
protected material, including computer
programs, les, broadcasts and sound
recordings, may be an infringement of
copyrights and constitute a criminal offence.
This equipment should not be used for such
purposes.
“Made for iPod, “Made for iPhone, and “Made
for iPad” mean that an electronic accessory
has been designed to connect specically to
iPod, iPhone, or iPad, respectively, and has
been certied by the developer to meet
Apple performance standards. Apple is not
responsible for the operation of this device
or its compliance with safety and regulatory
standards. Please note that the use of this
accessory with iPod, iPhone, or iPad may affect
wireless performance.
iPod and iPhone are trademarks of Apple Inc.,
registered in the U.S. and other countries. iPad
is a trademark of Apple Inc.
Class II equipment symbol:
CLASS II apparatus with double insulation, and
no protective earth provided.
Note
The type plate is located on the bottom of the
apparatus.
4 EN
2 Your Docking
Speaker
Congratulations on your purchase, and
welcome to Philips! To fully benet from the
support that Philips offers, register your product
at www.philips.com/welcome.
Introduction
With the docking speaker, you can:
enjoy audio from your iPod/iPhone/iPad;
enjoy audio from an external audio device;
charge any generation of iPod/iPhone/iPad
and external audio devices.
What's in the box
Check and identify the contents of your
package:
Main unit
1 x AC adaptor
Short user manual
Overview of the main unit
a 30-pin connector
b Lightning connector
c TIME/DATE
Display time and date.
Set time and date format.
Set time manually.
d AUDIO IN
Audio input connector for connecting
an external audio device.
e POWER OUT
USB socket for charging your mobile
phone.
f DC IN
AC power connector for the supplied
AC power adapter.
g Bottom light
c
g
f
e
d
h
j
k
i
b
a
5EN
h Display panel
i /
Adjust volume.
j Toggle switch for lightning/30-pin control
k
Adjust brightness of display and
bottom light.
6 EN
3 Get started
Always follow the instructions in this chapter in
sequence.
Connect power
Caution
Risk of product damage! Make sure that the power
supply voltage corresponds to the voltage printed on
the back of the unit.
Risk of electric shock! When you unplug the AC
adapter, always pull the plug from the socket. Never
pull the cord.
Connect the AC power adapter to:
the power socket at the back of the
docking speaker.
the wall power outlet.
Turn on
In standby mode, the docking speaker turns on
automatically when it detects an audio signal
from docked iPod/iPhone/iPad.
Switch to standby mode
The docking speaker switches to standby mode
in the following situations:
In dock mode: no audio signal from the
docked iPod/iPhone/iPad over 15 minutes.
In AUDIO IN mode: no audio signal
detected over 15 minutes.
7EN
4 Play
Play audio from iPod/ iPhone/
iPad
You can enjoy audio from iPod/ iPhone/ iPad by
connecting the docking speaker.
Compatible iPod/ iPhone/ iPad
The docking system supports the following
iPod/ iPhone/ iPad models.
iPod nano 7th generation
iPod touch 5th generation
iPhone 6 Plus
iPhone 6
iPhone 5s
iPhone 5c
iPhone 5
iPad mini 3
iPad mini with Retina display
iPad mini
iPad Air 2
iPad Air
iPad (4th generation)
iPod/ iPhone/ iPad models with a 30-pin
connector:
iPod classic
iPod touch (2nd, 3rd, 4th generation)
iPod with video
iPod nano (1st, 2nd, 3rd, 4th, 5th, and
6th generation)
iPod with color display
iPod mini
iPhone 4s
iPhone 4
iPhone 3GS
iPhone 3G
iPad (3rd generation)
iPad 2
iPad
Switch the dock
Switch the dock between the lightning
connector and 30-pin connector for different
generation of Apple device.
1 Slide the switch to the right.
» The dock swivels and the alternate
connector is accessible.
2 Select your desired connector and press
down until a click sound.
The switch slides to the left.
Load the iPod/ iPhone/ iPad
1 Connect your iPod/ iPhone/ iPad to the
dock connector.
8 EN
2 When using the docking speakerfor the
rst time, a required software application
automatically pops up.
3 Tap [Yes] (yes)to accept the installation
request.
4 Follow the on-screen instructions to
complete the installation.
» The docking speaker synchronizes
time and date from the docked iPod/
iPhone/iPad.
Remove the iPod/ iPhone/ iPad
To remove the iPod/ iPhone/ iPad
Pull your iPod/ iPhone/ iPad out of the
dock.
Tip
When placing or removing the iPod/ iPhone/ iPad, hold
the iPod/ iPhone/ iPad at the same angle as that of the
connector of the docking speaker.
Before disconnecting the iPod/ iPhone/ iPad, pause the
audio play.
Listen to the iPod/ iPhone/ iPad
Note
Make sure that the iPod/ iPhone/ iPad is loaded
correctly.
Start music play in your iPod/ iPhone/ iPad.
» You can hear music from <ProdDesc>.
Charge the iPod/ iPhone/ iPad
When the docking speaker is connected to
power, the docked iPod/ iPhone/ iPad charges
automatically.
Play through an audio cable
Through an MP3 link cable, you can also play
on the docking speaker from an external audio
device, such as an MP3 player.
1 Use an MP3 link cable to connect the
docking speaker with an external audio
device.
2 On the docking speaker, do the following:
Make sure that you have paused the
music on your iPod/ iPhone/ iPad
docked on the docking speaker.
3 On the external audio device, start music
play and change the volume.
9EN
Charge your mobile phone
Charge your mobile phone through the USB
socket in the docking speaker with a USB cable
(not supplied).
Other features
Set time and date
A: If an iPod/iPhone/iPad is docked, the speaker
synchronizes time and date with the iPod/
iPhone/iPad automatically. In this case, you can
set time and date format.
To set time format:
1 In standby mode, press TIME/DATE to
display time.
2 Press and hold TIME/DATE for 2 seconds
to select 12 or 24 hour format.
3 Press TIME/DATE to conrm.
To set date format:
1 In standby mode, press TIME/DATE to
display date.
2 Press and hold TIME/DATE for 2 seconds
to select [MONTH--DAY] or [DAY--
MONTH] display mode.
3 Press TIME/DATE to conrm.
B: If no iPod/iPhone/iPad is docked, you can set
time manually.
1 In standby mode, press TIME/DATE to
display [--:--].
2 Press and hold TIME/DATE for 2 seconds
to activate time setting.
» The hour digits blink.
3 Press +/- repeatedly to set the hour.
4 Press TIME/DATE to conrm.
» The minute digits blink.
5 Repeat steps 3 and 4 to set the minute.
Adjust volume
During play, press +/- repeatedly to increase or
decrease the volume.
10 EN
Adjust brightness
Press repeatedly to select different levels
of display light.
Press and hold to turn on or off the
bottom light.
Update the rmware
With the ClockStudioapp on your iPod/
iPhone/ iPad, you can update the rmware of
the docking speaker.
1 Make sure that your iPod/ iPhone/ iPad is
connected to the Internet.
2 Mount the iPod/ iPhone/ iPad onto the
lightning dock of the docking speaker.
» ClockStudio starts to search for
available rmware update.
» When the rmware update is available,
a message is displayed.
3 sec
3 Follow onscreen instructions to complete
rmware updating.
Note
During the rmware updating, keep the iPod/ iPhone/
iPad powered on and docked on the docking speaker.
11EN
5 Product
information
Note
Product information is subject to change without prior
notice.
Specications
Amplier
Rated Output Power 2 x 2.5 W RMS
Signal to Noise Ratio > 55 dBA
MP3 Link Input 650m V RMS
Amplier
Speaker Impedance 4 ohm
Speaker Driver 1.5''
General information
AC/DC switching
adapter
Model: AS250-050-
AQ400
Input: 100-240 V~,
50/60 Hz, 1.2 A;
Output: 5 V 4 A;
Operation Power
Consumption
< 23 W
Standby Power
Consumption
< 1 W
USB Charging DC 5 V ≤ 1000 mA
Ipod/Iphone Charging DC 5 V ≤ 2100 mA
Dimensions: Main
Unit (W x H x D)
225 x 149 x 96 mm
Weight: Main Unit 0.83 kg
12 EN
6 Troubleshooting
Warning
Never remove the casing of this device.
To keep the warranty valid, never try to repair
the system yourself.
If you encounter problems when using this
device, check the following points before
requesting service. If the problem remains
unsolved, go to the Philips Web page (www.
philips.com/support). When you contact Philips,
make sure that the device is nearby and the
model number and serial number are available.
No power
Make sure that the AC power plug of the
unit is connected properly.
Make sure that there is power at the AC
outlet.
No sound or poor sound
Adjust the volume of your docking speaker
or your iPod/iPhone.
No response from the unit
Disconnect and reconnect the AC power
plug.
Specications are subject to change without notice.
2014 © WOOX Innovations Limited. All rights reserved.
Philips and the Philips’ Shield Emblem are registered trademarks of Koninklijke Philips N.V. and
are used by WOOX Innovations Limited under license from Koninklijke Philips N.V.
DS1600_77_UM_V2.0
  • Page 1 1
  • Page 2 2
  • Page 3 3
  • Page 4 4
  • Page 5 5
  • Page 6 6
  • Page 7 7
  • Page 8 8
  • Page 9 9
  • Page 10 10
  • Page 11 11
  • Page 12 12
  • Page 13 13
  • Page 14 14
  • Page 15 15
  • Page 16 16

Philips DS1600 User manual

Category
Docking speakers
Type
User manual

Philips DS1600 offers a wide range of functionalities for enjoying your favorite audio content and charging your devices. With its 30-pin and Lightning connectors, it's compatible with various iPod, iPhone, and iPad models. You can effortlessly play audio from your docked Apple device or connect an external audio source via the AUX-IN port. Additionally, the DS1600 conveniently charges your docked device, ensuring it's always ready to go.

Ask a question and I''ll find the answer in the document

Finding information in a document is now easier with AI