Page is loading ...


Gebrauchsanleitung ................................................................................................. Seite 3 ... 78
Wichtige Hinweise:
Die Gebrauchsanleitung ist Bestandteil des Gerätes. Vor der ersten Inbetriebnahme bitte sorgfältig lesen,
beachten und anschließend aufbewahren. Aus Sicherheitsgründen darf das Gerät ausschließlich für die
beschriebenen Zwecke eingesetzt werden. Bitte beachten Sie auch die Gebrauchsanleitungen für eventuell
anzuschließende Geräte.
Alle in dieser Gebrauchsanleitung enthaltenen Angaben sind zum Zeitpunkt der Drucklegung gültige Daten.
Es können jedoch vom Hersteller sowohl aus technischen und kaufmännischen Gründen, als auch aus der
Notwendigkeit heraus, gesetzliche Bestimmungen der verschiedenen Länder zu berücksichtigen,
Ergänzungen an dem Gerät vorgenommen werden, ohne dass die beschriebenen Eigenschaften beeinflusst
werden.
Operating Manual ............................................................................................. Page 79 ..... 154
Important notes:
The operating manual is part of the device. Before initial operation of the unit, please carefully read and
observe the operating instructions and keep it. For safety reasons the unit may only be used for the purposes
described in these present operating instructions. Please also observe the operating instructions for the units
to be connected
All specifications in this operating manual are guidance values which are valid at the time of printing.
However, for technical or commercial reasons or in the necessity to comply with the statuary stipulations of
various countries, the manufacturer may perform additions to the unit without changing the described
properties.
Mode d´emploi ................................................................................................... Page 155 ... 230
Instructions importantes:
Le manuel d'utilisation fait partie de l´appareil. Prière de lire et d’observer attentivement le mode d'emploi
avant la première mise en marche de l´appareil, et de le conserver. Pour des raisons de sécurité, l´appareil ne
pourra être utilisé que pour les usages décrits dans ce présent mode d'emploi. Nous vous prions de respecter
également les modes d'emploi pour les appareils à connecter.
Toutes les indications comprises dans ce mode d’emploi sont données à titre indicatif au moment de
l'impression. Pour des raisons techniques et/ou commerciales ainsi qu'en raison des dispositions légales
existantes dans les différents pays, le fabricant se réserve le droit d'effectuer des suppléments concernant
l´appareil pour séries de dilution qui n’influencent pas les caractéristiques décrits.
Manual de instrucciones ................................................................................. Página 231 ... 307
Instrucciones importantes:
El manual de instrucciones forma parte del aparato. Antes de la operación inicial de aparato, lea atentamente
y observe las instrucciones de operaciones y guárdelas. Por razones de seguridad, el aparato sólo debe ser
empleado para los objetivos descritos en este manual de instrucciones. Por favor, observe las instrucciones
de operación para los aparatos a conectar.
Todas las especificaciones en este manual de instrucciones son datos orientativos que son válidos en el
momento de la impresión. No obstante, por motivos técnicos o comerciales, o por la necesidad de respetar
las normas legales existentes en los diferentes países, el fabricante puede efectuar modificaciones del
aparato sin cambiar las características descritas.
EG – KONFORMITÄTSERKLÄRUNG / EC – DECLARATION OF CONFORMITY
CE – DECLARATION DE CONFORMITE / CEE – DECLARATION DE CONFIRMIDAD

TABLE OF CONTENT
1 Technical Specifications of the Titrator TitroLine® 5000 ................................... 81
1.1 Summary ................................................................................................................................. 81
1.2 Specifications Titrator TitroLine® 5000 .................................................................................... 82
1.3 Warning and safety information .............................................................................................. 84
2 Unpacking and First Operation ............................................................................ 85
2.1 Unpacking and First Operation of the titrator .......................................................................... 85
2.2 Connection and installing of Piston Burette and magnetic stirrer TM 50 ................................ 85
2.3 Connecting the Titrator - Combination with Accessories and Additional Devices .................. 86
2.3.1 Back panel of the titrator TitroLine® 5000 .............................................................................. 86
2.3.2 Connection ports of the TitroLine® 5000 . Connection of Electrodes ..................................... 86
2.3.3 Connecting a printer ................................................................................................................ 86
2.3.4 Connecting a USB device (manual controller, keyboard, memory device, hub) .................... 86
2.3.5 Connection of analytical balances ........................................................................................... 86
2.4 Setting the Language of the Country ...................................................................................... 87
2.5 Dosing unit and Accessories ................................................................................................... 89
2.6 Initial Filling and Rinsing ......................................................................................................... 90
3 Working with the Titrator TitroLine® 5000 ........................................................... 92
3.1 Front Keyboard ........................................................................................................................ 92
3.2 Display ..................................................................................................................................... 92
3.3 Manual controller “mouse“ ...................................................................................................... 93
3.4 External PC Keyboard ............................................................................................................. 93
3.5 Menu Structure ........................................................................................................................ 94
3.6 Main Menu ............................................................................................................................... 96
3.6.1 Automatic Titration .................................................................................................................. 96
3.6.2 Calibration (CAL menu) ........................................................................................................... 98
3.6.3 Manual Titration ..................................................................................................................... 101
3.6.4 Dosage .................................................................................................................................. 103
4 Method Parameters ............................................................................................. 105
4.1 Method editing and new method ........................................................................................... 105
4.2 Default methods .................................................................................................................... 106
4.3 Copy Methods ....................................................................................................................... 106
4.4 Delete Methods ..................................................................................................................... 107
4.5 Print method .......................................................................................................................... 107
4.6 Change Method Parameters ................................................................................................. 107
4.6.1 Method type ........................................................................................................................... 108
4.6.2 Titration mode ....................................................................................................................... 108
4.6.3 Result .................................................................................................................................... 110
4.6.4 Titration parameters .............................................................................................................. 119
4.6.5 ‘End-point titration’ Titration parameters ............................................................................... 127
4.6.6 Dosing parameter .................................................................................................................. 128
4.6.7 Sample identification ............................................................................................................. 129
4.6.8 Documentation ...................................................................................................................... 130
5 System settings ................................................................................................... 131
5.1 Calibration settings ................................................................................................................ 131
5.2 Reagents – Dosing unit ......................................................................................................... 133
5.2.1 Replacing the dosing unit ...................................................................................................... 133
5.2.2 Replacing the titration solution .............................................................................................. 138
5.3 Globale Memory .................................................................................................................... 138
5.4 RS232 Settings ..................................................................................................................... 139
5.5 Connection of Printers ........................................................................................................... 141
5.6 Stirrer ..................................................................................................................................... 142
5.7 Date and Time ....................................................................................................................... 142
5.8 RESET .................................................................................................................................. 143
5.9 Device Information ................................................................................................................ 143
5.10 System Tone ......................................................................................................................... 144
5.11 Data exchange ...................................................................................................................... 144
5.12 Software Update .................................................................................................................... 146

6 Connection of Analytical Balances and Printers .............................................. 148
6.1 Connection of Analytical Balances ........................................................................................ 148
6.2 Balance data editor ............................................................................................................... 148
7 Data Communication via RS-232- and USB-B interface ................................... 150
7.1 General Information............................................................................................................... 150
7.2 Chaining multiple devices —“Daisy Chain Concept“ ............................................................ 150
7.3 Instruction Set for RS-Communication .................................................................................. 151
8 Maintenance and Care of the TitroLine® 5000 ................................................... 152
9 Storage and transportation ................................................................................. 153
10 Recycling and Disposal ...................................................................................... 153
11 Index ..................................................................................................................... 154
Notes to the Manual
The provided manual will allow you the proper and safe handling of the titration instruments.
The pictogram has the following meaning:
For maximum security, observe the safety and warning instructions in the Instructions.
Warning of a general danger to personnel and equipment
Non-compliance may result in injury or material will be destroyed.
Status at time of printing
Advanced technology and the high quality of our products are guaranteed by a continuous development.
This may result in differences between this operating manual and your product.
A potentially more recent version of this manual is available on our internet website at www.si-analytics.com.
The German version is the original version and binding in all specifications.
Copyright
© 2016, Xylem Analytics Germany GmbH
Reprinting - even as excerpts - is only allowed with the explicit written authorization. Printed in Germany.
Version 160922 US


81
1 Technical Specifications of the Titrator TitroLine® 5000
1.1 Summary
The TitroLine® 5000 is a potentiometric titrator and suitable for the following applications:
The possible range of titrations includes pH, and mV with a maximum of 5 memorisable methods.
The examples of possible use of the TitroLine® 5000 include:
Acid and base determination in aqueous solutions such as p and m value, titration of strong and weak acids
and bases
Redox titrations such as iodometry, manganometry, chromatometry, and COD determinations
Other mV titrations, e.g. chloride
Titrations using ion-selective electrodes, e.g. coppe-ISE
Indices such as iodine and peroxide value.
These methods are mere examples; further applications can be found in food technology, environment, quality
control, and process monitoring.
In addition, the TitroLine® 5000 comes with the functionalities of the TITRONIC® 300 piston burette:
Manual titrations with or without calculation of the result
Dosing
Each method allows for the setting of a variety of dosing and filling rates.
Solutions to be used:
Virtually, any liquids and solutions with a viscosity of < = 10 mm² / s such as concentrated sulphuric acid may
be used. However, one has to avoid the use of chemicals that may attack glass, PTFE or FEP or that are
explosive, such as hydrofluoric acid, sodium azide or bromine! Suspensions containing high solids
percentages may clog or even damage the dosing system.
General provisions:
The safety guidelines that are applicable to the handling of chemicals have to be observed under all
circumstances. This applies in particular to inflammable and/or etching liquids.
Guarantee
We provide guarantee for the device described for two years from the date of purchase. This guarantee covers
manufacturing faults being discovered within the mentioned period of two years. Claim under guarantee covers
only the restoration of functionality, not any further claim for damages or financial loss. Improper handling/use
or illegitimate opening of the device results in loss of the guarantee rights. The guarantee does not cover wear
parts, as lobes, cylinders, valves and pipes including the thread connections and the titration tips. The breach
of glass parts is also excluded. To ascertain the guarantee liability, please return the instrument and proof of
purchase together with the date of purchase freight paid or prepaid.

82
1.2 Specifications Titrator TitroLine® 5000
State 01.09.2014
CE sign:
EMC compatibility according to the Council Directive: 2004/108/EG;
applied harmonized standards: EN 61326-1:2006
Low-voltage directive according to the Council Directive 2006/95/EG
Testing basis EN 61 010, Part 1
Country of origin: Germany, Made in Germany
The following solvents/titration reagents are allowed to be used:
All common titration solutions.
As reagent water and all non-aggressive non-organic and organic fluids are allowed. If using combustible
fluids fire please adhere to the Guidelines for Explosion Protection and Prevention of the chemical industry.
For fluids with higher viscosity ( 5 mm2/s), lower boiling point or affinity to outgas, the filling and dosage
speed can be adjusted.
Fluids with viscosity over 10mm2/s cannot be dosed.
Measuring input: pH/mV-input with 12 bit transducer for high-precision readings.
Electrode socket according to DIN 19 262 or
additional with BNC socket insert (Z 860)
Reference electrode 1 x 4 mm socket
Measurement range
Display
resolution
Measurement
accuracy* without
sensor probe
Input
resistance
pH
pH
- 3.0 ... 17.00
0.01
0,05 1 Digit
> 5 1012
mV
U mV
- 1900 ... 1900
1
1,0 1 Digit
> 5 1012
To ensure maximum accuracy of the readings we recommend to allow some reasonable time for the
TitroLine® 5000 titrator to “warm up”.
Measurement input: Temperature probe - connector for a Pt 1000 resistance thermometer and NTC 30
Connection: 2 x 4 mm - sockets and 1 x 2 mm socket.
Measurement
range
Display resolution
Measurement
accuracy* without
Pt 1000 sensor
Measurement
accuracy* without
NTC 30 sensor
T [°C]
- 30 ... 115
0.1
0.5 K 1 Digit
0.5 K 1 Digit
* The measurement uncertainty of the sensor probe has to be taken into account as well
Display: 3.5 inches -1/4 VGA TFT display with 320x240 pixels.
Calibration: Automatically with up to three buffer solutions, sequence during calibration optional,
freely definable buffers can be input.
Default buffer solutions according to DIN 19 266 and NBS, or technical buffers:
pH = 1.00; pH=4.00; pH=4.01; pH=6.87; pH= 7.00; pH= 9.18; pH=10.00;
Inputs:
Input pH/mV: pH/mV-input with electrode socket according DIN 19 262/or BNC
Input Pt 1000/NTC 30: Temperature sensor probe (Connection sockets: 2 x 4 mm
Power supply: power supply 100 – 240 V; 50 – 60 Hz, power input: 30 VA
Use the Power supply TZ 1853, Type No.: FW 7362M/12 only!

83
RS-232-C Interface: RS-232-C interface
Daisy Chain function available.
Data bits: adjustable, 7 or 8 Bit (default: 8 Bit)
Stop bit: adjustable, 1 or 2 Bit (default: 1 Bit)
Start bit: static 1 Bit
Parity: adjustable: even / odd / none
Baud rate: adjustable: 1200, 2400, 4800, 9600, 19200 (Default 4800 baud)
Address: adjustable, (0 to 15, default: 01)
RS-232-1 for computer, input Daisy Chain
RS-232-2 devices of SI Analytics, titrator TitroLine 5000/6000/7000/7500,
TW alpha plus/TW 7400
- Burettes TITRONIC 500/300, TITRONIC 110 plus, TITRONIC universal,
- Balances of the types Mettler, Sartorius, Kern, Ohaus (for more, please contact
SI Analytics)
- Exit Daisy Chain
USB Interface: 1 x USB-type A and 1 x USB-type B (Mini – type)
USB –Typ B (“slave“) for connecting a PC
USB –Typ A (“master“) for connecting:
- USB “mouse“
- USB keyboard
- USB printer
- USB data media e.g. USB stick
- USB Hub for the connection of more than one USB device
Stirrer connection: Plug connection with integrated low voltage supply (= 12 V) in the casing bottom of
the titrator housing for stirrer TM 50
Housing material: Polypropylene
Front keyboard: Polyester
Housing dimensions: 135 x 310 x 205 mm (W x H x D), height incl. interchangeable unit w.o. stirrer
Weight: ca. 2 kg
Ambient conditions: Ambient temperature: + 10 ... + 40 °C for operation and storage
Humidity according to EN 61 010, Part 1:
Max. relative humidity 80 % for temperatures up to 31 °C,
linear decrease down to 50 % relative humidity at a temperature of 40 °C
Dosing units
Cylinder: TitroLine® 5000 with 20 ml burette (borosilicate glass 3.3)
TitroLine® 5000 with 50 ml burette (borosilicate glass 3.3)
UV protection coat made out of TROGAMID, blue transparent
Valve: volume neutral cone valve made from fluorocarbon polymers (PTFE), TZ 3000
Hoses: FEP hose set, blue transparent
Bracket for supply bottle: suitable for square glass bottle and misc. reagent bottles
Dosing accuracy: according DIN EN ISO 8655, part 3
Accuracy: 0.15 %
Precision: 0.05 %

84
1.3 Warning and safety information
The TitroLine® 5000 corresponds to protection class III. It was manufactured and tested according to DIN EN
61 010, Part 1, Protective Measures for electronic measurement devices and control devices and has left the
factory in an impeccable condition as concerns safety technology. In order to maintain this condition and to
ensure safe operation, the user should observe the notes and warning information contained in the present
operating instructions. Development and production is done within a system which meets the requirements laid
down in the DIN EN ISO 9001 standard.
For reasons of safety, the titrator TitroLine® 5000 must be opened by authorised persons only; this means, for
instance, that work on electrical equipment must only be performed by qualified specialists.
In the case of nonobservance of these provisions the titrator TitroLine® 5000 may constitute a
danger: electrical accidents of persons or fire hazard. Moreover, in the case of unauthorised
intervention in the titrator TitroLine® 5000 as well as in the case of negligently or deliberately caused
damage, the warranty will become void.
Prior to switching the device on it has to be ensured that the operating voltage of the titrator TitroLine® 5000
matches the mains voltage. The operating voltage is indicated on the specification plate. Nonobservance of
this provision may result in damage to the titrator TitroLine® 5000 or in personal injury or damage to property.
If it has to be assumed that safe operation is impossible, the titrator TitroLine® 5000 has to be put out of
operation and secured against inadvertent putting to operation. In this case please switch the titrator TitroLine®
5000 off, pull plug of the mains cable out of the mains socket, and remove the titrator TitroLine® 5000 from the
place of work.
Examples for the assumption that a safe operation is no longer possible,
the package is damaged,
the titrator TitroLine® 5000 shows visible damages,
titrator TitroLine® 5000 does not function properly,
liquid has penetrated into the casing.
If the titrator TitroLine® 5000 has been altered technologically or if unauthorized personnel tried or
succeeded to open the instrument as attempt to repair it.
In case that the user operates such a device, all thereof resulting risks are on the user.
The titrator TitroLine® 5000 must not be stored or operated in humid rooms.
For reasons of safety, the titrator TitroLine® 5000 must only be used for the range of application described in
the present operating instructions.
In the case of deviations from the intended proper use of the device, it is up to the user to evaluate the
occurring risks.
The relevant regulations regarding the handling of the substances used have to be observed: The
Decree on Hazardous Matters, the Chemicals Act, and the rules and information of the chemicals trade. It
has to be ensured on the side of the user that the persons entrusted with the use of the titrator TitroLine®
5000 are experts in the handling of substances used in the environment and in titrator TitroLine® 5000 or that
they are supervised by specialised persons, respectively.
During all work with titration solutions: Please wear protective glasses!
The titrator TitroLine® 5000 is equipped with integrated circuits (EPROMs). X rays or other high energy
radiation may penetrate through the device’s casing and delete the program.
For working with liquids, not beeing common titration solvents, especially the chemical resistance of the
construction materials of the titrator TitroLine® 5000 have to be considered (please also refer to chapter 1.1).
For the use of liquids with high vapour pressure or (mixture of) substances not being mentioned in chapter 1.1
as allowed substances, the safe and proper operation of the titrator TitroLine® 5000 has to be guaranteed by
the user.
When the piston moves upwards within the cylinder, a microfilm of dosing liquid or titration solution will always
remain adhered to the inner wall of the cylinder, but this has no influence on the dosing accuracy. This small
residue of liquid, however, may evaporate and thus penetrate into the zone underneath the piston, and if non-
admitted liquids are being used, the materials of the titrator TitroLine® 5000 may be dissolved or corroded
(please refer also to chapter 8 “Maintenance and Care of the titrator TitroLine® 5000”).

85
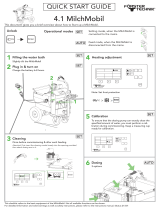
2 Unpacking and First Operation
2.1 Unpacking and First Operation of the titrator
The titrator itself as well as all related accessory and peripheral parts have been carefully checked at
the factory to ensure their correct function and size.
Please ensure that the small accessories are also removed in full from the packaging.
For the scope of delivery, please refer to the enclosed parts list.
The titrator TitroLine® 5000 may be placed on any flat surface.
2.2 Connection and installing of Piston Burette and magnetic stirrer TM 50
The low voltage cable of the power supply TZ 1853 has to be plugged in to the 12 V socket „in“(see
Fig. 3 back panel, chapter. 2.3), on the back panel of the Piston Burette. Then plug the power supply
into the plug socket.
Fig. 1a)
Place the power supply easily accessable in order to be able to remove the Piston Burette anytime
easily from the power circuit.
Insert the stirrer at the lower right side and fasten it by pushing backwards (Fig. 1). This automatically
connects the power supply to the Stirrer TM 50
Fig. 1b) Fig. 2)
The tripod rod TZ 1748 is screwed into the thread and the titration clip Z 305 can now be mounted on
the tripod rod (Fig. 2). Instead of the magnetic stirrer TM 50, you can also install the titration stand
without stirring function TZ3866.

86
2.3 Connecting the Titrator - Combination with Accessories and Additional
Devices
2.3.1 Back panel of the titrator TitroLine® 5000
Fig. 3
2.3.2 Connection ports of the TitroLine® 5000 . Connection of Electrodes
The TitroLine® 5000 has following connections:
1) pH/mV measurement input (DIN or BNC through adapter) for the connection of pH, redox and
other measurement or combination electrodes.
2) Input for reference electrodes (Ref.)
3) Temperature measurement input for connecting Pt 1000/NTC 30 electrodes
Two RS232 ports, 4-channel (Mini-DIN):
4) RS2 for connection of a weighing balance and other devices from SI Analytics (burettes etc.)
5) RS1 for connection to the PC
6) USB-A (“Master“) interfaces for connecting USB devices such as a keyboard, printer, manual
control unit, USB memory device
7) USB-B interface (mini type) for connection to a PC
8) Connection of the external power pack/supply TZ 1853
9) On/Off switch
2.3.3 Connecting a printer
Printers with a USB interface are to be connected one the USB-A interface. These printers have to
feature HP PCL emulation (3, 3 enhanced, 5, 5e no GUI or GDI printers!). Alternatively the thermo-
compact printer Seiko S445 can be connected.
2.3.4 Connecting a USB device (manual controller, keyboard, memory device, hub)
The following USB devices can be connected to the USB-A interfaces:
TZ 3880 manual controller (in the following: ”mouse“)
PC-keyboard
Printer
USB storage devices, e.g. USB sticks
USB hub
USB barcode scanners
2.3.5 Connection of analytical balances
Analytical balances are to be connected to the RS232-2 using an appropriate cable.
1
2
3
4
5
6
7
8
9

87
2.4 Setting the Language of the Country
The ex-factory default language setting is English. When the piston burette is switched on, the main
menu will appear once the boot sequence is completed:
Fig.4
Using <MODE> followed by <System settings> you navigate to the system settings. The very first
menu is to be used for setting the language of the country:
Fig. 5
The first menu are the language settings.
Fig. 6
Select the language using the <↑↓> arrow keys, confirm it with <ENTER>/<OK>.


89
2.5 Dosing unit and Accessories
Fig 8
1) TZ 2003 - drying tube
2) TZ 3282 - dosing hose without dosing tip and holding bracket
3) TZ 3802 - threaded cap with borehole GL 45, incl. adapter with 2 openings for drying tube and
suction hose
4) TZ 1748 - stand rod
5) Z 305 - titration clamp
6) TZ 3620 - dosing hose with dosing tip and holding bracket: bracket = TZ 3875
7) TZ 3803 - 1 litre reagent bottle, brown
8) TZ 3656 - titration tip unit, blue
9) TZ 3801 - valve cover lid and TZ 3000 - 3/2-way valve
10) TZ 3130 - 20 ml dosing unit or TZ 3160 50 ml dosing unit
11) TZ 3283 - connection hose
12) TZ 3281 - suction hose
1
2
3
4
5
6
7
8
9
10
11
12

90
2.6 Initial Filling and Rinsing
The dosing unit and the tubes are already mounted and ready-to-use. After the reagent bottle is
connected, the initial filling of the dosing unit can be performed. While performing the initial filling or
washing program, an adequately sized waste bin has to be placed below the titration tip.
On the main menu (fig. 9)
Fig. 9
Press <MODE> key and select Rinsing:
Fig. 10
Confirm the selection by pressing <OK>.
At this point you can select the number of rinsing cycles (Fig. 11). Initial filling requires a minimum of
two rinsing cycles. You can stop the rinsing operation (Fig. 12 and 13) at any time by pressing
<STOP> and then resume rinsing with <START>.
Fig. 11
The device fills first before the rinsing procedure starts:


92
3 Working with the Titrator TitroLine® 5000
3.1 Front Keyboard
Fig. 16
Apart from alphanumeric input (a-z, A-Z, 0-9) and a few other functions, almost all functions can be
performed using the front keyboard.
<Mode>: Methods selection, rinsing, system settings
<EDIT>: Changing the current method, new method, copy and delete method
<ESC>: <ESC> will take you back to the previous menu level.
<START/STOP>: Start and Stop of a current method
<CAL> <CAL> starts the pH calibration
<FILL>: Filling the unit
< > Arrow up: Selection of individual menus and numeric values
< > Arrow down: Selection of individual menus and numeric values
<→> Arrow right: change position in entry menu
The individual functions are described in detail in Chapter 3.4, External PC Keyboard.
3.2 Display
The display consists of a graphical LCD display with a resolution of 320 x 240 pixels.
It also offers the possibility to display graphics, e.g. the measuring curve while or after the titration
is/was running.
Abb. 17

93
3.3 Manual controller “mouse“
The “mouse“ (Fig. 18) is needed for manual titration. It can also be used for starting dosage or
automatic titration methods.
Fig. 18
Mode
Black key
Grey Key
Manual titration
Start of titration, single-step and
continuous titration (please refer
to chapter 3.6.1, manual titration)
Filling
Stop of titration including evaluation
Dosage through
Dosage method
Start dosage
Filling
Automatic titration
Start of the method
Stop of the method including evaluation
3.4 External PC Keyboard
Keys
Function
<ESC>
<ESC> will take the user to the previous level on the
menu.
<F1>/<START>
Start of a selected method
<F2>/<STOP>
Stop of the current method
<F3>/<EDIT>
Change of the current method, new method, copy method
<F4>/<FILL>
Fill the interchangeable unit
<F5>/
Display and modification of the balance data. With <Shift +
F5> display and modification of the global memories
<F6>/<MODE>
Selection of method, rinsing, system settings
<F7>/<SYS>
System settings (language selection, time/date ...)
<F8/<CAL>
Start calibration menu
<F9>/+ / -
Change of sign
<F10>/<DOS>
Start dosing menu
Num/ Scroll
Lock/ Lock
Without function
Prt Sc
Sys Rq
Without function
< > < > <←> <→>
Selection of individual menus and numeric values
0...9
Input of numeric values
<ENTER>
Confirmation of input parameters
< Backspace >
Deletion of one input digit / an input character to the left of
the blinking cursor
Letters,
ASCII-symbols
Alphanumeric input possible. Uppercase and lowercase
possible.
All other keys
Do not have any function

94
3.5 Menu Structure
There are 5 selection menus:
Start or main menu
Method parameters
Method selection
CAL menu
System settings
After power-up, the main menu is always the first menu to appear. The method displayed will always
be the last method that was used (Fig. 19).
Fig. 19
Pressing <START> will result in the immediate execution of the method shown. <EDIT>/F3 will take
you to the method parameters (Fig. 20).
Fig. 20
At this point you can
modify the current method
create a new method
call and memorise standard methods
copy or delete an existing method
print an existing method (only titration methods)
Use the <↓> und <↑> keys to select the submenus, confirm your selection with <OK>/<ENTER>.
<ESC> will take you back to the main menu.
/