Parkside KH 3168 ROTARY SANDER User manual
- Category
- Power sanders
- Type
- User manual
This manual is also suitable for
Page is loading ...
Page is loading ...

5 GB
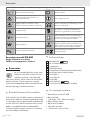
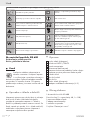
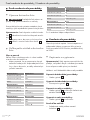
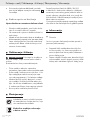
Introduction
Intended utilisation ..................................................................................................... Page 6
Features and Fittings ................................................................................................... Page 6
Items supplied ............................................................................................................. Page 6
Technical data ............................................................................................................. Page 7
General safety advice
Your working area ...................................................................................................... Page 7
Electrical safety ........................................................................................................... Page 7
Personal safety ............................................................................................................ Page 8
Careful handling and use of electrical power tools ................................................ Page 8
Safety advice relating specifically to random orbital sanders ............................... Page 9
Original accessories / tools ....................................................................................... Page 9
Understood everything? ............................................................................................. Page 10
Before use
Changing sanding sheets ......................................................................................... Page 10
Selecting rotation speeds and sanding sheets ....................................................... Page 10
Commissioning
Switching on and off .................................................................................................. Page 10
Dust suction ................................................................................................................. Page 11
Advice about ways of working when sanding ......................................................... Page 12
Maintenance and Cleaning ..................................................................... Page 12
Disposal .................................................................................................................... Page 12
Information
Servicing ...................................................................................................................... Page 12
Declaration of conformity / Manufacturer ................................................................ Page 13
Table of Content

6 GB
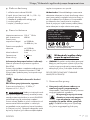
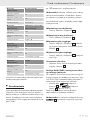
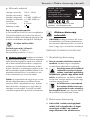
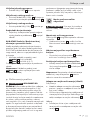
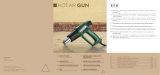
Rotary Sander XQ 600
Sanding of large areas.
For wood, plastics and metal
Q
Introduction
Please make sure you familiarise yourself
fully with the way the device works before
you use it for the first time and that you
understand how to handle electrical power tools
correctly. Further details can be found in the operating
instructions. Keep these instructions in a safe place. If
you pass the device on to anyone else, please ensure
that you also pass on all the documentation.
Q
Intended utilisation
The appliance is suitable for the dry sanding and
buffing of wood, metal and paint. Any other uses,
and modifications to the appliance, are deemed to
be improper usage and may result in serious physi-
cal injury. The manufacturer will not accept liability
for loss or damage arising from improper use.
This appliance is not intended for commercial appli-
cations.
Q
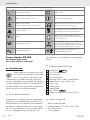
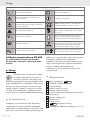
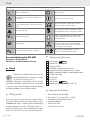
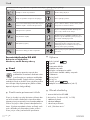
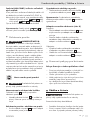
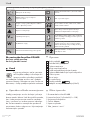
Features and Fittings
1
Handswitch
DUO-START
2
On / Off switch
3
Locking button
4
Dust collection box
5
Adjusting wheel - rotation speed selector
6
Release button - dust collection box
7
Suction ring
8
Sanding plate
9
Sanding pad
10
Front switch
DUO-START
11
Adaptor for external dust suction (Fig. D)
Q
Items supplied
1 Rotary Sander XQ 600
2 Sanding sheets (1x Grit 80, 1x Grit 120)
1 Dust collection box
1 Suction adaptor
Introduction
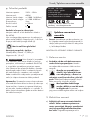
The following icons / symbols are used in this instruction manual:
Read instruction manual! Safety class II
Observe caution and safety notes! Proper procedure and handling.
Caution – electric shock!
Dangerous electric current – danger to life!
Wear hearing protection, dust protection mask,
protective glasses and protective gloves.
Explosive material!
Keep children and other unauthorised personnel
at a safe distance when using electrical tools.
V
~
Voltage
Keep the device away from rain or moisture.
Water entering an electrical device increases the
risk of electric shock.
W
Watts (Effective power)
Damaged appliances, power cables and power
plugs mean potentially fatal risks from electric
shock. Regularly check the condition of the appli-
ance, the power cables and the power plugs.
n
0
Rated idle running speed
Dispose packaging and appliance in an
environmentally-friendly way!

7 GB
1 Operating manual
1 Booklet “Warranty and Service”
Q
Technical data
Rated voltage: 230 V
~
50 Hz
Rated power: 600 W
Nominal oscillations: n
0
5.000 - 16.000 min
-1
Nominal revolutions: n
0
2.500 - 8.000 min
-1
Excentricity: 5 mm
Sanding plate: ø 150 mm
Protection class: II /
Noise and vibration data:
Values determined in accordance with EN 60745
The sound pressure level (A-weighted) of the
device is typically 84 dB(A). Uncertainty K=3 dB.
The sound level while working can exceed 85 dB (A).
Wear ear protection!
Evaluated acceleration, typical:
Hand / arm vibration a
h
= 2,309 m / s
2
Uncertainty K = 1,5 m / s
2
WARNING!
The vibration level given in these
instructions has been measured in accordance with a
standardised measurement procedure specified in
EN 60745 and can be used to compare devices.
Different uses of the device give rise to different vibra-
tion levels and in many cases they may exceed the
values given in these instructions. It is easy to underes-
timate the vibration load if the electrical power tool is
used regularly in particular circumstances.
Note: If you wish to make an accurate assessment
of the vibration loads experienced during a particu-
lar period of working, you should also take into ac-
count the intervening periods of time when the de-
vice is switched off or is running but is not actually
in use. This can result in a much lower vibration
load over the whole of the period of working.
Kompernaß GmbH · 44867 Bochum
Germany · www.kompernass.de
XQ 600 KH 3168
230 V
~
50 Hz · 600 W
2.500-8.000 min
-1
Schwingzahl: 5.000-16.000 min
-1
Date of manufacture: 02-2008
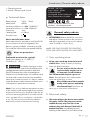
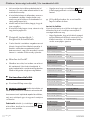
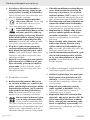
General safety advice
J ATTENTION! Please read all the instructions
and advice. Failure to observe the instructions
and advice given below may result in electric
shock, fire and / or serious injury.
MAKE SURE THAT YOU KEEP THESE INSTRUC-
TIONS AND SAFETY ADVICE IN A SAFE PLACE.
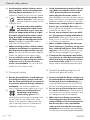
1. Your working area
a) Keep your working area clean and
clutter-free. Untidy or poorly lit working
areas can lead to accidents.
b)
Do not work with the device
in potentially explosive en-
vironments in which there
are inflammable liquids, gases or
dusts. Electrical power tools create sparks,
which can ignite dusts or fumes.
c)
Keep children and other people
away while you are operating
the electrical tool. Distractions can
cause you to lose control of the device.
2. Electrical safety
a)
The mains plug on the device must match
the mains socket. The plug must not be
modified in any way. Do not use an
adapter plug with devices fitted with a
protective earth.
Unmodified plugs and
matching sockets reduce the risk of electric shock.
Introduction / General safety advice

8 GB
b)
Avoid touching earthed surfaces such as
pipes, radiators, ovens and refrigerators
with any part of your body. There is an in-
creased risk of electric shock if your body is earthed.
c) Keep the device away from
rain or moisture. Water entering
an electrical device increases the risk
of electric shock.
d)
Do not use the mains lead for
any purpose for which it was
not intended, e.g. to carry the
device, to hang up the device or to pull
the mains plug out of the mains socket.
Keep the mains lead away from heat,
oil, sharp edges or moving parts of the
device. Damaged or tangled mains leads in-
crease the risk of electric shock.
e) When working outdoors with an electri-
cal power tool always use extension ca-
bles that are also approved for use out-
doors. The use of an extension cable suitable for
outdoor use reduces the risk of electric shock.
f) Use a residual current device (RCD)
for protection if operating the electri-
cal power tool in a moist environ-
ment is unavoidable. The use of an RCD
reduces the risk of electric shock.
3. Personal safety
a)
Remain alert at all times, watch what you
are doing and always proceed with cau-
tion. Do not use the device if you are tired
or under the influence of drugs, alcohol or
medication.
One moment of carelessness
when using the device can lead to serious injury.
b)
Wear personal protective
equipment and always
wear safety glasses. The
wearing of personal protective equipment such
as dust masks, non-slip safety shoes, safety
helmets or ear protectors, appropriate to the
type of electrical power tool used and work
undertaken, reduces the risk of injury.
c)
Avoid unintentional operation of the de-
vice. Make sure that the switch is in the
“OFF” position before you insert the
mains plug into the mains socket. Acci-
dents can happen if you carry the device with your
finger on the switch or you have already switched
the device on before you connect it to the mains.
d) Remove any setting tools or spanners
before you switch the device on. A
tool or spanner left attached to a rotating part
of a device can lead to injury.
e) Do not overestimate your own abili-
ties. Keep proper footing and balance
at all times. By doing this you will be in a
better position to control the device, especially
in unforeseen circumstances.
f) Wear suitable clothing. Do not wear
loose clothing or jewellery. Keep your
hair, clothing and gloves clear of mov-
ing parts. Loose clothing, jewellery or long
hair can become trapped in moving parts.
g) If vacuum dust extraction and collec-
tion devices are fitted do not forget to
check that they are properly connect-
ed and correctly used. The use of these
devices reduces the hazard presented by dust.
4. Careful handling and use of
electrical power tools
a) Do not overload the device. Always use
an electrical power tool that is intended
for the task you are undertaking. By us-
ing the right electrical power tool for the job you
will work more safely and achieve a better result.
b) Do not use an electrical power tool if
its switch is defective. An electrical pow-
er tool that can no longer be switched on and
off is dangerous and must be repaired.
c) When not in use always ensure that
electrical power tools are kept out of
reach of children. Do not let anyone use
the device if he or she is not familiar
with it or has not read the instructions
and advice. Electrical power tools are danger-
ous when they are used by inexperienced people.
General safety advice

9 GB
d)
Look after the device carefully. Check that
moving parts are working properly and
move freely. Check for any parts that are
broken or damaged enough to detrimen-
tally affect the functioning of the device.
Have damaged parts repaired before
you use the device. Many accidents have their
origins in poorly maintained electrical power tools.
e)
Keep cutting tools clean and sharp. Care-
fully maintained cutting tools with sharp cutting edg-
es are less likely to jam and are easier to control.
f) Use the electrical power tool, accesso-
ries, inserted tools etc. in accordance
with these instructions and advice, and
the stipulations drawn up for this
particular type of device. In doing this,
take into account the working condi-
tions and the task in hand. The use of
electrical power tools for purposes other than
those intended can lead to dangerous situations.
Safety advice relating
specifically to random
orbital sanders
J When working in outside areas, protect your-
self against leakage current by fitting an FI pro-
tection switch with a max. activation rating of
30 mA.
J Secure the workpiece firmly. Use clamps or a
vice to firmly hold the workpiece. This results
in a safer grip than with your hand.
J Under no circumstances should you place your
hands next to or in front of the appliance or on
the area to be worked, you could be seriously
injured if you slip or stumble.
J In event of danger, immediately remove the
power plug from the socket.
J Always run the power cable away from the
appliance to the rear.
J FIRE HAZARD DUE TO FLYING SPARKS!
When sanding metals, there is a risk of flying
sparks. For this reason, always make certain
that no one is at risk and that no flammable
materials are located near the working area.
WARNING!
TOXIC VAPOURS!
The working of materials that can produce harm-
ful / toxic dusts presents a health risk for the oper-
ator and for people located in the close vicinity.
Wear safety glasses and a dust
protection mask!
J When working for extended periods on wood
and, in particular, materials that produce dusts
that are hazardous to health, connect the appli-
ance to an appropriate external suction device.
J Provide for sufficient ventilation when working
plastics, varnishes and paints.
J Do not soak materials or surfaces to be worked
with liquids containing solvents. The heat gene-
rated during sanding can give rise to vapours
that are toxic or hazardous to health.
J Avoid sanding lead-based paints or other
materials that are hazardous to health.
J Material containing asbestos may not be worked.
Asbestos is considered to be a carcinogen.
J Avoid contact with the moving sanding sheet.
J Use the appliance only with a sanding sheet in
place.
J Never use the appliance for purposes other
than those intended and only with original
components / accessories.
J Introduce the appliance to the work piece with
it switched on. On task completion, lift the appli-
ance from the work piece and then switch it off.
J Permit the switched off appliance to come to a
complete standstill before putting it down.
J The appliance must always be kept clean, dry
and free of oil or grease.
Q
Original accessories / tools
J Use only the accessories detailed in the operat-
ing instructions. The use of inserted tools or ac-
cessories other than those recommended in the
operating instructions could lead to you suffer-
ing an injury.
General safety advice

10 GB
Q
Understood everything?
J You may begin to work with the appliance when
you have familiarised yourself with the instructions,
functions and handling of the appliance. The
safest work is possible by heeding all informa-
tion and instructions of the manufacturer.
Q
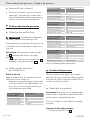
Before use
Q
Changing sanding sheets
WARNING!
Before carrying out work on the
appliance, always remove the plug from the power
socket.
The rotary sander is fitted with a velcro rapid attach-
ment, making possible a quick and easy exchange
of sanding sheets.
Note: Before securing a new sanding sheet
9
,
remove all dust and dirt from the sander plate
8
.
j Ensure that the openings in the sanding sheet
9
concur with the boreholes of the sanding plate
8
.
Q
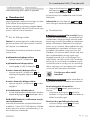
Selecting rotation speeds
and sanding sheets
Removal rate and surface quality
The removal rate and the surface quality are deter-
mined by the rotation speed and the gritting of the
sanding sheet.
j Please take note that, for working the various
materials, you must select the appropriate
sanding sheet, one with a suitable gritting, and
match it to an appropriate rotation speed.
Material / Working
range
Softwood
Rough finish (Gritting) 60
Fine finish (Gritting) 240
Rotation speed preselection
high (
E+)
Material / Working
range
Hardwood
Rough finish (Gritting) 60
Fine finish (Gritting) 180
Rotation speed preselection
high (
E+)
Material / Working
range
Abrade varnish
Rough finish (Gritting) 180
Fine finish (Gritting) 400
Rotation speed preselection medium (- F)
Material / Working
range
Remove paint / varnish
Rough finish (Gritting) 40
Fine finish (Gritting) 80
Rotation speed preselection medium to high
Material / Working
range
Metals
Rough finish (Gritting) 80
Fine finish (Gritting) 240
Rotation speed preselection medium to high
These are noncommittal declarations and recommen-
dations.
Q
Commissioning
The voltage of the power source must tally with the
details given on the rating plate of the appliance.
Appliances requiring 230 V can also be run on 220 V.
Q
Switching on and off
Notice! Always switch the rotary sander on be-
fore applying it to the material to be worked, then
make contact with it.
When operating the device you can select be-
tween intermittent or continuous operation mode
To switch on intermittent operation mode:
j Press the On / Off switch
2
.
General safety advice / Before use / Commissioning

11 GB
To switch off intermittent operation mode:
j Release the On / Off switch
2
.
Switching on for sustained operation:
j Press the On / Off switch
2
and, at the same
time, secure it with the locking button
3
.
Switching off after sustained operation:
j Press the On / Off switch
2
and then release it.
Rotation preselection:
j Select the desired rotation with the adjusting
wheel rotation speed selector
5
.
DUO-START function / Reduced idling
rotation speed:
The appliance is fitted with a reducer for the rotation
speed when idling.The full motor performance resp.
the preselected rotation speed becomes available with
the additional activation of a DUO-START switch.
j Activate either the Front switch
DUO-START
10
or
the Hand switch
DUO-START
1
(see Figs. A, B, C).
This makes possible a gentler touch down onto the
work piece.
Note: The front switch
DUO-START
10
springs back
into the starting position on being released.
Q
Dust suction
WARNING!
FIRE HAZARD! A risk of fire
exists when working with electrical appliances that
have a dust collection box or can be connected to
an external collection unit via a dust suction adapt-
er! Under unfavourable conditions, such as flying
sparks, grinding of metal or metal remnants in
wood, the wood dust in the dust sack (or in the dust
sack of a vacuum cleaner) can ignite.This can hap-
pen especially if the wood dust has paint particles on
it or is mixed with other chemical substances and
the material being sanded is hot after extensive
working. You should therefore avoid an overheat-
ing of the items being sanded, as well of as the ap-
pliance itself, and always empty the dust collection
box or the dust bag of the suction unit before work
pauses.
Wear a dust protection mask!
WARNING!
Before carrying out work on the
appliance, always remove the plug from the power
socket.
Installing the suction ring:
The suction ring
7
makes possible an optimal dust
suction.
j Place the suction ring
7
in the housing guide.
Close the clamp bracket on the housing rear side.
Dust suction with the dust collection box:
j Slide the dust collection box
4
onto the adap-
tor opening on the appliance rear side.
Emptying the dust collection box:
j Press the release buttons
6
on both sides,
then remove the dust collection box
4
from
the appliance.
Note: To maintain an optimal suction perform-
ance, empty the dust collection box
4
regularly.
Adapter for external suction (Fig. D)
Connection:
j Slide the adaptor for external suction
11
exactly
and completely onto the adapter opening on the
appliance rear side.
j Slide the tube of an authorised dust collection
unit (e.g. a workshop vacuum cleaner) onto the
adaptor for external suction
11
Removal:
j Remove the tube of the dust collection unit from
the adaptor for external suction
11
j Press both release buttons and remove the
adaptor for external dust collection
11
from
the appliance.
Commissioning

12 GB
Q
Advice about ways of working
when sanding
Note: Apply light pressure only!
j Move the appliance parallel, in extensive cir-
cles or alternatively to and across.
j Clean the sanding pad occasionally with the
vacuum cleaner.
j Never sand different materials with the same
sanding pad (e.g. wood then metal).
j Only with faultless sanding sheets can you
obtain a good sanding performance and
spare the appliance.
Q
Maintenance and Cleaning
WARNING!
Before carrying out work on the
appliance, always remove the plug from the power
socket.
The rotary sander is maintenance free.
j Clean the appliance regularly, preferably di-
rectly on completion of the task.
j Always keep the device and the ventilation
slots clean. If the ventilation slots become
blocked it may lead to overheating and/or
damage to the device.
j Do not allow any liquids to enter the device.
Use a dry cloth to clean the housing. Never
use petrol, solvents or cleaning agents that
might attack plastic.
j
Remove dust clinging to the sander
with a brush.
Q
Disposal
The packaging is wholly composed of envi-
ronmentally-friendly materials that can be
disposed of at a local recycling centre.
Do not dispose of electrical
appliances in household waste.
In accordance with European Directive
2002 / 96 / EC on used electrical and electronic ap-
pliances and its implementation in national law, used
power tools must be collected separately and recy-
cled in an ecologically compatible manner. Please
return the tool via the available collection facilities.
Information on options for disposing of electrical
appliances after their useful life can be obtained
from your local or city council.
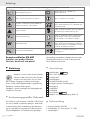
Q
Information
Q
Servicing
The service centre for your country is shown in the
guarantee documentation.
J Have your device repaired only by qualified
specialist personnel using original manufactur-
er parts only. This will ensure that your device
remains safe to use.
J If the plug or mains lead needs to be replaced,
always have the replacement carried out by
the manufacturer or its service centre. This will
ensure that your device remains safe to use.
Commissioning / Maintenance and Cleaning / Disposal / Information

13 GB
Information
Q
Declaration of conformity /
Manufacturer
We, Kompernaß GmbH, Burgstr. 21,
44867 Bochum, Germany, hereby declare
that this product conforms to the following
EU Directives:
Machinery Directive (98 / 37 / EC)
EC Low-Voltage Directive (2006 / 95 / EC)
Electromagnetic Compatibility
( 2 0 0 4 / 1 0 8 / E C)
Product designation:
Parkside Rotary Sander XQ 600
Bochum, 30.11.2007
Hans Kompernaß
- Managing Director -
We reserve the right to make technical modifications in the course
of product development.
Page is loading ...
Page is loading ...
Page is loading ...
Page is loading ...
Page is loading ...
Page is loading ...
Page is loading ...
Page is loading ...
Page is loading ...
Page is loading ...
Page is loading ...
Page is loading ...
Page is loading ...
Page is loading ...
Page is loading ...
Page is loading ...
Page is loading ...
Page is loading ...
Page is loading ...
Page is loading ...
Page is loading ...
Page is loading ...
Page is loading ...
Page is loading ...
Page is loading ...
Page is loading ...
Page is loading ...
Page is loading ...
Page is loading ...
Page is loading ...
Page is loading ...
Page is loading ...
Page is loading ...
Page is loading ...
Page is loading ...
Page is loading ...
Page is loading ...
Page is loading ...
Page is loading ...
Page is loading ...
Page is loading ...
Page is loading ...
Page is loading ...
Page is loading ...
Page is loading ...
Page is loading ...
Page is loading ...
Page is loading ...
Page is loading ...
Page is loading ...
Page is loading ...
Page is loading ...
Page is loading ...
Page is loading ...
Page is loading ...
Page is loading ...
Page is loading ...
Page is loading ...
Page is loading ...
Page is loading ...
Page is loading ...
Page is loading ...
Page is loading ...
Page is loading ...
Page is loading ...
Page is loading ...
Page is loading ...
Page is loading ...
Page is loading ...
-
 1
1
-
 2
2
-
 3
3
-
 4
4
-
 5
5
-
 6
6
-
 7
7
-
 8
8
-
 9
9
-
 10
10
-
 11
11
-
 12
12
-
 13
13
-
 14
14
-
 15
15
-
 16
16
-
 17
17
-
 18
18
-
 19
19
-
 20
20
-
 21
21
-
 22
22
-
 23
23
-
 24
24
-
 25
25
-
 26
26
-
 27
27
-
 28
28
-
 29
29
-
 30
30
-
 31
31
-
 32
32
-
 33
33
-
 34
34
-
 35
35
-
 36
36
-
 37
37
-
 38
38
-
 39
39
-
 40
40
-
 41
41
-
 42
42
-
 43
43
-
 44
44
-
 45
45
-
 46
46
-
 47
47
-
 48
48
-
 49
49
-
 50
50
-
 51
51
-
 52
52
-
 53
53
-
 54
54
-
 55
55
-
 56
56
-
 57
57
-
 58
58
-
 59
59
-
 60
60
-
 61
61
-
 62
62
-
 63
63
-
 64
64
-
 65
65
-
 66
66
-
 67
67
-
 68
68
-
 69
69
-
 70
70
-
 71
71
-
 72
72
-
 73
73
-
 74
74
-
 75
75
-
 76
76
-
 77
77
-
 78
78
-
 79
79
-
 80
80


Parkside KH 3168 ROTARY SANDER User manual
- Category
- Power sanders
- Type
- User manual
- This manual is also suitable for
Ask a question and I''ll find the answer in the document
Finding information in a document is now easier with AI
in other languages
Related papers
-
Parkside XQ 600 - MANUAL 2 Operating And Safety Instructions Manual
-
-
-
Parkside PHS 160 A1 - 4 Operation and Safety Notes
-
-
-
-
-
-
Parkside PEXS 270 A1 User manual
Other documents
-
 Trisa Electronics 7716.7010 Datasheet
-
 Trisa Electronics 7726.2410 Datasheet
-
 Bench PHLG600 User manual
-
Bosch GEX 125-1 AE Operating instructions
-
Bosch GEX 125-150 AVE Specification
-
Bosch PEX 300 AE Specification
-
-
Bosch GEX 150 Turbo Professional Operating instructions
-
Hyundai RA 104 User manual
-
Melissa 635-089 User manual


