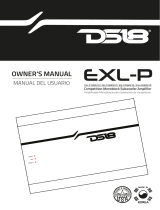
DS18 Hydro Full Range Digital Marine Monoblock AMP Owner's manual

Category
Car audio amplifiers
Type
Owner's manual

The DS18 Hydro Full Range Digital Marine Monoblock AMP delivers exceptional audio power and clarity to enhance your marine audio system. With its robust design and impressive features, this monoblock amplifier is built to withstand the harsh marine environment while providing superior sound quality. Explore its capabilities:

The DS18 Hydro Full Range Digital Marine Monoblock AMP delivers exceptional audio power and clarity to enhance your marine audio system. With its robust design and impressive features, this monoblock amplifier is built to withstand the harsh marine environment while providing superior sound quality. Explore its capabilities:

RMS: 200 WATTS / 2 CH FULL RANGE DIGITAL MARINE AMPLIFIER
RMS: 400 WATTS / 4 CH FULL RANGE DIGITAL MARINE AMPLIFIER
RMS: 600 WATTS / 1 CH CLASS D - MONOBLOCK MARINE AMPLIFIER
RMS: 800 WATTS / 5 CH FULL RANGE DIGITAL MARINE AMPLIFIER
OWNER’S MANUAL
NXL200.2D
NXL400.4D
NXL600.1D
NXL800.5D
RMS: 850 WATTS / 4 CH FULL RANGE DIGITAL MARINE AMPLIFIER
RMS: 900 WATTS / 6 CH FULL RANGE DIGITAL MARINE AMPLIFIER
RMS: 1100 WATTS / 1 CH CLASS D - MONOBLOCK MARINE AMPLIFIER
RMS: 1000 WATTS / 8 CH FULL RANGE DIGITAL MARINE AMPLIFIER
NXL850.4D
NXL900.6D
NXL1100.1D
NXL1000.8D
1
Where You Headed?
Thank you for choosing DS18 NXL marine amps! Your
choice of DS18 NXL Marine amps indicates a desire for
high quality music reproduction. DS18 NXL marine amps
brings to you over four decades of car audio expertise. So
whether you are a daily driving music lover, or a serious
car audio competitor, DS18 NXL marine amps have the
product for you!
To take full advantage of the DS18 NXL marine amps gear
you have just purchased, please read and follow the
instructions in this manual. As with all of our products,
professional installation by an authorized DS18 NXL
marine amps dealer is highly recommended! Otherwise,
the performance of your new gear may not be
satisfactory. In addition to the installation services and
expertise offered by an authorized DS18 NXL marine
amps dealer, the warranty of this product may be
extended when installed by an authorized DS18 NXL
marine amps dealer . Be sure to ask your DS18 NXL
authorized marine amps dealer about whether your
product may qualify for an extended warranty.
You’re Headed in the Right Direction with DS18 NXL
marine amps!
INTRODUCTION
The DS18 NXL marine amplifiers offer high quality audio
reproduction for the audiophile and the everyday listener
a like. All models feature fully variable crossovers with
12dB per octave slopes, allowing you the ability to tailor
the sound to best fit the speakers and your listening
preferences.
Fully Variable Crossovers: Fully variable crossovers
promote installation ease and save the cost of outboard
crossovers. Additionally, they may be used in conjunction
with outboard passive or active crossovers, depending on
the complexity required by the system. The 12 dB per
octave slope offers steep roll-off above or below the
selected frequency.
Protection Circuitry: Against Overload, Short Circuit,
Thermal, and Reverse Polarity. These Protection features
are designed to protect the amplifier from misuse, as well
as from common causes of amplifier failure.
¿A dónde te diriges?
¡Gracias por elegir los amplificadores marinos DS18 NXL!
Su elección de amplificadores marinos DS18 NXL indica
un deseo de reproducción de música de alta calidad. Los
amplificadores marinos DS18 NXL le brindan más de
cuatro décadas de experiencia en audio para automóviles.
Entonces, ya sea que seas un amante de la música
cuando conduces o un competidor serio de audio para
automóviles, los amplificadores marinos DS18 NXL tienen
el producto para usted!
Para aprovechar al máximo el equipo de amplificadores
marinos DS18 NXL que acaba de comprar, lea y siga las
instrucciones de este manual. Como con todos nuestros
productos, se recomienda encarecidamente la instalación
profesional por parte de un distribuidor autorizado de
amplificadores marinos DS18 NXL. De lo contrario, es
posible que el rendimiento de su nuevo equipo no sea
satisfactorio. Además de los servicios de instalación y la
experiencia que ofrece un distribuidor autorizado de
amplificadores marinos DS18 NXL, la garantía de este
producto puede extenderse cuando lo instale un distribui-
dor autorizado de amplificadores marinos DS18 NXL.
Asegúrese de preguntar a su distribuidor autorizado de
amplificadores marinos DS18 NXL si su producto puede
calificar para una garantía extendida.
¡Va en la dirección correcta con los amplificadores mari-
nos DS18 NXL!
INTRODUCCIÓN
Los amplificadores marinos DS18 NXL ofrecen una repro-
ducción de audio de alta calidad para el audiófilo y el
oyente cotidiano. Todos los modelos cuentan con cross-
overs totalmente variables con pendientes de 12dB por
octava, lo que le permite adaptar el sonido para que se
adapte mejor a los altavoces y sus preferencias de escu-
cha.
Crossovers Totalmente Variables: Los cruces completa-
mente variables facilitan la instalación y ahorran el costo
de los crossovers externos. Además, se pueden usar junto
con crossovers externos pasivos o activos, dependiendo
de la complejidad requerida por el sistema. La pendiente
de 12dB por octava ofrece una caída pronunciada por
encima o por debajo de la frecuencia seleccionada.
Circuito de Protección: Contra sobrecarga, cortocircuito,
temperatura y polaridad inversa. Estas funciones de
protección están diseñadas para proteger el amplificador
del mal uso, así como de las causas comunes de falla del
amplificador.
2
INSTALLATION
Professional installation by an authorized DS18
NXL marine amps dealer is highly recommended!
Otherwise, the performance of your new gear may
not be satisfactory. In the event that you decide to
do your own installation, please read and follow
this manual very carefully. Failure to do so may
compromise the integrity of this product, your
automobile, and possibly void the product warranty.
Select a location that will provide adequate ventila-
tion for the amplifier. Avoid mounting the amplifier
with the fins facing down. The fins should be facing
up, either vertically or horizontally. Secure the
amplifier with the screws provided.
WARRANTY!
Before securing the amplifier, inspect the mounting
location carefully to ensure that you do not drill
into or damage any electrical, hydraulic, fluid, or
fuel lines.
Input Section (Waterproof RCAs Harness)
Because of the wide range of head unit output
configurations all DS18 NXL marine amps have an
adjustable input sensitivity of “Gain”. The gain is
not a volume or a power limiting control like a
throttle. It makes the amp more sensitive to input
from the stereo. With the gain up the amp will
reach full output at a lower volume setting on the
deck. At higher gain settings the amp also becomes
more sensitive to noise from the car's electrical
system. Try to run the gain at the lowest setting
possible for your system.
There is no correct gain setting Because speakers
require different power demands to reach the same
output the gains most often need to be used to
compensate for these differences. If you tried to
set all the gains at half way you would probably
find the system didn't sound very good. Using good
judgment and listening carefully to each speaker is
still the best way to tune a system.
INSTALACIÓN
Se recomienda encarecidamente la instalación profesion-
al por parte de un distribuidor autorizado de amplifica-
dores marinos DS18 NXL. De lo contrario, es posible que
el rendimiento de su nuevo equipo no sea satisfactorio.
En caso de que decida realizar su propia instalación, lea
y siga este manual con mucha atención. El no hacerlo
puede comprometer la integridad de este producto, su
automóvil y posiblemente anular la garantía del
producto.
Seleccione una ubicación que proporcione una ventilación
adecuada para el amplificador. Evite montar el amplifica-
dor con las aletas hacia abajo. Las aletas deben mirar
hacia arriba, ya sea vertical u horizontal. Asegure el
amplificador con los tornillos proporcionados.
¡GARANTÍA!
Antes de asegurar el amplificador, inspeccione
cuidadosamente la ubicación de montaje para asegu-
rarse de no perforar ni dañar ninguna línea eléctrica,
hidráulica, de fluido o de combustible.
Sección de entrada (arnés impermeable de RCA)
Debido a la amplia gama de configuraciones de salida de
la unidad principal, todos los amplificadores marinos
DS18 NXL tienen una sensibilidad de entrada ajustable
de “Ganancia”. La ganancia no es un control de limitación
de volumen o potencia como un acelerador. Hace que el
amplificador sea más sensible a la entrada del estéreo.
con la ganancia arriba, el amplificador alcanzará la
salida máxima a un nivel de volumen más bajo en la
plataforma. Con configuraciones de ganancia más altas,
el amplificador también se vuelve más sensible al ruido
del sistema eléctrico del automóvil. Intente colocar la
ganancia en la configuración más baja posible para su
sistema.
No hay un ajuste de ganancia correcto. Debido a que los
altavoces requieren diferentes demandas de potencia
para alcanzar la misma salida, las ganancias deben
usarse con mayor frecuencia para compensar estas
diferencias. Si intenta establecer todas las ganancias a
la mitad, probablemente encontrará que el sistema no
suena muy bien. Usar el buen juicio y escuchar atentam-
ente a cada altavoz sigue siendo la mejor manera de
sintonizar un sistema.
F RO N T IN P U T LIN E O UT PUT
3
CLIP CLIP CLIP CLIP
Input Section (Waterproof RCAs Harness) / Sección de entrada (arnés impermeable de RCA)
Top Crossover controls
A crossover is a device that removes unwanted
frequencies from a speaker or amplifier.A tweeter
can easily be destroyed by bass notes if they are
not filtered out.Likewise a subwoofer will not sound
natural if it is playing midrange notes.A crossover
removes these sounds from the speaker.As you
might guess,careful adjustment in need to ensure
that all the speakers are playing the right sounds
and that you are left with no “holes” or low spots in
the frequency response.
Controles superiores de crossover
Un crossover es un dispositivo que elimina las
frecuencias no deseadas de un altavoz o amplificador.
Un tweeter puede ser fácilmente destruido por notas
graves si no se filtran. Del mismo modo, un subwoofer
no sonará natural si está tocando notas de rango
medio. Un crossover elimina estos sonidos del
altavoz. Como puede adivinar, es necesario realizar un
ajuste cuidadoso para garantizar que todos los altav-
oces reproduzcan los sonidos correctos y que no
quede ningún "agujero" o puntos bajos en la respues-
ta de frecuencia.
+12V
GND
RE M
4
BASS BOOST
DS18 NXL600.1D, NXL800.5D & NXL1100.1D
marine amps have an adjustable bass boost.Begin
your adjustments at low volume.If you do not hear
any improvement then woofer does not need any
BASS BOOST. The Low Pass Filter(LPF) must be
switched on for the bass boost to activate. Use
Bass Boost carefully.The demands on power
output are tremendous.Try to minimize the use by
changing the woofer`s position or the enclosure
size.
REFORZADOR DE GRAVES
DS18 NXL600.1D,NXL800.5D y NXL1100.1D amplifica-
dores marinos tienen un refuerzo de graves ajustable.
Comience sus ajustes a bajo volumen. Si no oye ninguna
mejora, el woofer no necesita ningún BASS BOOST. El
filtro de paso bajo (LPF) debe estar activado para que se
active el refuerzo de graves. Utilice Bass Boost con
cuidado. Las demandas de potencia de salida son
enormes. Intente minimizar el uso cambiando la posición
del woofer o el tamaño de la caja.
SPEAKER OUTPUTS
This amplifier is a multi channel amplifier design;
meaning it has more than one channel of speaker
outputs. It is equipped with an over-mold harness.
Connect this carefully and neatly; strip your wire
back and twist the exposed leads and use an insu-
lated waterproof marine connector. If the wires
ever come in contact with each other the amplifier
will go into protection mode.
SALIDAS DE ALTAVOZ
Este amplificador es un diseño de amplificador multica-
nal; lo que significa que tiene más de un canal de salidas
de altavoz. Está equipado con un arnés sobremoldeado.
Conecte esto con cuidado y prolijamente; Pele el cable
hacia atrás y retuerza los cables expuestos y use un
conector marino impermeable aislado. Si los cables
alguna vez entran en contacto entre sí, el amplificador
entrará en modo de protección.
INSTALLATION INSTRUCTIONS
1. Before you start, disconnect the negative cable
from the car battery Tape up the end so it is iso-
lated from the battery.
2. Run an appropriate gauge wire from the battery
to the amplifier. Plan this part of the installation
carefully. This cable will carry very high current. If
it should short to the body and it is not properly
fused it could catch fire.
INSTRUCCIONES DE INSTALACIÓN
1. Antes de comenzar, desconecte el cable negativo de la
batería del automóvil. Pegue el extremo con cinta adhe-
siva para que quede aislado de la batería.
2. Tienda un cable de calibre adecuado desde la batería
hasta el amplificador. Planifique esta parte de la insta-
lación con cuidado. Este cable transportará una corriente
muy alta. Si tiene un cortocircuito con el cuerpo y no está
correctamente fusionado, podría incendiarse.
Know your total ohm load before you
make any connections.
Conozca su carga total de ohmios antes de
realizar cualquier conexión.
5
3. Connect the power wire to the battery using a
fuse capable of the total current load of all amplifi-
ers connected Don’ t install the fuse yet. Wait until
the end. Locate the fuse as close as possible to the
battery If the fuse is further than 18 inches (wire
length) from the battery you should reevaluate the
wire and fuse placement.
4. Find the closest clear metal area to the amp for a
ground. Sand, grind or scrape all paint and under-
coating from the body and screw the ground
securely in place.
It is advisable to test the ground with an ohmme-
ter between the ground cable and the negative
battery cable to ensure a good low resistance
connection. Some alloys used in modern cars do
not offer the best ground. If you believe this is the
case - first consult with the vehicle manufacturer.
5. Run the speaker wire to the speakers. It is
advised that you leave some extra wire at this
point. You can fix it later.
6. If you haven’t done so already, mount the amp
now.
7. Connect the power and ground to the amplifier.
Only after this step - you should install the fuse
at the battery.
8. Connect the remote wire from the head unit to
the amplifier. Now is a good time to turn on the
amp for the first time. Make sure it turns on prop-
erly and does not go into protection mode.
9. Connect the speaker wires to the amp and
speakers (make sure the amp is off first). Make sure
the polarity(+add-)is correct.
10. Connect the RCA S to the amp.
11. Double check the amplifier controls at this time.
Make sure everything is set correctly for your
system.
12. Now you`re ready to play it for the first time. It
is best to leave the gain all the way down at first.
Start with the head unit volume low and work your
way up.
13. Now you can tune the amp. Take your time and
make only one adjustment at a time. It may take
some time to get the system fully adjusted. During
this time the amp is drawing current from the bat-
tery. You should check the battery voltage from
time to time and re-charge it if it gets low. That’s it.
You’re done. Now have fun!
3. Conecte el cable de alimentación a la batería usando
un fusible capaz de la carga de corriente total de todos
los amplificadores conectados. No instale el fusible
todavía. Espere hasta que el final localice el fusible lo
más cerca posible de la batería. Si el fusible está a más
de 18 pulgadas (longitud del cable) de la batería, debe
reevaluar la ubicación del cable y el fusible.
4. Encuentre el área de metal libre más cercana al
amplificador para usarla como tierra. Raspe toda la
pintura y la capa base del cuerpo y atornille la tierra de
forma segura en su lugar.
Es recomendable probar la tierra con un ohmímetro
entre el cable de tierra y el cable negativo de la batería
para asegurar una buena conexión de baja resistencia.
Algunas aleaciones utilizadas en los automóviles mod-
ernos no ofrecen el mejor terreno. Si cree que este es el
caso, consulte primero con el fabricante del vehículo.
5. Pase el cable del altavoz a los altavoces. Se recomien-
da que deje un poco de cable adicional en este punto.
Puedes arreglarlo más tarde.
6. Si aún no lo ha hecho, monte el amplificador ahora.
7. Conecte el poder y la tierra al amplificador.
Solo después de este paso, debe instalar el fusible en la
batería.
8. Conecte el cable remoto de la unidad principal al
amplificador. Ahora es un buen momento para encender
el amplificador por primera vez. Asegúrese de que se
encienda correctamente y no entre en modo de protec-
ción.
9. Conecte los cables de los altavoces al amplificador y
los altavoces (asegúrese de que el amplificador esté
apagado primero). Asegúrese de que la polaridad (+ add-)
sea correcta.
10. Conecte el RCA al amplificador.
11. Verifique dos veces los controles del amplificador en
este momento. Asegúrese de que todo esté configurado
correctamente para su sistema.
12. Ahora estás listo para probarlo por primera vez. Es
mejor dejar la ganancia al mínimo al principio. Comience
con el volumen de la unidad principal bajo y vaya subien-
do.
13. Ahora puede sintonizar el amplificador. Tómese su
tiempo y haga solo un ajuste a la vez. Puede llevar algún
tiempo ajustar el sistema por completo. Durante este
tiempo, el amplificador está consumiendo corriente de la
batería. Debe verificar el voltaje de la batería de vez en
cuando y volver a cargarla si está baja, eso es todo. Ya
terminaste. ¡Diviértete ahora!
SPECIFICATIONS
NXL200.2D
100Wx2
150Wx2
300Wx1
IPX65
0.07%
>90dB
0.2V-5.0V
20Hz-20KHz
192MM
7.56”
POWER OUTPUT AT OHM4
POWER OUTPUT AT OHM2
POWER OUTPUT AT 1 OHM
POWER OUTPUT AT 4 OHM BRIDGED
Waterproof Level
TOTAL HARMONIC DISTORTION
S/N RATIO REF 1W AT 4OHM
GAIN RANGE
CROSSOVER RANGE
FREQUENCY RANGE
BASS BOOST
MODEL NO.
DIMENSIONS(Lx125x42MM)
INPUT/OUTPUT/POWER HARNESS
OVERMOLD
40Hz-3KHz
N/A
NXL400.4D
100Wx4
150Wx4
300Wx2
0.07%
>90dB
0.2V-5.0V
20Hz-20KHz
245MM
9.65”
40Hz-3KHz
N/A
NXL600.1D
250W
400W
-
0.07%
>90dB
0.2V-5.0V
40Hz-500Hz
215MM
8.46”
50Hz-250Hz
(LPF only)
0dB-18dB
600W
NXL800.5D
80Wx4+200W
125W x 4+300W
250Wx2
(Front/Rear)
0.07%
>90dB
0.2V-5.0V
20Hz-20KHz
295MM
16.1”
40Hz-3KHz(Front/Rear)
50Hz-250Hz(Sub)
NOT
RECOMMENDED
IPX65 IPX65 IPX65
--
0dB-18dB
HARNESS
OVERMOLD
HARNESS
OVERMOLD
HARNESS
OVERMOLD
6
SPECIFICATIONS
NXL850.4D
200W
300W
500W
IPX65
0.07%
>95dB
0.2V-5.0V
20Hz-20KHz
295MM
16 .1”
295MM
16 .1”
POWER OUTPUT AT OHM4
POWER OUTPUT AT OHM2
POWER OUTPUT AT 1 OHM
POWER OUTPUT AT 4 OHM BRIDGED
Waterproof Level
TOTAL HARMONIC DISTORTION
S/N RATIO REF 1W AT 4OHM
GAIN RANGE
CROSSOVER RANGE
FREQUENCY RANGE
BASS BOOST
MODEL NO.
DIMENSIONS(Lx125x42MM)
INPUT/OUTPUT/POWER HARNESS
OVERMOLD
40Hz-3KHz
N/A
NXL900.6D
160W
240W
400W
0.07%
>95dB
0.2V-5.0V
20Hz-20KHz 20Hz-20KHz
40Hz-3KHz 40Hz-3KHz 40Hz-3KHz
N/A N/A
NXL1000.8D NXL1100.1D
130W1100W
200W900W
-
0.07%
>95dB
0.2V-5.0V
320MM
12. 59
360W600W
0.07%
>95dB
0.2V-5.0V
20Hz-20KHz
265MM
10.43”
IPX65 IPX65 IPX65
- --
0dB-18dB
HARNESS
OVERMOLD
HARNESS
OVERMOLD
HARNESS
OVERMOLD
7
8
NXL200.2D
9
NXL600.1D
10
NXL400.4D
5CH/800W
11
NXL800.5D
12
NXL850.4D
850
13
NXL900.6D
6
900
5/6 input
speaker impedance: 2-4 ohms (4-8 ohms bridge)
1CH/1100W
14
NXL1100.1D
15
NXL1000.8D
8
1000
speaker impedance: 2-4 ohms (4-8 ohms bridge)
Should your amplifier require service Please consult with the dealer from
which it was purchased,or contact Local Dealer.
Do not attempt to return your amplifier directly to us without first calling for a
Return Authorization Number. Units received without an accompanying
Return Authorization Number will be processed more slowly. Additionally, you
must include a copy of your purchase receipt from an authorized dealer for
consideration of in-warranty service; otherwise repair charges will apply.Units
received without a receipt will be held for 30 days, allowing us time to contact
you and obtain a copy of the receipt. After 30 days,all units will be returned
DS18
WARRANTY
16
without repair.
  • Page 1 1
  • Page 2 2
  • Page 3 3
  • Page 4 4
  • Page 5 5
  • Page 6 6
  • Page 7 7
  • Page 8 8
  • Page 9 9
  • Page 10 10
  • Page 11 11
  • Page 12 12
  • Page 13 13
  • Page 14 14
  • Page 15 15
  • Page 16 16
  • Page 17 17
  • Page 18 18

DS18 Hydro Full Range Digital Marine Monoblock AMP Owner's manual

Category
Car audio amplifiers
Type
Owner's manual

The DS18 Hydro Full Range Digital Marine Monoblock AMP delivers exceptional audio power and clarity to enhance your marine audio system. With its robust design and impressive features, this monoblock amplifier is built to withstand the harsh marine environment while providing superior sound quality. Explore its capabilities:

Ask a question and I''ll find the answer in the document

Finding information in a document is now easier with AI