Cavalry CAND3001T5 User manual
- Category
- NAS & storage servers
- Type
- User manual
This manual is also suitable for

User's Manual
CAND Series

Preface
Copyright
Please respect copyrighted content. Duplication or modification of this publication in whole or in
part is prohibited without express or written authorization.
Usage
Strong impacts or dropping the product may cause damage. Only allow qualified personnel to
repair this product. Disassembling or opening this product will void your warranty.
Disclaimer
Cavalry is not liable for compensation for data loss which may result from a malfunction of the
product or from changes due to improper use, repairs, defects, or battery change. Please back
up your data to avoid unexpected losses. Cavalry reserves the right to make changes to the
content of this manual without notice. The most current manuals and software are available for
download at our download page: www.cavalrystorage.com/su_download.htm
2 2

Thank you for choosing Cavalry.
We at Cavalry extend our sincere gratitude for your purchase of this product.
We hope our dedication to delivering high quality products with excellent
customer service will ensure your continued interest in our products.
This manual will assist in the operation of the product. To optimize your
experience with this product, we recommend reading this entire manual
before usage. Please keep this manual for future reference.
3 3

Table of Contents
Preface .................................................................................................... 2
List of Accessories ............................................................................. 5
Product Illustrations ........................................................................... 6
Features ............................................................................................. 8
Setup Instructions .............................................................................. 9
Basic NAS Setup ............................................................................... 11
Troubleshooting ................................................................................. 15
Warranty ............................................................................................ 18
Contact .............................................................................................. 19
4
4

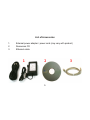
List of Accessories
1. External power adapter / power cord (may vary with product)
2. Resources CD
3. Ethernet cable
5
5
3
1
2

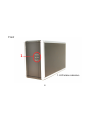
Front
1
1. LED status indicators
6
6

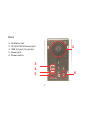
Back
3
4
6
2. Ventilation fan
3. 10/100/1000 Ethernet port
4. USB 2.0 port (for printer)
5. Power jack
6. Power switch
7
7
2
5

8
Features
Network Attached Storage (NAS)
Supports 10/100/1000 Mbps LAN Speed
Supports USB printers and can host other devices
SATA and IDE support
Supports RAID levels 0 and 1, as well as Spanning and JBOD
Supports FTP / SMB server
Supports UPnP Protocol
Supports EXT2, EXT3 and FAT32 (JBOD only) formatting
Exceptional heat dissipating ability
Nearly silent operation
PC, Mac and Linux compatible
8

Setup Instructions
Follow the steps below to successfully set up your Cavalry Network Attached
Storage (NAS) with your computer.
Step 1. For optimal security and convenience, we recommend designating a
single computer to handle all NAS configuration settings.
Step 2. Start your computer and wait for Windows/Mac OS/Linux to load
completely.
Step 3. Connect the power adapter to the drive. Then plug the power
adapter into an electrical outlet. Turn on the power switch; the "Power" LED
will light up to indicate proper operation.
99

1110
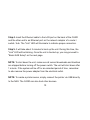
Step 4. Insert the Ethernet cable to the LAN port on the back of the CAND
and the other end to an Ethernet port on the network adapter of a router /
switch / hub. The "Link" LED will illuminate to indicate proper connection.
Step 5. It will take about 2 minutes to boot up the unit. During this time, the
"Link" LED will be blinking. Once the unit is booted up, you may proceed to
"Basic NAS Setup" on the next page.
NOTE: To shut down the unit, make sure all current downloads and transfers
are stopped before turning off the power switch. The unit will shut down after
1 minute. If the system will be off for an extended period of time, remember
to also remove the power adapter from the electrical outlet.
NOTE: To create a printer server, simply connect the printer via USB directly
to the NAS. The CAND can also host other devices.

1110
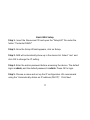
Basic NAS Setup
Step 1. Insert the Resources CD and open the "SetupUtil" file under the
folder: "Contents/CAND/"
Step 2. Once the Setup Wizard appears, click on Setup.
Step 3. NAS will automatically show up in the device list. Select “nas” and
click OK to change the IP setting.
Step 4. Enter the admin password before accessing the device. The default
login is admin, and the default password is admin. Press OK to login.
Step 5. Choose a name and set up the IP configuration. We recommend
using the “Automatically obtain an IP address (DHCP)”. Click Next.

12 13
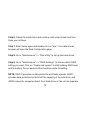
Step 6. Follow the instructions and continue with setup of date and time.
Save your settings.
Step 7. Enter Setup again and double-click on "nas". Your default web
browser will open the Web Configuration page.
Step 8. Go to "Maintainance" >> "Disk Utility" to set up the hard drives.
Step 9. Go to "Maintainance" >> "RAID Settings" to choose which RAID
setting you want. Click on “Create raid system” to start building RAID level
and formatting. Do not perform other functions while formatting.
NOTE: RAID 0 provides no data protection and faster speeds, RAID1
provides data protection but with half the capacity of the total drive, and
JBOD makes the computer detect the 2 hard drives in the unit as separate.

12 13
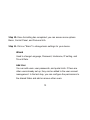
Step 10. Once formatting has completed, you can access more options:
Basic, Control Panel, and Personal Info.
Step 11. Click on "Basic" to change basic settings for your device.
Wizard
Used to change Language, Password, Hostname, IP setting, and
Time & Date.
Add User
You can add users, user passwords, and quota limits. If there are
other users already set up, they can be added to the user account
management. In the last step, you can configure the permissions to
the shared folder and add or remove other users.

1514
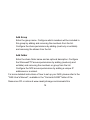
Add Group
Enter the group name. Configure which members will be included in
this group by adding and removing the members from the list.
Configure the share permissions by adding (read only or writable)
and removing the shares from the list.
Add Folder
Enter the share folder name and an optional descrption. Configure
the Winsows/FTP access permissions by adding (read-only and
writable) and removing the members or group from the list.
Configure the NFS access permissions by adding a unique IP
addresses or a subnet.
For more detailed instructions of how to set up your NAS, please refer to the
"NAS User's Manual", available in the "Contents/CAND" folder of the
Resources CD or online at www.cavalrystorage.com/manuals.htm

1514
Troubleshooting
LED light indicator does not turn on
Make sure the power adapter is securely connected to a working electrical
outlet. Secondly, make sure the Ethernet cable is inserted correctly into the
hard drive and the router. Turn on the power switch (page 7).
Computer does not detect hard drive
Be sure to wait at least 2 minutes for the unit to boot up. Make sure the
Ethernet cable between the device and the router / swtich / hub is securely
connected. It could take a few minutes before the setup utility will detect the
hard drive.

16 17
Loud noises coming from external hard drive
In most cases, loud noises coming from the drive suggest a defective drive or
a loose part. We apologize for any inconvenience this may cause. Please
contact customer service for assistance.
One of the hard drives appeared to have failed
This indicates one of the drives may need replacing. The hard drive must be
replaced by another hard drive of the same capacity, brand, and model
number. Open the enclosure, remove the failed hard drive and replace with
the new drive. Close the unit. The new drive should rebuild automatically.

16 17
If you have more questions, please refer to the Frequently Asked
Questions section online at: www.cavalrystorage.com/su_faq.htm. For
further inquiries, you may contact Bason/Cavalry tech support at

18 19
Warranty
This product comes with a one year warranty from the date of purchase.
Please register your product at www.cavalrystorage.com/prodreg.htm to
activate the warranty. Please have your Serial Number and Model Number
ready. We are not responsible for any loss of data. Please back up your data
often to avoid unexpected losses.

18 19
Contact
Cavalry Storage, Inc.
555 E. Easy St.
Simi Valley, CA 93065
Email:
Website:
www.cavalrystorage.com

CA1093
061008
-
 1
1
-
 2
2
-
 3
3
-
 4
4
-
 5
5
-
 6
6
-
 7
7
-
 8
8
-
 9
9
-
 10
10
-
 11
11
-
 12
12
-
 13
13
-
 14
14
-
 15
15
-
 16
16
-
 17
17
-
 18
18
-
 19
19
-
 20
20


Cavalry CAND3001T5 User manual
- Category
- NAS & storage servers
- Type
- User manual
- This manual is also suitable for
Ask a question and I''ll find the answer in the document
Finding information in a document is now easier with AI
Related papers
-
Cavalry CAUE Series User manual
-
-
Cavalry Storage CAXR25160 User manual
-
-
 Cavalry Storage CADT001U32 User manual
-
Cavalry CAND-T02 User manual
-
Cavalry CADA-SA2 Series User manual
-
-
-
 Cavalry Storage CADA-U3E4 User manual


