5
G
E
N
E
R
A
L
G
U
I
D
E
L
I
N
E
S
PROCEDURE 1
GENERAL GUIDELINES
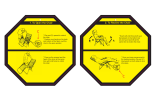
SAFETY/HANDLING OF THE HTR
“Safety and Handling” of the HTR requires the close
attention of the HTR user as well as the assistant.
This manual points out the most common procedures
and techniques involved in the safe operation and
maintenance of the HTR. It is important to practice
and master these safe techniques until you are
comfortable in maneuvering around the frequently
encountered architectural barriers.
Use this information only as a “basic” guide. The
techniques that are discussed on the following pages
have been used successfully by many.
Individual HTR users often develop skills to deal with
daily living activities that may dif fer from those
described in this manual. Invacare recognizes and
encourages each individual to try what works best for
him/her in overcoming architectural obstacles that
they may encounter, however ALL WARNINGS and
CAUTIONS given in this manual MUST be followed.
Techniques in this manual are a st arting point for the
new HTR user and assistant with “safety” as the most
important consideration for all.
Stability And Balance
WARNING
ALWAYS wear your seat positioning strap.
Inasmuch as the SEAT POSITIONING STRAP is an
option on the HTR (You may order with or without
the seat positioning strap), Invacare strongly
recommends ordering the seat positioning strap
as an additional safeguard for the HTR user.
5000/5500 MODELS ONLY - Anti-tippers MUST BE
attached at all times. Inasmuch as the
ANTI-TIPPERS are an option on the HTR (You may
order with or without the anti-tippers), Invacare
strongly recommends ordering the anti-tippers
as an additional safeguard for the HTR user.
To assure st ability and proper operation of your HTR,
you must at all times wear your seat positioning strap
and maint ain proper balance. Y our HTR has been
designed to remain upright and stable during normal
daily activities as long as you do not move beyond
the center of gravity.
GENERAL WARNINGS (CONTINUED)
WEIGHT LIMITATION
The HTR Tilt/Recline has a weight limitation of 250 lbs.
V irtually all activities which involve movement in the
HTR have an effect on the center of gravity . Invacare
recommends using seat/chest positioning straps for addi-
tional safety while involved in activities that shift your weight.
DO NOT lean forward out of the HTR any further than
the length of the armrests. Make sure the casters are
pointing in the forward position whenever you lean
forward. This can be achieved by advancing the HTR
and then reversing it in a straight line.
The HTR Tile/Recline MUST be operated by an atten-
dant when the chair is in any tilted or reclined position.
Coping With Everyday Obstacles
Coping with the irritation of everyday obstacles can be
alleviated somewhat by learning how to manage your
HTR. Keep in mind your center of gravity to maintain
stability and balance.
A Note To HTR Assistants
When assistance to the HTR user is required,
remember to use good body mechanics. Keep your
back straight and bend your knees whenever tilting
the HTR or traversing curbs, or other impediments.
WARNING
DO NOT attempt to lift the HTR by lifting on any
removable (detachable) parts. Lifting by means
of any removable (detachable) parts of the
HTR may result in injury to the user or damage to
the HTR.
Also, be aware of any removable (detachable) parts.
These must NEVER be used for hand-hold or lifting
supports, as they may be inadvertently released,
resulting in possible injury to the user and/or assistant(s).
When learning a new assistance technique, have an
experienced assistant help you before attempting it alone.
Percentage of Weight Distribution
WARNING
DO NOT attempt to reach objects if you have to
move forward in the seat or pick them up from
the floor by reaching down between your knees.
Changing the seat depth of the chair changes
the stability of the HTR. To maintain stability, safety
limits for bending, reaching and transferring
activities MUST be re-evaluated by a qualified
healthcare professional BEFORE using the HTR.