Page is loading ...

Barn Door
I
n
stallation Guide
(v. 0.4.092517)
www.urbanwoodcraft.com
toll free: 1.855.738.1378

Barn Door - Installation Guide
Requirements
www.urbanwoodcraft.com - toll free: 1.855.738.1378
- Minimum floor to ceiling height required to install this door is 91 inches
- The mounting location must be supported by wooden studs (not metal)
- Check with local building codes if applicable before proceeding with installation
- For optimum results, seek a licensed professional to conduct the installation
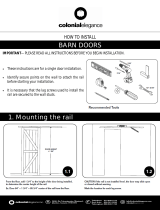
Tools Required
Level
Pencil
Tape Measure
Power Drill
Philips
Screwdriver
5/16” Wrench
Allen Key
(Included)
Stud Finder
page 01
(v. 0.4.092517)
3/16”
5/16”
15/64”
Drill Bits
This instruction manual can be used for the following models:
1. 500.40BD.BB.W / 500.40BD.BB.G
2. 500.40BD.ZP.W / 500.40BD.ZP.G
3. 500.40BD.XB.W / 500.40BD.XB.G
4. 500.40BD.RW.II
5. 500.40BD.BB.RW
6. 500.40BD.PN.N / 500.40BD.PN.G
7. 500.40BD.5P.W / 500.40BD.5P.G

Parts List
www.urbanwoodcraft.com - toll free: 1.855.738.1378
Ledger Board x1
Rail x1
Barn Door x1
Top Roller x2
Illustrations not to scale
Anti-jump Block x2
Right Stopper x1
Left Stopper x1
Wall Spacer x5
Rail Bolt Anchor x5
Rail Hex Bolt x5
Bottom Roller Guide x1 Floor Screw x2
Floor Anchor x2
page 02
Barn Door - Installation Guide
Hex Lag Screw x5
(v. 0.4.092517)

Measurements
www.urbanwoodcraft.com - toll free: 1.855.738.1378
17 3/4" 17 3/4" 17 3/4" 17 3/4"
78 3/4"
4 3/4"
(H) 83" + 1 3/8" = 84 3/8"
Height of Door (H) = 83"
3/8"
Quick Reference
page 03
Barn Door - Installation Guide
Floor to Centre of Rail = 84 3/4"
Minimum Required Floor to Ceiling Height = 91"
A
B
C
D
A. Minimum floor to ceiling height required for the installation of this door is 91"
B. Total height from the base of the door to the centre of the mounted rail
C. Height of the door
D. Total height from the floor to the centre of the mounted rail
(v. 0.4.092517)

Door Preperation
www.urbanwoodcraft.com - toll free: 1.855.738.1378
Remove the pre-threaded bolts from the Top Roller.
Thread the bolt through the pre-drilled holes in the
Door along with the Top Roller ensuring you have
washers on eitherside of the assembly.
Use Wrench to tighten bolt to nut, do not over
tighten.
Pre-drill two small holes on the top of the
door near the Rollers to prepare installation of
the Anti-jump Blocks. The positon of these
holes should be offset from the center core of
the door. Refer to figure 1.1
Install the Anti-jump Blocks by screwing into
your pre-drilled holes.
Keep these blocks swung outward as you
will need them in this positon while hanging it
onto the rail.
page 04
Barn Door - Installation Guide
fig. 1.1
(v. 0.4.092517)

Ledger Board Introduction
www.urbanwoodcraft.com - toll free: 1.855.738.1378
Mounting the Ledger Board:
A Ledger board is included in your order for your convenience and for solid installation. Without a Ledger
Board, the holes in the metal track must line up with the wall studs. Otherwise the weight of your hardware
and door will be too heavy and could pull out of your drywall, which could result in damage or injury.
page 05
Barn Door - Installation Guide
Mount the Ledger Board to wall studs
(v. 0.4.092517)

Rail Install - DRYWALL
www.urbanwoodcraft.com - toll free: 1.855.738.1378
These instructions are for walls backed with
wooden studs (steel or aluminum studs will not
support the hardware track and door). If installing
in a condominium, it is highly likely that your wall
studs are made of aluminum. In this case you
would need to consult with a licensed installer (or
contractor) to have your wall re-inforced with
wooden backing.
78 3/4"
H (Height of door) + 1 3/8"
3/16”
Position the Ledger Board by measuring up from the
door height (H) + 1 3/8" to the centre of the Ledger. If
your oor is not level, be sure to measure up from the
highest point of your nished oor. Then measure
across from edge of doorway opening to 4”.
Ensure the Ledger Board is level, nd the studs
behind the wall and screw the Ledger Board to these
stud points with appropriate hardware (not supplied).
Typically 4” wood screws are used for wooden studs.
Prepare the mounting of the rail to the center of the
Ledger Board by laying the rail onto the Ledger Board
and mark where the bolts should go with a pencil.
Predrill pilot holes for each of the hole locations. A 3/16”
drill bit is sufcient.
Slide the Left and Right Stoppers onto the rail before
proceeding with mounting the rail. Ensure the
adjustment bolts are facing upward. Cross only the rst
hole on either side of the rail. Refer to figure 1.2
Thread the Hex Lag Screw through the rail and then a
Wall Spacer and Tighten with a Wrench. Repeat this step
four additional times. Refer to figure 1.3
page 06
Barn Door - Installation Guide
fig. 1.2
fig. 1.3
(v. 0.4.092517)

Rail Install - CONCRETE
www.urbanwoodcraft.com - toll free: 1.855.738.1378
Prepare the mounting of the rail to the wall by marking
where the bolts should go with a pencil. Refer to the
Measurements page for making your measurements.
Predrill 5/16” holes for each of the markings you have
made. Holes should be drilled to 1 1/2” depth
Insert the Rail Bolt Anchors into the pre-drilled holes.
Sometimes a hammer is useful for this step.
Slide the Left and Right Stoppers onto the rail before
proceeding with mounting the rail. Ensure the
adjustment bolts are facing upward. Cross only the rst
hole on either side of the rail. Refer to figure 1.4
Thread the Rail Hex Bolt through the rail and then a Wall
Spacer and Tighten into Anchors with a Wrench. Repeat
this step four additional times. Refer to figure 1.5
5/16”
page 07
Barn Door - Installation Guide
fig. 1.4
fig. 1.5
(v. 0.4.092517)

Hanging the Door
www.urbanwoodcraft.com - toll free: 1.855.738.1378
Hang the door assembly onto the rail. Ensure the rail sits
in the groove of the wheels.
Swing the Anti-jump Blocks to lock the door into place.
refer to figure 1.6
To nd the mounting position of the Bottom Roller Guide,
ensure you are installing it away from doorway opening.
You will also need to determine how wide the door
overlap is (minimum 1”). Note: The door overlap is the
distance between the leading edge of the door when fully
open, and the trailing edge of the door when fully closed.
Center the wheel about 1.5” from the wall and mark the
holes.
Pre-drill the holes the same size as the Floor Anchors and
push the Floor Anchors in the holes.
Screw the Bottom Roller Guide to the Floor Anchors
using the Floor Screws.
1 3/8" (30mm)
5/16" (8mm)
1 1/2”
Installing the Bottom Roller Guide
page 08
Barn Door - Installation Guide
15/64”
fig.1.6
(v. 0.4.092517)

Adjusting the Stoppers
www.urbanwoodcraft.com - toll free: 1.855.738.1378
Slide the door into the closed position.
Slide the Stopper to the desired open and close points
such that it touches the arm of the Roller.
Use the Allen Key and tighten the screws that are
pre-mounted into the Stopper.
Repeat these steps for the opened postion.
(x2)
page 09
Barn Door - Installation Guide
(v. 0.4.092517)
/