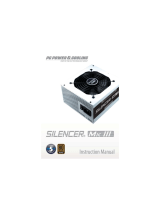
OCZ COREXSTREAM SERIES 500 WATT PERF. Owner's manual

Type
Owner's manual

OCZ COREXSTREAM SERIES 500 WATT PERF. is a power supply unit with a continuous power output of 500 watts and features universal compatibility with Intel and AMD motherboards. It comes with a 24-pin ATX connector, an 8-pin EPS connector, and multiple SATA and PCI-E connectors to support various components including graphics cards, hard drives, and optical drives. Its high-quality components and protections ensure stable and reliable performance, making it suitable for gaming PCs and high-performance workstations.

OCZ COREXSTREAM SERIES 500 WATT PERF. is a power supply unit with a continuous power output of 500 watts and features universal compatibility with Intel and AMD motherboards. It comes with a 24-pin ATX connector, an 8-pin EPS connector, and multiple SATA and PCI-E connectors to support various components including graphics cards, hard drives, and optical drives. Its high-quality components and protections ensure stable and reliable performance, making it suitable for gaming PCs and high-performance workstations.

01
CONTENTS - INDEX
Technical Specifications
Installation of Power Supply
Connectors
Troubleshooting/ Warranty and RMA
GERMAN
Einbau des Netzteils
Anschlüsse
Fehlerbehebung/Garantie und Rücksendungsgewähr
SPANISH
Instalación de la fuente de alimentación
Conectores
Solución de problemas /Garantía y Autorización de devolución de mercancía (RMA)
FRENCH
Installation de l’alimentation
Connecteurs
Dépannage / Garantie et procédure de retour du matériel
ITALIAN
Installazione dell'alimentatore
Connettori
Risoluzione dei problemi/Garanzia e RMA
RUSSIAN
Установка блока питания
Разъемы
Устранение неисправностей/Гарантия, возврат и ремо
JAPANESE
榊䄟ቑ♥ቭⅧሴ
ነኪኌኜ
እ዆ኳወኔዂዙኣኀዐኍ≬峋ቋ50$
CHINESE
䟄䄟䤓⸘孔
扭㘴⣷
㟔椫幙㠼ℶ❐≬≽✛抏徶㘗㧒
2
3
4
5
6
7
8
9
10
11
12
13
14
15
16
17
18
19
20
21
22
23
24
25
26
02
TECHNICAL SPECIFICATION
AB09
AC INPUT
DC OUTPUT
MAX LOAD
MAXIMUM
COMBINED
WATTAGE
120W 444W 3.6W 12.5W
TOTAL POWER:
230Vac 4A 47-63Hz, 220Vac 4A 47-63Hz
+3.3V +5V +12V
1
+12V
2
-12V +5VS
24A 15A 25A 20A 0.3A 2.5A
500W CONTINUOUS
03
INSTALLATION OF THE POWER SUPPLY
NOTE: You will need a Philips screwdriver to install your new power supply.
To install a new power supply you first need to remove the old one. Please proceed as
follow
INSTALLING THE NEW OCZ POWER SUPPLY:
1. Unplug the AC power cable from your old power supply.
2. Make sure to disconnect all other cables from the PC and remove the cover from the
PC case. Remove any screws holding the cover in place; specifics will vary by
computer case design.
3. Disconnect the power supply from all the components in the PC- make sure that all
the connectors are unplugged.
4. You can now remove the screws securing the old power supply to your case; normally,
there are four screws at the back of the chassis. After removing all the screws, slowly
take the power supply out of the PC case. Be careful that you do not damage any
other components during this action.
1. Place your new power supply in the appropriate space in the PC case and
secure it by screwing the four screws into the rear of the power supply.
2. Guide the 20 or 24-pin ATX connector through the case and connect it to
your motherboard as needed.
3. Connect the 8-pin power cable to the motherboard. If your motherboard
supports only a 4-pin jack, connect only the right side of the connector to the
motherboard.
4. If you are using a graphics card with a 6-pin connector please connect the
respective connector to the jack on the card. If your card supports more than
one jack connect the second 8-pin connector. If your card has an 8-pin jack
mounted just use the additional two pins beside the regular 6-pin connector
to form an 8-pin connector.
5. Proceed with connecting all peripheral and SATA connectors to your hard
drives and optical drives.
6. Connect any other internal components that require power to the
appropriate connector- i.e. fans and/or case lighting.
7. You may replace the cover on the PC case now, or you can leave it off
initially while you verify everything works properly.
8. Connect your display, keyboard, mouse, speakers, printer, and any other
peripherals to your computer.
9. Plug in the main AC power cable into the back of the power supply and turn
on your computer.
10. If everything works properly and you have not already done so, turn your
computer off and replace the cover on the case.
04
CONNECTORS DESCRIPTION AND ILLUSTRATION
(20+4Pin)
+12VDC
+12VDC
+12VDC
+12VDC
+12VDC
+12VDC
+12VDC
+12VDC
+12VDC
+12VDC
+12VDC
+12VDC
+12V
+12V
+3.3 V
113
1022
1224
05
TROUBLESHOOTING/WARRANTY AND RMA
If you experience any problems with your new power supply, please check these simple
trouble-shooting steps or consult the retailer where the product was purchased.
Caution: Working on electrical devices can be life-threatening. If you are not familiar with
the steps taken please consult a professional. If your power supply has developed traces
of smoke, broken cables, or was exposed to liquids it should not under any
circumstances be brought back into operation.
If you installed a new power supply and the system will no longer start, please check
the following steps:
1. Make sure the AC input is plugged in correctly and the wall outlet distributes power.
[ Try another device in the electrical outlet to verify it is working properly.]
2. Check that all connectors from the power supply are correctly plugged into the
motherboard.
3. Are the cables from the power switch of the computer case properly connected to
the motherboard?
4. Make sure there are no short circuits within the systems that could result from
defective hardware or misplaced connectors.
5. If you are not sure take all parts out of the housing and only leave the motherboard
inside together with the power supply. Disconnect all plugs, check them and then
connect them again to the respective sockets.
If you needfurther assistance please visit:
http://www.ocztechnology.com/support/ticket.html
3- Year Warranty
Your OCZ PSU is covered by an industry-leading 3-Year Warranty. This product is
warranted to be free from defects in material and workmanship for a period of three [3]
years from the date of purchase. If any defects should occur during this period, contact
OCZ Technology for further assistance and to take advantage of your warranty.
To place a Returned Merchandise Authorization [RMA] request, you may simply submit
a ticket through our website at: http://www.ocztechnology.com/support/ticket.html
06
EINBAU DES NETZTEILS
HINWEIS: Für den Einbau Ihres neuen Netzteils benötigen Sie einen Philips-Schraubendreher.
INSTALLATION DES NEUEN OCZ STROMVERSORGUNG:
Zum Einbau eines neuen Netzteils müssen Sie zunächst das alte Netzteil entfernen.
Gehen Sie bitte wie folgt vor:
1. Stecken Sie das Wechselstromkabel Ihres alten Netzteils aus.
2. Vergewissern Sie sich, dass alle anderen Kabel des PCs ausgesteckt sind, und
nehmen Sie das Gehäuse des PCs ab. Entfernen Sie jegliche Schrauben, die das
Gehäuse halten. Je nach Bauweise des Gehäuses können unterschiedliche Vorgehens-
weisen erforderlich sein.
3. Trennen Sie das Netzteil von allen Bauteilen des PCs. Vergewissern Sie sich, dass alle
Anschlüsse abgezogen sind.
4. Sie können nun die Schrauben lösen, die das alte Netzteil am Gehäuse befestigen.
Normalerweise befinden sich vier Schrauben an der Hinterseite des Gehäuses. Heben
Sie das Netzteil vorsichtig aus dem PC-Gehäuse, sobald alle Schrauben entfernt sind.
Achten Sie darauf, dass Sie bei diesem Schritt keine anderen Bauteile beschädigen.
1. Setzen Sie Ihr neues Netzteil an der geeigneten Stelle in das PC-Gehäuse ein
und sichern Sie es durch Anziehen der vier Schrauben an der Rückseite des
Netzteils.
2. Führen Sie das 20/24 Pin ATX Anschlusskabel durch Ihr Gehäuse und
verbinden Sie es mit Ihrem Mainboard.
3. Verbinden Sie das 8-Pin-Netzkabel mit dem Motherboard. Sollte Ihr
Motherboard nur 4 Pins unterstützen, so verbinden Sie lediglich die rechte Seite
des Anschlusses mit dem Motherboard.
4. Wenn Sie eine Grafikkarte mit einem 6-Pin-Anschluss verwenden, so verbinden
Sie bitte den entsprechenden Anschluss mit der Buchse auf der Karte.
Verbinden Sie den zweiten 6-Pin-Anschluss, wenn Ihre Karte mehr als eine
Buchse unterstützt. Wenn Ihre Karte über eine 8-Bin-Buchse verfügt, verwenden
Sie einfach die beiden zusätzlichen Pins neben dem herkömmlichen
6-Pin-Anschluss, um einen 8-Pin-Anschluss herzustellen.
5. Fahren Sie fort, indem Sie alle peripherer- und SATA-Anschlüsse mit Ihren
Festplatten und optischen Laufwerken verbinden.
6. Schließen Sie alle anderen internen Bauteile, die eine Netzverbindung
benötigen, an die entsprechenden Anschlüsse an – d.h. Gebläse und/oder
Gehäusebeleuchtung.
7. Sie können nun die Gehäuseabdeckung wieder auf Ihren PC aufsetzen oder sie
anfänglich noch weglassen, bis Sie bestätigt haben, dass alles ordnungsgemäß
funktioniert.
8. Verbinden Sie Bildschirm, Tastatur, Maus, Lautsprecher, Drucker und andere
Peripheriegeräte mit Ihrem Computer.
9. Stecken Sie das Netzstromkabel hinten in das Netzteil und schalten Sie den
Computer ein.
10. Wenn alles ordnungsgemäß funktioniert und Sie dies noch nicht getan haben,
schalten Sie den Computer wieder aus und setzten Sie die Gehäuseabdeckung auf.
11
SOLUCIÓN DE PROBLEMAS /
GARANTÍA Y AUTORIZACIÓN DE DEVOLUCIÓN DE MERCANCÍA (RMA)
Si tiene algún problema con la nueva fuente de alimentación, compruebe estos pasos
de solución de problemas o consulte al representante que le vendió el producto.
Precaución: El trabajo con dispositivos eléctricos puede suponer un peligro para la
vida. Si no está familiarizado con los pasos descritos, consulte a un profesional. Si la
fuente de alimentación vieja ha echado humo alguna vez, tiene algún cable roto o se
ha visto expuesta a líquidos, no deberá ponerla en funcionamiento bajo ningún
concepto.
Si ha instalado una nueva fuente de alimentación y el ordenador no se enciende,
compruebe los siguientes pasos:
1. Asegúrese de que la entrada de CA está bien enchufada y que la toma de la pared
funciona correctamente. [Pruebe otro dispositivo en la toma eléctrica para ver si
funciona correctamente.]
2. Verifique que todos los conectores de la fuente de alimentación están conectados
correctamente a la placa madre.
3. ¿Están los cables del interruptor de encendido de la caja del ordenador conectados
correctamente a la placa madre?
4. Asegúrese de que no se producen cortocircuitos en los sistemas debido a
hardware defectuoso o conectores mal colocados.
5. Si no está seguro, saque todos los componentes de la caja y deje sólo la placa
madre dentro con la fuente de alimentación. Desconecte todos los conectores,
inspecciónelos y luego vuelva a conectarlos en sus enchufes correspondientes.
Si necesita asistencia técnica adicional, visite:
http://www.ocztechnology.com/support/ticket.html
Garantía de 3 años:
Su fuente de alimentación de la de OCZ está cubierta por una garantía de 3 años líder
en el sector. Se garantiza que este producto está libre de defectos de material y
fabricación durante un período de 3 años desde la fecha de compra. Si se produce
algún defecto durante este período, póngase en contacto con OCZ Technology para
recibir asistencia y aprovecharse de la garantía.
Para hacer una solicitud de Autorización de devolución de mercancía (RMA), sólo
tiene que presentar un formulario de incidencias en nuestro sitio web:
http://www.ocztechnology.com/support/ticket.html
14
DÉPANNAGE / GARANTIE ET PROCÉDURE DE RETOUR DU MATÉRIEL
Si vous rencontrez des problèmes avec votre nouvelle alimentation, veuillez suivre ces
simples conseils de dépannage ou consulter le fournisseur qui vous l'a vendue.
Avertissement: La manipulation d’appareils électriques peut mettre votre vie en danger.
Si vous ne connaissez pas la marche à suivre, veuillez consulter un professionnel. Vous
ne devez en aucun cas réutiliser votre alimentation électrique lorsque celle-ci présente
des traces de fumée, des câbles sectionnés ou qu’elle a reçu des projections de liquides.
Après l’installation d’une nouvelle alimentation, si le système ne redémarre pas,
veuillez vérifier les points suivants:
1. Assurez-vous que le câble d’alimentation électrique est correctement branché et que
la prise électrique murale est bien alimentée. [Effectuez un essai avec un autre appareil
pour vérifier que la prise électrique fonctionne bien.]
2. Vérifiez que tous les connecteurs de l’alimentation sont branchés correctement sur
la carte mère.
3. Les câbles de l’interrupteur d’alimentation du boîtier de l’ordinateur sont-ils connectés
correctement à la carte mère ?
4. Assurez-vous que des éléments défectueux ou des connecteurs mal positionnés
n’entraînent pas de court-circuit dans le système.
5. En cas de doutes, sortez toutes les pièces du boîtier et laissez-y seulement la carte
mère et l'alimentation. Débranchez toutes les prises, vérifiez-les, puis rebranchez-les sur
leurs fiches respectives.
Si vous avez besoin d’aide supplémentaire, veuillez consulter :
http://www.ocztechnology.com/support/ticket.html
3 ans de garantie:
Votre unité d’alimentation de OCZ est couverte par la garantie de 3 ans des leaders du
secteur. Ce produit est garanti exempt de vices de matériaux et de fabrication pendant
une période de 3 ans à compter de sa date d’achat. En cas de vices de matériaux au
cours de cette période,contactez OCZ Technology pour obtenir une assistance et
profiter de votre garantie.
Pour solliciter la procédure de retour du matériel, il suffit d’en faire la demande sur
notre site Internet at: http://www.ocztechnology.com/support/ticket.html
17
RISOLUZIONE DEI PROBLEMI/GARANZIA E RMA
Se si verificano problemi con il nuovo alimentatore, controllare i seguenti passi di
risoluzione dei problemi o consultare il venditore presso il quale è stato effettuato
l’acquisto del prodotto.
Attenzione: Intervenire su dispositivi elettrici può esporre a rischio di morte. Se non si
ha dimestichezza con i passi indicati, consultare un professionista. Se l’alimentatore
mostra tracce di fumo, cavi rotti o è stato esposto a liquidi, non dovrà per alcuna
ragione essere messo in funzione.
Se si è installato un nuovo alimentatore e la macchina non si avvia più, controllare i
seguenti passi:
1. Assicurarsi che l’ingresso AC sia correttamente collegato e che la presa fornisca
alimentazione. [ Provare un altro dispositivo nella presa elettrica per verificare che
funzioni correttamente.]
2. Controllare che tutti i connettori dell’alimentatore siano correttamente collegati alla
scheda madre.
3. I cavi dell’interruttore di alimentazione del case sono correttamente collegati alla
scheda madre?
4. Assicurarsi che non ci siano corto circuiti nei sistemi che potrebbero risultare da
hardware difettoso o connettori mal posizionati.
5. Se non si è sicuri, rimuovere tutte le parti e lasciare soltanto la scheda madre con
l’alimentatore. Scollegare tutte le spine, controllarle e poi collegarle nuovamente nelle
rispettive prese.
Per ulteriore assistenza, vistitare il sito:
http://www.ocztechnology.com/support/ticket.html
3- Garanzia
L’Alimentatore OCZ è coperto dalla migliore Garanzia triennale del settore. Questo
prodotto è garantito per l’assenza di difetti di materiale e lavorazione per un periodo di
[3] anni dalla data di acquisto. Se si dovessero notare dei difetti durante questo periodo,
contattare OCZ Technology per l’assistenza e usufruire della garanzia.
Per inoltrare una richiesta di autorizzazione a rendere prodotti [RMA], è possibile
inoltrare una semplice richiesta tramite il nostro sito web su:
http://www.ocztechnology.com/support/ticket.html
20
УСТРАНЕНИЕ НЕИСПРАВНОСТЕЙ/ГАРАНТИЯ,
Если у вас есть проблемы с новым блоком питания, пожалуйста выполните эти
простые шаги по устранению неисправностей или проконсультируйтесь с
продавцом, у которого было приобретен продукт.
Внимание: Работа с электрическими устройствами может представлять угрозу
для жизни. Если вам не понятны предпринимаемые действия, пожалуйста,
свяжитесь со специалистом. При выделении из блока питания
дыма, при обрыве
кабелей или попадании на него жидкостей дальнейшая эксплуатация не
разрешается ни при каких обстоятельствах.
Если после установки нового блока питания система перестала запускаться,
пожалуйста, выполните следующее:
1. Убедитесь, что кабель питания переменного тока правильно подключен и
настенная розетка находится в рабочем состоянии. [ Для проверки работы
электрической розетки попробуйте подключить к ней другое устройство.]
2. Убедитесь, что все коннекторы блока
питания правильно подключены к
материнской плате.
3. Правильно ли подключены к материнской плате кабели, идущие от
выключателя питания системного блока?
4. Убедитесь в отсутствии коротких замыканий в системе , причиной которых
может стать дефектное оборудование либо неправильно подключенные
коннекторы.
5. Если вы не уверены, выньте из корпуса все части, оставив внутри только
материнскую
плату вместе с блоком питания. Отключите все вилки, проверьте их
и затем включите снова в соответствующие розетки.
Если вам потребуется дополнительная помощь, посетите:
http://www.ocztechnology.com/support/ticket.html
3-летняя гарантия
Блок питания OCZ имеет лучшую в отрасли 3-летнюю гарантию. На этот продукт
распространяется трех (3) летняя гарантия на отсутствие дефектов материала
и
производственных дефектов, действующая с даты
покупки. При обнаружении
каких-либо дефектов в течение этого периода свяжитесь с OCZ Technology для
получения дальнейшей помощи и воспользуйтесь гарантией.
Заявку на возврат и ремонт можно просто разместить через наш веб-сайт:
http://www.ocztechnology.com/support/ticket.html
23
እ዆ኳወኔዂዙኣኀዐኍ≬峋ቋ50$
㠿ሺሧ榊䄟ቊ⟞櫛ሯ䤉䞮ሺቂ⫃⚗ᇬ亰◧እ዆ኳወኔዂዙኣኀዐኍኖኣአኴቊ
ኞኄአኌሼቮሮᇬ完❐ት律⏴ሺቂ弸⮁ㄦ቎ር⟞ሧ⚗ቲሾሲቃሸሧᇭ
㽷㎞榊㺦ኤክኁኖቑ⇫㯼ትሺ቉ሧቮቋᇬ✌቎ሮሮቲቮℚ㟔቎ቇቍሯቮ㋟ቯሯ
ሥቭቡሼᇭኖኣአኴ቎㏲ቯ቉ሧቍሧ⫃⚗ᇬ⺑栏⹅቎ር⟞ሧ⚗ቲሾሲቃሸሧᇭ
榊䄟ሮቬ䏨ቑ䤉䞮ᇬ኎ዙኳወቑ⒖㠼ᇬ䁁⇢቎䉰ቬሺቂ⫃⚗ቍቌቒᇬ㼉ሺ቉␜
怆╤ሺቍሧቊሲቃሸሧᇭ
㠿ሺሧ榊䄟ት♥ቭⅧሴቂቑ቎3&ሯ䵚ቄₙሯቬቍሧ⫃⚗ᇬⅴₚቑ
ኖኣአኴቊኞኄአኌሺ቉ሲቃሸሧᇭ
$&ነዙኦት㷲ሺሲነዐኘዐእ቎ぽሺ手ቶቊሧቮሮ䭉崜ሺ቉ሲቃሸሧᇭᨗ⒴
ቑኤክኁኖትነዐኘዐእ቎㘴倩ሺᇬ㷲デ቎㳮厌ሼቮሮ䭉崜ሺ቉ሲቃሸሧᨙ
榊䄟ቑነኪኌኜሯᇬ㷲ሺሲኻናዙኹዙኦ቎㘴倩ሸቯ቉ሧቮሮኞኄአኌሺ቉
ሲቃሸሧᇭ
3&኎ዙኖቑ榊䄟ኖኁአኞቑ኎ዙኳወሯᇬኻናዙኹዙኦ቎㷲ሺሲ㘴倩ሸቯ቉
ሧቡሼሮᇭ
ኬዙኦኃኄቿቑ㟔椫ቧነኪኌኜቑ崳㘴倩ቑቂቤᇬ3&ሯ䩼俰ሺ቉ሧቍሧሮ䭉
崜ሺ቉ሲቃሸሧᇭ
⒕ሮቬቍሧ⫃⚗ᇬ榊䄟ቋኻናዙኹዙኦቃሴ㸚ሺ቉ᇬኬኃንዐኍሮቬⅥቑ捷
❐ትሼቜ቉♥ቭ⒉ሺቡሼᇭኴ዆ኍትሼቜ቉㔫ሰᇬኞኄአኌሺ቉ሮቬ
ነዐኘዐእ቎␜ቖぽሺ手ቶቊቢቡሼᇭ
崂便቎ቇሧ቉ቒⅴₚ቎ቿኌኘኖሺ቉ሲቃሸሧᇭ
KWWSZZZRF]WHFKQRORJ\FRPVXSSRUWWLFNHWKWPO
㄃≬峋
2&=368ቒᇬ㯼䟛椞₏ት崖ቮ㄃≬峋ቊሼᇭ㦻完❐ቒᇬ律⏴㡴ሮቬ㄃栢቎ቲ
ቂቭᇬ㧟㠨ቋ完❐ቑₜ␆⚗቎⺍ሺ቉≬峋ሺቡሼᇭ≬峋㦮栢₼቎ₜ␆⚗ሯ䤉䞮
ሺቂ⫃⚗ᇬ
≬峋ት㿊ሮሺ቉ᇬ2&=ኣኌካዊንዙ቎ር⟞ሧ⚗ቲሾሲቃሸሧᇭ
50$ᨗ扣❐≬峋ᨙት嵚㻑ሼቮ⫃⚗ᇬ㆙䯍ኃኄኳኒኁእሮቬኞ኎አእት㙟⒉ሼ
ቮቃሴቊ2.ቊሼᇭKWWSZZZRF]WHFKQRORJ\FRPVXSSRUWWLFNHWKWPO
24
䟄䄟䤓⸘孔
⮖㽷᧶㌷榏䞷◐ⷦ婉€⒏⸘孔㠿䟄䄟ᇭ
⸘孬㠿䤓2&=䤓榊䄟᧶
⸘孔㠿䟄䄟㢅᧨㌷氥⏗榏尐♥ₚ㡶䟄䄟ᇭ庆挄䏶Ⱁₚ㷴洳
⅝㡶䟄䄟ₙ㕣ₚℳ㿐䟄䟄冕ᇭ
┰㉔⅝₹ⅉ䟄厠ₙ♥ₚ㓏㦘␅⸒䟄冕᧨ㄅ⅝䟄厠㧉乀ₙ♥ₚ凸⮂ᇭ♥ₚ凸
⮂䤓⦉⸩婉€᧷␆⇢㍔⑄⥯䟄厠㧉乀幍帰力㆑ᇭ
㠼㆏₹ⅉ䟄厠ₙ㓏㦘兓ↅ䤓䟄䄟ದ䫽≬㓏㦘扭㘴⣷掌め㕣ₚᇭ
䘿⦷᧨♾ⅴ♥ₚ㧉乀ₙ⦉⸩㡶䟄䄟䤓婉€᧨₏咻㧉乀卛⚝㦘⥪欦婉€ᇭ♥
ₚ㓏㦘婉€⚝᧨㏱㏱⦿㔙䟄䄟⅝₹ⅉ䟄厠㧉乀₼♥⒉ᇭ⺞㉒⦷㷳扖䲚₼ₜ尐㗮
⧞↊⇤␅⸒兓ↅᇭ
㔙㠿䟄䄟㟍扪₹ⅉ䟄厠㧉乀₼䤓⚗抑⇜函᧨ㄅ㔙⥪欦婉€㡚扪䟄䄟卛捷᧨⦉
⸩⇞䟄䄟ᇭ
㖘榏尐㔙㒥朗$7;扭㘴⣷䴎扖㧉乀᧨₝⃊㨎扭㘴ᇭ
㔙朗䟄冕扭㘴Ⓙ⃊㨎ₙᇭⰑ㨫⃊㨎♹㞾㖐朗㙡ⷣ᧨挲⃗♹㔙扭㘴⣷䤓⚂∶
扭㘴Ⓙ⃊㨎ₙᇭ
Ⱁ㨫㌷∎䞷サ朗扭㘴⣷䤓㣍◰᧨庆㔙⚓呹䤓扭㘴⣷㘴Ⓙ㣍◰䤓㙡ⷣₙᇭⰑ
㨫㣍◰㞾㖐₏₹ⅴₙ㙡ⷣ᧨⒨扭㘴䶻ℛ₹朗扭㘴⣷ᇭⰑ㨫㣍◰孔㦘朗㙡ⷣ᧨
⒨∎䞷デ屓朗扭㘴⣷㡐扈䤓♵⮥₳朗᧨㨓㒟朗扭㘴⣷ᇭ
其兼㔙㓏㦘⛷扈✛6$7$扭㘴⣷扭㘴Ⓙ䫻䥧✛⏘洀┷ₙᇭ
㔙榏尐䞷䟄䤓↊⇤␅⸒␔捷兓ↅ扭㘴Ⓙ䦇ㄣ䤓扭㘴⣷ₙ᧨Ⱁ歝㓖✛㒥㧉乀㖖
䯉䋾ᇭ
䘿⦷㌷♾ⅴ㔙凸⮂孔⥭Ⓙ䟄厠㧉乀ₙℕ᧨㌷⃮♾ⅴ⦷㭏㩴₏⒖㢾⚵㷲デ㢅⏗
ₜ䥥ₙ凸⮂ᇭ
㔙㣍䯉⣷ᇬ枽䥧ᇬ熯㪖ᇬ㓻⭿⣷ᇬ㓢◿㧉✛↊⇤␅⸒⮥幍扭㘴Ⓙ䟄厠ₙᇭ
㔙ℳ㿐䟄⃊䟄䄟䤓䟄冕㙡⏴䟄䄟䤓⚝槱᧨㓢㆏䟄厠ᇭ
Ⱁ㨫₏⒖㷲デ᧨凸⮂执㼰㦘䥥ₙ᧨挲⃗庆␂桼䟄厠᧨㔙凸⮂孔⥭Ⓙ㧉乀ₙᇭ
25
扭㘴⣷広㢝✛⦍屲
+12VDC
+12VDC
+12VDC
+12VDC
+12VDC
+12VDC
+12VDC
+12VDC
+12V
+12V
+3.3 V
⃊䟄䄟扭㘴⣷᧤朗᧥ 3&,([SUHVV扭㘴⣷᧤朗᧥
ㄞ⒦$7$䟄䄟扭㘴⣷ 3&,([SUHVV扭㘴⣷᧤朗᧥
⮥幍扭㘴⣷᧤朗᧥
䟄☚欫唁 欫唁 䟄☚
㡯扭㘴
欫唁≰⚆≰⚆
欫唁≰⚆朗
欫唁≰⚆朗
欫唁≰⚆朗
+12VDC
+12VDC
+12VDC
+12VDC
9&38扭㘴⣷᧤朗᧥
欫唁≰⚆≰⚆
113
1022
1224
26
㟔椫幙㠼ℶ❐≬≽✛抏徶㘗㧒
Ⱁ㨫㠿䟄䄟♠䞮↊⇤桽欧᧨庆㫇⺈扨K丏◤䤓㟔椫幙㠼㷴洳᧨㒥✷幱
⒉➽ℶ❐䤓兞枏⟕ᇭ
⺞㉒᧶㝜⇫䟄⣷幍⮖♾厌㦘䞮✌☀棸ᇭⰑ㨫㌷ₜ䐮㌘扨K㷴洳᧨庆
✷幱₢₩ⅉ⛧ᇭⰑ㨫䟄䄟㦘␡䍮䘿廰᧨䟄冕㔧㠼᧨㒥䟄䄟㘴屵扖䁁⇢
挲⃗⦷↊⇤㍔⑄ₚ掌ₜ厌␜ㄵ∎䞷ᇭ
Ⱁ㨫㌷⸘孔㠿䟄䄟⚝᧨侊兮ₜ␜⚾┷᧨挲⃗庆㭏㩴ⅴₚ㷴洳
䫽≬㷲䫽㙡⏴ℳ㿐䟄戢⏴䵾᧨₣⬨⭐㙡ㄶ㦘䟄ᇭ>㔙♵₏₹⣷ↅ㙡
⏴䟄䄟㙡ㄶ᧨䦚⸒㢾⚵㷲デぴ⇫ᇭ@
㭏㩴䟄䄟ₙ䤓㓏㦘扭㘴⣷㢾⚵掌㷲䫽㙡⏴⃊㨎ᇭ
䟄厠㧉乀䟄䄟㆏␂ₙ䤓䟄冕㢾⚵㷲䫽㙡⏴⃊㨎᧻
䫽≬侊兮␔㼰㦘䩼恾ᇭ䫻ↅ㦘凉椆㒥扭㘴⣷扭㘴ₜ㇢♾⺋咃䩼恾ᇭ
Ⱁ㨫㌷㡯㽤䫽⸩᧨♾⺕㓏㦘捷ↅ掌⅝㧉乀₼♥⒉᧨⅔䟨ₚ⃊㨎✛䟄
䄟ᇭ㠼㆏㓏㦘㙡⯃᧨₏₏㭏㩴᧨䏅⚝␜⺕␅㙡⏴⚓呹䤓㙡ㄶᇭ
Ⱁ㨫㌷榏尐扪₏㷴◞┸᧨庆幎桽᧶
KWWSZZZRF]WHFKQRORJ\FRPVXSSRUWWLFNHWKWPO
㄃≬≽
2&=368㦘₩␔欕⏗䤓㄃≬≽㦜┰ᇭ呹徼⃿ℶ❐⃚㡴怆㄃᧨ℶ❐
≬幐㼰㦘㧟德✛ぴ唉ₙ䤓凉椆ᇭⰑ㨫⦷㷳㦮梃♠䞮↊⇤凉椆᧨庆勣八
2&=7HFKQRORJ\噆㈦扪₏㷴◞┸᧨ㄅ扟䞷㌷䤓≬≽㧒ᇭ
Ⱁ榏㙟⒉抏徶㘗㧒>50$@䟂庆᧨㌷♹榏抩扖㒠ⅻ䤓几䵨㙟ℳ₏↌䟂庆
◤᧨几⧏㢾᧶KWWSZZZRF]WHFKQRORJ\FRPVXSSRUWWLFNHWKWPO
  • Page 1 1
  • Page 2 2
  • Page 3 3
  • Page 4 4
  • Page 5 5
  • Page 6 6
  • Page 7 7
  • Page 8 8
  • Page 9 9
  • Page 10 10
  • Page 11 11
  • Page 12 12
  • Page 13 13
  • Page 14 14
  • Page 15 15
  • Page 16 16
  • Page 17 17
  • Page 18 18
  • Page 19 19
  • Page 20 20
  • Page 21 21
  • Page 22 22
  • Page 23 23
  • Page 24 24
  • Page 25 25
  • Page 26 26
  • Page 27 27
  • Page 28 28

OCZ COREXSTREAM SERIES 500 WATT PERF. Owner's manual

Type
Owner's manual

OCZ COREXSTREAM SERIES 500 WATT PERF. is a power supply unit with a continuous power output of 500 watts and features universal compatibility with Intel and AMD motherboards. It comes with a 24-pin ATX connector, an 8-pin EPS connector, and multiple SATA and PCI-E connectors to support various components including graphics cards, hard drives, and optical drives. Its high-quality components and protections ensure stable and reliable performance, making it suitable for gaming PCs and high-performance workstations.

Ask a question and I''ll find the answer in the document

Finding information in a document is now easier with AI