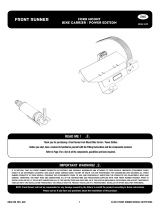
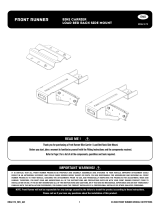
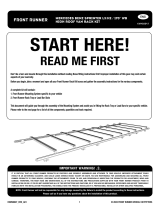
Front Runner RRAC214 is a bike carrier that allows you to securely transport your bike on your vehicle's roof rack. It features a thru-axle mount that fits most bikes, and a rear wheel mounting bracket that keeps your bike stable during transport. The carrier is easy to assemble and can be used on a variety of roof racks, including Front Runner's own SliiM, LoadBar, and SlimSport racks. With a sturdy and durable construction, the RRAC214 ensures a safe and reliable way to transport your bike, making it an excellent choice for cyclists who need a reliable and secure bike carrier.
Front Runner RRAC214 is a bike carrier that allows you to securely transport your bike on your vehicle's roof rack. It features a thru-axle mount that fits most bikes, and a rear wheel mounting bracket that keeps your bike stable during transport. The carrier is easy to assemble and can be used on a variety of roof racks, including Front Runner's own SliiM, LoadBar, and SlimSport racks. With a sturdy and durable construction, the RRAC214 ensures a safe and reliable way to transport your bike, making it an excellent choice for cyclists who need a reliable and secure bike carrier.


-
 1
1
-
 2
2
-
 3
3
-
 4
4


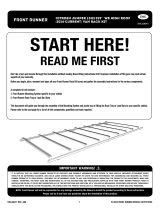
Front Runner RRAC214 is a bike carrier that allows you to securely transport your bike on your vehicle's roof rack. It features a thru-axle mount that fits most bikes, and a rear wheel mounting bracket that keeps your bike stable during transport. The carrier is easy to assemble and can be used on a variety of roof racks, including Front Runner's own SliiM, LoadBar, and SlimSport racks. With a sturdy and durable construction, the RRAC214 ensures a safe and reliable way to transport your bike, making it an excellent choice for cyclists who need a reliable and secure bike carrier.
Ask a question and I''ll find the answer in the document
Finding information in a document is now easier with AI
Related papers
-
 Front Runner RRAC189 Installation guide
-
 Front Runner RRAC172 Installation guide
-
 Front Runner WTAN070 Installation guide
-
 Front Runner KVLD001T Installation guide
-
 Front Runner KVMS006T Installation guide
-
 Front Runner KVMS004T Installation guide
-
 Front Runner KVCJ004T Installation guide
-
Front Runner KVRP005T Installation guide


