Grainfather S40 Operating instructions

Type
Operating instructions

This manual is also suitable for

Grainfather S40 is a small batch brewing system designed for homebrewers. It features a 40-liter capacity boiler, a digital controller for precise temperature control, a recirculation system for even mash lautering, and an immersion chiller for rapid wort cooling. With the Grainfather S40, you can easily brew a variety of beer styles, from lagers to IPAs, stouts, and more.

Grainfather S40 is a small batch brewing system designed for homebrewers. It features a 40-liter capacity boiler, a digital controller for precise temperature control, a recirculation system for even mash lautering, and an immersion chiller for rapid wort cooling. With the Grainfather S40, you can easily brew a variety of beer styles, from lagers to IPAs, stouts, and more.

INSTRUCTIONS
S40 BREWING SYSTEM
SOCKET GUIDE (NORTH AMERICA 220 V ONLY)
THANK YOU FOR CHOOSING THE GRAINFATHER S40 BREWING SYSTEM
The S40 has been developed for small batch brewing. Get started by following these quick and easy
instructions on how to assemble and use your S40 Brewing System. We recommend reading the following
safety information before use. Please also find enclosed, advice for cleaning and storing your S40.
NEMA 14-30R NEMA L14-30R
NEMA 14-50R NEMA 14-60R
4-pin modern
laundry dryer
supply, commonly
installed after 1996.
Brewing system is compatible by
using an adapter that includes a
ground connection and has
appropriate electrical certification.
4-pin electric
oven supply.
Brewing system is compatible by
using an adapter that includes a
ground connection and has
appropriate electrical certification.
NEMA 6-15R NEMA 6-20R
3-pin workshop and
power tools supply.
3-pin workshop
and power tools
supply.
3-pin laundry
dryer supply, most
common installation
prior to 1996.
This power supply socket is
NOT SUITABLE for use with the
brewing system. This socket provides
hot-hot-neutral connections. The
brewing system requires a ground
connection to perform safely in the
event of an electrical fault.
Brewing system is compatible by
using an adapter that includes a
ground connection and has
appropriate electrical certification.
Brewing system is compatible using
power cord supplied in-box.
POWER SUPPLY SOCKET DESCRIPTIONCOMPATIBILITY
NEMA L6-20R
NEMA 10-30R
NOT SUITABLE
WARNING! (NORTH AMERICA 220 V ONLY)
Please check your unit rating label for the voltage. If your unit is a North American 220 V product, the Power Cord,
Control Box and Boiler Body included in the box are designed to be used together with a 220 V supply. Using any of
these components with another product (including the 110 V S40) may result in hazards and equipment damage.
2
3
SAFETY INFORMATION
SAFETY CUTOUT
Read all instructions before using the S40.
Do not use the appliance for any purpose other than its intended use.
If the supply cord is damaged, it must be replaced by the manufacturer, its
service agent, or a similarly qualied persons to avoid hazards.
This appliance is intended to be used in household and similar applications,
such as sta kitchen areas in shops, oces and other working environments;
farm houses and by clients in hotels, motels and other residential type
environments; bed and breakfast type environments; catering and similar
non-retail applications.
Always unplug the unit before cleaning, during storage or in the event
of a fault.
To protect against re, electric shock, and injury, do not immerse cord/plugs
in water or other liquid.
The boiler, lid and pipes reach temperatures of up to 100°C (212°F) and
therefore must be handled with caution.
Never move the unit while it is in operation. The handle on the side of the
unit is only meant for moving the S40 when it’s not in use, empty and no
longer hot.
The S40 features a boil dry protection system, which will automatically switch
o the heating element if the water level is too low or a lm of debris has built up
on the base. To reset the safety cutout, switch o and unplug the unit. Empty any
liquid and press the reset button located at the bottom, underneath the boiler.
If there is a lm on the bottom of the boiler, remove and clean it, then try again.
NOTE: Not following the safety information above may void your warranty.
4
DIAGRAM
1. Lid handle
2. Lid
3. Support ring
4. Boiler body
5. Grain basket
6. Tap and nut
7. Immersion chiller
8. Immersion chiller hoses
9. Hose clamps
10. Recirculation arm
and wort sprayer
11. Tap adapter
12. Digital controller
13. Recirculation pipe
3
12
1
2
7
4
6
8
5
13
11
9
10
5
ASSEMBLING THE TAP
1. Place the o-ring over the threaded shaft on the
tap and place the shaft through the hole in the boiler.
2. From the inside of the boiler, place the Teon washer
over the threaded shaft and then screw the valve
nut onto the shaft. Tighten it by hand at rst then
gently use a spanner, but avoid over tightening.
3. Then attach the barb onto the tap faucet. Place the
barb nut over the top and screw it on by hand.
ASSEMBLING THE IMMERSION CHILLER
1. Connect the hoses to the inlets of the chiller so
there is about 2 cm of hose overlapping the pipes
of the chiller.
2. Thread the hose clamps onto the hose and use
a screwdriver to tighten the clamps on the
overlapped section.
ASSEMBLY
ASSEMBLING THE LID
1. Place the handle washers on the top and bottom of
the lid where the holes are. Put the screws through
the bottom of the lid through the handle and screw
on the nuts provided. Be careful not to over tighten.
3. Check which hose is connected to the immersion
chiller where the coil goes straight to the bottom
(see image below). On the other end of that hose,
attach the tap adapter and push the nal clamp
onto the end.
BARB NUT
Teflon
washer
Valve nut
o-ring
BARB
Tap faucet Threaded
shaft
6
ADD THE MASH WATER
1. Make sure that your S40 is on a stable, at surface
before you start brewing.
NOTE: We recommend placing the S40 on a solid
table that allows you to position your fermenter
underneath the tap on the side of the unit.
2. Add the volume of mash water required by your
recipe – you can use the advanced calculators
available on the free Grainfather App.
SET THE STRIKE TEMPERATURE
1. Insert the grain basket and cover with the lid.
2. Plug in the unit, set for 2300 W, and push the ‘on’
button. Now press ‘on/o’ on the digital controller
and press ‘set’. The default strike water temperature
of 72°C (162°F) will ash.
3. Use the Grainfather App to calculate your strike
temperature based on your recipe.
4. To change the temperature, press the ‘+’ or ‘–’
button, otherwise, press ‘set’ to agree to this strike
temperature.
NOTE: A strike temperature is necessary as
you are adding a large portion of grains at room
temperature to the hot water, so the temperature
will drop initially. You will use this to set your mash
temperature.
SET THE MASH TEMPERATURE
1. Once your water reaches the set strike temperature,
add the grain to the grain basket.
2. Mix thoroughly to avoid any dry clumps and for
even heat distribution. Continue until the mash
develops a porridge like consistency.
3. Now with the lid removed, change the set
temperature on the controller to the mash
temperature as per your recipe, and then press ‘set’.
4. The strike water temperature will ash, press the ‘+’
or ‘–’ button to adjust the temperature. Press ‘set’ to
conrm your mash temperature.
ATTACH THE RECIRCULATION PIPE
1. Now attach the recirculation arm to the valve at
the top of the boiler so the silicone hose and wort
sprayer are in the centre of the grain basket.
2. Connect the immersion chiller to your cold water
tap by attaching the hose with the tap adapter.
Leave the tap switched o until you’re ready to chill
your wort.
3. With the blue handled valve all the way open
(vertical) turn on the PUMP switch on the side of the
unit to start the pump.
NOTE: Use the valve to adjust the ow of
recirculation so that the unit maintains about
2 - 3 cm of water above the grain bed. Leave to
recirculate for 1 hour. Using the Grainfather App,
we also recommend measuring and heating your
sparge water at this point.
HOW TO USE
INSTALLING THE RECIRCULATION ARM
1. Attach the silicone hose to the barbed end of the
recirculation arm. On the other end of the silicone
hose, insert the wort sprayer.
Before use, we recommend cleaning your S40 and all of its components using the Grainfather High Performance Cleaner.
7
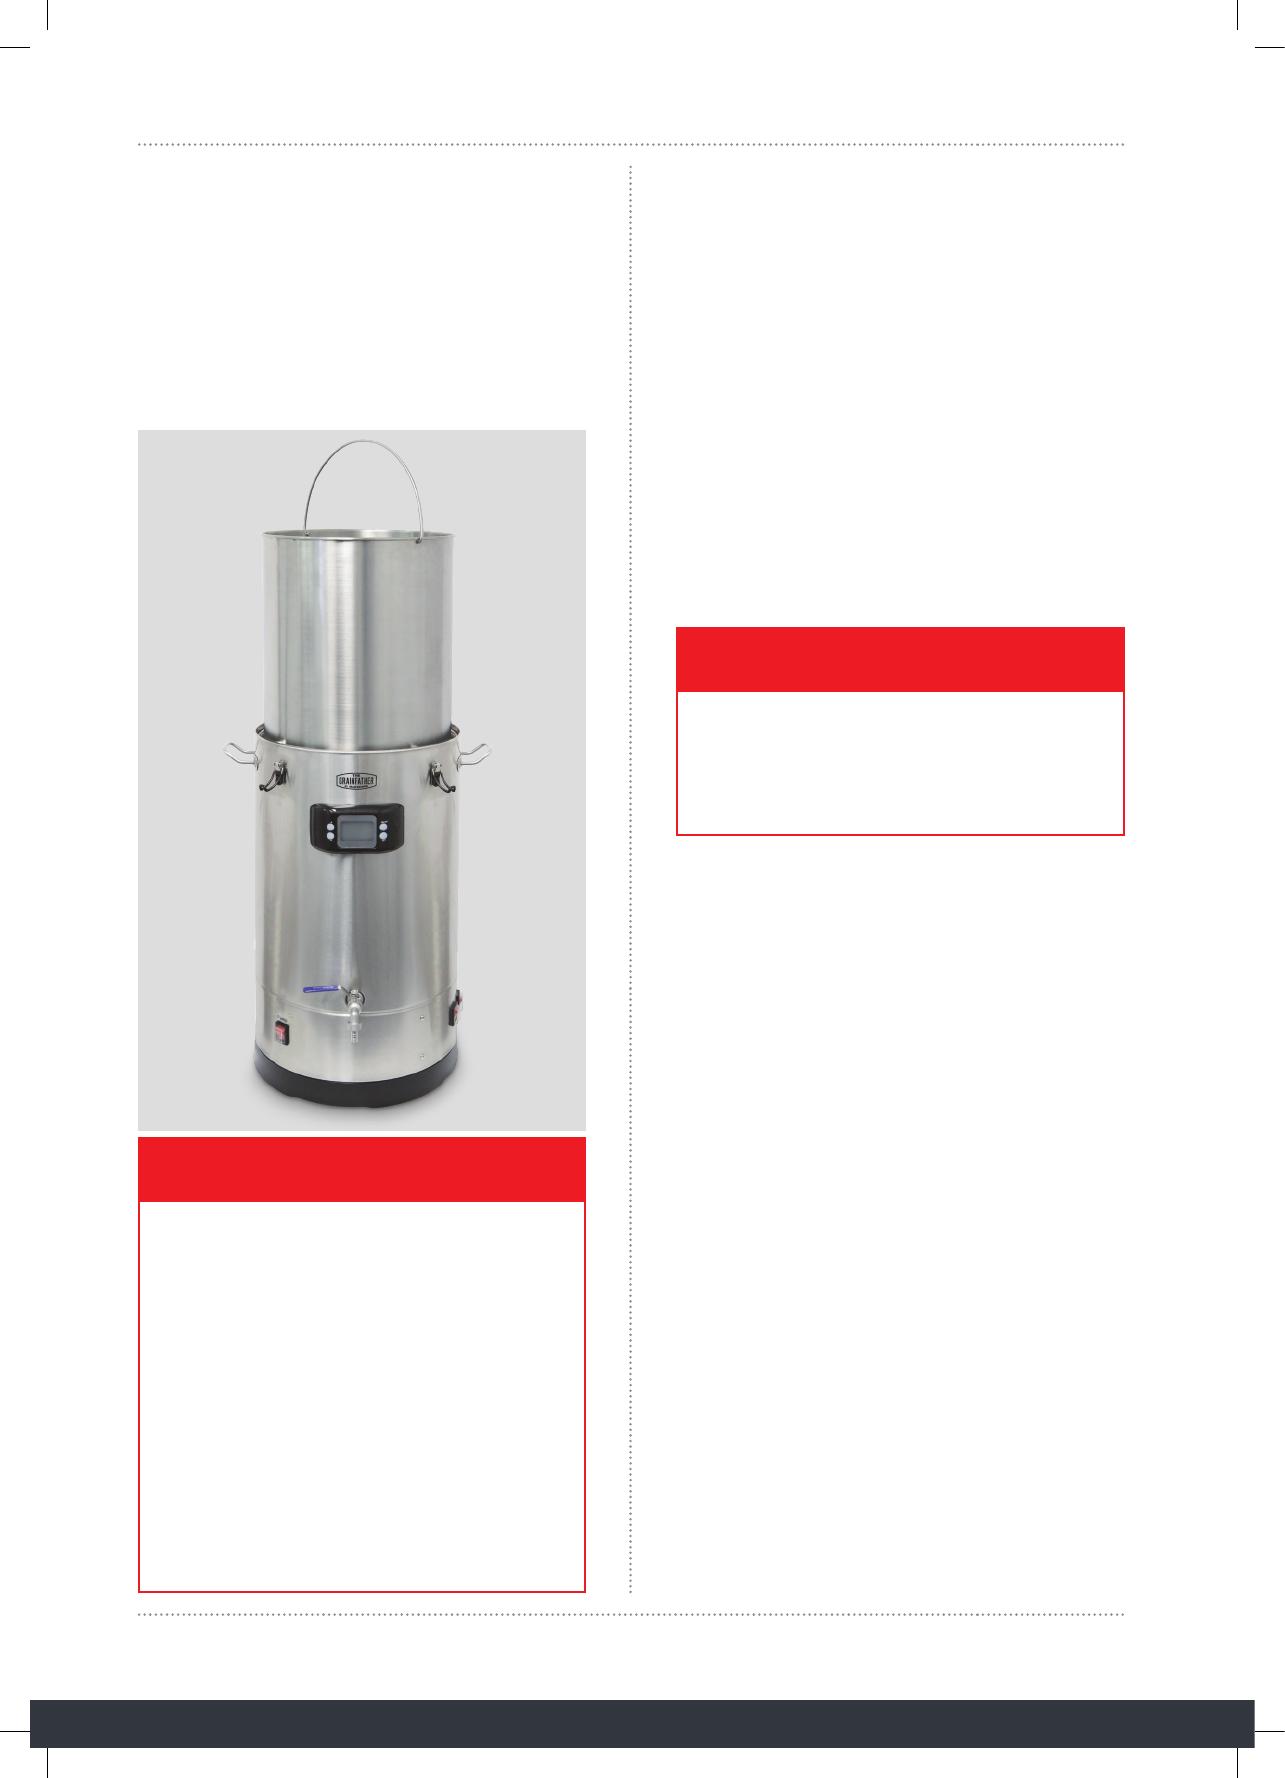
LIFTING THE GRAIN BASKET
1. When the mash has nished, turn o the pump. Close
the ball valve and remove the recirculation pipe.
2. Lift the grain basket, and then turn it 45 degrees so
that the feet at the bottom of the basket rest securely
on the support ring.
3. Press ‘set’, the temperature will ash. Press the ‘+’ or
‘–’ button to set the temperature to 98°C (208°F) and
press ‘set’ again to conrm your temperature.
SPARGE YOUR MASH
1. Gently and evenly pour the sparge water all over the
grains, and allow to drain.
BOIL YOUR WORT
1. After removing the grain basket, press ‘set’ and the
temperature will ash on the digital controller.
2. Press the ‘+’ or ‘–’ button to set the temperature to
103°C (218°F) and press ‘set’ again to conrm your
temperature.
3. Allow to boil for 1 hour.
NOTE: Refer to your recipe for when to add hop
additions during your boil.
4. When there’s 5 minutes boil time remaining, add the
immersion chiller to the boiler to sanitise it.
COOLING WITH THE IMMERSION CHILLER
1. Place the hose where the water will exit from the
immersion chiller into a drain or bucket to divert
the water.
2. Once you are ready to cool your wort, turn on
the cold water tap and leave it to run through
the immersion chiller until your wort reaches
fermentation temperature.
NOTE: The nal wort temperature will be within
approximately 5 degrees of your ground water
temperature.
3. To increase the cooling speed, stir the wort with
a sanitised spoon.
TRANSFERRING TO YOUR FERMENTER
1. Allow the cooled wort to settle.
2. Place your clean and sanitised fermenter under the
tap on the side of the boiler.
3. Open the tap and allow the wort to drain into your
fermenter.
4. Once all of your wort has been transferred into
your fermenter, add yeast, and leave to ferment
for the specied time, depending on your recipe.
CAUTION!
CAUTION!
During the boil, do not t the lid as you may
cause a boil-over. Check that the immersion
chiller contains no water after the rst use,
to ensure that water doesn’t shoot out when
lowered into the hot wort.
BE VERY CAREFUL not to twist the basket
while the basket is in the sparge position which
could knock it o the support ring. If the sparge
is “stuck” (not draining), then remove the top
plate (if applicable), lower the basket and slice
the grain bed with a stainless steel paddle or
similar. Cut through the stuck grain from the
centre towards the outside repeatedly until it
loosens. Then return the basket to the sparge
position to continue sparging. Always ensure
the Support Ring ts tightly into its groove and
is held in place by the Support Ring Retainer.
If you remove the Support Ring for cleaning,
ensure that it is correctly reinstalled along
with the Support Ring Retainer.
www.grainfather.com
Version: 3
IMPORTANT SAFEGUARDS:
READ AND FOLLOW ALL INSTRUCTIONS
CAUTION –
Risk of res and electric shock.
Do not immerse in water.
SAVE ALL WARNINGS AND INSTRUCTIONS FOR FUTURE REFERENCE
FOR COMMERCIAL AND FOR INDOOR USE ONLY
WARNING
AVERTISSEMENT
RISK OF ELECTRIC SHOCK . DO NOT OPEN.
RISQUE DE CHOC ÉLECTRIQUE. NE PAS OUVRIR
Download the FREE
Grainfather App
Always disconnect the appliance before cleaning.
Before rst use, rinse with clean water to remove
any dust and cardboard debris.
Immediately after use, the S40 and all of
its components should be cleaned and dried
thoroughly. If the remnants of wort and malt
appear on the surfaces, do not let these dry out
as this will signicantly complicate the cleaning
process.
We recommend using the Grainfather High
Performance Cleaner as it removes the need for
tedious scrubbing.
Do not store in a damp area as this could cause
damage to the product.
ADVICE FOR CLEANING AND STORAGE
GET IN TOUCH:
Email: info@grainfather.com
NZ +64 6 888 3027
AU +61 2 8074 3798
US +1 (562) 354-4603
UK/EU +44 1750 432048
RESOURCES: Check out our YouTube Channel for helpful videos. For more information visit our FAQ’s page
shop.grainfather.com/index.php/faq
  • Page 1 1
  • Page 2 2
  • Page 3 3
  • Page 4 4
  • Page 5 5
  • Page 6 6
  • Page 7 7
  • Page 8 8

Grainfather S40 Operating instructions

Type
Operating instructions
This manual is also suitable for

Grainfather S40 is a small batch brewing system designed for homebrewers. It features a 40-liter capacity boiler, a digital controller for precise temperature control, a recirculation system for even mash lautering, and an immersion chiller for rapid wort cooling. With the Grainfather S40, you can easily brew a variety of beer styles, from lagers to IPAs, stouts, and more.

Ask a question and I''ll find the answer in the document

Finding information in a document is now easier with AI