INSTALLATION INSTRUCTIONS
Model 45657LED / CP157174
WARNING:
• This fixture is intended for installation in accordance with the
National Electric Code (NEC) and all local code specifications.
If you are not familiar with code requirements, installation by a
certified electrician is recommended.
• This lighting fixture is suitable for indoor use, dry,
or damp locations.
• The LED light output is strong enough to injure human eyes.
Precautions must be taken to prevent looking directly at the
LED’s with unaided eyes for more than a few seconds.
DIMMING: This LED fixture is compatible with most standard
incandescent dimmers, LED dimmers, and electronic low voltage
dimmers. For optimal performance, an electronic low voltage
dimmer should be used.
CLEANING: Always be certain that electric current is turned off
before cleaning.
• Only a soft damp cloth should be used. Harsh cleaning
products may damage the finish.
1) TURN OFF POWER.
IMPORTANT: Before you start, NEVER attempt any work
without shutting off the electricity until the work is done.
a) Go to the main fuse, or circuit breaker, box in your
home. Place the main power switch in the “OFF” position.
b) Unscrew the fuse(s), or switch “OFF” the circuit breaker
switch(s), that control the power to the fixture or room
that you are working on.
c) Place the wall switch in the “OFF” position. If the fixture
to be replaced has a switch or pull chain, place those in
the “OFF” position.
2) Attach mounting plate to outlet box with the screws provided.
a) Remove crossbar from canopy by removing four (4)
screws on back of canopy.
b) Carefully place glass onto fixture.
c) Place crossbar on top of glass and canopy. Secure with
four (4) screws removed previously.
3) Attach the grounding conductor to the mounting plate.
Secure by tightening the green ground screw. Never connect
black or white power supply wires to the grounding screw.
4) Connect the black fixture wire to the black supply wire with
a suitable wire connector. Connect the white fixture wire to
the white supply wire with a suitable wire connector.
5) Carefully push wire connections back into outlet box making
sure all connections remain secure.
6) Push decorative housing to wall.
7) Secure decorative housing to mounting plate with the
provided screws.
Date Issued: 04/21/2016 IS-45657LED-US
We’re here to help 866-558-5706
Hrs: M-F 9am to 5pm EST
SEE OTHER SIDE FOR SPANISH TRANSLATIONS.
VEA EL OTRO LADO DE TRADUCCIONES AL ESPAÑOL.
This device complies with part 15 of the FCC Rules. Operation is
subject to the following two conditions: (1) This device may not
cause harmful interference, and (2) this device must accept any
interference received, including interference that may cause un-
desired operation.
Note: This equipment has been tested and found to comply with
the limits for a Class B digital device, pursuant to part 15 of the
FCC Rules. These limits are designed to provide reasonable pro-
tection against harmful interference in a residential installation.
This equipment generates, uses and can radiate radio frequency
energy and, if not installed and used in accordance with the in-
structions, may cause harmful interference to radio communica-
tions. However, there is no guarantee that interference will not
occur in a particular installation. If this equipment does cause
harmful interference to radio or television reception, which can
be determined by turning the equipment off and on, the user is
encouraged to try to correct the interference by one or more of
the following measures:
• Reorient or relocate the receiving antenna.
• Increase the separation between the equipment and receiver.
• Connect the equipment into an outlet on a circuit different from
that to which the receiver is connected.
• Consult the dealer or an experienced radio/TV technician for
help.
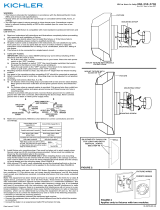
OUTLET BOX
CAJA DE CONEXION
MOUNTING PLATE
DE MONTAJE A LA CAJA
SCREW
TORNILLO
SCREW
TORNILLO
DECORATIVE HOUSING
CUBIERTA DECORATIVA
CROSSBAR
BARA TRANSVERSAL
STEP 2
Page is loading ...

INSTALLATION INSTRUCTIONS
Model 45657LED / CP157174
WARNING:
• This fixture is intended for installation in accordance with the
National Electric Code (NEC) and all local code specifications.
If you are not familiar with code requirements, installation by a
certified electrician is recommended.
• This lighting fixture is suitable for indoor use, dry,
or damp locations.
• The LED light output is strong enough to injure human eyes.
Precautions must be taken to prevent looking directly at the
LED’s with unaided eyes for more than a few seconds.
DIMMING: This LED fixture is compatible with most standard
incandescent dimmers, LED dimmers, and electronic low voltage
dimmers. For optimal performance, an electronic low voltage
dimmer should be used.
CLEANING: Always be certain that electric current is turned off
before cleaning.
• Only a soft damp cloth should be used. Harsh cleaning
products may damage the finish.
1) TURN OFF POWER.
IMPORTANT: Before you start, NEVER attempt any work
without shutting off the electricity until the work is done.
a) Go to the main fuse, or circuit breaker, box in your
home. Place the main power switch in the “OFF” position.
b) Unscrew the fuse(s), or switch “OFF” the circuit breaker
switch(s), that control the power to the fixture or room
that you are working on.
c) Place the wall switch in the “OFF” position. If the fixture
to be replaced has a switch or pull chain, place those in
the “OFF” position.
2) Attach mounting plate to outlet box with the screws provided.
a) Retirer la barre transversale du couvercle en enlevant
les quatre vis situées à l’arrière du couvercle.
b) Placer soigneusement le verre dans le luminaire.
c) Replacer la barre transversale au-dessus du verre et du
couvercle. Fixer avec les quatre vis enlevées
précédemment.
3) Attach the grounding conductor to the mounting plate.
Secure by tightening the green ground screw. Never connect
black or white power supply wires to the grounding screw.
4) Connect the black fixture wire to the black supply wire with
a suitable wire connector. Connect the white fixture wire to
the white supply wire with a suitable wire connector.
5) Carefully push wire connections back into outlet box making
sure all connections remain secure.
6) Push decorative housing to wall.
7) Secure decorative housing to mounting plate with the
provided screws.
Date Issued: 04/21/2016 IS-45657LED-CB
We’re here to help 866-558-5706
Hrs: M-F 9am to 5pm EST
This device complies with part 15 of the FCC Rules. Operation is
subject to the following two conditions: (1) This device may not
cause harmful interference, and (2) this device must accept any
interference received, including interference that may cause un-
desired operation.
Note: This equipment has been tested and found to comply with
the limits for a Class B digital device, pursuant to part 15 of the
FCC Rules. These limits are designed to provide reasonable pro-
tection against harmful interference in a residential installation.
This equipment generates, uses and can radiate radio frequency
energy and, if not installed and used in accordance with the in-
structions, may cause harmful interference to radio communica-
tions. However, there is no guarantee that interference will not
occur in a particular installation. If this equipment does cause
harmful interference to radio or television reception, which can
be determined by turning the equipment off and on, the user is
encouraged to try to correct the interference by one or more of
the following measures:
• Reorient or relocate the receiving antenna.
• Increase the separation between the equipment and receiver.
• Connect the equipment into an outlet on a circuit different from
that to which the receiver is connected.
• Consult the dealer or an experienced radio/TV technician for
help.
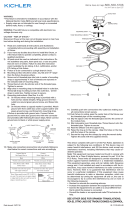
OUTLET BOX
BOÎTE DE JONCTION
MOUNTING PLATE
LA PLAQUE DE MONTAJE
DECORATIVE HOUSING
BOÎTIER DÉCORATIF
SCREW
VIS
SCREW
VIS
SEE OTHER SIDE FOR CANADIAN FRENCH TRANS-
LATIONS.
VOIR L’AUTRE CÔTÉ POUR LES CANADIENS TRA-
DUCTIONS EN FRANÇAIS.
STEP 2
CROSSBAR
BARRE TRANSVERSALE
Page is loading ...
/


