Page is loading ...

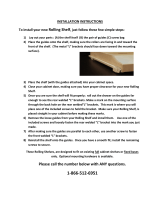
STEP 1: START WITH THE LARGEST SHELF FIRST Suggested tools:
MEASURE CABINET OPENING WIDTH IN THE Drill, 9/64 drill bit, hammer, wood glue,
CABINET WHERE THE SHELF WILL MOUNT. Phillips screwdriver, Saw (table, saber, hand or miter)
Small level, Safety glasses, tape measure
STEP 2: DEDUCT 1” FROM THE SMALLEST WIDTH CABINET OPENING
(THIS IS THE DEDUCTION FOR THE DRAWER GUIDES).
.
NOTE: IF YOUR CABINET HAS 2 DOORS AND THE DOORS OR HINGES PROTRUDE INTO
THE CABINET OPENING, SUBTRACT 1” FROM THAT FINAL WIDTH
MEASUREMENT, TO ASSURE PROPER CLEARANCE.
STEP 3: CUTTING PARTS TO SIZE
CUT FRONT, BACK, AND BOTTOM TO WIDTH YOU MEASURED.
STEP 4: ASSEMBLE SHELF
A) APPLY WOOD GLUE TO DOVETAILS ON SIDES.
B) SLIDE THE TWO SIDE PIECES INTO BACK.
C) REPEAT STEPS A AND B FOR FRONT
D) PLACE A CLAMP ON SIDE OF DRAWER TO HOLD BACK
AND SIDES TOGETHER. IF YOU DON’T HAVE ANY
CLAMPS, RATCHET STRAPS WORK WELL .
THIS WILL HOLD THE JOINT UNTIL THE GLUE DRIES.
MAKE SURE THE BOX IS SQUARE BEFORE GLUE DRIES.
STEP 5: FINISHING: (IF YOU PURCHSED A FACTORY FINISHED SHELF, SKIPT TO
STEP 6).
DRAWER CAN BE LEFT IN FACTORY CONDITION OR YOU CAN
STAIN WITH OIL BASED STAIN THEN FINISH WITH A
LACQUER BASED SEALER AND TOP COAT.
.
STEP 6: DRILL BOTTOM AND ATTACH
IF BOTTOM HAD TO BE CUT TO SIZE, USE A 9/64” DRILL
BIT AND COUNTERSINK TO DRILL HOLES TO MATCH OPPOSITE
SIDE OF BOTTOM.
A) FLUSH BOTTOM WITH FRONT LIP OF FRONT PIECE AND
FLUSH LEFT AND RIGHT SIDES. FASTEN USING SCREWS THROUGH
ALL HOLES.
STEP 7: APPLY GUIDES
A) GUIDES ARE MARKED “L” (LEFT) AND “R” (RIGHT) SIDES. HOLD LEFT GUIDE ON LEFT SIDE AND FLUSH WITH FRONT
OF SHELF. (THE WHEEL ON THE GUIDE SHOULD BE IN THE BACK OF THE SHELF WHEN INSTALLED CORRECTLY).
INSERT 3 - 5/8” SCREWS THROUGH GUIDE INTO BOTTOM. MAKE SURE GUIDES ARE TIGHT AGAINST SIDE AND FLUSH
WITH FRONT. (SEE PICTURE)
B) FULL EXTENSION GUID

STEP 8: INSERT GUIDES INTO CABINET
A) START WITH SHELF THAT WILL MOUNT AT BOTTOM OF CABINET
B) ATTACH LEFT MOUNTING SOCKET (PLASTIC, STANDARD GUIDES/METAL, FULL EXTENSION GUIDES) TO REAR OF
GUIDE. 1 “R” BRACKET AND 1 ”L” BRACKET ARE SUPPLIED.
NOTE: IF YOUR DOOR PROTRUDES NOW IS THE TIME TO USE THE
SPACERS (PROVIDED) BY PLACING BEHIND GUIDES AND USING
1 ½” SCREWS THROUGH GUIDE AND INTO FACE FRAME ( PICTURE).
C) IF YOU DO NOT NEED TO USE SPACERS JUST ATTACH LEFT
GUIDE TO FACE FRAME HOLDING GUIDE IN 1/8” FROM FRONT
EDGE OF CABINET AND FASTEN USING 5/8” SCREWS.
D) REPEAT STEPS B AND C FOR RIGHT SIDE.
NOTE: CHECK TO SEE IF YOU’RE CABINET HAS A BACK THICK AND STRONG ENOUGH TO
SUPPORT THE SHELF IF NOT, ATTACH SOME
½” PLYWOOD TO THE WALL INSIDE OF THE CABINET AND FASTEN THE
MOUNTING SOCKETS TO THE PLYWOOD. BEING SURE SOCKETS ARE PARALLEL TO FRONT END OF GUIDES.
STEP 9: PLACE A SMALL LEVEL ON TOP OF GUIDE TO MAKE IT LEVEL.
NOW SET THE GUIDE SO IT IS SQUARE WITH THE FACE OF THE CABINET.
SET ONE SCREW TO HOLD GUIDE IN PLACE.
STEP10: WITH STANDARD GUIDES--INSERT SHELF WITH GUIDES ATTACHED AT AN ANGLE AND INSERT INTO
TOP FRONT CABINET MOUNTED SIDES. FULL EXTENSION GUIDES ARE INSERTED STRAIGHT IN.
STEP 11: SHELF SHOULD SLIDE FREELY BACK AND FORTH WITH NO RUBBING SOUNDS. IF THIS OCCURS ADJUST
REAR MOUNTING SOCKETS IN OR OUT ACCORDINGLY.
NOTE: IF SHELF DOES NOT GO INTO THE ADJOINING SLIDES YOU MIGHT HAVE BUILT
THE SHELF TOO LARGE. START AT STEP ONE AND CHECK YOUR PROCEDURES.
STEP 13: ONCE SHELVES SLIDE NICELY, INSERT 2 MORE 5/8” SCREWS IN EACH REAR MOUNTING SOCKET TO SECURE.
CONGRATULATIONS, YOU’RE DONE!!!
FAQ’S
Q: When I push my rolling shelf in, it falls off the guide on the back left side.
A: Adjust the guides making sure they are parallel and level.
Q: There is a rubbing sound when the guide is pushed in.
A: Check if the screws are rubbing on the guide . It is also possible the guides in the back may be too close or the guides might be angled down from the
front of the cabinet to the back, causing the shelf to rub on the bottom of the cabinet.
Q: I accidentally made my shelf too small.
A: Don't worry; just add some metal washers to the sides on top of the spacer to bring the guides in.
Q: I accidentally made my shelf too big.
A: Simply file down or cut the supplied “spacer”. It will still hold just as well. Or, if it is over “too big”, you may need to disassemble one side of the shelf and
cut down accordingly.
Q: One side of the shelf in the front does not sit on the guide.
A: This means that the opposite side of the side that is lifted is too low in the back. Move the rear mount socket up, and adjust accordingly as needed.
FOR QUESTIONS OR MISSING PARTS PLEASE CALL 1-866-512-6951
/