Instruction Manual
DE: Bedienungsanleitung - de.startech.com
FR: Guide de l'utilisateur - fr.startech.com
ES: Guía del usuario - es.startech.com
IT: Guida per l'uso - it.startech.com
NL: Gebruiksaanwijzing - nl.startech.com
PT: Guia do usuário - pt.startech.com
Manual Revision: 09/20/2012
For the most up-to-date information, please visit: www.startech.com
CAB1019WALL
10U 19in Wall Mount Server Rack Cabinet with Fan
Installation (Drywall)
NOTE: These instructions are for installing the cabinet into drywall. If
installing the cabinet into brick or cement, please see the reverse side.
1. To ensure the stability of your cabinet, StarTech.com recommends
that you secure the unit to a 1” thick piece of plywood that has
been mounted to the wall studs. Locate the studs in your wall
and mount a sheet of plywood, making sure that the plywood is
securely connected.
2. Mount the unit to the plywood using lag screws.
Side View
Front View
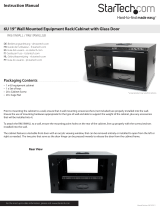
Packaging Contents
• 10U Server Rack Cabinet
• 20x M5 Screws
• 20x M5 Cage Nuts
• 4x Wall Anchor
• 4x Lag Screws
• 2x Keys
• Instruction Manual

Use of Trademarks, Registered Trademarks, and other Protected Names and Symbols
This manual may make reference to trademarks, registered trademarks, and other protected names and/or symbols of third-party companies not related in any way to
StarTech.com. Where they occur these references are for illustrative purposes only and do not represent an endorsement of a product or service by StarTech.com, or an endorsement of the product(s)
to which this manual applies by the third-party company in question. Regardless of any direct acknowledgement elsewhere in the body of this document, StarTech.com hereby acknowledges that all
trademarks, registered trademarks, service marks, and other protected names and/or symbols contained in this manual and related documents are the property of their respective holders.
Technical Support
StarTech.com’s lifetime technical support is an integral part of our commitment to provide industry-leading solutions. If you ever need help with your product, visit www.startech.com/support and access
our comprehensive selection of online tools, documentation, and downloads.
For the latest drivers/software, please visit www.startech.com/downloads
Warranty Information
This product is backed by a lifetime warranty.
In addition, StarTech.com warrants its products against defects in materials and workmanship for the periods noted, following the initial date of purchase. During this period, the products may be returned
for repair, or replacement with equivalent products at our discretion. The warranty covers parts and labor costs only. StarTech.com does not warrant its products from defects or damages arising from
misuse, abuse, alteration, or normal wear and tear.
Limitation of Liability
In no event shall the liability of StarTech.com Ltd. and StarTech.com USA LLP (or their ocers, directors, employees or agents) for any damages (whether direct or indirect, special, punitive, incidental,
consequential, or otherwise), loss of prots, loss of business, or any pecuniary loss, arising out of or related to the use of the product exceed the actual price paid for the product. Some states do not allow
the exclusion or limitation of incidental or consequential damages. If such laws apply, the limitations or exclusions contained in this statement may not apply to you.
Installation (Brick or Cement Wall)
NOTE: These instructions are for installing the cabinet into a brick
or cement wall. If installing the cabinet into drywall, please see the
reverse side.
1. Using Figure 1 (below), mark the location of the four screw holes.
2. Drill each hole 1.57” (40mm) deep and 0.48” (11.1mm” across.
3. Connect Parts A and B of the wall anchor (see Figure 2) and insert
the wall anchor into the hole (see Figure 3).
4. Hammer the anchor until it is ush with the wall (see Figure 4).
5. When you have mounted all four wall anchors, position the
cabinet so it is lined up with the wall anchors and screw the unit
into place.
/
