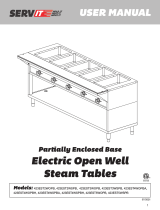
APW Wyott PSST-2 Operating instructions

Category
Food warmers
Type
Operating instructions
1
INSTALLATION
AND
OPERATING
INSTRUCTIONS
MODELS: SST, PSST
Sealed Steam Table
INTENDED FOR OTHER THAN HOUSEHOLD USE
RETAIN THIS MANUAL FOR FUTURE REFERENCE
UNIT MUST BE KEPT CLEAR OF COMBUSTIBLES AT ALL TIMES
FOR YOUR SAFETY: Do not store or use gasoline or other flammable vapors and
liquids in the vicinity of this or any other appliance.
WARNING: Improper installation, adjustment, alteration, service or maintenance can
cause property damage, injury or death. Read the Installation, Operating and
Maintenance Instructions thoroughly before installing or servicing this equipment.
Improper installation, adjustment, alteration, service or maintenance can cause property damage, injury or
death. Read the Installation, Operating and Maintenance Instructions thoroughly before installing or
servicing this equipment.
This equipment has been engineered to provide you with year-round dependable service when used
according to the instructions in this manual and standard commercial kitchen practices.
Phone: +1 (214) 421-7366
Fax: +1 (214) 565-0976
Toll Free: +1 (800) 527-2100
Website: www.apwwyott.com
E-mail: info@apwwyott.com
P/N 8898750 3/11
APWWYOTT
729 Third Avenue
Dallas, TX 75226
2
TABLE OF CONTENTS
SECTION
ITEM
SECTION
ITEM
PAGE
1
Owner’s Information
7
Cleaning
8
2
Safety Information
8
Troubleshooting
9
3
Specifications
9
Preventative Maintenance
9
4
Installation Instructions
10
Wiring Diagrams
12
5
Operations Instructions for
ST and PST
11
Parts Lists & Exploded
Views
14
6
Operations Instructions for
SST AND PSST
12
Warranty
17
WARNING: In Europe, appliance must be connected by an earthing cable to all other
units in the complete installation and thence to an independent earth connection in
compliance with EN 60335-1 and/or local codes.
WARNING: An earthing cable must connect the appliance to all other units in the
complete installation and from there to an independent earth connection.
1) OWNER’S INFORMATION
General Information:
1. Always clean equipment thoroughly before first use. (See general cleaning instructions).
2. Check rating label for your model designation and electrical rating.
3. For best results, use stainless steel counter tops.
General Operation Instructions:
1. All food-service equipment should be operated by trained personnel.
2. Do not allow your customers to come in contact with any surface labeled "CAUTION HOT".
3. Never pour cold water into dry heated units.
4. Do not cook, or hold food directly in wells. Always use steam table pans or inserts.
5. Never hold food below 150°F
Warranty Information:
Reliability Backed By APW Wyott’s Warranty:
All APW Wyott’s Steam Tables are backed by a one year parts and labor warranty, including On-Site
Service calls within 50 miles of authorized service technicians.
Service Information:
Service Hotline (800) 733-2203
IMPORTANT FOR FUTURE REFERENCE
Please complete this information and retain this manual for the life of the equipment.
For Warranty Service and/or Parts, this information is required.
Model Number
Serial Number
Date Purchased
3
2) SAFETY INFORMATION
APW Wyott equipment is designed, built, and sold for commercial use and should be operated by trained
personnel only. Clearly post all CAUTIONS, WARNINGS and OPERATING INSTRUCTIONS near each
unit to insure proper operation and to reduce the chance of personal injury and/or equipment damage. This
product is used for the cooking, defrosting or re-thermalization of food products only.
Always disconnect power before servicing the unit. Surfaces will remain hot after power has been turned
off. Allow unit to cool before cleaning or servicing. Never clean the unit by immersing it in water. The unit is
not protected against water jets; DO NOT CLEAN THE STEAM TABLE WITH A WATER JET. Always
clean equipment properly before first use.
Safety Signs and Messages
The following Safety signs and messages are placed in this manual to provide instructions and identify
specific areas where potential hazards exist and special precautions should be taken. Know and
understand the meaning of these instructions, signs, and messages. Damage to the equipment, death or
serious injury to you or other persons may result if these messages are not followed.
This message indicates an imminently hazardous situation which, if not
avoided, will result in death or serious injury.
This message indicates a potentially hazardous situation, which, if not
avoided, could result in death or serious injury.
This message indicates a potentially hazardous situation, which, if not
avoided, may result in minor or moderate injury. It may also be used to
alert against unsafe practices.
This message is used when special information, instructions or
identification are required relating to procedures, equipment, tools,
capacities and other special data.
3) SPECIFICATIONS: SST AND PSST
SST,PSST MODEL
VOLTS
WATTS
AMPS
PH
SST-2, PSST-2
120
1500
12.5
1
SST-3, PSST-3
120
2250
18.75
1
SST-4, PSST-4
120
3000
25
1
SST-5, PSST-5
120
3750
31.25
1
SST-2, PSST-2
208
1500
7.2
1
SST-3, PSST-3
208
2250
10.8
1
SST-4, PSST-4
208
3000
14.4
1
SST-5, PSST-5
208
3750
18.0
1
SST-2, PSST-2
240
1500
6.3
1
SST-3, PSST-3
240
2250
9.4
1
SST-4, PSST-4
240
3000
12.5
1
SST-5, PSST-5
240
3750
15.6
1
The Data plate is located on the right hand side bottom panel, where the power cord comes into the unit.
4
4) SPECIFICATIONS: ST AND PST
SST,PSST MODEL
VOLTS
WATTS
AMPS
PH
ST-2, PST-2
120
1000
8.3
1
ST-3, PST-3
120
1500
12.5
1
ST-4, PST-4
120
2000
16.7
1
ST-5, PST-5
120
2500
20.8
1
ST-2, PST-2
208
1500
7.2
1
ST-3, PST-3
208
2250
10.8
1
ST-4, PST-4
208
3000
14.4
1
ST-5, PST-5
208
3750
18.0
1
ST-2, PST-2
240
1500
6.3
1
ST-3, PST-3
240
2250
9.4
1
ST-4, PST-4
240
3000
12.5
1
ST-5, PST-5
240
3750
15.6
1
Power Cord:
Six (6) foot, 3 wire grounded cord. If the supply cord is damaged, the manufacturer, or an authorized
service agent, must replace it in order to avoid a hazard and warranty. Please contact the factory by calling
the 800 # located on the unit.
5) INSTALATION INSTRUCTIONS SST and PSST
If the carton appears damaged, or damage is discovered once the carton is opened, stop
immediately and contact the freight company to file a damage claim.
CAUTION: The Steam Table is shipped without the legs, under shelf or cutting board
shelf attached. Please read the installation and operation instruction before operating
the unit. Remove all supports and packaging materials before operating the unit.
Failure to remove all packaging materials may lead to a fire and / or damage to the
appliance.
1. Remove all external packaging that is protecting top portion of unit
2. Remove all internal packaging to the unit, if present.
3. Visually inspect all external and internal portions of unit for damage.
4. Wipe down the exterior of the unit using a damp cloth with warm water. Do not use abrasive pads or
cleaners as they will damage the stainless steel surface.
Note: Ambient Conditions - Make sure that the operating location is in an area where the
ambient temperature is held constant (minimum 70°F). Please avoid areas such as near
exhaust fans and air conditioning ducts.
Warning! Operating environment
Ensure that operation location is at a reasonable distance from combustible walls and materials
otherwise combustion or discoloration could occur.
Caution! Operating environment
Place unit on a stable, level floor. The unit must be level, both front and back and left to right, in
order to maintain an equal water depth throughout the wells. To eliminate rocking or adjust
height turn the adjustable feet in the proper direction until the desired results are obtained.
Note: Maximum adjustment is 1 inch
5
5. A ¾ ball valve is supplied with every unit. The installer must provide a suitable drain connection.
Over heating the ball valve during installation can cause damage to the ball valve. This equipment
is to be installed to comply with applicable federal, State or local plumbing codes.
6. Before plugging unit into wall outlet or permanently electrical connecting, the unit should be
adjusted to the desired height and align with other equipment.
7. The voltage and wattage ratings of this steam table are given on the device nameplate. Connect the
steam table to a circuit having a voltage and type of current similar to that stamped on the device
nameplate. For movable equipment a proper cord and plug are included for connection to the
matching power supply outlet.
8. Plug unit into grounded electrical outlet with correct voltage, and plug configuration.
a. Warning! Using any receptacle that is not designed to match the attached cord and plug
MAY cause personal injury and WILL void your warranty. Please attach the Steam Table, to
an individual branch circuit
9. For permanent installations, connections to supply line may be made through conduit or armored
cable. For supply connections use No. 12 AWG or larger wires suitable for at least 90°C (194°F).
Use copper wire for power supply or suitable copper to aluminum wire connector.
10. The body of the appliance should be grounded by connecting the ground stud provided in the
junction box to a good electrical ground, such as a water pipe, a steam pipe, or a grounded supply
conduit.
11. The steam table is not fused and consequently must be connected to a fused circuit equipped with
suitable disconnect means, as required by local code authorities.
12. To assembly the units follow steps 1 thru 6 listed below.
UNIT IS SHIPPED UNASSEMBLED. TO MEET NATIONAL SANITATION
FOUNDATION STANDARDS, THE INSTALLER MUST USE A NSF APPROVED
SILICONE SEALANT TO SEAL THE SEAMS BETWEEN THE
UNIT AND ASSEMBLED PARTS
Step 1
Insert the bullet leg into the 4 tubes. If the unit was supplied with caster skip this step and install caster before
turning the unit over.
When inserting bullet legs use a soft mallet only. To avoid damaging the leg inserts.
6
Step 2
Place the unit on the floor upside down. Be sure to protect the top surface and well from damage when the unit is
placed on it top on the floor. Once the legs are in place tighten the set screws in the leg inserts.
Step 3
Slide the shelf over the legs.
7
6"
Step 4
Locate the shelf at minimum 6 inches from the floor to allow for cleaning and to comply with NSF standards. Tighten
the 4 set screws located in each corner of the shelf leg inserts.
A
DETAIL A
Step 5
Do not install
screw until
shelf is installed
8
Install the shelf support brackets on each end. When positioning the bracket only put the bottom screw in place. Do
not install the top screw until the shelf has been installed.
B
DETAIL B
Step 6
Place the shelf over the support brackets and install the top screw in each shelf bracket. Install the cut board stops
through the shelf and the shelf support brackets at each end as shown.
6) OPERATION INSTRUCTION FOR ST AND PST
1. PREHEAT - To preheat individual sections, turn the switch dial to high for 10 - 20 minutes before
the foods are placed in the compartments. Insure that pan openings are covered to prevent loss of
heat.
2. Water Is not necessary in the ST OR PST models.
a. Note If water is used the ST or PST models a spillage pan is required. When air is
used the spillage is not required or recommended.
b. Air. Being easier and quicker to heat than water makes the waterless steam table faster and
more economical to operate than a table using water. Foods can be kept moist by keeping
them at the correct temperature. Foods dry out only when excessive temperatures are
reached, so when foods tend to dry out, REDUCE HEAT.
3. If only part of the food warmers is needed, the compartment not in use does not need to be heated.
4. SWITCH SETTINGS
a. The most satisfactory switch settings must be determined by experience based on the
nature of the foodservice and the type of operation as well as individual preference of the
restaurant operator. The proper switch setting necessary to keep foods at the desired
temperature will vary dependent upon the frequency of turnover, size of food containers,
amount of food in each container, room temperature, location of food warmer with respect to
range or other heated equipment, air outlets, fans, doors and passageways.
7) OPERATION INSTRUCTION FOR SST AND PSST
9
1. Before the unit is used for the first time, turn the temperature knob to "10" and heat the well for 20-
30 minutes. Do not be alarmed if smoke appears; this preheat should burn off any residue or dust
on the heating element.
WARNING: Steam can cause serious burns. Always wear some type of protective
covering on your hands and arms when removing lids or pans from the unit. Lift the
lid or pan in a way that will direct escaping steam away from your face and body.
2. Never place food directly into the well. Always use pans.
3. Wet operation is recommended.
4. Always place covers on pans when not serving to prevent food from drying out and to reduce your
operating costs.
5. For most efficient operation, keep empty, covered insets in each well during preheating and when
the well is not in use.
a. WET OPERATION
1. Fill food well with two (2) quarts of water. For quicker pre-heating, use hot water to till the
well.
2. Turn the control to "HIGH" and pre-heat the warmer for 30 minutes.
3. After pre-heating, set the control to your desired serving temperature.
4. Never pour water into a well that has been heated dry. This may cause well to crack
and leak.
5. Always fill well before preheating or before water level is below 1/2".
b. DRY OPERATION
1. Pre- heat the well on "HIGH" for approximately 15 minutes.
2. After pre-heating, set the control to your desired serving temperature.
8) CLEANING
Insure the appliance has been turned off and has had sufficient time for all surfaces to cool down before
cleaning.
DAILY CLEANING
1. Turn the control knob to the OFF position and allow unit to cool before cleaning.
2. Drain or remove water from the well.
CAUTION: Do not allow water to splash or run on to the controls or wiring.
3. Use a soft cloth or sponge with a mild detergent to clean the entire warmer assembly. Rinse
completely with warm water and then dry.
4. A plastic scouring pad and a mild detergent may be used to remove hardened food.
NOTICE: Do not use steel wool.
WEEKLY CLEANING
1. Scale deposits due to the mineral content of the water may be removed using a plastic scouring
pad and a de-scaling agent approved for use on stainless steel. It is important to keep these
deposits from building up as they may cause corrosion of the stainless steel well.
2. After de-scaling, the well assembly should be rinsed thoroughly with a solution of vinegar and
water to neutralize all cleaner residues.
3. Wipe the well assembly dry and leave uncovered.
WARNING
Do not use any highly caustic cleaners, acids or ammonia. These may cause corrosion and/or
damage to the stainless steel well. Do not allow water to stand in the well for long periods of time.
Water must be removed from the well and the well cleaned after each use.
CLEANING PROCEDURES FOR
POLYETHYLENE OR ABS (RUBBER) COMPOSITION TABLE TOPS
10
OR CUTTING BOARDS
When high pressure cleaning equipment is not available; use hot water, a granular cleanser or detergent
and a stiff bristle brush. (Abrasive action is necessary, as simply wiping the board will not suffice.) After
Scrubbing, rinse thoroughly with hot water. Allow to lie flat.
Several excellent germicidal cleaners are also available, including Calgon's "Big Cat" and Johnson's
"Break Up". Clorox is another good cleaner and is USDA approved.
The tabletop material is cut into sections not larger than 36" in any plane, and no section weighs more
than fifty (50) pounds. These are stipulations of the National Sanitation Foundation to facilitate cleaning.
The tops should be turned over daily to reduce possibility of warping and should never be stood on end.
Periodically, go over the board with a clean, flat stainless steel scraper to help seal some of the knife
marks.
The use of cleavers on synthetic boards or tabletops is not recommended.
8) TROUBLESHOOTING
Always ask and check the following:
TROUBLE SHOOTING GUIDE
1. Problem: Pilot light off and unit does not heat:
a. Has unit been connected to a proper electrical source of the proper voltage?
b. Is electric turned on at the main? Check the circuit breaker or fuse.
c. Are the master switch and/or control knobs set to the "ON" position?
2. Problem: Unit does not maintain proper food temperature.
a. Are the controls set to the proper setting?
b. If used with water, was hot water used to fill well? If not, allow extra pre-heat time.
c. Has unit been pre-heated for 30-45 minutes?
d. Were pans of food placed into unit at or above desired temperature?
e. Has the food been kept covered?
f. Are there air conditioning ducts, take-up air ducts or fans located near or over unit, causing cool
drafts?
g. Has unit been connected to a proper electrical source of the proper voltage? If so, is there a
"low" voltage condition?
9) PREVENTATIVE MAINTENANCE SCHEDULE
Please follow the cleaning section for the daily and weekly preventative maintenance schedule.
1 Use the proper tools.
When cleaning stainless steel products, use non-abrasive tools. Soft cloths and plastic
scouring pads will not harm steel’s passive layer. Stainless steel pads also can be used but
the scrubbing motion must be in the direction of the manufacturers’ polishing marks.
2. Clean with the polish lines
Some stainless steel comes with visible polishing lines or “grain.” When visible lines are
present, always scrub in a motion parallel to the lines. When the grain cannot be seen, play
it safe and use a soft cloth or plastic scouring pad.
3. Use alkaline, alkaline chlorinated or non-chloride containing cleaners.
While many traditional cleaners are loaded with chlorides, the industry is providing an ever-
increasing choice of non-chloride cleaners. If you are not sure of chloride content in the
cleaner used, contact your cleaner supplier. If your present cleaner contains chlorides, ask
11
your supplier if they have an alternative. Avoid cleaners containing quaternary salts; it also
can attack stainless steel and cause pitting and rusting.
4. Treat your water.
Though this is not always practical, softening hard water can do much to reduce deposits.
There are certain filters that can be installed to remove distasteful and corrosive elements.
To insure proper water treatment, call a treatment specialist.
5. Keep your food equipment clean.
Use alkaline, alkaline chlorinated or non-chloride cleaners at recommended strength. Clean
frequently to avoid build-up of hard, stubborn stains. If you boil water in stainless steel
equipment, remember the single most likely cause of damage is chlorides in the water.
Heating cleaners that contain chlorides have a similar effect.
6. Rinse.
If chlorinated cleaners are used, rinse and wipe equipment and supplies dry immediately.
The sooner you wipe off standing water, especially when it contains cleaning agents, the
better. After wiping equipment down, allow it to air dry; oxygen helps maintain the stainless
steels passivity film.
7. Never use hydrochloric acid (muriatic acid) on stainless steel.
8. Regularly restore/passivate stainless steel.
12
9) WIRING DIAGRAMS/SCHEMATICS
WIRING DIAGRAM SST
13
WIRING DIAGRAM
14
10) PARTS LISTS & EXPLODED VIEWS
ST-PST
1
2
4
7
10
12
13
6
3
8
9
5
11
15
PARTS LISTS & EXPLODED VIEWS
Parts List ST-PST
Item #
Description
Part Number ST-2
Part Number ST-3
Part Number ST-4
Part Number ST-5
1
Poly Cutting Board
32010011
32010021
32010031
32010041
2
Stud Assembly
32010108
32010108
32010108
32010108
3
Bracket, Board Left
32010102
32010102
32010102
32010102
4
Bracket, Board Right
32010101
32010101
32010101
32010101
5
Bracket, Board Left
32010102
32010102
32010102
32010102
6
Support, Carving Board
32010016
32010026
32010036
32010046
7
Knob, 2”
8705610
8705610
8705610
8705610
8
Switch, Infinite 208-240V
1328200
1328200
1328200
1328200
8
Switch, Infinite 120V
1327900
1327900
1327900
1327900
9
Indicator Light
1513903
1513903
1513903
1513903
10
Leg, Galvanized for Caster
32010109
32010109
32010109
32010109
10
Leg, Stainless for Caster
32010097
32010097
32010097
32010097
10
Leg, Galvanized for Bullet Leg
32010008
32010008
32010008
32010008
10
Leg, Stainless for Bullet Leg
32010007
32010007
32010007
32010007
11
Caster with Brake
8671300
8671300
8671300
8671300
11
Caster without Brake
8671200
8671200
8671200
8671200
11
Bullet Leg
8656600
8656600
8656600
8656600
12
Adjustable Under shelf (Aluminized)
32010211
32010212
32010213
32010214
12
Adjustable Under shelf (Stainless)
32010111
32010112
32010113
32010114
13
Heater Element, 120V 500W
32010002
32010002
32010002
32010002
13
Heater Element, 208V 750W
32010003
32010003
32010003
32010003
13
Heater Element, 240V 750W
32010004
32010004
32010004
32010004
16
PARTS LISTS & EXPLODED VIEWS
SST-PSST
7
9
6
1
2
10
12
8
14
13
15
16
3
4
5
11
17
PARTS LISTS & EXPLODED VIEWS
SST-PSST Parts List
Item #
Description
Part Number SST-2
Part Number SST-3
Part Number SST-4
Part Number SST-5
1
Poly Cutting Board
32010051
32010061
32010071
32010081
2
Stud Assembly
32010108
32010108
32010108
32010108
3
Bracket, Board Left
32010102
32010102
32010102
32010102
4
Bracket, Board Right
32010101
32010101
32010101
32010101
5
Bracket, Board Left
32010102
32010102
32010102
32010102
6
Support, Carving Board
32010056
32010066
32010076
32010086
7
Knob, 2”
8705610
8705610
8705610
8705610
8
Switch, Infinite 208-240V
1328200
1328200
1328200
1328200
8
Switch, Infinite 120V
1327900
1327900
1327900
1327900
9
Indicator Light
1513903
1513903
1513903
1513903
10
Leg, Galvanized for Caster
32010109
32010109
32010109
32010109
10
Leg, Stainless for Caster
32010097
32010097
32010097
32010097
10
Leg, Galvanized for Bullet Leg
32010008
32010008
32010008
32010008
10
Leg, Stainless for Bullet Leg
32010007
32010007
32010007
32010007
11
Caster with Brake
8671300
8671300
8671300
8671300
11
Caster without Brake
8671200
8671200
8671200
8671200
11
Bullet Leg
8656600
8656600
8656600
8656600
12
Adjustable Under shelf (Aluminized)
32010215
32010216
32010217
32010218
12
Adjustable Under shelf (Stainless)
32010115
32010116
32010117
32010118
13
Heater Element, 120V 500W
55445
55445
55445
55445
13
Heater Element, 120V 1200W
55446
55446
55446
55446
13
Heater Element, 208V 750W
45547800
45547800
45547800
45547800
13
Heater Element, 208V 1200W
55441
55441
55441
55441
13
Heater Element, 240V 750W
45547700
45547700
45547700
45547700
13
Heater Element, 240V 1600W
55441
55441
55441
55441
14
WELL PAN W/DR
55607
55607
55607
55607
15
REFLECTOR, PLATE WELD ASSY
55567
55567
55567
55567
16
BOTTOM COVER ASSY
55608
55608
55608
55608
Not shown
THERMOSTAT, LIMITING
69106
69106
69106
69106
18
NOTES:
19
12. APW WYOTT EQUIPMENT LIMITED WARRANTY
APW Wyott Food service Equipment Company warrants it's equipment against defects in materials and workmanship, subject to the
following conditions:
This warranty applies to the original owner only and is not assignable.
Should any product fail to function in its intended manner under normal use within the limits defined in this warranty, at the option of
APW Wyott such product will be repaired or replaced by APW Wyott or its Authorized Service Agency. APW Wyott will only be
responsible for charges incurred or service performed by its Authorized Service Agencies. The use of other than APW Wyott Authorized
Service Agencies will void this warranty and APW Wyott will not be responsible for such work or any charges associated with same. The
closest APW Wyott Authorized Service Agent must be used.
This warranty covers products shipped into the 48 contiguous United States, Hawaii, metropolitan areas of Alaska and Canada. There will
be no labor coverage for equipment located on any island not connected by roadway to the mainland.
Warranty coverage on products used outside the 48 contiguous United States, Hawaii, and metropolitan areas of Alaska and Canada may
vary. Contact the international APW Wyott distributor, dealer, or service agency for details.
Time Period
One year for parts and one year for labor, effective from the date of purchase by the original owner. The Authorized Service Agency may,
at their option, require proof of purchase. Parts replaced under this warranty are warranted for the un-expired portion of the original
product warranty only.
Exceptions
* Gas/Electric Cookline: Models HCB, HCRB, HMG, HTG, HHP, HHPS, GCB, GCRB, GF, GGM, GGT, CHP-H, EF, EG,
EHP. Three (3) Year Warranty on all component parts, except switches and thermostats. (2 additional years on parts only.
No labor on second or third year.)
* Broiler Briquettes, Rock Grates, Cooking Grates, Burner Shields, Fireboxes: 90 Day Material Only. No Labor.
* Heat Strips: Models FD, FDL, FDD, FDDL. Two (2)Year Warranty on element only. No labor second year.
* Glass Windows, Doors, Seals, Rubber Seals, Light Bulbs: 90 Day Material Only. No Labor.
In all cases, parts covered by extended warranty will be shipped FOB the factory after the first year.
Portable Carry In Products
Equipment weighing over 70 pounds or permanently installed will be serviced on-site as per the terms of this warranty. Equipment
weighing 70 pounds or under, and which is not permanently installed, i.e. with cord and plug, is considered portable and is subject to the
following warranty handling limitations. If portable equipment fails to operate in its intended manner on the first day of connection, or
use, at APW Wyott's option or its Authorized Service Agency, it will be serviced on site or replaced.
From day two through the conclusion of this warranty period, portable units must be taken to or sent prepaid to the APW Wyott
Authorized Service Agency for in-warranty repairs. No mileage or travel charges are allowed on portable units after the first day of use. If
the customer wants on-site service, they may receive same by paying the travel and mileage charges. Exceptions to this rule: (1)
countertop warmers and cookers, which are covered under the Enhanced Warranty Program, and (2) toasters or rollergrills which have in
store service.
Exclusions
The following conditions are not covered by warranty:
* Equipment failure relating to improper installation, improper utility connection or supply and problems due to ventilation.
* Equipment that has not been properly maintained, calibration of controls, adjustments, damage from improper cleaning and
water damage to controls.
* Equipment that has not been used in an appropriate manner, or has been subject to misuse or misapplication, neglect, abuse,
accident, alteration, negligence, damage during transit, delivery or installation, fire, flood, riot or act of god.
* Equipment that has the model number or serial number removed or altered.
If the equipment has been changed, altered, modified or repaired by other than an Authorized Service Agency during or after the warranty
period, then the manufacturer shall not be liable for any damages to any person or to any property, which may result from the use of the
equipment thereafter.
This warranty does not cover services performed at overtime or premium labor rates. Should service be required at times which normally
involve overtime or premium labor rates, the owner shall be charged for the difference between normal service rates and such premium
rates. APW Wyott does not assume any liability for extended delays in replacing or repairing any items beyond its control.
In all cases, the use of other than APW Wyott Authorized OEM Replacement Parts will void this warranty.
This equipment is intended for commercial use only. Warranty is void if equipment is installed in other than commercial application.
Water Quality Requirements
Water supply intended for a unit that has in excess of 3.0 grains of hardness per gallon (GPG) must be treated or softened before being
used. Water containing over 3.0 GPG will decrease the efficiency and reduce the operation life of the unit.
Note: Product failure caused by liming or sediment buildup is not covered under warranty.
"THE FOREGOING WARRANTY IS IN LIEU OF ANY AND ALL OTHER WARRANTIES EXPRESSED OR IMPLIED
INCLUDING ANY IMPLIED WARRANTY OF MERCHANTABILITY OR FITNESS FOR PARTICULAR PURPOSES AND
CONSTITUTES THE ENTIRE LIABILITY OF APW WYOTT. IN NO EVENT DOES THE LIMITED WARRANTY EXTEND
BEYOND THE TERMS STATED HEREIN."
9/05
  • Page 1 1
  • Page 2 2
  • Page 3 3
  • Page 4 4
  • Page 5 5
  • Page 6 6
  • Page 7 7
  • Page 8 8
  • Page 9 9
  • Page 10 10
  • Page 11 11
  • Page 12 12
  • Page 13 13
  • Page 14 14
  • Page 15 15
  • Page 16 16
  • Page 17 17
  • Page 18 18
  • Page 19 19

APW Wyott PSST-2 Operating instructions

Category
Food warmers
Type
Operating instructions

Ask a question and I''ll find the answer in the document

Finding information in a document is now easier with AI