Haier MWG7036RW User manual

Category
Microwaves
Type
User manual
Read these instructions carefully before using your microwave oven, and keep it carefully.
If you follow the instructions, your oven will provide you with many years of good service.
Lise attentivement les instructions suivantes et conservez-les précieusement. Si vous suivez ces
instructions, votre four vous donnera de longues années de bons et loyaux services.
Lea estas instrucciones con atención antes de usar su horno microondas y consérvelas con
cuidado. Si sigue las instrucciones, su horno le brindará muchos años de buen servicio.
Quality
Innovation
Style
1.1 Cu.Ft. / 1000 Watt Microwave Oven
Four à micro-ondes 31L 1000 Watts
Horno Microondas con de 1,1 pies Cúbicos y 1000
Vatios
Owner’s Manual
MWM11100TB/MWM11100TW
Manual del Usuario
Manual d’ Utilisation
MWM11100TB/MWM11100TW
PRECAUTIONS TO AVOID POSSIBLE EXPOSURE TO EXCESSIVE
MICROWAVE ENERGY
a) Do not attempt to operate this oven with the door-open since open-door operation can result in harmful exposure to
microwave energy. It is important not to defeat or tamper with the safety interlocks.
b) Do not place any object between the oven front face and the door or allow soil or cleaner residue to accumulate on
sealing surfaces.
c) Do not operate the oven if it is damaged. It is particularly important that the oven door close
properly and that there is no damage to the :
1 Door ( bent ),
2 Hinges and latches ( broken or loosened ),
3 Door seals and sealing surfaces.
d) The oven should not be adjusted or repaired by anyone except properly qualified service personnel.
1
English
ADDENDUM
If the apparatus is not maintained in a good state of cleanliness, its surface could be degraded and affect the lifespan of
the apparatus and lead to a dangerous situation.
SPECIFICATIONS
Model: MWM11100TB / MWM11100TW
Rated Voltage: 120V~60Hz
Rated Input Power(Microwave): 1450W
Rated Output Power(Microwave): 1000W
Oven Capacity: 1.1 Cu.ft
Turntable Diameter: 12.4 inch
External Dimensions(LxWxH): 20.5X17.1X13.2 inch
Net Weight:
33.5 Lbs (Approx.)
Warning: Handling the cord on this unit or cords associated with accessories sold with this product, will expose you to a
chemical known to the state of California to cause cancer, and birth defects or other reproductive harm. Wash
hands after handling.
CONTENTS
PAGE
PRECAUTIONS TO AVOID POSSIBLE EXPOSURE
TO EXCESSIVE MICROWAVE ENERGY
....................................................................................................................................1
SPECIFICATIONS ....................................................................................................................................................................1
IMPORTANT SAFETY INSTRUCTIONS ....................................................................................................................................3
ADDITIONAL SAFETY TIPS ....................................................................................................................................................4
GROUNDING INSTRUCTIONS ..............................................................................................................................................4
UTENSILS GUIDE ....................................................................................................................................................................5
Materials you can use in microwave oven....................................................................................................................................5
Materials to be avoided in microwave oven ................................................................................................................................6
SETTING UP YOUR OVEN ..................................................................................................................................................6-7
Names of Oven Parts and Accessories ........................................................................................................................................6
Turntable Installation ..................................................................................................................................................................7
Countertop Installation ..............................................................................................................................................................7
Installation ................................................................................................................................................................................7
OPERATION ......................................................................................................................................................................7-12
Control Panel and Features ........................................................................................................................................................7
Operating Instructions ..........................................................................................................................................................8-12
MAINTENANCE ....................................................................................................................................................................13
Troubleshooting ......................................................................................................................................................................13
LIMITED WARRANTY ............................................................................................................................................................14
2
English
3
English
IMPORTANT SAFETY INSTRUCTIONS
When using electrical appliances, basic safety precautions should be followed, including the following:
WARNING - To reduce the risk of burns, electric shock, fire, injury to persons or exposure to excessive
microwave energy:
1.
Read all instructions before using the appliance.
2. Read and follow the specific "PRECAUTIONS TO AVOID POSSIBLE EXPOSURE TO EXCESSIVE
MICROWAVE ENERGY" on page 1.
3. This appliance must be grounded. Connected only to properly grounded outlet. See "GROUNDING
INSTRUCTIONS" on page 5.
4. Install or locate this appliance only in accordance with the provided installation instructions on page 8.
5. Some products such as whole eggs and sealed containers, for example, closed glass jars may explode and
should not be heated in this oven.
6. Use this appliance only for its intended use as described in this manual. Do not use corrosive chemicals or
vapors in this appliance. This type of oven is specifically designed to heat, cook or dry food. It is not designed
for industrial or laboratory use.
7. As with any appliance, close supervision is necessary when used by children.
8. To reduce the risk of fire in the oven cavity:
a. Do not overcook food. Carefully attend appliance if paper, plastic or other combustible materials are
placed inside the oven to facilitate cooking.
b. Remove wire twist-ties from paper or plastic bags before placing bag in oven.
c. If materials inside the oven should ignite, keep oven door closed, turn oven off, and
disconnect the power cord or shut off power at the fuse or circuit breaker panel.
d. Do not use the cavity for storage purposes. Do not leave paper products, cooking utensils or food in the
cavity when not in use.
9. Liquids, such as water, coffee, or tea are able to be overheated beyond the boiling point without appearing to
be boiling. Visible bubbling or boiling when the container is removed from the microwave oven is not always
present. THIS COULD RESULT IN VERY HOT LIQUIDS SUDDENLY BOILING OVER WHEN THE
CONTAINER IS DISTURBED OR A UTENSIL IS INSERTED INTO THE LIQUID.
10. Do not deep fry food in the microwave. It is difficult to control the fat which could cause a fire hazard.
11. Pierce foods with heavy skins such as potatoes, whole squash, apples and chestnuts before cooking.
12. The contents of feeding bottles and baby jars should be stirred or shaken and the temperature should be
checked before serving in order to avoid burns.
13. Cooking utensils may become hot because of heat transferred from the heated food. Potholders may be
needed to handle the utensil.
14. Do not cover or block any openings on the appliance.
15. Do not store or use this appliance outdoors. Do not use this product near water, for example, near a kitchen
sink, in a wet basement, or near a swimming pool, and the like.
16. Do not operate this appliance if it has a damaged cord or a plug, if it is not working properly or if it has been
damaged or dropped.
17. Do not immerse cord or plug in water. Keep cord away from heated surface. Do not let cord hang over edge of
table or counter.
18. Use only thermometers which are specifically designed for use in microwave ovens.
19. Be certain the glass tray and roller ring are in place when you operate the oven.
20. This appliance should be serviced only by qualified service personnel. Contact nearest authorized service facil-
ity for examination, repair, or adjustment.
21. Oversized foods or oversized metal utensils should not be inserted in a microwave/convection oven as they
may create a fire or risk of electrical shock.
22. Do not clean with metal scouring pads. Pieces can burn off the pad and touch electrical parts involving a risk of
electric shock.
23. Do not use paper products when appliance is operated in the grill mode.
24. Do not cover racks or any other part of the oven with metal foil. This will cause overheating of the oven.
25. When cleaning surfaces or door and oven that comes together on closing the door, use only mild, nonabrasive
soaps, or detergents applied with a sponge or soft cloth.
SAVE THESE INSTRUCTIONS
4
English
GROUNDING INSTALLATION
DANGER: Electric Shock Hazard Touching some of the internal components can cause serious personal injury or death.
Do not disassemble this appliance.
WARNING: Electric Shock Hazard Improper use of the grounding can result in electric shock. Do not plug into an outlet
until appliance is properly installed and grounded.
Three-Pronged (grounding) Plug
This appliance must be grounded. In the event of an electrical short circuit, grounding reduces the risk of electric
shock by providing an escape wire for the electric current. This appliance is equipped with a cord having
grounding wire with a grounding plug. The plug must be plugged into an outlet that is properly installed and
grounded.
Consult a qualified electrician or serviceman if the grounding instructions are not completely understood or if
doubt exists as to whether the appliance is properly grounded.
We do not recommend to use an extension cord.
If it is necessary to use an extension cord, use only a 3-wire extension cord that has a 3 blade grounding plug
and a 3-slot receptacle that will accept the plug on the microwave oven. The marked rating of the extension cord
shall be equal to or greater than the electrical rating of the appliance.
The longer cord should be arranged so that it will not drape over the countertop or tabletop where it can be
pulled on by children or tripped over unintentionally.
Neither Haier no the dealer can accept any liability for damage to the oven or personal injury resulting from
failure to observe the electrical connection procedures.
ADDITIONAL SAFETY TIPS
1. The oven must be on a leveled surface.
2. The turntable and turntable roller rest must be in the oven during cooking. Place the cookware gently on the turntable
and handle it carefully to avoid possible breakage.
3. Incorrect use of browning dish may cause the turntable to break.
4. Use only the specified bag size when using Direct Access Popcorn.
5. The oven has several built-in safety switches to ensure that the power remains off when the door is open. Do not
tamper with these switches.
6. Do not operate the microwave oven empty. Operating the oven with no food or food that is extremely low in moisture
can cause fire, charring or sparking.
7. Do not cook bacon directly on the turntable. Excessive local heating of the turntable may cause the turntable to break.
8. Do not heat baby bottles or baby food in the microwave oven. Uneven heating may occur and could cause physical
injury.
9. Do not heat narrow-necked containers, such as syrup bottles.
10. Do not attempt to deep-fry in your microwave oven.
11. Do not attempt home canning in this microwave oven, as it is impossible to be sure all contents of the jar have
reached boiling temperature.
12. Do not use this microwave oven for commercial purpose. This microwave oven is made for household use only.
13. To prevent delayed eruptive boiling of hot liquids and beverages or scalding yourself, stir liquid before placing the
container in the oven and again halfway through cooking time. Let stand in the oven for a short time and stir again
before removing the container.
14. Use carefully when cooking food in the microwave oven to avoid burning due to excessive cooking.
15. When the appliance is operated in the combination mode, children should only use the oven under adult supervision
due to the temperatures generated
16. Failure to maintain the oven in a clean condition could lead to deterioration that could adversely affect the life of the
appliance and possibly result in a hazardous situation.
5
English
UTENSILS
DANGER: PERSONAL INJURY HAZARD Tightly-closed utensils could explode. Closed containers should be opened
and plastic pouches should be pierced before cooking.
See the instructions on "Materials you can use in microwave oven or to be avoided in microwave oven." There
may be certain non-metallic utensils that are not safe to use for microwaving. If in doubt, you can test the utensil in ques-
tion following the procedure below.
UTENSIL TEST
1. Fill a microwave-safe container with 1 cup of cold water (250ml) along with the utensil in question.
2. Cook on maximum power for 1 minute.
3. Carefully feel the utensil. If the empty utensil is warm, do not use it for microwave cooking.
4. Do not exceed 1 minute cooking time.
MATERIALS YOU CAN USE IN MICROWAVE OVEN
Aluminum foil Shielding only. Small smooth pieces can be used to cover thin parts of meat or poultry to prevent overcooking.
Arcing can occur if foil is too close to oven walls. The foil should be at least 1 inch (2.5cm) away from oven walls.
Browning dish Follow manufacturer’s instructions. The bottom of browning dish must be at least 3/16 inch (5mm) above the
turntable. Incorrect usage may cause the turntable to break.
Dinnerware Microwave-safe only. Follow manufacturer's instructions. Do not use cracked or chipped dishes.
Glass jars Always remove lid. Use only to heat food until just warm. Most glass jars are not heat resistant and may break.
Glassware Heat-resistant oven glassware only. Make sure there is no metallic trim. Do not use cracked or chipped dishes.
Oven cooking bags Follow manufacturer’s instructions. Do not close with metal tie. Make slits to allow steam to escape.
Paper plates and
cups
Use for short–term cooking/warming only. Do not leave oven unattended while cooking.
Paper towels Use to cover food for reheating and absorbing fat. Use with supervision for a short-term cooking only.
Parchment paper Use as a cover to prevent splattering or a wrap for steaming.
Plastic Microwave-safe only. Follow the manufacturer’s instructions. Should be labeled "Microwave Safe". Some plastic
containers soften, as the food inside gets hot. "Boiling bags" and tightly closed plastic bags should be slit, pierced
or vented as directed by package.
Plastic wrap Microwave-safe only. Use to cover food during cooking to retain moisture. Do not allow plastic wrap to touch
food.
Thermometers Microwave-safe only (meat and candy thermometers).
Wax paper Use as a cover to prevent splattering and retain moisture.
6
English
Aluminum tray May cause arcing. Transfer food into microwave-safe dish.
Food carton with metal handle May cause arcing. Transfer food into microwave-safe dish.
Metal or metal trimmed utensils Metal shields the food from microwave energy. Metal trim may cause arcing.
Metal twist ties May cause arcing and could cause a fire in the oven.
Paper bags May cause a fire in the oven.
Plastic foam Plastic foam may melt or contaminate the liquid inside when exposed to high temperature.
Wood Wood will dry out when used in the microwave oven and may split or crack.
SETTING UP YOUR OVEN
PARTS AND ACCESSORIES
Remove the oven and all materials from the carton and oven cavity.
Your oven comes with the following accessories:
Glass tray ................................1
Turntable ring assembly ............1
Instruction Manual ....................1
A) Control panel
B) Turntable shaft
C) Turntable ring assembly
D) Glass tray
E) Observation window
F) Door assembly
G) Safety interlock system
Shut off oven power if the door is opened during operation.
A
BC
D
E
G
F
MATERIALS TO BE AVOIDED IN MICROWAVE OVEN
UTENSILS REMARKS
7
English
TURNTABLE INSTALLATION
a. Never place the glass tray upside down. The glass tray should never be restricted.
b. Both glass tray and turntable ring assembly must always be used during cooking.
c. All food and containers of food are always placed on the glass tray for cooking.
d. If glass tray or turntable ring assembly cracks or breaks, contact your nearest
authorized service center.
COUNTERTOP INSTALLATION
Remove all packing material and accessories. Examine the oven for any damage
such as dents or broken door. Do not install if oven is damaged.
Cabinet: Remove any protective film found on the microwave oven cabinet surface
Do not remove the light brown Mica cover that is attached to the oven cavity to protect the magnetron.
INSTALLATION
1. Select a level surface that provide enough open space for the intake and/or outlet vents.
A minimum clearance of 3.0 inches (7.5cm) is
required between the oven and any adjacent walls.
One side must be open.
(1) Leave a minimum clearance of 12 inches (30cm) above
the oven.
(2) Do not remove the legs from the bottom of the oven.
(3) Blocking the intake and/or outlet openings can damage
the oven.
(4) Place the oven as far away from radios and TV as
possible. Operation of microwave oven may cause
interference to your radio or TV reception.
2. Plug your oven into a standard household outlet. Be sure the
voltage and the frequency is the same as the voltage and the frequency on the rating label.
WARNING: Do not install oven over a range cooktop or other heat-producing appliance. If installed near or over a heat
source, the oven could be damaged and the warranty would be void.
OPERATION
CONTROL PANEL AND FEATURES
1. Weight Defrost
2. Time Defrost
3. Kitchen Timer
4. Memory
5. AM/PM
6. Stop/Clear: clears all previous
setting pressed before cooking
starts. During cooking: press once
to stop oven; twice to stop and
clear all entries.
7. Auto Menu
8. Power
9. Number keys
10. Clock/Pre-set
11. Start/+30Sec
3.0 inch(7.5cm)
3.0 inch(7.5cm)
12 inch(30cm)
OPEN
Hub (underside)Glass tray
Turntable shaft
Turntable ring
assembly
(1)
(3)
(4)
(9)
(2)
(8)
(6)
(11)
(10)
(5)
(7)
8
1. POWER LEVEL
Ten power levels are available.
Remarks: When a power between level 10-8 is chosen, the high level indicator is lighted and it will flash when in operation.
When a power between level 7-1 is chosen, the low level indicator is lighted and it will flash when in operation.
2. CLOCK SETTING
When the microwave oven is plugged into a outlet, the oven will display “0:00
1. Press “Clock/Pre-Set”, LED will display 00:00, clock indicator will be lighted. The hour figures will flash
“.” and “0 will be lighted.
2. Press the number keys and enter the correct time. For example, time is 10:12 now, please press “1, 0, 1,
2 in turn.
3. Press “AM/PMto choose AM or PM. AM or PM will be selected in turn by pressing the button of
AM/PM continuously.
4. Press “CLOCK/PRE-SET to finish clock setting, and the clock indicator will go out. “.” will flash and the
clock will be lighted.
5. If the numbers input are not within the range of 1:00 - 12:59, the setting will be invalid until valid numbers are input.
Note: In the process of clock setting, if the “STOP/CLEARbutton is pressed or if there is no operation within 1 minute,
the oven will go back to the former setting automatically.
3. KITCHEN TIMER
1. Press “KITCHEN TIMER”, LED will display 00:00, clock indicator will be lighted. The first “0will flash, “.” and the
other “0 will be lighted.
2. Press the number keys and enter the correct time. (The maximum cooking time is 99 minutes and 99 seconds)
3. Press “START/+30 SEC to confirm setting, clock indicator will flash.
4. When the kitchen time arrives, clock indicator will go out. The buzzer will ring 5 times. If the clock be set (12-hour
system), LED will display the current.
Note: The kitchen timer is differ from 12-hour system, Kitchen Timer is a timer. In the process of Kitchen Timer operation
of Kitchen Timer is finished, any cooking program cannot be operated.
4. MICROWAVE COOKING
1. Keep on pressing “POWERto choose microwave power. " " and " " or " " will be lighted.
2. Press number keys to input the cooking time; the maximum cooking time is 99 minutes and 99 seconds.
3. Press “START/+30SECto start cooking, and the remained cooking time will be displayed. ":", " ", " " or " "
indicators will flash.
Note: In the process of cooking, if the “STOP/CLEARbutton is pressed or if there is no operation within 1 minute, the
oven will go back to the former setting automatically.
5. FAST STARTING
1. In waiting state, instant cooking at 100% power level can be started by select a cooking time from 1 to 6 minutes by
pressing number pads1 to 6. Press “START/+30SEC to increase the cooking time; the maximum cooking time is 99
minutes and 59 seconds.
2. In waiting state, instant cooking at 100% power level with 30 seconds' cooking time can be started by pressing
START/+30SEC”. Each press on the same button will increase cooking time by 30 seconds. the maximum cooking time
is 99 minutes and 59 seconds.
Note: Each pressing on “START/+30SECcan increase the cooking by 30 seconds for the microwave and Auto menu
cooking. However, the operation will not work under "Auto Defrost" (except " defrost by time") operation.
6. WEIGHT DEFROSTING FUNCTION
1. Press “WEIGHT DEFROST ”, LED will display "dEF1"; when at the same time " ", " " indicators will
be lighted.
2. Press numerical pads to input weight to be defrosted. ”Oz indicator will be lighted. Input the weight ranged between
4~100 Oz.
English
Level 10 9 8 7 6 5 4 3 2 1
Power 100% 90% 80% 70% 60% 50% 40% 30% 20% 10%
Display PL10 PL9 PL8 PL7 PL6 PL5 PL4 PL3 PL2 PL1
9
English
7. TIME DEFROST FUNCTION
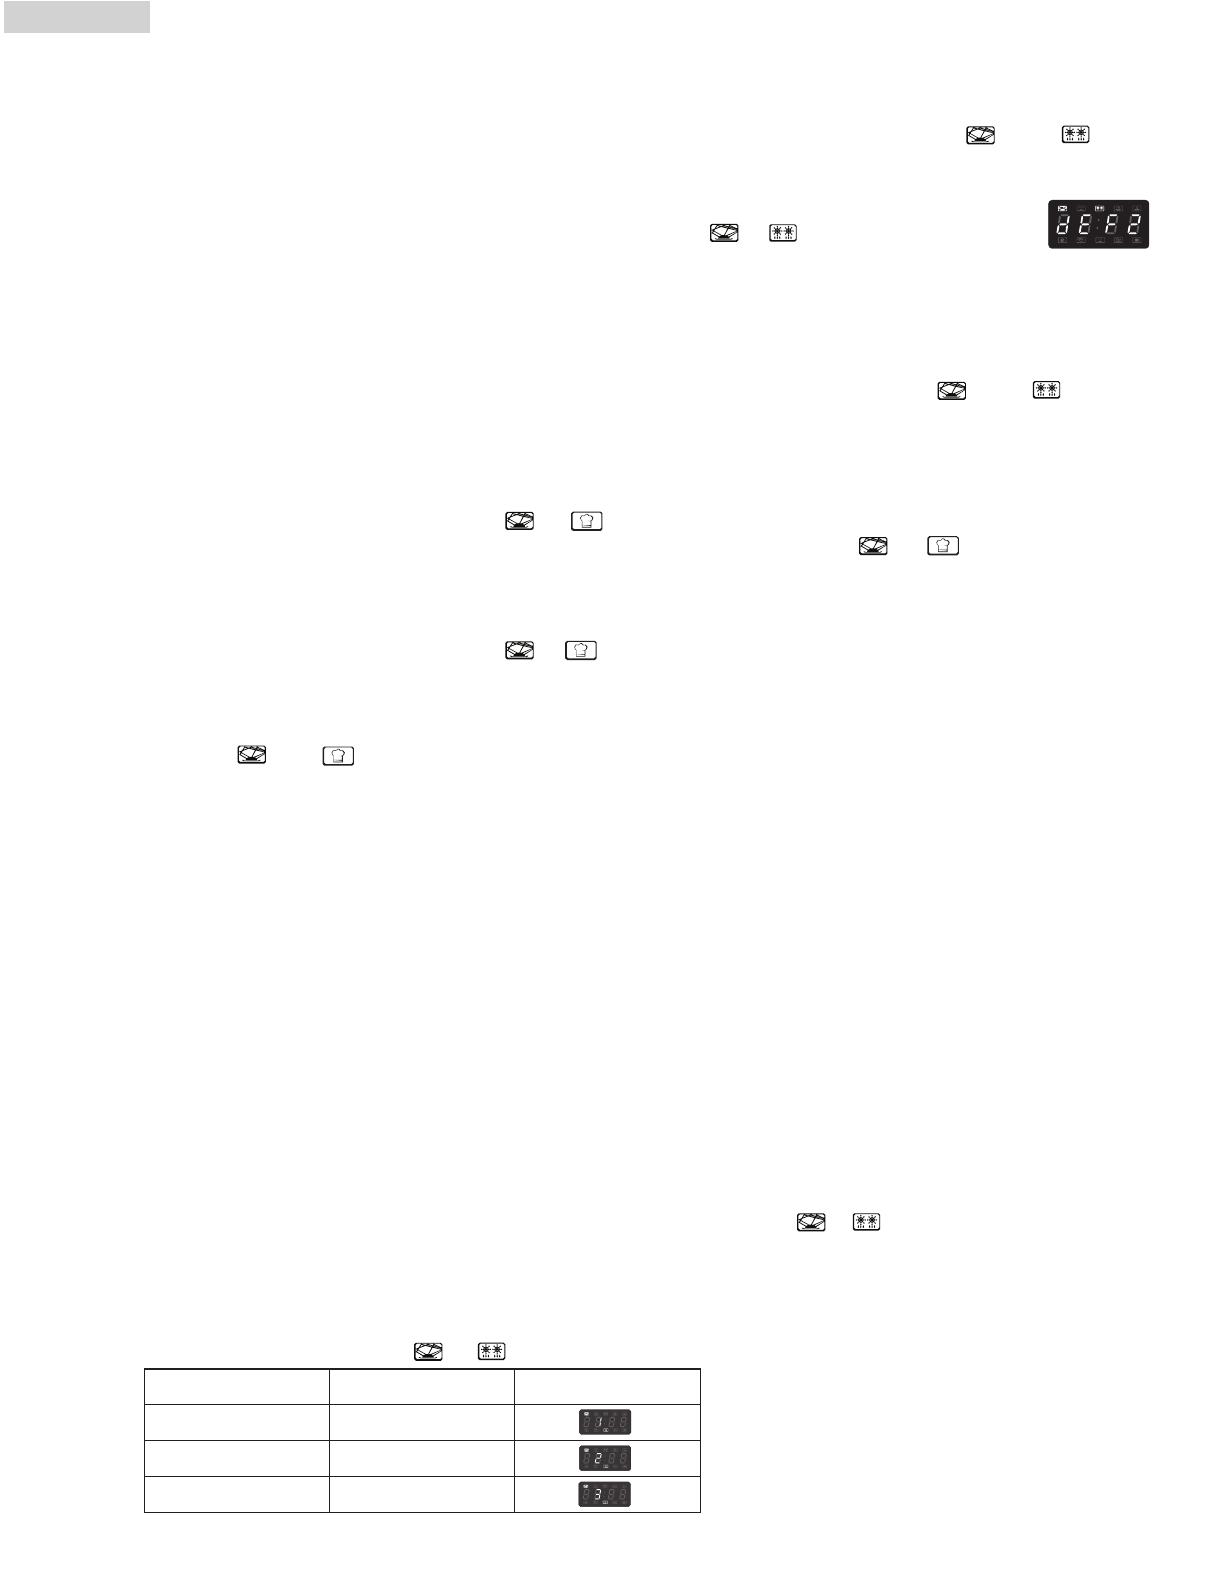
1. Press “TIME DEFROST”, LED will display "dEF2". At the same time, " ", " " indicators will be lighted.
2. Press number pads to input defrosting time. The effective time range is 00:01~99:99.
3. If the time input is not within 00:01~99:99, no "beep" will be sound and the unit will not work until valid numbers are
input.
4. The default microwave power is power level 3. If you want to change the power level, press “POWERonce, and the
LED will display "PL 3", then press the number pad of the power level you wanted.
5. Press “
START/+30SEC to start defrosting. The remained cooking time will be displayed. ":", " " and " "
indicators will flash.
8. POPCORN
a) Default Mode
1. Press “POPCORNto select popcorn mode, " " , " " and "Oz" are light. "1.75", "3.0", "3.5" appear in the LED.
2. Press “
START/+30 SEC to start cooking, the buzzer will ring once, "Oz" will go out, " " , " " will flash.
3. When the cooking is over, the buzzer will ring 5 times, LED will display "0:00". If the clock be set (12-hour system), LED
will display the current time.
b) Cooking-time adjustable mode (the maximum cooking time is 9 minutes and 59 seconds.)
1. Press “POPCORNto select popcorn mode, " ", " " and "Oz" are light. "1.75", "3.0", "3.5" appear in the LED.
2. Press “MEMORY”, LED will display the cooking time of the weight, the minute figure is flashing.
3. Press the number keys and enter the time.
4. Press “MEMORYto save the setting.If press “START/+30 SEC directly, the oven will to cook with the amended
cooking time. " " "•" " " will flash.
Users can change the cooking time
e.g.: Users set “POPCORNtime for 3 minutes and 15 seconds.
1. Press “POPCORNbutton once or twice when in waiting states. (the LED will display "1.75" for once press and "3.0"
for twice), then press “MEMORY button, LED screen will display the default cooking time of current weight ( which is
not 0:00 ), for example 1'30''. on the screen the first number 1 flashes, press number button to input 3; the second
number 3 flashes, press number button to input 1; the third number 0 flashes, press number button to input 5.And then
the first number 3 flashes again ( It is similar as clock setting ).
2. Press “MEMORYagain to save current setting. If press “START/+30 SEC to begin cooking directly, the program will
save the latest setting of cooking time automatically.
3. To change the set cooking time, repeat step 1), the screen will firstly display the saving time ( 3:15 for example ), press
number button to reset cooking time, and the follow step 2).
4. When completed, whenever press “POPCORNbutton, screen displays food deal 1.75, 3.0 or 3.5, only cooking time
follows the saved time setting.
5. To go back to initialization, press “POPCORN button for more than three seconds, the buzzer will sound once, then
go back to initial setting.
9.POTATO
1. Press “POTATOrepeatedly until the number you wish appears in the display, " "," " light.
"1"SET : 1 potato (approximate 230 gram)
"2"SETS: 2 potatoes (approximate 460 gram)
"3"SETS: 3 potatoes (approximate 690 gram)
For example, press "POTATO" once : "1" displays.
2. Press “START/+30 SEC to cook, " ", " "are flashing, time counts down.
Times( Press "Potato") Weight Display
Once 1 set
Twice 2 set
Thrice 3 set
3. If the weight input is not within 4~100, the input will be invalid. No "BEEP" will be sound and the unit will not work
until valid numbers are input.
4. Press “START/+30SEC to start defrosting and the cooking time remained will be displayed. ":", " " and " "
indicators will flash and the "Oz" indicator will go out.
10. PIZZA
1. Press ”PIZZA repeatedly until the number you wish appears in the display, " " , " " light. You can reheat 1~3
slices of Pizza each time.
For example, press" PIZZA " twice, "2" appears in the LED.
2. Press “START/+30 SEC to cook, " " , " " are flashing, time counts down.
11. BEVERAGE
1. Press ” “ repeatedly until the number you wish appears in the display, light.
You can reheat 1~3 cups of beverage each time (approximate 250 ML).
For example, press“ “ twice, “ “ appears in the LED.
12. SOUP
1. Press ”SOUP repeatedly until the number you wish appears in the display,
Oz light.
For example, press ”SOUP twice, "8.0" appears in the LED.
2. Press “START/+30 SEC to cook, are flashing , time counts down.
13. DINNER PLATE
1. Press "DINNER PLATE" repeatedly until the number you wish appears in the display. " " , " " and ”Ozlight.
For example, press ”DINNER PLATE twice, "12.0" appears in the LED.
2. Press “START/+30 SEC to cook, " " , " " are flashing, time counts down.
10
English
Times( Press "Pizza") Weight Display
Once 3.0 Oz
Twice 6.0 Oz
Thrice 9.0 Oz
Times ( Press "SOUP ") Weight Display
Once 4.0 Oz
Twice 8.0 Oz
Thrice 12.0 Oz
4 Times 16.0 Oz
Times( Press "BEVERAGE ") Weight Display
Once 1Mug
Twice 2Mugs
Thrice 3Mugs
Times (Press
"DINNER PLATE")
Weight Display
Once 9.0 Oz
Twice 12.0 Oz
Thrice 18.0 Oz
BEVERAGE
" " " " " "
, ,
2. Press “ “ to cook, are flash, time counts down.
BEVERAGE
" " " "
,
START/+30 SEC
" " " "
, ,
2
" " " "
,
14.FRESH VEGETABLE
b. Press “START/+30 SEC to cook, ”Oz disappears, " ", " " are flashing, time counts down.
a. Press ”FRESH VEGETABLE repeatedly until the number you wish appears in the display, " ", " " and ”Oz light.
For example, press ”FRESH VEGETABLE twice, "8.0" appears in the LED.
15.FROZEN VEGETABLE
b. Press “START/+30 SEC to cook, "Oz" disappears, " ", " " are flashing, time counts down.
a. Press "”FROZEN VEGETABLE repeatedly until the number you wish appears in the display, " ", " " and ”Oz
light.
For example, press ”FRESH VEGETABLE twice, "8.0" appears in the LED.
16. PRE-SET FUNCTION
1. Set the clock first. (Consult the instruction of clock setting.)
2. Set a certain cooking procedure(one or two blocks), the setting method and display are same as relevant cooking
procedure. (Defrosting is beyond pre-set cooking).
3. Press ”CLOCK/PRE-SET to display current time and hour figure is flashing, the icon ":" and other ”0 keep lighting
on.
4. Press number keys to input the cooking time.For example: to set the time is 12:12, you can press the number keys
1”,”2”,”1”,”2 in order.
5. Press "AM/PM" to choose AM or PM.
6. Press “START/+30 SEC to confirm the preset procedure.
11
English
Times (Press
"FRESH VEGETABLE")
Weight Display
Once 4.0 Oz
Twice 8.0 Oz
Thrice 16.0 Oz
Times (Press
"FROZEN VEGETABLE")
Weight Display
Once 4.0 Oz
Twice 8.0 Oz
Thrice 16.0 Oz
17. MEMORY FUNCTION
1. Press MEMORY” to choose memory 1-5 procedure. The LED will display 1,2,3...5.
2. If the procedure has been set, press “START/+30 SECto use it. If not, continue to set the procedure. Only one or two
stages can be set.
3. After finishing the setting, press ”MEMORY” to save the procedure and turn back to the waiting states. If press
START/+30 SEC”, it can save and operate the setting.
12
English
At most 2 stages can be set for cooking. In multi-stage cooking, if one stage is weight defrosting, then weight defrosting
shall be placed at the first stage automatically.
Note: 1. Auto cooking cannot work in the multi-stage cooking.
2. If Time Defrost is chosen, other program cannot be set.
Example: If you want to cook with 80% microwave power for 5 minutes + 60% microwave power for 10 minutes. The
cooking steps are as following:
1. Press ”POWERthree times to choose 80% microwave,now ”PL8 is displayed;
2. Press number keys ”5”,”0”,”0to set the cooking time;
3. Press ”POWERfive times to choose 60% microwave power, ”PL6 is displayed;
4. Press number keys ”1”,”0”,”0”,”0to set the cooking time;
5. Press “START/+30 SEC to start cooking.
19. INQUIRING FUNCTION
1. In clock state, press ”AM/PM to display ”A or ”P for 3 seconds. In cooking state, press ”CLOCK/PRE-SET”, the LED
will display clock for three seconds and the ”AM/PM for another 3 seconds.
2. In pre-set state, LED will display the clock and the seconds will be flashing at the same time. Press ”AM/PM and
AM/PM will be displayed for 3 seconds. Then press ”CLOCK/PRE-SET to inquire the pre-set time. The pre-set time
will flash for 3 seconds, then ”AM/PM will be displayed for another 3 seconds. After that, the oven will turn back to
the clock state.
3. In the microwave cooking state, press ”POWERto inquire microwave power level, and the current microwave power
will be displayed. After three seconds, the oven will turn back to the previous state. In 2 stages cooking state, the
inquiring way can be done by the same way as above.
20. LOCK FUNCTION FOR CHILDREN
Lock: In waiting state, press ”STOP/CLEAR for 3 seconds, there will be a long ”beep denoting the entering into the
children-lock state; meanwhile, LED will display ” ”
Lock quitting: In locked state, press ”STOP/CLEAR for 3 seconds, there will be a long ”beep denoting that lock is
released.
21. COOKING END REMINDING FUNCTION
When the cooking is over, the buzzer will sound 5 ”beep to remind user the cooking is finished.
22. OTHER SPECIFICATIONS
1. In waiting state, if the LED displays current time, the icon ”:” would flash; otherwise, it shows ”0:00”.
2. In setting function state, LED displays corresponding setting.
3. In working or pause state, LED displays remainder cooking time.
18. MULTI-STAGE COOKING
13
English
TROUBLE SHOOTING
Check your problem by using the chart below and try the solutions for each problem. If the microwave oven still does not work properly,
contact the nearest authorized service center.
TROUBLE POSSIBLE CAUSE POSSIBLE REMEDY
Oven will not start a. Electrical cord for oven is not plugged in.
b. Door is open.
c. Wrong operation is set.
a. Plug into the outlet.
b. Close the door and try again.
c. Check instructions.
Arcing or sparking a. Materials to be avoided in microwave oven
were used.
b. The oven is operated when empty.
c. Spilled food remains in the cavity.
a. Use microwave-safe cookware only.
b. Do not operate with oven empty.
c. Clean cavity with wet towel.
Unevenly cooked
foods
a. Materials to be avoided in microwave oven
were used.
b. Food is not defrosted completely.
c. Cooking time, power level is not suitable.
d. Food is not turned or stirred.
a. Use microwave-safe cookware only.
b. Completely defrost food.
c. Use correct cooking time,power level.
d. Turn or stir food.
Overcooked foods Cooking time, power level is not suitable. Use
correct cooking time, power level.
Use correct cooking time and power level.
Undercooked foods a. Materials to be avoided in microwave oven were
used.
b. Food is not defrosted completely.
c. Oven ventilation ports are restricted.
d. Cooking time, power level is not suitable.
a. Use microwave-safe cookware only.
b. Completely defrost food.
c. Check to see that oven ventilation ports are not
restricted.
d. Use correct cooking time and power level.
Improper defrosting a. Materials to be avoided in microwave oven were
used.
b. Cooking time, power level is not suitable.
c. Food is not turned or stirred.
a. Use microwave-safe cookware only.
b. Use correct cooking time and power level.
c. Turn or stir food.
14
English
What is covered and for how long?
This warranty covers the original retail purchaser, all defects in
workmanship or materials for a period of:
Carry-In Service
12 Months (labor)
24 Months (parts)
10 Years Magnetron Tube (part only)
What is covered.
1. The mechanical and electrical parts, which serve as a functional
purpose of this appliance for a period of 24 months. This
includes all parts except glass, finish, and trim.
2. If the magnetron tube fails due to poor workmanship or materi-
al, the part will be relaced.
What will be done and how to obtain service?
1. We will repair or replace, at our discretion any mechanical or
electrical part which proves to be defective in normal usage dur-
ing the warranty period so specified.
2. There will be no charge to the purchaser for labor on any
covered items during the initial 12 month period, and no
charge for parts on any covered items during the initial 24
month period. The magnetron tube is covered for a period of
ten years.
3. To obtain service, bring the unit to your nearest authorized
Service depot. For name of the nearest authorized service center
please call: 1-877-337-3639.
THIS WARRANTY COVERS APPLIANCES WITHIN THE
CONTINENTAL UNITED STATES, CANADA AND PUERTO RICO. IT
DOES NOT COVER THE FOLLOWING:
Damages from improper installation.
Damages in shipping.
Damage from misuse, abuse, accident,alteration, lack of proper
care and maintenance, incorrect current or voltage or acts of God.
Damage from other than normal household use.
Damage from service by other than an authorized dealer or
service center.
Decorative trims, glass or light bulbs.
Transportation and shipping costs.
THIS LIMITED WARRANTY IS GIVEN IN LIEU OF ALL OTHER
WARRANTIES, EXPRESSED OR, INCLUDING THE WARRANTIES OF
MERCHANTABILITY AND FITNESS FOR A PARTICULAR PURPOSE.
The remedy provided in this warranty is exclusive and is granted in
lieu of all other remedies.
This warranty does not cover incidental or consequential
damages, so the above limitations may not apply to you. Some
States do not allow limitations on how long an implied warranty
lasts, so the above limitations may not apply to you. This warranty
gives you specific legal rights, and you may have other rights,
which vary, from state to state.
Haier America
New York, NY 10018
LIMITED WARRANTY
Haier America
New York, NY 10018
IMPORTANT
Do Not Return This Product To The Store
If you have a problem with this product, please contact the "Haier Customer Satisfaction Center" at
1-877-337-3639.
DATED PROOF OF PURCHASE REQUIRED FOR WARRANTY SERVICE
IMPORTANTE
No regrese este producto a la tienda
Si tiene algún problema con este producto, por favor contacte el "Centro de Servicio al Consumidor de Haier" al 1-877-337-3639 (Válido solo en
E.U.A).
NECESITA UNA PRUEBA DE COMPRA FECHADA PARA EL SERVICIO DE LA GARANTIA
IMPORTANTE
No regrese este producto a la tienda
Si tiene algún problema con este producto, por favor contacte el "Centro de Servicio al Consumidor de Haier" al 1-877-337-3639 (Válido solo en
E.U.A).
NECESITA UNA PRUEBA DE COMPRA FECHADA PARA EL SERVICIO DE LA GARANTIA
MWM11100TB / MWM11100TW
Issued - JULY 2006
  • Page 1 1
  • Page 2 2
  • Page 3 3
  • Page 4 4
  • Page 5 5
  • Page 6 6
  • Page 7 7
  • Page 8 8
  • Page 9 9
  • Page 10 10
  • Page 11 11
  • Page 12 12
  • Page 13 13
  • Page 14 14
  • Page 15 15
  • Page 16 16

Haier MWG7036RW User manual

Category
Microwaves
Type
User manual

Ask a question and I''ll find the answer in the document

Finding information in a document is now easier with AI